Return to E.D.N. III - C2
Lost Planet 2 Walkthrough and Guide
Return to E.D.N. III
Chapter 2
Mission 1
Objective: Find the Hidden Route
Hidden Route Found -- Find the hidden route between the two trees along the mountainside at the south end of the starting area to earn this GJ award.
Crossing the red line at the end of the hidden route will end this mission and ushers you to an optional area. Though this area is optional in the sense that you can skip it and still complete the chapter, you must complete the area to unlock the achievement or trophy awarded for completing the campaign on your chosen difficulty level. If you wish to unlock the achievements or trophies awarded for completing the game on a certain difficulty level, don't pass this area by when playing through Episode 1 on a new difficulty level.
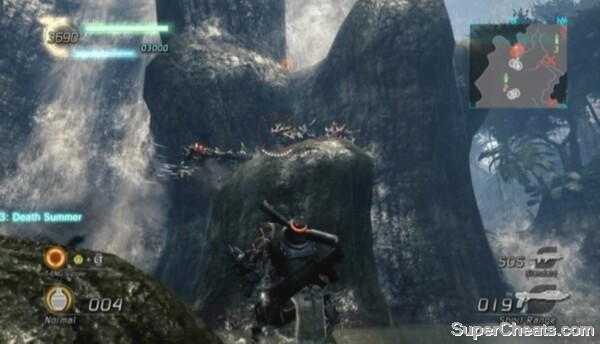
Finding the Hidden Route
Aside from achievements/trophies, this optional area contains a VS you can take with you to the sub-boss battle in Mission 2. Having a VS for this sub-boss makes the fight significantly easier, especially if you're playing solo.
Though it's definitely in your best interest to end this level via the hidden route, there are a couple more GJ awards to earn in this area. As well, ending the level right at the start will earn you an abysmal number of Career Points on the Area Results screen. Thus, it is best to clear the map of enemies, activate all of the Data Posts and then backtrack to the start of the level and end the area via the hidden route.
Objective: Activate All the Data Posts!
All Data Posts Online -- Activate all four Data Posts in the level to earn this award.
Data Post 1 is just outside the starting area; activate it to reveal the map on the Radar in the top-right corner of the screen and add 500 points to your team's Battle Gauge. Marked on the map are the three remaining Data Posts in the area. Activate each Data Post as you come to it.
Activating these Data Posts also has the benefit of marking nearby enemies on the Radar. This proves especially useful when it comes to the second objective of this area.
 Kill all of the akrid in the area to earn the 'All Akrid Defeated' GJ award. |
Objective: Defeat the Akrid!
All Akrid Defeated -- Clear the map of Akrid to earn this GJ award.
On this map you will encounter Genessa, Trilid, Vodoggs and Dongo. You don't need to kill all of the Trilid that appear to earn this award -- just the medium-sized akrid.
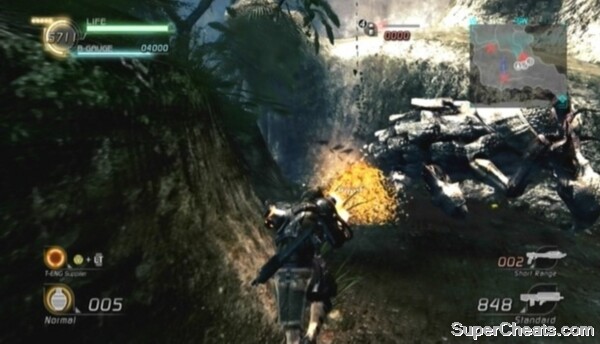
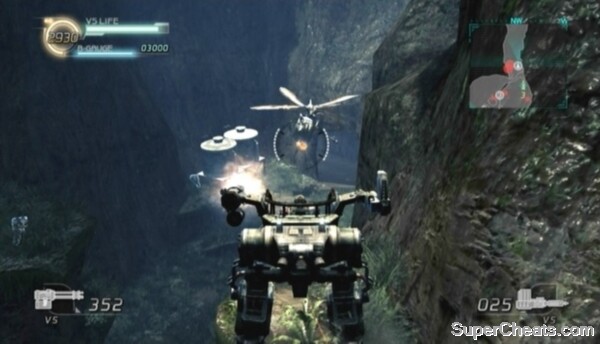
Begin by destroying the Genessa around the starting area. There are a couple of Vodoggs beyond the wall. Vodoggs are bipedal, spiky akrid that move quickly and erratically. The Vodogg's weak spot is its face. A Shotgun or grenades are very effective against Vodoggs, but a Machine Gun can take one down just as well. These akrid are extremely quick and their attacks damaging, especially their charge. When the spikes on a Vodogg's head extend, get ready to roll to the side to avoid the charge that follows. Press the A/X button while crouching (click the Left Stick to crouch) to roll.
Dongo are medium-sized akrid that can curl into a ball and roll. The Dongo's weak spot is its orange tail. The best weapons to use against these akrid are the Machine Gun, Shotgun and grenades. Dongo move slowly, so get behind one by circling around it and unload bullets into its tail. You can also throw a grenade behind the Dongo and detonate the grenade by shooting it while it's near the Dongo's tail. The Shotgun is the most effective weapon against Dongo; just a few shots to its tail at point-blank range will do the job.
The Dongo's claw swipe can be easily avoided by simply circling around the Dongo. The evasive roll can get you out of the way of a rolling Dongo, but you won't always see it coming.
 The Dongo's weak spot is its orange tail. |
Follow the Data Posts north and eliminate all of the akrid you encounter. Large red blips on the map in the top-right corner of the screen denote akrid, so locating the enemies required to complete this objective is simple.
Data Post 4 and the last few akrid are just before the area end marker at the north end of the map. Activate Data Post 4 and kill these akrid, but be careful not to cross the red line.
When all four Data Posts are online and the map is clear of akrid, backtrack to the starting area and end the level by crossing the red line at the end of the hidden route.
Mission 1a
Objective: Proceed to the Reservoir Area
There's a sniper in the tower behind the building across the bridge, so run-and-gun rather than take your time crossing. Toss a grenade up at the tower behind the building and detonate the grenade by shooting it when it reaches the top to kill the sniper and raze the tower. There's a Rifle on the roof; take it with you, as you'll need it in a moment. Activate Data Post 1 inside the building before continuing on.
The narrow path between the mountains beyond the building are covered with Sepia and Genessa pods. Plow through the Sepia with your Shotgun to the broken-down VS where the path opens up. Remove the VS Rocket Launcher attached to this VS and attach it to the working Evax VS further up. Hop in the Evax and use the VS Rocket Launcher to clear away the Genessa and Sepia covering the mountain side. There are explosive Bolsepia on the top ledge, so it's best to remove the Genessa this way rather than anchoring up and destroying the pods at point-blank range with a Shotgun.
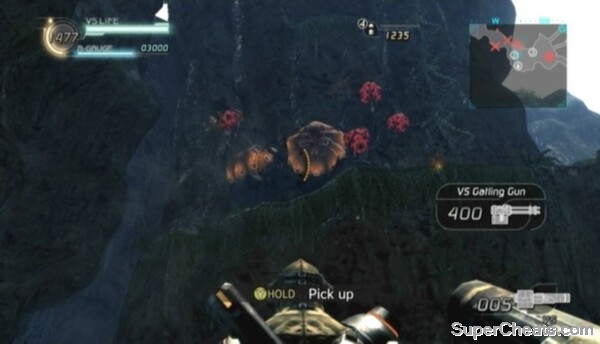 Use the VS Rocket Launcher to destroy the Genessa pods and Bolsepia. |
You'll encounter a couple of Dongo here as well, but hop out of the VS and conserve the VS Rocket Launcher ammo by killing the Dongo with a Shotgun instead.
If you still have VS Rocket Launcher ammo left, look north for an enemy Evax VS on the other side of the chasm. Fire whatever ammo at this VS, as it will make your bridge crossing difficult if left intact. Anchor onto the upper bridge and use your Rifle to pick off the enemy snipers across the chasm. These snipers likely won't fire at you from this distance due to dim enemy AI.
Objective: Get Across the Bridge - Now!
Mission Accomplished: No Casualties -- Make your way across the bridge without a single death on your team to earn this award. AI partner deaths do count, so this is best attempted with human allies.
There are two bridges you can cross to the other side. If you weren't able to take down the enemy Evax VS on the other side, dash across whichever bridge that VS isn't standing at the other end of. These bridges are destructible, so get across quickly. Use grenades to destroy the enemy VS once on the other side of the bridge.
Keep moving once across the bridge, as every moment you sit still leaves you vulnerable to sniper fire. Get in the vacant Nida VS parked near Data Post 2 to protect yourself from the enemy snipers, as they can't headshot you while you're in a VS. Use the Gatling Guns on the VS to shred the snipers to the north. Hop out of the VS and activate Data Post 2 once you're sure the area is clear.
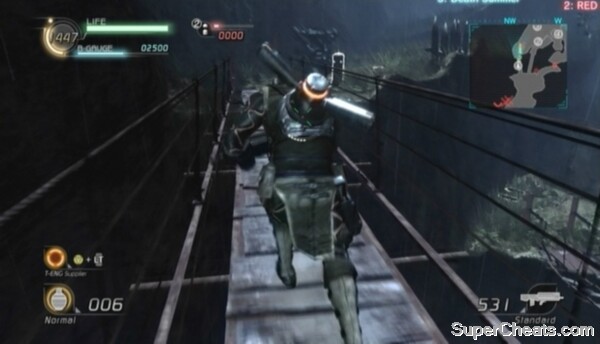 Dash across the bridge to avoid sniper fire. |
Lost Planet 2 introduces the ability to repair damaged VSs. To do so, hop out of your VS and rapidly tap the X/Square button when the prompt appears. Repairing a damaged VS consumes T-ENG, however T-ENG is much less of a commodity in Lost Planet 2 than it was in the original Lost Planet, and so it is very beneficial to keep your fighting machines in tip-top shape.
Get back in the VS and cross the narrow rock bridge north of Data Post 2 to reach a VS Shotgun. Be sure to attach this Shotgun to your VS, as this weapon will make the upcoming sub-boss a cinch. Pick up the Gatling Gun you swapped out to collect its ammo and then continue northwest along the ledge.
Objective: Defeat the Akrid!
All Akrid Defeated -- You'll encounter a Raibee -- a large, flying bee-like creature -- a couple of Vodoggs and a Chryatis beyond Data Post 3. Kill the Raibee, Vodoggs and Chryatis to earn this GJ award.
Conserve your VS Shotgun ammo and instead use your Gatling Gun to kill these akrid. The Raibee's weak spot is the orange patch on its abdomen. Fire down at the Vodoggs and Chryatis from the ledge until they're both dead.
Activate Data Post 3 if you haven't already to add 500 points to your team's Battle Gauge. Repair your VS if it's damaged and pick up the Gatling Gun ammo next to the T-ENG drums near the tunnel entrance. With that, enter the tunnel and cross the red line to complete the level. Remain seated in the VS and you will spawn with it in the next area.
 End the level in a Nida VS with a VS Shotgun and the upcoming sub-boss battle will be a cakewalk. |
Mission 2
Objective: Decimate the Category G Akrid!
The Cat-G Akrid you're up against here is a Queen Chryatis. The Queen differs significantly from the smaller Chryatis. For one, she remains stationary for the entirety of the fight. She also has two removable arms, but also the ability to quickly grow new arms if hers are severed. She has six smaller arms -- three on both sides of her body -- and a prominent orange weak spot on the top of her head.
Category G Akrid Decimated -- The orange spot on the Queen's head is her major weak spot, however you must remove both of her arms at least once during the course of the battle to earn this GJ award.
Removing the Queen's arms has the added benefit of leaving her momentarily incapacitated. Her head will fall smack down onto the platform, giving you easy access to her weak spot. If you have the Nida VS with and attached VS Shotgun from Mission 1a, you can likely kill the Queen Chryatis before she even has a chance to attack.
Start by severing one of her arms with the Gatling Gun and Shotgun; a couple of hits should do it. When the first arm comes off, immediately shift your fire to the other arm, as she can regenerate a lost arm very quickly. When her head hits the platform, fire the VS Shotgun at her weak spot at point-blank range to knock down her health. There's a human Shotgun next to the gate at the east end of the platform another player can use for added damage.
Defeating the Queen Chryatis
If all goes well, you should be able to eliminate the Queen Chryatis very quickly. If you're on foot, though, you're in for a considerably more difficult fight. As mentioned above, there's a Shotgun by the gate at the east end of the platform. There's also a Gatling Gun on one of the platforms attached to the mountainside at the south end of the area.
All of the Queen Chryatis's attacks can be dodged with the evasive roll, which can be performed by pressing the A/X button while crouching (click the Left Stick to crouch). Your character is invulnerable during the first part of the roll animation, allowing you to escape almost any enemy attack with the right timing.
Objective: Escape the Breath of Ice
Team Member Rescued -- Rescue a teammate encased in ice by shooting him (or be rescued yourself) to earn this GJ award.
This objective will become active if you or one of your allies is hit by the Queen Chryatis's ice breath. A character hit by this attack will become encased in ice. The player can rapidly move the Left Stick back and forth to break free, but this requires a great deal of effort. A teammate can shoot a trapped ally to instantly free them, earning this GJ award in the process. If the trapped player is forced to free themselves, the bronze 'Team Member Escaped' GJ award will be earned instead.
If you're playing solo, it's unlikely the AI will free you if you're hit by the Queen's ice breath and become encased in ice. You can still earn this GJ award by freeing a trapped AI partner, however.
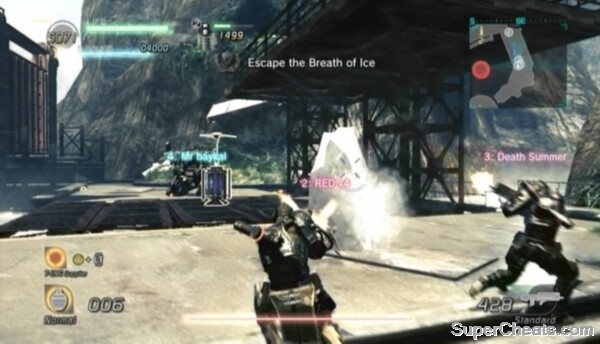 Free a teammate hit by the Queen Chryatis's ice breath to earn the 'Team Member Rescued' GJ award. |
Severing both of the Queen's arms is difficult on foot because she can regenerate a single lost arm back very quickly. Thus, to knock the Queen down and make her weak spot accessible to your Shotgun, you must shoot off each arm in quick succession. Doing so requires gradually weakening each arm until both have turned bright red, then knocking one off and immediately concentrating fire on the other.
When both arms are off, move in with your Shotgun and unload into the weak spot on her head to deal a large amount of damage. Repeat until the Queen Chryatis is dead.
Objective: Activate All the Data Posts!
Activate Data Post 1 if you haven't already and then continue through the destroyed gate at the east end of the platform. Activate Data Post 2 beyond the gate and then trade your Nida VS for the Evax VS with the attached Rocket Launcher by the stairs.
Objective: Akrid Extermination Challenge
Akrid Massacre -- Keep killing akrid marked on the Radar. Kill enough and you will earn this GJ award.
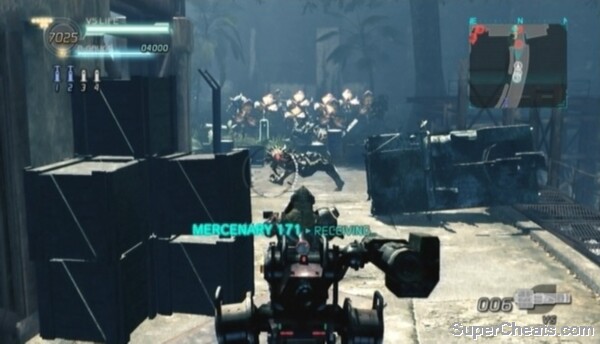 Exterminate the akrid and activate the Data Posts on the way to the gate. |
Fire a rocket at the mass of Sepia surrounding Data Post 3. Destroy all of the nearby Genessa pods and then activate the third Data Post. There are two Vodoggs surrounding Data Post 4, so be ready with grenades or a Shotgun.
When all four Data Posts are online, head for the door at the north end of the area (follow the blue diamond marker on the Radar) and cross the red line there to complete the chapter.
No comments yet. Tell us what you think to be the first.