Overtime Mode
Dead Rising Walkthrough and Guide
Dead Rising Guide - Walkthrough
Overtime Mode
To unlock Overtime Mode after the credits roll, you must have completed every case and spoken to Isabela after receiving her transmission at 10:00AM before heading to the Heliport for the 12:00PM pick up. Those are the only prerequisites that must have been in order to continue the story and unlock the true ending.
In Overtime Mode, you have 24 hours to find a cure to stave off Frank's infection. If Frank is going to live to see another day, you must collect some items from around the mall and bring them to Isabela in Carlito's Hideout. With these items, Isabela can then create a concoction that will impede the infection, giving Frank more time as a human. Though you're on a 24 hour timer, that is more than enough time to scrounge everything needed to save Frank.
You must scour the mall for a First Aid Kit, a Blender, Coffee Filters, a Magnifying Glass, a Camp Stove, a Developing Solution, a Perfume Bottle, and Cold Spray. As well, you'll need to provide Isabela with 10 queens.
The mall is still occupied by Special Forces soldiers, who are apparently cleaning up whatever survived the first wave. You'll want to get your hands on a Katana or two so you can easily deal with them.
 Avoiding alerting the sentry drones or Special Forces will come running. |
There are also small sentry drones that fly around the mall. If one of these sentries spots Frank, a siren will sound, alerting every Special Forces soldier in the area to your presence. Any gun is adequate for destroying one of these drones. The Machine Gun works especially well. Melee weapons work, too.
Before you get moving, consider stopping by the Huntin' Shack, as well as the Ripper's Blades, to grab a couple of guns and swords.
In Need of Supplies
Since simply going down the list of items on the mission menu is both tedious and a waste of time, just go after the items in the order they are described here.
You're in the North Plaza now; you can obtain the First Aid Kit in the Seon's Food & Stuff pharmacy. Unfortunately, the Special Forces presence in Seon's is heavy. So, run. Simply run past the soldiers, swerving from side to side in a seemingly futile attempt to avoid their gunfire. Make your way to the double-door at the back of the store and head through. Enter the pharmacy and grab the First Aid Kit from the shelf. Grab a couple of bottles of Wine from the King of Wine section on your way out.
 The First Aid Kit is found in the pharmacy inside of the Seon's Food & Stuff grocery store in the North Plaza. |
Next stop is Wonderland Plaza to retrieve the Magnifying Glass. Once out of Seon's, leave the North Plaza via the west exit to reach Wonderland Plaza. The Magnifying Glass can be found in the Wonder Jewels store on the first floor of the plaza. Wonderland Plaza appears to be sparsely populated with soldiers, so you shouldn't have much difficulty getting to the store and acquiring the Magnifying Glass. The item is on the counter at the back of the store.
 Look for the Magnifying Glass in Wonder Jewels, which is located on the first floor of Wonderland Plaza. |
Once you have that, run through Wonderland Plaza and enter the Food Court. Here, you will likely encounter a few soldiers in the main area of the Food Court. The Blender is on the table that is behind the counter of the ice cream stand.
Take some Wine from Chris' Fine Foods if you are low on health items and need healing. Next, travel through Leisure Park and enter Paradise Plaza. There are quite a few soldiers in the plaza. If you are low on health, stop by the Colombian Roastmasters restaurant and grab some Orange Juice, as well as the Katana on the awning outside.
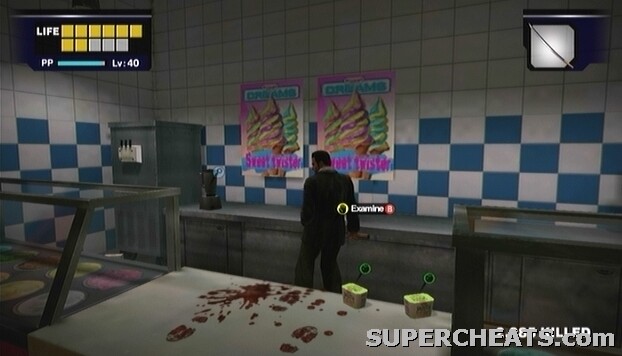 The Blender is behind the counter of the “Frozen Dreams” ice cream stand in the Food Court. |
The Cold Spray is in the SporTrance store on the second level of Paradise Plaza. The Developing Solution can be found in Cam's Camera, which is located right next to the door to the warehouse. The Coffee Filters can be found in the Security Room. The warehouse area is swarming with soldiers, so take your time as you make your way through there.
 Cold Spray |
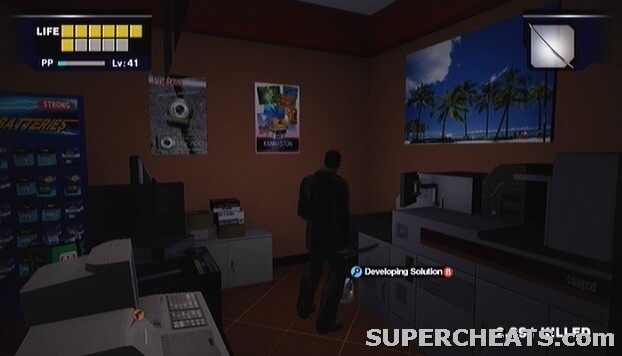 Developing Solution |
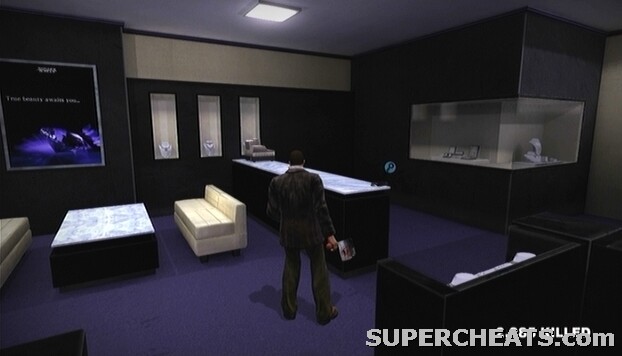
The Perfume Bottle can be found in Estelle's Fine-lady Cosmetics, which is on the second floor of the Entrance Plaza. The Camp Stove can be found in the Sports High store on the first floor of the Entrance Plaza. Now that you have everything Isabela needs, return to Carlito's Hideout in the North Plaza and hand them over to her.
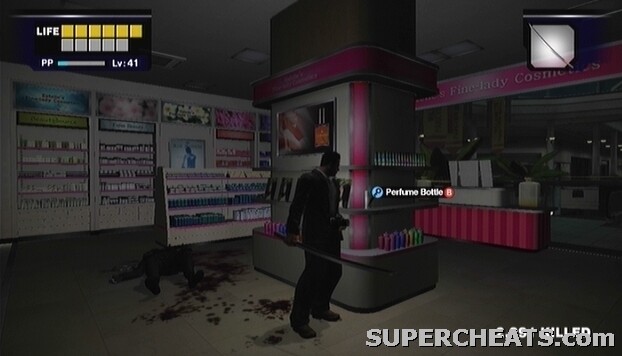 Perfume Bottle |
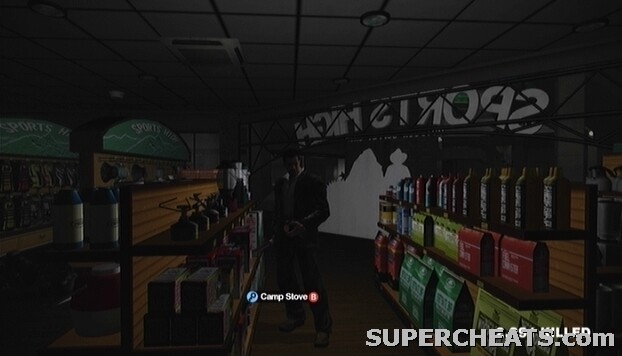 Camp Stove |
Before Isabela can put the equipment to use, you'll have to travel to the clock tower in Leisure Park to retrieve a backup Generator. After the cutscene, interact with the panel on the side of the clock tower opposite the tunnel opening to retrieve the Generator. Return to Carlito's Hideout to trigger another cutscene.
 A backup generator can be found by examining the panel on the clock tower in Leisure Park. |
It's not over yet. Isabela needs ten adult queens to create the formula. You should have more than enough time remaining to acquire the necessary number of queens. If you spot a zombie that is standing in one spot with its hands flailing up in the air and its head tilted upwards, apparently this is not normal zombie behaviour. Kill zombies that fit this description and a Queen will appear. Both the North and Wonderland Plaza have a healthy population of zombies, so head to either of those locations and begin your search. The Maintenance Tunnel is also a good place to scour.
A good strategy is to run back and forth between the North and Wonderland plazas, killing any zombie you spot that fits the description of one that will yield a Queen. You will once or twice, however, have to stop by Carlito's Hideout to empty your inventory of queens to free up some space.
Be especially careful not to accidentally use a Queen. If you are wielding a weapon and it breaks or runs out of ammo, Frank will auto-switch to the next item in your inventory. Thus, you may inadvertently waste a Queen in your inventory. Monitor your ammo or weapon durability to avoid such an occurrence.
Into the Tunnel
Once you have given ten queens to Isabela, she will then create the formula and inject it into Frank. Next, you're headed through the tunnel that seems to begin in Leisure Park. When you gain control of Frank after the cutscene, save the game where you are standing. ‘
Take Isabella by the hand and begin start down the zombie-packed tunnel. The zombies are only repelled by the perfume if they step within its aura.
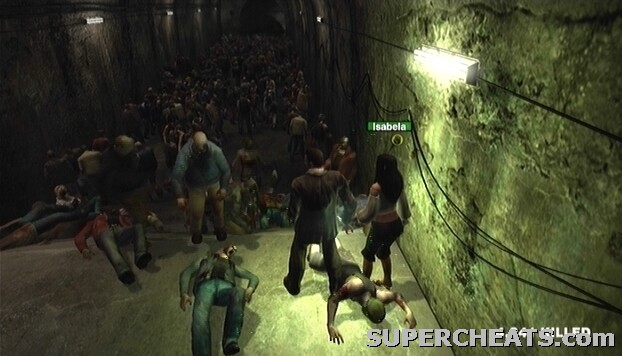 Use Isabela's zombie-repellent perfume to part the sea of undead. |
You will soon come to a large, iron gate. Stand by the grate and lift it up to have Isabela to crawl through. You will have to stand your ground here and fight off the zombies until Isabela activates a switch to open the gate so you can follow her through.
Take Isabela by the hand once again and continue to lead her through the sea of undead. When you reach the gate, open the door to proceed into the next section. Continue down the tunnel past you will soon encounter yet another gate. Open the grate to have Isabela crawl through, fight off the zombies while Isabela opens the gate, and then follow her through.
The light at the end of the tunnel! Though slightly obscured by the droves of undead that occupy the tunnel. When you regain control of Frank after the short cutscene, save your game where you are.
Proceed to carry Isabela through the last stretch of zombies. Take a left and head up the stairs here. Put Isabela down and flip the lever here to open the gate and unleash the zombies. Head outside and make your way over to the jeep in the distance. Hop in to trigger a cutscene.
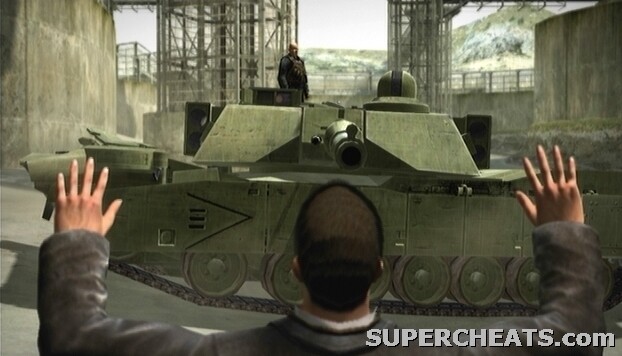
BOSS BATTLE: XM3 Prototype Tank
Just as Frank and Isabela appear to be home free, an automated Special Forces tank rolls in to act as yet another barrier. This is an on-rails sequence, so the only thing you have to worry about is aiming and shooting. The tank has a lengthy life bar, which you'll need to deplete to halt its movement.
Though the tank is heavily-armoured, you can still deal damage, provided you shoot for the right parts. Firing at the two blinking boxes on the front corners of the tank will slowly drain the bar at the bottom of the screen. Each box has a pair of flashing green lights on its front, so they're easy to spot.
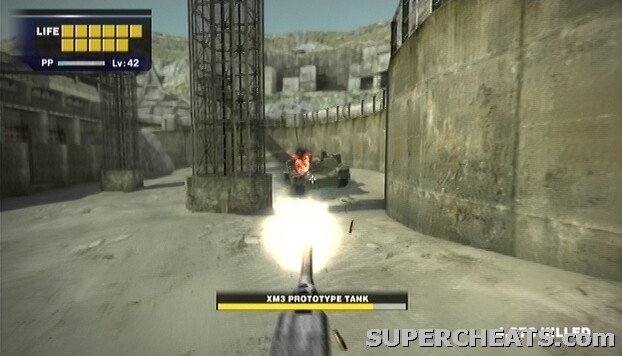 Fire at either of the boxes on the front corners of the tank to damage it. |
When you see the little sentry unit appear on the top-right side of the tank, concentrate your fire on it. A green target-seeking laser will appear from the unit and attempt to locate a target for main cannon to fire at. If you destroy the sentry unit before the laser locks on to the jeep and turns red, the tank won't be able to fire its main cannon. The sentry unit will reappear once destroyed though, so always keep an eye out for the sentry and destroy it before it is able to lock on completely. Each blast from the main cannon knocks off one block of health, so it's worth taking the time to silence the sentry.
The XM3 tank also employs flying sentry drones. Aim and destroy these before they get too close. They are released at quite a rapid pace though, so you will only be free of their nuisance for so long.
Eventually the tank will begin to periodically fire-off four homing missiles at a time. These don't deal a whole lot of damage by themselves, but you can take a fair bit of damage if each one makes it to the jeep. Try to take out as many of them as you can before they reach the jeep by blasting them with the turret.
Continue firing at the weak points on the tank. When one box is destroyed, shift your fire to the other. Do this until the bar at the bottom of the screen is completely depleted and the tank comes to a stop
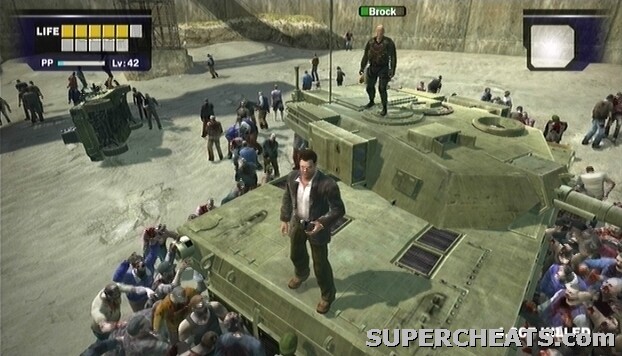
BOSS BATTLE: Brock
This fight can be quite tough. For one thing, your inventory is completely empty. You can only use skills to attack and damage Brock. Fortunately, you're health has been completely restored from the ordeal with the XM3 tank. The two most important skills here are Flying Kick (Jump and press X) and Knee Drop (push downward on the Left Thumbstick and the press X button while in the air).
 This hardly seems fair. |
Brock is able to block most attacks, and his own melee attacks are quite powerful. The trick here is to just keep moving! Don't stand in one spot for too long, and never try to hit Brock with a basic kick or punch. Constantly move between the cannon and body of the tank. When Brock jumps down, try to catch him off guard with a Flying Kick while he has his back turned as he tries to get back up to the cannon. You'll essentially just be running in circles around him, jumping up into the air and kicking when you get close.
If you fall into the hungry mass of zombies below, try using the Double Lariat skill (click the Left Thumbstick and press X) to escape and get back onto the tank.
Jumping up into the air and pressing the X button, and then pressing X again once you hit the ground to perform another kick seems to work quite well against Brock. Just do this once, then jump down to the body of the tank, hit Brock in the same fashion when he follows you down, and then climb back up onto the cannon. Knee Drop can knock off a large amount from Brock's health bar if it isn't unblocked, so try to get one through his guard every once in a while.
 Keep your distance to avoid Brock's damaging melee attacks. |
If Brock manages to get Frank in a chokehold, rotate the Left Thumbstick to escape.
Continue hitting Brock with Jump Kicks and Knee Drops until his health bar is completely depleted.
That's it; you've just completed Dead Rising and earned the true ending! Congratulations on a job well done!
Dead Rising Xbox 360 Index
Suck a sack
Yummy, I have moved beyond orange
Unsealedmetl22 but im lev 37.
u can kill brock with the knee drop easily so next time do that on ur video :killabreez lvl 39 in dead rising