Prologue
Dead Rising Walkthrough and Guide
Dead Rising Guide - Walkthrough
Prologue
After the opening video, you can sit through a short helicopter ride over the town of Willamette. This is a good time familiarize yourself with the photography aspect of Dead Rising. During this short on-rails sequence, you can use Frank's camera to snap pictures of the sights. Taking a picture of something interesting yields points. Earn enough of these points, and Frank will level up. As Frank levels up, his health increases; he becomes stronger, faster, able to carry more items, and can unlock new skills. Aside from snapping pictures, there are numerous ways to gain points; you'll learn more about those once you get to the mall.
This helicopter ride is completely optional; you can press start to skip past it if you're eager to get to bashing zombies. It would, however, be a good idea to sit through the ride so you can earn some valuable points to start off with.
The camera controls are simple; use the B button to zoom in, and the A button to zoom out. Use the Right Thumbstick to look around. When you have something interesting in the shot, press the X button to take the picture. Once a photo has been taken, you'll see a breakdown of the shot, and then receive points after they have been totalled up.
There are a number of photo opportunities in particular that yield a good amount of points. At the start of sequence, zoom in on the white car and snap a few photos of the man as he's being pulled off of the roof of the car, and then as he is being thrashed by the zombies. Next, take a few pictures of the zombies that are pushing up against the school bus when the helicopter gets close enough to receive a fair amount of points. Further ahead, a gas station will explode. Take a couple pictures of it—right when it explodes, as well as the aftermath—to gain more points.
Shortly after the gas station, you'll come to a building with a flat rooftop. Look to the roof of this building to spot a woman fending off some zombies. Snap a picture of the first zombie that falls off of the roof to earn a substantial amount points. Then, immediately take a picture of the woman and second zombie as they fall from the building to earn even more points. As you near the mall, snap shots of the dead zombies and woman until the sequence ends.
Once the helicopter has reached the mall and Frank is on the rooftop, take a picture of the man by the door with his arms folded. To switch to your camera, hold the left trigger down. Again, use the B button to zoom in, the A button to zoom out, and the X button to take a picture. When you're ready to move on, step through the door to enter the mall security room.
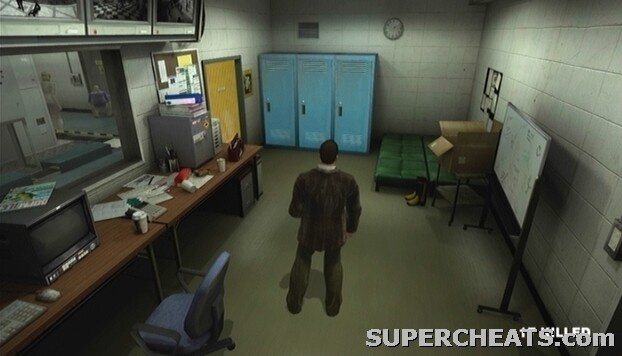
The Security Room is your safehouse. To save your progress, use the green benches at the bottom of the stairs. When you're ready to move on, go through the door marked "Janitor's Room," and then head through the yellow door straight ahead. Proceed through the door marked "Staff Only" and you'll find yourself in a long hallway. Move down this hall and head through the door at its end to reach the Entrance Plaza.
 The Security Room |
In the Entrance Plaza, a group of survivors are building up a barricade to prevent the zombie horde outside from gaining entrance to the mall. Your first task is to collect some objects strengthen the barricade.
Achievement Tip: Portraiture -- Take pictures of each of the survivors in the Entrance Plaza to earn additional points. Do so and you should also unlock the “Portraiture” achievement.
When ready, run down the area opposite the main entrance of the mall. Approach the large pile of items to trigger a cutscene. Lindsay, in a foolish attempt to save her little dog, claws her way through the barricade and throws open the door, allowing the zombies outside to enter the mall. Great. When you regain control over Frank, grab the two baseball bats near the assortment of objects and start cracking some zombies. Unfortunately, there isn't anything you can do to save the people in the Entrance Plaza. You're going to have to fight your way to the second level of the entrance plaza. Move towards the barricade, batting down any zombie in your path, and proceed up the stairs to reach the second level.
Inside the security room, you'll meet several of the game's characters. Feel free to save your game at this point, so you won't need to play through the opening sequence again if you end up dying.
When you regain control of Frank, attempt to exit through the duct in this area. Otis will hand over a transceiver and a map. Get used to talking to this Otis guy, because he won't give you a break. He's constantly calling Frank on the transceiver, usually at the most unideal of times. Try receiving a call from Otis while you're surrounded by dozens of zombies with only a stepladder as a means of defending yourself. If you use a weapon or are struck by an enemy, thus ending the transmission, Otis will call right back. Sorry for being rude Otis, I was just busy trying to keep a zombie from biting my head off!
Anyway, once you've gone through the duct, you'll find yourself on the rooftop. Hop down off of the platform and head to the right. You'll encounter a man named Jeff near the elevator; talk to him by pressing the B button. Jeff will join you, and you'll learn a little bit about the escorting aspect of Dead Rising.
Lead Jeff to the other end of the rooftop. There, you'll come across a woman named Natalie, whom Jeff is searching for. Get your camera ready, because when Jeff and Natalie are reunited, they will hug. If you snap a picture of the two at the right time, you'll receive a large amount of points. Stand close to the survivors, and take a picture that captures both of their faces when the little PP icon appears above them. The picture could be worth up to 10,000 points, and you'll unlock the “Photojournalist and “The Artiste” achievement as well.
 Capture both of the survivors' faces during their embrace to earn the maximum amount of PP. |
Escorting mall survivors to safety is arguably the best way to gain PP. Future escorts missions will never be as easy as this one though. With Jeff and Natalie in tow, lead them back through the duct and into the security room. Be sure that the two survivors are standing on the upper level before heading through the duct, because otherwise they won't follow you through. With Jeff and Natalie safe in the security room, head back through the duct and use the door at the far left end of the rooftop to reach the warehouse area.
Otis will call Frank on the transceiver to quickly explain the layout of the mall. Afterwards, follow the catwalk and jump down onto the shelf below. Move to the end of this shelf and jump across to the shelf with the sledgehammer on it. The sledgehammer is very powerful and durable, making it a great weapon to use. Make a point of grabbing this weapon each time you leave the security room.
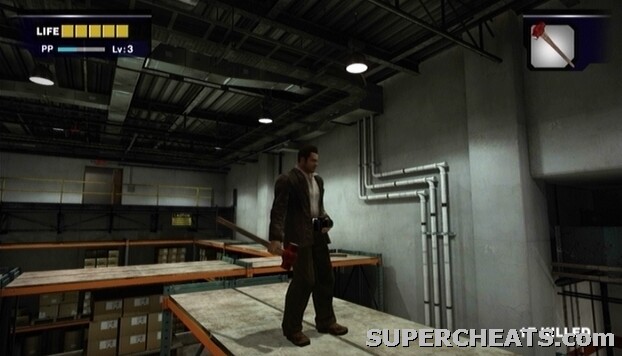 The Sledgehammer |
Achievement Tip: Freefall -- If you drop down from the top shelf to the ground floor, you should earn this achievement just like that.
Head to the other end of the warehouse, and start down the hall that leads to Paradise Plaza. As you approach the door, you'll encounter Jessie, a DHS agent. Thus begins Case 1.
Dead Rising Xbox 360 Index
No comments yet. Tell us what you think to be the first.