Mission 1: Phantom Limbs
Thank you for printing this page from www.SuperCheats.com.
Remember to come back to check for updates to this guide and much more content for Metal Gear Solid V: The Phantom Pain
Follow this guide to hear about updates
Last Updated:
| # | REQUIRED/OPTIONAL | OBJECTIVE | SPECIFICS |
| 1 | Optional | Pinpoin[Subsistence] Kazuhira Miller's whereabouts | Intel file is at Da Wialo Village and at Eastern Communications Outpost (only one is required; this guide aims for the one at Da Wialo) |
| 2 | Required | Extract Kazuhira Miller | Obligatory extraction within 4 in-game days (4 x 36 mins) |
| 3 | Optional | Extract the commander from Wakh Sind Barracks | The commander wears a red beret |
| 4 | Optional | Complete the mission without being discovered by the Skulls | Follow the walkthrough instructions, or replay the mission and choose a different landing zone |
| 5 | Optional | Secure the rough diamonds hidden in Spugmay Keep | Follow walkthrough instructions |
| 6 | Optional | Extract the transport truck driver | Requires Fulton device (obtained after Mission #2) |
Onc[Subsistence] you've watched all scenes, head down the trail. After hundred meters or so you can spot a yellow plant (Wormwood) that you can pick up. This guide won't cover all these items (at least not right now), but you should as a general rule of thumb be on the lookout for any colorfol plants. If you think something has a little bit too much color for the desert, it probably can be picked up.
THE FIRST OUTPOST
- Continue down the trail galloping (Square on Playstation, X on Xbox) until you come across a small outpost (#23 on your map). Indeed this is a good time to practice your sneaking skills, so dismount your horse and grab out your binoculars.

The First Outpost
- Ther[Subsistence]'s one guy standing near the path, somewhat on the left side of the outpost. Then there's a guy at the far end, looking away from you. You can sneak behind the first hostile (just be sure to sneak very slowly the last few meters, or you'll be heard) and as the hand icon appears, grab him and knock him out. Look around you to spot a portable toilet. You can drag his body inside (toilets can also be useful to hide in, if necessary).
- If i[Subsistence]'s night by now, you should easily be able to spot a glittering glimmer below the small table nearby. This is a Rough Diamond you'll want to collect. If it's day, you can still collect it, but it might be a little more difficult to spot. The table is around the right corner of the building when you're facing the portable toilet.
First Rough Diamond
- Check th[Subsistence] other building across the road to find some generic materials, then be on your way. You'll have conquered the outpost, as it's called, since you've defeated all (key) enemies.
- Tip: Before you enter Da Wialo Village, you can find a big treasure to the east side (from the main entrance). Follow the video for more specifics.

Rough Diamonds outside Da Wialo Village
DA WIALO VILLAGE
- Continue down the trail until you reach the village of Da Wialo. Ocelot recommends that you first find a place to look out on the site. Lucky for you, on the left/west side is a rocky outcrop that grants you a good overview of the area.
- Grab out your binoculars and spot two hostiles standing guard down below on the west side. There are also (static) guards posted at firm positions on the north and south side of the main road passing through the village, and they are behind heavy turrets.
- Check your map on The iDroid (selec[Subsistence] the 'Map Mode (North Top)' option for easier reference) and spot the largest building in the middle of the village, just west of the main road. Intel on Miller is being held here, and the goal is to collect it. The building is illuminated (at night), and there's a red (Russian) flag and a radio antenna on top.
- There are various ways to sneak into the village, but starting from the west side you'll want to start taking out one of the guards here when the other is walking away. Always hide bodies out of sight, so for example in a grassy area behind sandbags or low walls (or inside dark rooms/buildings).
- A good way to tackl[Subsistence] the area is to start in the northwest part of the village, which is free from patrolling guards. There's an illuminated building here, and south from here are several rooms with minor items and metals.
- From here you take out the guard stationed near the main road, close to a burning barrel.
- Yo[Subsistence] should now be able to move towards the main building, although there's still a guard circling it. If you can take him out and hide his body elsewhere, it does help.
- There are usually two to three guards near or even inside the main building. You can point your binoculars at the building to check if you can hear snippets of conversation. In any case, the ground floor contains a Casette Tape, the first floor contains the intel on Miller you were looking for.
- If you want to capture the village, you'll have to take out the remaining guards. When you've collected the intel, usually one or two guards will close in on your position. Drop down the roof by the northeast (if possible) and approach these guards from the back or simply take them out with tranquilizers.
- Should you decide to neutralize all enemies in Da Wialo, exploring the town becomes much easier. There are in fact various Rough Diamonds to be found inside, all of which can add up to quite a hefty sum of GMP (cash). See the video for more details.

Da Wialo Rough Diamonds Locations
THE NEXT OUTPOST (#18)
- Wait for the guards to stop conversing, then take out the guard on the east side with a tranquilizer round. You can also shoot the guard to the far west, but this will most likely be noticed by the third guard, who you'll then need to quickly take out with another round. The last guard on the far north can be taken out with a stealthy strangle. Collect the Casette Tape (She Blinded Me With Science) and regular materials from the middle of the tent, then be on your way.
GHWANDAI TOWN (RESCUING MILLER)
- Depending on whether you come from the southwest or southeast path (the latter is preferrable), you should move towards the cliffs to the east regardless. If you come at night, a Rough Diamond can be spotted more easily near a rocky edge of one of the hills here (see screenshot).

Rough Diamond near Gwandai Town
- Mark th[Subsistence] three guards behind the searchlights and try to spot any other guards near the main road. Also open up your iDroid and mark the main building in the center of the larger market (which only roughly marks Miller's location).

Rescuing Miller
- Enter the village from the east side. In fact, check the corners of the small building on the far east to find another Rough Diamond.
- From here, take out the closest guard behind the searchlight, but beware of any guards down below who might be able to spot you.
- Yo[Subsistence] should already be close to the main building by now. There's a guard out on the road, and another around the corner. They don't need to be taken out right now. Enter the door (slowly and quietly!) of the building, head upstairs and carefully enter the other room; there's likely a guard inside, so quickly put him to sleep. If any other guards are alarmed by this, be sure to take measures.
- Be sure to collect the Secondary Weapon Ammo and Supressor from the table, along with the Casette Tape [Koi no Yokushiryoku (Love Deterrence)] and some minor materials.
- Fre[Subsistence] Miller from one of the adjacent rooms; he's chained to the wall with handcuffs. Carry him and quickly make your way out of the village unseen, the way you came.
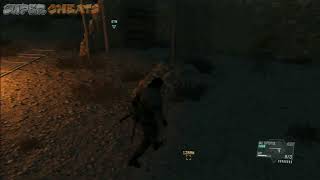
AVOID/ESCAPE FROM SKULL SQUAD
- Make your way to the extraction point with D-horse. Unfortunately some vague, ethereal mist-like gas appears, along with Skull Squad. Despite not being properly introduced into this game, Kojima just assumes you know who they are. In any case, they are four lame *** undefeatable zombies that just avoided you taking off with the chopper.

Avoiding the Skulls
- Avoiding th[Subsistence] Skull Squad is easy, but you need to know how to do it. First scan all four of them with your binoculars. After doing so, calmly ride down underneath the bridge, and stand on the right side of it. The two Skulls on top of the bridge will automatically be lured towards your position. Stand underneath the bridge so you can't be seen by either of them. When both are roughly 13 - 15 meters away from you, move back to your original position and cross the bridge. Stay as far away from the Skulls on either side and you should be fine.
- If avoiding th[Subsistence] Skulls fails, either try again or try to outrun and avoid them. Be sure to continuously dash with your horse (Square on Playstation, X on Xbox) and zigzag. This will make the Skulls dash in one direction while you're already going into another. The second they get in front of you, gallop in another direction. When the chopper is only roughly 375 meters away, the gas-mist disappears and it's finally - sort of - explained who these guys were in the first place.
- A[Subsistence] the end of the mission you get the Afghanistan Today and Ocelot's Briefing Casette Tapes.
Anything missing from this guide?
ASK A QUESTION for Metal Gear Solid V: The Phantom Pain
Comments for Mission 1: Phantom Limbs
Add a comment
Please log in above or sign up for free to post commentsTable of ContentsClose
Guide Updates
Get notified of updates to this guide
Many of our guides get updated with additional information. To get an email when this guide is updated click below.
 Join us on Discord
Click to close
Thank you very much for this guide! It really helped me.