Between Mission 6 and 7: Side Ops, Upgrades and D-Dog
Thank you for printing this page from www.SuperCheats.com.
Remember to come back to check for updates to this guide and much more content for Metal Gear Solid V: The Phantom Pain
Follow this guide to hear about updates
Last Updated:
Now i[Subsistence] a good time to go a little more indepth about several Side Ops you can do at this point. Right now you can do the following: 1, 5, 11, 12, 13, 27, 47, 51, 61, 152-155. Some of these will only appear after you've completed Side Ops that have to be done first. Although the GMP rewards aren't that high, doing these missions now will unlock more Side Ops later on that are increasingly more rewarding.
- Sid[Subsistence] Ops 1 - Extract Interpreter (Russian): You'll most likely have done Side Ops 1 already, where you needed to extract a Russian interpreter from a small outpost east of Spugmay Keep, but if you haven't done so yet, get to it immediately, as understanding Russian is a very important perk.
- Side Ops 5 - Secure the [RIOT SMG] Blueprint: You're simply required to located this blueprint in a building on the relatively south side of Da Wialo (see video support). Neutralize any nearby guards if required.
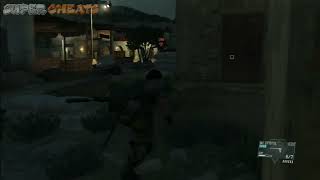
Side Ops 5
- Sid[Subsistence] Ops 11 - Extract the Highly-Skilled Soldier 01: This is a sniper with two colleagues located on a top of a cliff south of Yakho Oboo. Don't approach them head-on by going over the bridge. Instead, cirlce around and head for a back attack, allowing you to neutralize all three with relative ease (tranq. headshots).
- Side Ops 12 - Extract the Highly-Skilled Soldier 02: This is a guard patrolling the east side of Da Wialo. Enter the village from the east, mark and neutralize everyone you come across until you reach the masked target.
- Sid[Subsistence] Ops 13 - Extract the Highly-Skilled Soldier 03: This extraction mission is a bit harder compared to the previous two, hence the greater reward (60000 GMP). The soldier is stationed at Da Smasei Laman and is accompanied (if not 'guarded') by at least five other soldiers (mark them all). Crawl towards the entrance of the tunnels and curve towards your target to the east from there. If you can manage to neutralize them with tranq. headshots, all the better, but if that doesn't work out, simply waste the rest after tranquilizing your target.
- Side Ops 27 - Prisoner Extraction 01: This prisoner is located inside the main building (with radio transmitter you head to destroy in main Mission 4). Use the mountain trail to the south of the outpost to infiltrate it stealthily and drop down until you reach the building. Neutralize the soldier guarding the prisoner, head through the window and drop the prisoner outside, the Fulton extract him and get out of the outpost.
- Side Ops 47 - Extract the Little Lost Sheep: This is indeed a sheep, located somewhere in the northeast region of Da Wialo. Clear the area and extract the critter.

Side Ops 47
- Sid[Subsistence] Ops 51 - Extract the Wandering Mother Base Soldiers 01: This is the first of a series of somewhat strange and (depending on your approach) relatively difficult Side Ops. It requires you to extract a bewildered former Mother Base Soldier. To do this you must locate him first. This can be very tricky if you don't at least have upgraded your Mother Base intel to detect enemy presences, or alternatively have D-Dog. You'll probably should have access to the first right now, so we'll roll with that. The current target can be found between outposts 16 and 20 and is usually found in the hills, away from the main road. Doing this mission during the night improves your Stealth and allows you to use nightvision goggles. Keep in mind only a tranq. headshot will do anything to this bewildered soldier, so be sure to land it on your first try (if you fail, the soldier will go on a frenzy and run away). You can still take down this particular soldier when he runs away, but it does complicate things. Your melee moves have to be fast and you need to restrain him immediately afterwards. If you want to be sure the nearby outposts don't interfere with this mission, neutralize all guards there beforehand.

Side Ops 51
- Side Ops 61 - Unlucky Dog: This prisoner is located in a cell at the north portion of the Yakho Oboo Outpost. There are, as always, various ways to go about this. The hard way is to systematically neutralize all guards and infiltrate the outpost regularly. An alternative way is to set some C4 near the entrance, then head down the east trail and use the hole in the ground at the end to reach a vent, crawling through to enter the base. Trigger the C4 fot a diversion effect, then neutralize any remaining enemies if required and enter the cell too carry the prisoner outside to extract him.
- Sid[Subsistence] Ops 152-155 - Target Practice: These Side Ops are target practice shooting missions done at mother base. Most of them are quite easy, with the exception of #152 (video in preparation). For #153, don't miss the three targets at the back corner of the area. For #155, note that there are three targets outside as well.

Side Ops 154

Side Ops 155
Upgrades: Some very useful upgrades that should ideally be available to you at this point are the following listed. If you want to know the requirements for these upgrades, simply select the item in your iDroid Development Menu. Keep in mind that you should have created several Mother Base platforms for these upgrades already at an earlier time. If you lack some of the processed materials to do one or more of the below upgrades, raid some outposts or return to one of the more familiar villages to see if you can stock up there.
- Useful upgrade[Subsistence] are: Int-Scope 2 (Allows analyzing soldier skills up to B-ranks), Fulton Cargo 1 (allows vehicle extraction), Fulton Device 2 (Ammo up from 12 to 24), iDroid 2 (Speaker function, allows playing of tapes), Prosthetic Arm Mobility 1 (Extends Reflex Mode duration), WU S. Pistol 2 (improved general functionality), AM MRS-4 (improved general functionality including scope and dot sight), C4, Flare Grenade, Smoke Grenade.
D-Dog (New Buddy): During the starting deployment areas of mission 3, 4 or 5 (or during free roaming at the same places, being Shago Kallai, Eastern Communication Post, Wakh Sind Barracks) you may hear a puppy bark at some point. You'll also get a comment about this, along the lines of: "This is no time to be playing with animals." If you search for the puppy (at nighttime, night vision goggles helps, otherwise go by the strength of the sound), extract him. Once you get back to Mother Base, a cutscene will play. After this, you'll need to play six missions of which three are from missions 7-10. When you return to Mother Base after this, D-Dog becomes an ally.
Anything missing from this guide?
ASK A QUESTION for Metal Gear Solid V: The Phantom Pain
Comments for Between Mission 6 and 7: Side Ops, Upgrades and D-Dog
Add a comment
Please log in above or sign up for free to post commentsNo comments yet. Tell us what you think to be the first.
Table of ContentsClose
Guide Updates
Get notified of updates to this guide
Many of our guides get updated with additional information. To get an email when this guide is updated click below.
 Join us on Discord
Click to close