Mission 6: Only Human
Thank you for printing this page from www.SuperCheats.com.
Remember to come back to check for updates to this guide and much more content for Crysis 3
Follow this guide to hear about updates
Last Updated:
Datapads: 5
Blackboxes: 2
Propaganda Posters: 1
Make your way to the first Ceph AAA battery. Take out the enemies from a distance using your long-ranged rifles or the stealth DSG-1 you came across along the way. Take the path to the left and a Citadel defense turret will land. Hack / destroy it then use the zipline to the next building. Hack the minefield ahead and destroy/hack another citadel turret along the way. Proceed to the next building and the initial wave of enemies.


Continue to the AA battery and find the power source in the building. Destroy it to disable the AAA and have Psycho deal the finishing blow. Check the upper floor of the building to the west, beside the AAA to find a Propaganda Poster.

CELL Cash ID card
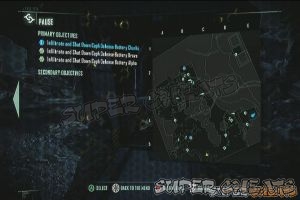
You now have to head to any of the two Locations to disable the defense batteries. From your position, head to the northwest (open your map) and find another datapad inside the head of Lady Liberty. You'll find an APC past the head of Lady Liberty as well. You can use this to take out enemies easier; just don't submerge it in deep water.

Breaking News
Ride to the north and leave it at the shore for a while so you can swim to the isolated building to the northwest. Here, you can help clear the Ceph forces to save your allied rebel mortar team. They should be able to provide you with mortar support now. Grab the datapad on the crate as well.


Head out and start marking targets, especially the pingers. Take out three of the pingers in the area to unlock the achievement “Ping Pong”. After the pingers are down, the mortar team won't be able to provide any more artillery support.

Proceed to Battery Bravo and take the northwestern side so you can pick up a nanosuit upgrade on the way. Hack the weapon crate if you want then disable the minefield across the bridge. Take out the citadel turret and proceed to the AAA position. More enemies will be waiting inside so tag them and take them out.
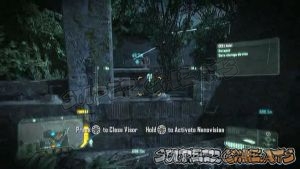

Just below the energy cell is a corpse with a Blackbox. Grab it and destroy the energy cell to disable the AAA.

Blackbox #6-01
Continue southeast of Battery Bravo to trigger another secondary objective. Here you have to clear the mines around the rebel ICV. They're inside the cavern. Just open your nanovisor to automatically hack the mines and clear the path. Head deeper inside to find a nanosuit upgrade, datapad and some ammo and arrows.


Further southeast is a downed helicopter, near the metal tentacle beside an island. Head there to grab the datapad inside the wreckage.
CELL
There's a downed allied VTOL to the southwest. Head there to scout it. Remove the barrier blocking the exit so the rebels can escape, then grab the supplies inside, including a nanosuit upgrade.
Proceed to the southeast towards defense battery charlie and take out the enemy VTOL along the way. Between the two citadel turrets deployed before the battery position lie a ceph wreckage. You can find the second Blackbox underneath it.

Blackbox #6-02
Proceed inside the defense battery and take out the ceph units around it. The resupply crate nearby contains a M.I.K.E weapon. Take it and use it to easily eliminate the ceph infantry around the AAA. After destroying the battery, more enemies will appear. Eliminate them and make your way to the upper ledges. Wait for Psycho to land and enter the VTOL.
During this sequence, just use the VTOL's gun to take out aerial targets. Keep doing this until you clear the skies and you're forced to make an emergency landing. Upon landing, you have to take out the ceph ground forces that will drop from the passing dropships. The mounted grenade launcher's ammo is limited so take your shots wisely. It should be more than enough to take out the enemies though.

Dogfight
After a short while, a new enemy called the Ceph Mastermind will appear. You have to concentrate your fire on it, destroying some of its floating options to weaken it. Once enough damage is dealt, you'll be pulled towards it. Mash the A button to force feedback the energy towards it. Move around the battlefield and take cover constantly. There are several ammo crates in the area but it is recommended that you exhaust your clips to maximize the ammo resupplies. There are ceph weapons and energy cells in the area as well which you can use to supercharge your suit. Use it to gain temporary invulnerability and infinite ceph weapon discharge. Keep doing this until the mastermind is defeated.
After defeating the mastermind, grab the last datapad in the corner, on top of some ammo crates.

Mastermind battle and last datapad acquisition
Head to the mission marker to trigger a scene and complete the mission.
Anything missing from this guide?
ASK A QUESTION for Crysis 3
Comments for Mission 6: Only Human
Add a comment
Please log in above or sign up for free to post commentsNo comments yet. Tell us what you think to be the first.
Table of ContentsClose
Guide Updates
Get notified of updates to this guide
Many of our guides get updated with additional information. To get an email when this guide is updated click below.
 Join us on Discord
Click to close