Mission 11: Fleet Destruction
Thank you for printing this page from www.SuperCheats.com.
Remember to come back to check for updates to this guide and much more content for Ace Combat 7: Skies Unknown
Follow this guide to hear about updates
Last Updated:
Operation Siren Song
This mission is timer-based and will require you to destroy as much as you can until the timer runs out. There’s a supply line that you can use to repair your aircraft, switch your SP weapons, and restock ammo and flares. You should resupply once or twice, especially if you’re using LASMs to instantly sink enemy vessels and easily rack up points. Upon returning to the resupply base, the timer of the main mission is paused and you'll have a separate timer for landing.

There are three sectors you can attack, each with their own assortment of aircraft, ships, and AA weapons. You’re free to choose what sector you want to attack. You only need to completely wipe out the enemy fleet to the east (1) and one of the platforms to reach/exceed the quota within the time limit. It’s recommended to clear out the northern platform (2) since there’s a lot of open space to work with, compared to the western platform’s natural protection of mountains (3). As you destroy targets, more will appear in the map as reinforcements.

A good path I can recommend is outlined below. This will maximize your strike time and loadout, while giving you enough time to repair or replenish your armament before the timer runs out. If you also want to spawn the two Aces of the mission, interchange steps 1 and 2 instead. (attack platform first before engaging the fleet)
1. Clear the eastern fleet
2. Attack the northern platform and surrounding ships
3. Fly back to the return line, while engaging new enemy ships and aircraft
4. Sweep the remaining enemy forces
Dealing with the enemy fleet / naval targets
Each ship has different individual destructible parts (guns, VLS, CIWS, etc). Always aim for the ship’s main body (body = ship type, e.g. destroyer, cruiser, frigate, etc), especially when using your LASMs or Missiles. Destroying the ship will also destroy its other parts instantly, adding up to your points.

CIWS (close-in weapon systems) installations on ships and platforms can shoot down your standard and special Missiles. Avoid firing single missiles against them since they’ll rip your missiles in mid-air. You have to overpower them by firing your SP weapons and standard missiles in very quick succession.

Planes with LASMs and LACMs will excel here. LASM requires a clear Line of Sight to the target since it flies at a low altitude while LACM flies at a higher altitude then hits the target from above. Consider your angle of approach to the target when using these weapons. You can use other air-to-ground weapons but the LASM was made for instantly sinking warships from long distances, making it the undeniably best SP weapon for this mission. The X-02s is a top pick for this mission as well since on top of having access to LASM and other excellent parameters across the board, it has excellent speed which will allows it to use the return line easily. You can still however, use any other plane with access to LASM.

The fleet has an aircraft carrier with multiple AA systems, including twin CIWS so don’t expect it to go down easily. It can also launch two fighters at once, that you can destroy during takeoff for some easy kills/points.

If you find stationary ships in dry docks, make sure to either shoot Missiles at them from above or from the front. The dry docks will block any projectile or explosive from the side.

Dealing with armed platforms
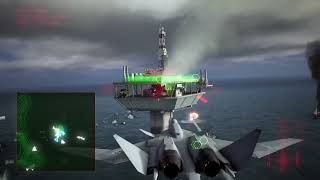
The platforms to the north and west are both littered with a heavy dose of AA emplacements, including SAMs, AA guns, and CIWS. The platform to the north is also a makeshift runway, capable of launching helicopters and fighters to intercept you. You can shoot down any aircraft that attempts to take-off but this leaves you open to the AA installations on the platform.

As soon as you reach the platforms, attempt to approach the support cores underneath them. These will become targets you can destroy. Destroying them will make the supported section collapse, destroying everything on it. You can demolish the entire platform and sink them to the sea by flying through the gap and destroying the cores.


Mission 11: First Run
ACES
Unlike the earlier missions, this mission has two Aces that will appear.
Chris Azure “CHASSEUR” (Rafale M)
Use your fastest aircraft and equip it with multi-target AA SP weapons. As soon as the mission starts, fly all the way to the fortified platform/ makeshift launch deck in the middle-north of the operation area. Switch to your SP weapon and fire it at the aircraft on the runway.

As soon as you do this, they will attempt to take off so you’ll only have a maximum of two quick strafings before any of the aircraft can take off. If done correctly, CHASSEUR will appear as a lone dot from the west, heading towards the platform.

Matthieu Bertin “IBIS” (SU-33 Flanker D)
Shortly after taking out CHASSEUR, make your approach to enter the narrow gap under the northern platform where the support cores are located. Just fly through it and IBIS will appear from the fleet to the east. He will attempt to fly north and leave the combat area so immediately intercept him and shoot him down.


RANK S TIPS
Use a plane with access to good AA SP weapons and Air-to-Ground (preferably LASM). Start off with the SP weapon dedicated to deal with the sector you’re planning to attack. You can then go back to the return line to switch your SP weapon as needed.
Planes with LASMs and LACMs will excel here. LASM requires a clear Line of Sight to the target since it flies at a low altitude while LACM flies at a higher altitude then hits the target from above. Consider your angle of approach to the target when using these weapons. You can use other air-to-ground weapons but the LASM was made for instantly sinking warships from long distances, making it the undeniably best SP weapon for this mission. The X-02s is a top pick for this mission as well since on top of having access to LASM and other excellent parameters across the board, it has excellent speed which will allows it to use the return line easily.
Each ship has different individual destructible parts (guns, VLS, CIWS, etc). Always aim for the ship’s main body (body = ship type, e.g. destroyer, cruiser, frigate, etc), especially when using your LASMs or Missiles. Destroying the ship will also destroy its other parts instantly, adding up to your points.
You can destroy the platform support cores to demolish them. Any installation, aircraft, or ships caught in the collapse are instantly destroyed and added to your score. This is the most efficient way of racking up points in the shortest amount of time.
Mission 11: Rank S - Normal, +Spawning Aces (Chasseur and IBIS)
Anything missing from this guide?
ASK A QUESTION for Ace Combat 7: Skies Unknown
Comments for Mission 11: Fleet Destruction
Add a comment
Please log in above or sign up for free to post commentsNo comments yet. Tell us what you think to be the first.
Table of ContentsClose
- Basics - Features
- Basics - Game Mechanics
- Basics - Multiplayer
- Campaign
- Assault Records
- Extras
Guide Updates
Get notified of updates to this guide
Many of our guides get updated with additional information. To get an email when this guide is updated click below.
 Join us on Discord
Click to close