File R-07
Thank you for printing this page from www.SuperCheats.com.
Remember to come back to check for updates to this guide and much more content for Metal Gear Rising: Revengeance
Follow this guide to hear about updates
By Bkstunt & AbsoluteSteve
Last Updated:
ENTERING THE BASE
VR Mission #19
The intel for this VR Mission can be found by climbing the rocks directly behind Raiden at the very start of the level.
VR Mission #19 intel location
-- Video coming soon --
Move to the upper left corner of the field and search the large rock to find an [ELECTROLYTE PACK]. There's also a [CARDBOARD BOX] in the corner nearby. Head to the far end of the road to collect a [REPAIR NANOPASTE] from a box. Lastly, there's a Humanoid Gekko on the right side of the main entrance.

Outside the base.
To sneak past the three cyborgs guarding the main gate, be creative and use one or two of your 3D Photo Frames to distract them, allowing you to take 'em out.
Slice the main gate open and rush over to the armored vehicle to the left. Wait for the heavily armored cyborg to pass (use AR) and slice him up from the back (he's a wielder of a
). Quickly move behind the armored vehicle again so the other nearby cyborg doesn't see you. From the perspective of entering the base, move to the right part of the area and waste the cyborg (just be careful the turret near the hangar entrance doesn't spot you). If you climb the containers near this entrance, you can reach a platform with a chest that contains [5000 BP].
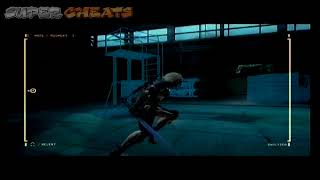
Perfect stealth approach for the entire hangar area.
Data Storage #19
After entering the base, move on top of the containers to the upper left in the first area to reach the platform attached to the building. The data storage can be found at the end of this roof.
Data Storage #19 Location.
-- Video coming soon --
You can sneak past the guy at the top of the stairs by equipping a drum can and hugging the wall as the other cyborg walks away. Once you're past the guard on top of the stairs, quickly take out the remaining cyborg. There's a [JAM GRENADE] in the corner of the area, hidden behind some containers, and you can also take out the guard above by climbing these containers.
THE HANGAR
As one would expect, there are many guards in the hangar. Hide behind the forklift in the right corner and wait for the heavily armored guard to come close, allowing an easy strike from behind.
Now wait for the guard on the upper catwalk to move to the left, then quickly ninja run on top of the containers to reach him. After dispatching him, perform a ninja move on the other guard in the first section of the hangar.
With these guys out of the way, things are suddenly much easier. The heavily armored guard closest to you is wielder of a
, and he can be taken out easily by waiting until he moves to the left side of the hangar while the other is on the fence at the back. With him out of the way, as usual, the last cyborg should pose no difficulties. There's also a box with some [REPAIR NANOPASTE] on top of the containers in the upper right corner.
VR Mission #20
Approaching the hangar from the start of this area, stay on the right side of the hangar and look behind the containers. The intel can be found behind them; it's not directly underneath the nearby catwalk, but it's certainly close.
Data Storage #20
In the hangar, jump on top of the second plane (initially furthest away) and carefully hop onto the right propellor to find the last data storage!
Data Storage #20 Location.
-- Video coming soon --
Head outside (through the fence) and look in the corner of the area to find some [REPAIR NANOPASTE]. Destroy the camera to the left, then quickly jump on top of the catwalk when the guard is looking away, and immediately equip the drum can. If you do it correctly you should be able to quickly approach the guard from behind (even if it triggers caution) and cut off his
; again, immediately switch to the drum can after this. The other two cyborgs can be dealt with a RP/EM Grenade or 3D Photo Frame.
There's one last [MAN IN BOX] behind the containers at the far end alley, after which you can proceed to the waypoint to trigger the final boss fight.
Boss Battle: METAL GEAR EXCELSUS
Keep dodging its attacks (see below) and damage the boss' legs whenever he moves them. You'll enter Blade Mode when damaging the legs enough, and you'll also be able to slash away at the head when you generate a BMI error halfway through the battle.
SINGLE BLADE VERTICAL SLASH: This can be dodged with Ninja Run.
DOUBLE BLADE VERTICAL SLASH: This can also be dodged with Ninja Run, but this is more difficult to do than with the single blade slash. It helps to keep moving and have some distance available to run. A dash at the very last moment can also make a difference. You can damage Excelsus' by hacking away at its blades after this.
SINGLE BLADE HORIZONTAL SLASH: You'll have to timely jump over these, which are typically performed multiple consecutive times.
DOUBLE BLADE HORIZONTAL SLASH
The following attacks are performed after lowering Excelsus' health somewhat.
LEG SMASH: This is a fairly slow attack that you'll want to evade by staying away from the leg.
LEG CRUSH: A very easy attack to evade, since it is a vertical crush on the place it is standing still.
After halving its health, the following attacks are performed (and two gekkos join the fun - try to get Excelsus to toast them):
DOUBLE BEAM: Can be evaded with Ninja Run.
HORIZONTAL DOUBLE BEAM: Can also be evaded with Ninja Run, but stay far away from Excelsus. On the other hand, it's smart to first lure the Gekkos close to Excelsus so he accidentally toasts them.
Boss Battle: SENATOR ARMSTRONG
Yup, the lame guy is actually the final boss of this game. There's no way he ever made it to senator in real life. Anyway, his attacks are fairly easy to evade once you know them.
The first part of the battle is easy, and isn't the 'real' battle yet. Keep blocking his attacks while hacking away. When Raiden loses his sword, simply keep fighting until a cutscene plays. After this, the final battle commences.
STRAIGHT LAVA LINE BURST: Armstrong hits the ground and a stream of fire/magma is aimed at Raiden in a straight line. Sometimes he uses this twice in a row, so be careful. He'll always open the battle with this attack, so use Ninja Run to avoid it.
LAVA CRACKS: Armstrong hits the ground and cracks appear everywhere around the area. Don't stand on any of them when they burst and you'll be fine. He usually comes at you through the flames, following his attack up with several punches.
DOUBLE LAVA LINE: Mr. Senator punches the ground but this time two streams of fire/lava emerge, curving somewhat around the area.
ENERGY BLAST: This cannot be blocked, so once you see him 'charge up', immediately back off and dodge.
GRAPPLE: Needless to say this can also not be blocked, so dodge sideways.
METAL ARM THROW: An annoying attack for which Blade Mode is quite broken. You'll have to slice several squares at once, especially on the higher difficulties. The first slice is easy, but the ones after that are very hard to do right. You'll have to move the camera with the left analog stick or otherwise the slice is impossible. If you cannot get it to work (which is very understandable), simple Ninja Run the hell away from the arm and you'll most likely dodge it (left stick up works well).
Get Armstrong down to 0.1% of his health and he'll perform an attack that triggers a QTE:
Left Stick wiggle, Blade Mode his fists, Y+B (Xbox 360) or Triangle+Circle, tap X (Xbox 360) or Square (PS3), Blade Mode his heart, B (Xbox 360) or Circle (PS3). Do it correctly to end the fight.
Congratulations on beating Metal Gear RisingYou now unlock several items. Keep playing and check out the other sections of this guide (coming soon) to figure out how to collect all optional items.
Anything missing from this guide?
ASK A QUESTION for Metal Gear Rising: Revengeance
Comments for File R-07
Add a comment
Please log in above or sign up for free to post commentsTable of ContentsClose
Guide Updates
Get notified of updates to this guide
Many of our guides get updated with additional information. To get an email when this guide is updated click below.
 Join us on Discord
Click to close
How to defend his last attack at 0.1 health.and how to finish him?
WHat will be it for pc at the last most step? i.e. cutting the arms?
The Song is "It Has To Be This Way" by Jamie Christopherson, but there are two versions to it, one with lyrics and one without. Happy hunting!
where are all the hiding cyborgs in box's?
Could you tell me what is the song when fighting senator armstrong? (Man)
Omg the final from of the last boss is so stupid...the second block he throws i can't cut