File R-01: Coup D'Etat
Thank you for printing this page from www.SuperCheats.com.
Remember to come back to check for updates to this guide and much more content for Metal Gear Rising: Revengeance
Follow this guide to hear about updates
By Bkstunt & AbsoluteSteve
Last Updated:
THE BEACH
After the cutscenes, feel free to slice up almost everything in the area, if only for fun. There's a white cat on the beach that you can't hit, but it's fun to try nonetheless. When you decide playtime is over, use Ninja Run to climb the wall's platforms to the right side (which are close to the rusty stairs, which you can also take if you haven't cut them to pieces yet).
BATTLE #1
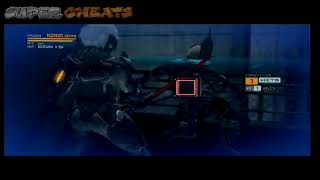
Three cyborgs "ambush" you, giving you an excellent opportunity to test out Blade Mode's Zandatsu. Once you've staggered an enemy (as indicated by a slow-mo effect accompanied by a flash at their body), enter Blade Mode when nearby your foe. You'll see a red square; hit it with one of your swipes and press B (Xbox) or Square (PS3) to rip the fuel cells out of your enemy, restoring your health, FC, and giving you bonus points on battle rankings.
Parry your enemies' attacks and experiment with Raiden's moveset. It's good to know that you will be able to get S-rankings on battles much more easily after you've upgrades Raiden's body and weapons, so it's not necessary to keep replaying the battle over and over right now; chapters can be replayed later.
INSIDE THE BUILDING
After the codec call, open up the red item box laying next to the pillar on the upper right part of the area to find a [REPAIR NANOPASTE]. Remember that you can locate items more easily by using your AR (press 'Up' on the directional pad to activate it - Ninja Run or combat moves will deactivate it).
Climb the containers to reach the second floor, and climb some more boxes to your immediate left (don't cut them just yet, or you can never reach the floor above!) to reach a balcony overviewing the room. There's a box with a [REPAIR NANOPASTE] in the dark corner past the double doors.
Data Storage #3 Location + Saving the hostage
-- Video coming soon --
Data Storage #3
Slice the candelabra to pieces to find the third data storage item.
You can find [300 BP] in a box right before heading through the doors on the other side of the room. Move through the corridor and look for a [REPAIR NANOPASTE] at the far end of the upper half (use Ninja Run to get there, or simply jump over the gap). Stand nearby the cyborg (while still on the upper walkway) to activate the option to press B/Square. This is a special 'ninja' move that instantly kills your foes and allows you to enter Blade Mode for a Zandatsu finisher.
MAIN THOROUGHFARE - PART 1
Enemies: Cyborg x4
Head outside and collect a [GRENADE] from the box to the right of the stairs. Don't use the stairs but walk back to the left side of the area. Ninja Run over the bridge and approach the cyborg from his back to stealthily waste him. There's a [GRENADE] on the ground nearby the boxes, which you can use to climb the passageway. Move to the other side to find [500 BP], then stand nearby one of the floor windows and carve it by using Blade Mode. Wait for the guard to walk underneath it to perform a stealth kill.
Return to the spot where you killed the first guard (on the left side of the area) and move to the far right towards the fence. From here, Ninja Run to the spot where the first cyborg was standing and leap towards the two cyborgs in the street, performing a stealth kill by pressing B/Square in midair and carving up both cyborgs simultaneously if possible. Speak with the civilian and be on your way. You can find a [GRENADE] in the corner of the building to your right. If you hadn't done so already, you can also climb this building to collect the 500 BP mentioned earlier.
MAIN THOROUGHFARE - PART 2
Enemies: Gekko, Cyborg x4
As you proceed through the thoroughfare you'll be forced to fight a Gekko and four cyborgs. Parry their attacks and beware of the Gekko's grapple attack (it will flash yellow when it attempts this); either avoid it altogether by pressing X+A (Xbox 360) or Square+X (PS3) simultaneously, or wiggle the left analog stick to perform a counter move.

Ranked Battle #2
MAIN THOROUGHFARE - PART 3
There are several items you can find before proceeding to the next part of the thoroughfare:
- There's a [ROCKET LAUNCHER] on the first viaduct.
- Nearby the church on the left side of the area there's a [REPAIR NANOPASTE] in a box to the right side.
Data Storage #4
Look for this box to the left of the church doors; it contains the data storage item.
Data Storage #4 Locations
-- Video coming soon --
As for the enemies up ahead, start by taking out the cyborg to the left side of the area - he's just beyond some boxes that have another [ROCKET LAUNCHER] lying next to them. Only approach this cyborg when the gekko is walking over the viaduct to the other side. After killing him in stealth-fashion, backtrack to the other side of the street (climb the walkway) and wait for the first gekko to jump down the thoroughfare. Quickly Ninja Run to the first cyborg (or alternatively the second one, but hug the wall while doing so) and waste him. If this triggers caution, quickly backtrack again until it goes away.
The remaining cyborg can be killed when the gekko has once again jumped on the thoroughfare (wait for it to make another round). This leaves only the two gekkos. The first one can easily be killed by following it over the viaduct and dispatching it from behind in the left corner. The second gekko in the main thoroughfare can now easily be destroyed. Be sure to collect the [REPAIR NANOPASTE] in the upper right corner of the street before heading through the door on the upper left side.

Perfect Stealth approach main thoroughfare
VR Mission #1
Inside the building, inspect the laptop in the small green case to retrieve the first VR mission. All others are unlocked in the same way.
Simply head upstairs and go through the hall to trigger a cutscene.
Boss Battle: BLADE WOLF

Boss fight Blade Wolf
The fight with Blade Wolf can justly be interpreted as a tutorial on how to master parrying. Its attacks are plenty and you'll need to parry them by tapping the left analog stick (plus X [Xbox 360] or Square [PS3]) in the right direction (while not holding it down).
Blade Wolf will summon three cyborgs after you damage it enough, and one gekko after that. The battle can be finished after these replenishing supplies have been dealt with. There are a few minor BP items on the battlefield (smash the small crates in the center of the area), as well as a [REPAIR NANOPASTE] near the door, but nothing too noteworthy.
BLADE THROW: Blade Wolf's Blade Throw is his most basic attack. Just as you saw in the cutscene, he uses his tail to throw three knives at you. If you are standing still they will aim for center mass, but if you are running they will spread out. A simple parry will protect you in either case.
CLAW SWIPE: The Claw Swipe attack is only used when you're fairly close to Blade Wolf. He will rear back a bit and then leap forward, using his right claw to attack. The swipe is rather large, but a well-timed parry will open Blade Wolf up to a counterattack.
BODY CHARGE: A vicious attackBlade Wolf will throw himself at you at a high velocityHe can do this several times in a row if he wishes (and you dodge). He can also leap off of the side of a wall to add even more velocity to this attack. A parry will keep you safe here, but a perfect-parry will drop Blade Wolf right in front of you instead of knocking him far away, so aim for perfection so you can hurt him even further.
CHAINSAW COMBO: This is an interesting attack. You know it is coming when Blade Wolf uses his tail to grab the chainsaw, which he only does when you are somewhat close to him. He will then start to swing it around and hit you with it. He will often only use either a horizontal swipe or a leaping vertical slam, which consist of one hit each (and one parry), but he can also chain together a three-hit attack (horizontal swipe, vertical slam, horizontal swipe), so be ready to parry multiple times and counter afterward.
RAMPAGE: Another vicious attack. Blade Wolf will charge up and pounce around the battle area. He pounces around five times in total before he is done, and if you are caught unware during this attack he will pounce on TOP of you and impale you with his chainsaw. Thankfully this attack is easy to parry, as Blade Wolf has a habit of trying to actually pounce on you during his FOURTH pounce. Alternately, you may find it rather easy to jump away from Blade Wolf when he pounces towards you and then, while in the air, use a Strong Attack while aiming at him to swoop down and start your own chain of attack.
After the fight, slash the door open and open the red box for [500 BP].
Data Storage #5
After defeating Blade Wolf slash the nearby door open to find the data storage item on top of the cabinet in the corner.
Data Storage Location #5
-- Video coming soon --
THE STREET UP TO THE BRIDGE
Proceed down the street and hug the right wall until you reach some sandbags and boxes to hide behind. Wait for one (of three in total) cyborg guard to come close (tap 'Up' to activate your AR, making him easy to spot) and Ninja Run towards him, allowing a stealthy kill.
There are two guards with riot shields up ahead, so move in for the kill. Attack them from behind in the hope of destroying their shield as well. Before heading over the bridge, collect a [ROCKET LAUNCHER near the armored vehicle, a [GRENADE] on some crates on the opposite side of the street, and [100 BP] from the red box to the right of the bridge.
THE BRIDGE & CHOPPERS
Enemies: Hammerhead (helicopter) x1
Head over the bridge in a dramatic fashion, holding the left stick down while doing a Ninja Run. When Raiden falls, tap Y (Xbox 360) or Triangle (PS3), then continue your Ninja Run immediately.
You'll have to fight off one of the choppers, which isn't as hard as it looks. You can find [ROCKET LAUNCHERS x4] lying around the area, although you don't necessarily have to use them. Climbing the ruins makes it possible to directly slash away at the chopper. Doing this two to three times will make it launch a series of rockets. At this time, press the left analog stick + RT or R2 in the direction of the chopper to use the rockets as stepping stones, allowing Raiden to reach the chopper and enter Blade Mode to 'chopper' it to pieces.

Ranked Battle #4 (Hammerhead)
MAIN STREET
Enemies: Cyborg x4, Flying Cyborg x2

Saving the hostage
Head underneath the viaduct and open the box to your left; inside is a handy [E M GRENADE], which stuns (groups of) enemies for a brief moment.
Hug the right buildings of the street as you continue, then head upstairs. As you've undoubtedly noticed, a civilian is being held hostage and is about to be killed by the group of cyborgs, which includes two flying ones. Activate AR mode to find out where the cyborgs on the ground are located and drop the EM Grenade towards them. Jump at one of the flying cyborgs and do battle with them. Stay away from the civilian and he should be fine at the end (if you have thrown the grenade correctly).
There are a few items in this area you can now collect:
- [REPAIR NANOPASTE] can be found behind some large crates to the right side of the main street.
- [100 BP] from the box on the roof you were on just now.
- Climb the buildings on the left side of the street to access some roofs to the southwest. Here you can find an [ELECTROLYTE PACK].
VR Mission #2
Just after defeating the cyborgs and (possibly) rescuing the civilian, climb the buildings on the left side of the street and make your way to the far southwest of the rooftops to find the intel for this mission.
THIS WILL COME IN HANDY
When you've collected all those goodies, head towards the main gate and collect a [ROCKET LAUNCHER] next the control panel. You'll have to go back and snatch an officer's hand to proceed, so do exactly that.

Stealth approach to this street.
As you backtrack slightly, hug the left side of the street. Soon enough an armored vehicle stops in the middle of the street, spawning three cyborgs. Head up the nearby stairs (to your left) and take out the first guard with a stealthy ninja move from above. The second guard in the middle of the street can now easily be taken out. The third guard moves onto the roof you first accessed (to rescue the civilian), so head up those stairs, sneak behind him and take 'em out. It helps to activate AR mode before doing this, because if he's already halfway up the stairs, it's better to wait for him to move to the roof; better safe than sorry.
The commanding officer is located behind the armored vehicle. Cut off his left hand while in blade mode (after first stealthily stabbing him) to get what you needed. From now on, cyborg officers with a left hand that is of interest will have a blip indicating they're carriers of precious data.
'HIDDEN' BATTLE
Enemies: Cyborg, Flying Cyborg x3
If you return the the place where you fought the Hammerhead chopper, a new battle can be activated.
BEHIND THE GATE
Enemies: Cyborg x4, Cyborg with blade x1
Behind the gate an inevitable battle commences. Focus on destroying the regular cyborgs first, since their gunfire is particularly annoying if you're aiming to get through the battle fully unscathed. The cyborg armed with a blade can parry your attacks, so be sure to parry his attacks in turn!
You can find a [HOMING MISSILE] near the green crates, which may come in handy soon.
INSIDE THE BUILDING
You can find a [3D PHOTO FRAME] by going into the room straight ahead from the main entrance, just behind the stacked boxes. The room to the right contains a [REPAIR NANOPASTE], and the small hall in the corner of this room leads to..
VR Mission #3
After opening the large gate in the street and defeating the cyborgs on the square with a small fountain, you head inside a building. Go into the first room to your right and enter the small hall in the left corner to find this mission's intel.
VR Mission #3 Location.
-- Video coming soon --
Head up the stairs (or climb the boxes) until you reach the second floor. Before going up the last set of stairs, note that you can find a [GRENADE] next to them; it's to the left of it. The last floor contains a box in the corner that holds [500 BP], so don't rush outside just yet.
THE ABANDONED FAIRGROUND

The abandoned fairground R-01 stealth approach.
Climb on the building in front of you and patiently wait for the second guard to move away. As soon as he turns his back towards you, perform a ninja move from above on the first guard, then quickly rush towards the second guard to stealthily kill him; be sure to take his
as you cut him open!
There's another guard on the roof of a building up ahead, so you'll need sneak towards him, climb the crates and stab him from the back. Incidentally you can also find a box with a [GRENADE] on the street side of this building. There's an [E M GRENADE] in the corner of the street as well.
In the large square up ahead are two more enemies; a gekko and a cyborg. From your current position, wait for the gekko to come close until it turns its back and starts moving away from you. Ninja Run toward him to perform a stealth kill, then cirle around the area to the right to approach the final cyborg in what may yet again be called a stealthy fashion.

The abandoned fairground R-01 stealth approach (part 2).
You can now search the place for the following remaining items:
- A dose of [REPAIR NANOPASTE] can be found in a box inside the destroyed building on the left.
- You can climb the building to the left of this destroyed building (use Ninja Run). The box here contains [5000 BP].
- There's a [HOMING MISSILE] next to a pillar of the somewhat intact building to the right.
In any case, use your AR to spot three cyborgs in this building. One of the will move out on the right side every now and then, which is an excellent time to - very quickly - approach him from behind and cut off his
.
The guard inside the building is best downed by approaching him from the left side (carve up the fence first). Carefully watch in which direction he's looking and move behind him when you get the chance. The third and last guard in the back alley should pose no difficulties by now. Feel free to look around for three last items:
- There's [500 BP] in the box inside the building (behind the second guard).
- You can find a [ROCKET LAUNCHER] at the end of the adjacent hall.
- There's a [REPAIR NANOPASTE] in the corner of the destroyed (open) building to the right from here.
Approaching the waypoint triggers a call from Boris who tells you it's now possible to fight even more enemies. Well, what are you waiting for? Simply head to the middle of the square to trigger a fight with two Hammerheads. Enter through the doors whenever you're ready.
BATTLE: TWO HAMMERHEADS
Keep running around with Ninja Run and try to get underneath the hammerheads, allowing you to jump and have a few good slashes at them. Homing Missiles and Rocket Launchers may be used, although they're not necessary and may leave you vulnerable to attacks. When you enter Blade Mode, remember not to stay in it for too long; the hammerheads don't have any fuel cells that you can use to recharge!

Ranked Battle #8
INSIDE THE FACTORY
Head down the mountain trail and cut through the fence. There's a box to the left that contains some [REPAIR NANOPASTE], which might prove useful in the upcoming battle.

Ranked Battle #9
Enter the room and you'll face at least ten dwarf gekkos, who can jump at and grapple you - needless to say that's annoying. Don't worry too much about getting an S-Rank here for the time being; this is one of those battles that becomes significantly easier once you've unlocked a new weapon (the Pole Arm "L'etranger").
You can find [300 BP] inside the box on top of the containers in the corner. Cut through the ventilators located above the containers in the other corner to proceed. From here on you'll spot several surveillance turrets, and there's an achievement attached to destroying them all.
IR SENSORS AND TURRETS EVERYWHERE
There are two turrets in this room, the first one attached to the pillar in the center, the second on top of the stairs. Take them out (avoid being seen by their laser sight) and move over the containers to find a box with a [JAM GRENADE] inside (this is equivalent to what used to be Chaff Grenades in the MGS series; why they changed the name is beyond me).
The next room is protected by IR sensors, so activate your AR to spot them. Dash underneath the first one (Ninja Run + Y [Xbox 360] or Triangle [PS3]); the second one can be jumped over. Destroy the camera, but waitThere's a third IR sensor system blocking the stairs. Throwing the Jam Grenade you just found will solve this problem. Move through the laser beams (Dwarf Gekkos will attack you, so deal with them in this hall, but make sure the camera up ahear doesn't spot you, since you haven't triggered the alarm yet).
Destroy the camera above the doorway, then enter a gigantic area protected by several guards, various turrets and IR sensors. The first thing you should do is destroy the turret on the large concrete pillar to your right, but be very careful not to trigger any IR sensors (use AR to figure out where they are all located). Do the same with the turret diagonally across the first one, and again, be careful around the IR sensors. Before you go upstairs, collect the [HOMING MISSILE] in the lower right corner.
In fact, you'll want to be careful with approaching the stairs to begin with. There's a turret whose vision extends all the way down the stairs, so carefully watch its laser beam move and rush towards the stairs when it's safe to do so. From here, carefully watch whether the turret is moving away from the stairs; if so, rush up, destroy it, and preferably rush back down again so you can comfortly monitor how the three guards patrol. There's a [JAM GRENADE] inside the box to the right from here (still on the lower floor), should you need it.
Stealth approach turret/lasers section.
When you've got an idea how the three guards move around, head to the top of the stairs (but make sure the nearby guard on the walkway in the middle of the area cannot see you; have a pillar between you and him at all times to be safe). As the second guard (on the walkway to the far upper right side) moves away from the third guard (who circles around the walkway to the left, carefully monitor that third cyborg. As soon as he turns his back on you, quickly rush towards him for a stealth kill (assuming the first guard is also moving away from you).
From here you can hide until the moment arrives that both the first guard (on the middle walkway) and the second guard (on the left walkway) turn their back on you; first dispatch the second guard. After this, the first guard poses no real difficulty. With all the guards dispatched, feel free to destroy the remaining two camera's (you'll have to jump over the walkway to reach them), unlocking the achievement/trophy 'No Flash Photography!'. Don't miss the [JAM GRENADE] in the corner of the room (on the upper walkway) before you continue.
Data Storage #6
In the large area with various IR Sensors and turrets, move to the far end of the upper walkway to find this data storage in the darkness.
Lastly, cut away the ventilators nearby the walkway where the second guard was patrolling to reach a platform with a box containing [ENDURANCE +1]. Finally unlock the door and head downstairs.
VR Mission #4
After making your way through the large area with IR sensors and turrets, instead of going up the circular stairs, head down to find this VR intel.
Make your way upstairs to intiate the next boss fight.
Boss Battle: MISTRAL

Mistral Boss.
The battle with Mistral isn't terribly complex, but matters are made more difficult by the nearly constant presence of four dwarf gekkos, who all need your love, all at once. That's not an option, so thin out some of the crowd to focus the majority of your love on Mistral. Many of her attacks can be parried, although there are some exceptions:
POLE SPIKE: Mistral extends her pole, spiking you for some damage. This can be parried/blocked.
SPINNING WHEEL: Mistral tries to run you over by performing extremely fast saltos, effectively turning her into a sharp wheel. You'll want to block this attack several times (from multiple directions).
SIMPLE SLASH: Like most enemies, Mistral has a few basic slashes; one is a horizontal round swing, the other is a vertical slam slash.
BRUTAL WHIP: This attack cannot be parried/blocked, and Mistral will flash yellow when she attempts it, so immediately dodge and get out of the way. Should it hit you, quickly wiggle the left analog stick to the left and right, or otherwise it'll inflict quite some damage.
IREBALL GEKKOS: Mistral jumps on top of a pipe and hurls several fireball gekkos at you. Naturally, you'll want to avoid those by running around the area using Ninja Run.
Every now and then, Blade Mode becomes possible, allowing you to chop Mistral's pole in pieces (as well as some of her arms). After lowering Mistral's health down to 75% or lower she'll perform an attack that triggers a short QTE (enter blade mode and cut her pole), which leads to the second phase of the battle that takes place on a pipe. Mistral now gains access to two new attacks she will use (besides regular slashes):
WHIP SLASH: Similar to her regular slashes; can be parried.
WHIPLASH FROM ABOVE: Mistral hurls her pole around her several times, then leaps into the air and strikes down on you. Try to block this attack.
After getting Mistral down to 50% or less health, a cutscene initiates the third and final stage of the battle, taking place on the ground. She gains access to a new move, but loses her 'whiplash from above' move as well as her 'fireball gekko' move. Five dwarf gekkos will be begging for your attention during this part of the battle.
UNDERGROUND WHIP: This long range attack is aimed in a straight line towards you, making it fairly easy to anticipate.
Get Mistral down to 10% of her health and a short QTE triggers, in which you will have to press Y+B (Xbox 360) or Triangle+Square (PS3), followed by Blade Mode, effectively ending the battle and chapter.
Anything missing from this guide?
ASK A QUESTION for Metal Gear Rising: Revengeance
Comments for File R-01: Coup D'Etat
Add a comment
Please log in above or sign up for free to post commentsNo comments yet. Tell us what you think to be the first.
Table of ContentsClose
Guide Updates
Get notified of updates to this guide
Many of our guides get updated with additional information. To get an email when this guide is updated click below.
 Join us on Discord
Click to close