Kikowani Station
Halo 3: ODST Walkthrough and Guide
Halo 3: ODST Guide - Walkthrough
Kikowani Station
Mombasa Streets
Character: The Rookie
Note that you can tackle the Kizingo Boulevard, ONI Alpha Site, NMPD HQ, and Kikowani Station missions in any order you wish. To set a different Beacon on your compass, first press the Back button to access your VISR NAV and then use the up and down buttons on the D-pad to switch between the available Beacons. Press the A button to set the selected Beacon to the compass.
Objective: Search Kikowani Station for ODST squadmate
Activate VISR and look for the clue on the ground behind the pillars along the northwest side of the street. Inspect the BIO-FOAM CANISTER to start the mission.
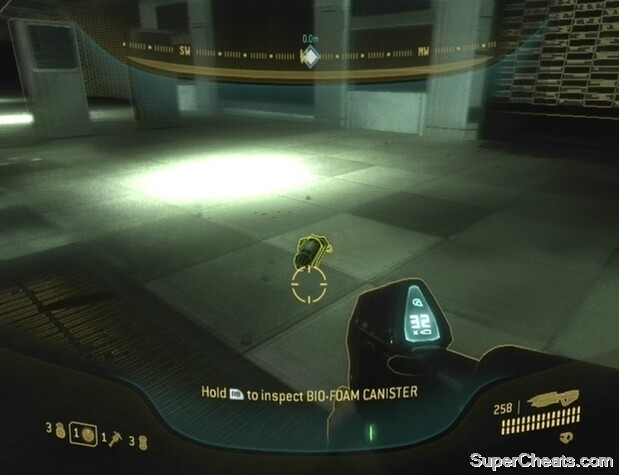 Find the clue in Kikowani Station and inspect it to get started. |
Kikowani Station
Character: Buck
Achievement: Kikowani Station.
Objective: Capture Phantom drop-ship
Activate VISR, follow Mickey down the stairs, and use your Magnum to headshot the Grunts at the bottom. Cross the tracks to the southwest and look for two Beam Rifles on the weapon rack on the opposite platform. Swap your Assault Rifle for one of the Beam Rifles and use it to pick off the Grunts, Brutes, and Jackals in front of the Phantom to the west. It takes three body shots or a couple of headshots to down a Brute.
Note that there are one or two Engineers among the enemies; only fire at them if you’re after the “Naughty Naughty” Xbox 360 achievement, otherwise leave them be. When the area before the Phantom is clear, grab the fresh Beam Rifle on the rack and join Mickey at the stairs. Use your Magnum to take out any remaining enemies and then approach the docked Phantom.
Objective: Escort Phantom in a Banshee
After Mickey flies off with the hijacked Phantom, head up the stairs at the southwest end of the area and hop in one of the Banshees at the top. Join your allies to the east and then start flying northwest. Target the two Shade turrets you come to. You can fire a Banshee bomb by pressing the B button. If you manage to kill the gunner but leave the turret intact, be aware that nearby enemies can take control of the unoccupied turret. With VISR equipped, you can differentiate between occupied turrets (red) and unoccupied turrets (cyan).
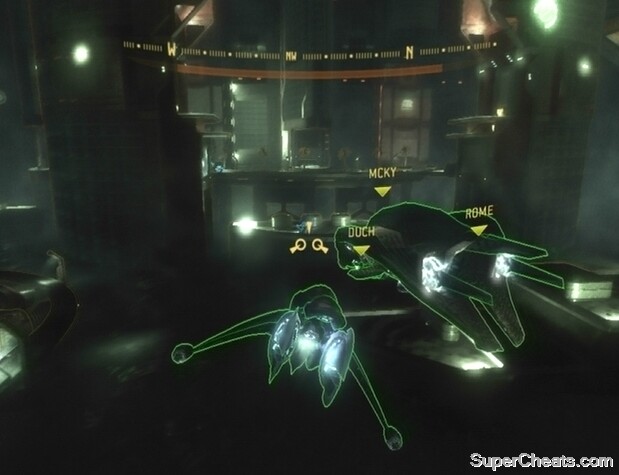 Escort the hijacked Phantom. |
There are two more Shade turrets along the curved road ahead. Also, watch out for the Brute Shot-wielding Brutes and the Fuel Rod Gun-wielding Grunts on the walkways to the east and west.
Shoot down the two Banshees that come out of the tunnel and then fly through. Fire a bomb at the sniper tower at the start of the tunnel and then fly around to the gate at the other side. There is an Engineer among the Brutes and Grunts below so again, if you’re after the Good Samaritan achievement, avoid firing at it. Through the gate, fire a bomb at the highlighted structure on top of one of the buildings and then take to the Banshees that are flying around.
Objective: Open all blocking doors
You’ll soon be pointed to an override switch for the large security door at the northwest end of the area. Fly down to the platform, hop out of the Banshee, and use the RB button to activate the switch. Immediately return to your Banshee and fallback, as you’ll be greeted by a barrage of gunfire as soon as that door is opened.
Use bombs to clear away the enemies in the opening area before flying in. Inside, turn left and fire a bomb or two at the Phantom in the distance to destroy it. There’s a fresh Banshee parked by the door, so hop out of yours if it’s damaged and get in. Fly around to the door at the other end of the tunnel and use a bomb to kill the Ghost that comes through as it opens. Once through the door, immediately turn right to spot an AA Wraith. Hit it with a few bombs to destroy it.
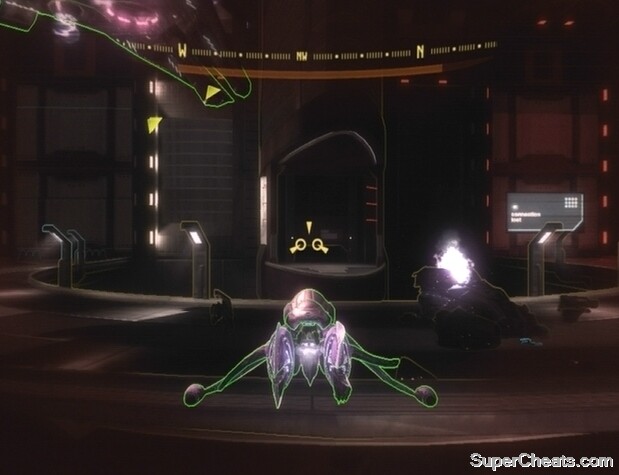 Use Banshee bombs to destroy AA Wraiths. |
Fly further into the area and target the highlighted structures. There’s another AA Wraith on the bridge, so fly to the side to dodge its fire and hit it with bombs until it explodes. When the area is clear, park your Banshee by the security door at the west end of the bridge. The override switch by the security door will only open the smaller doors along its base, so you’ll have to head through on foot.
If you’ve been following this walkthrough, you will still have that Beam Rifle from the start of the level. If not, there are two Beam Rifles on the weapon rack at the northwest end of the first set of steps. You can also find two Carbines on the weapon rack across from it. Use the Beam Rifle to kill the Brutes, Grunts, and Jackals at the far end of the area. Keep the mounted Plasma Turret clear; with any luck the Brutes will one by one take control of it, allowing you to pick them off with easy headshots.
There is a couple Brute Stalkers among them, but they will be outlined in orange if you have VISR active. Grab a fresh Beam Rifle if yours runs out of energy and keep plugging away at the enemies. A Brute Chieftain wielding a Gravity Hammer will charge you once you’ve killed his allies. Continuously hit him with shots from your Beam Rifle as he approaches. If you run out of energy, start throwing grenades his way. With any luck the chieftain will be dead before he can reach you. If not, just move aside to dodge his melee attacks and continue firing at him until he falls.
 Use VISR to detect Brute Stalkers. |
Once the chieftain has been dealt with, proceed up the steps. At the top of the stairs you can find a Fuel Rod Gun on the weapon rack at the northwest end. You might as well swap your Beam Rifle for it. Continue to the curved room further up and activate the switch there to open the security door. Return to your parked Banshee and hop in.
Objective: Evade or destroy the Scarab
A Scarab lies between you and the exit. You can make a break for the override switch and run past it, or you can destroy it. Destroying things is always fun, but doing so in this case is a bit of a risk.
If you choose to evade it, press up on the D-pad to add an onscreen marker pointing to the override switch, and then just fly to it while dodging the Scarabs cannons and make a break for it.
Destroying the Scarab is deceptively simple. Start by flying southwest when you first enter the area to avoid taking fire from the turrets surrounding your target. Be ready to dodge the Scarab’s projectiles as you approach. Press the X button and push the Right Stick to the left or right to perform an evasive manoeuvre.
Fly your Banshee right to the deck of the Scarab and hop out. Toss a Frag Grenade down the ramp and use your Fuel Rod Gun to kill the Brute and Grunts below. Then, make your way to the power core at the back of the Scarab and hit it with your Fuel Rod Gun a couple of times. When the light on the core is flashing red, hop out of the bay door and move as far as you can from the Scarab to avoid getting caught in the ensuing explosion.
Destroying the Scarab.
Whatever you decide to do, once you’re through the door, hop in one of the parked Banshees and shoot a bomb at the first structure in line at the other end of the area. Destroying it will set of a chain reaction, ending the level.
More for Halo 3: ODST on Super Cheats
thanks to u i finally passed the mission