Jim's Missions
Grand Theft Auto 4: The Lost and Damned Walkthrough and Guide
GTA 4: The Lost and Damned Guide
Jim’s Missions
You’ll get a call from Jim after completing “Serene and Clean” in Billy’s mission line. He wants you to meet him in Acter; just a short ways from The Lost clubhouse. Make your way to Jim’s location and hit the marker there to get started.
Mission 1: Liberty City Choppers
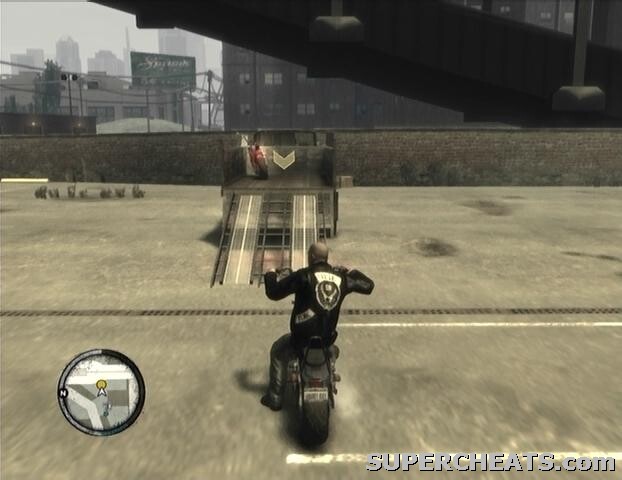
The truck is in Alderney City, so follow the marked route on your radar. When you reach the truck, dismount and get in the driver’s seat. You’re headed for a diner in Tudor, where you’ll be seizing some A.O.D. bikes. Drive the trunk into the marker in the diner parking lot to begin.
There are five bikes parked in the lot. A ramp has been affixed to the back of truck, allowing you load the bikes into the back. Get on the first bike and drive it up onto the back of the truck. A group of enemies will come out of the diner as soon as the first bike has been taken. Bring up your cell phone and call either Terry or Clay for backup. A good spot to sit is on the road along the west-end of the parking lot. From there, you have a full view of the enemies around the diner.
 |
Once the enemies have been dealt with, continue loading the bikes onto the back of the truck. Load four bikes onto the truck, then get in and pull out of the parking lot. Some more gang members will start tailing you here, but don’t bother trying to fight them off. Just speed to Jim’s the drop-off point. Drive the truck into the marker to complete the mission.
Mission 2: Bad Cop Drop
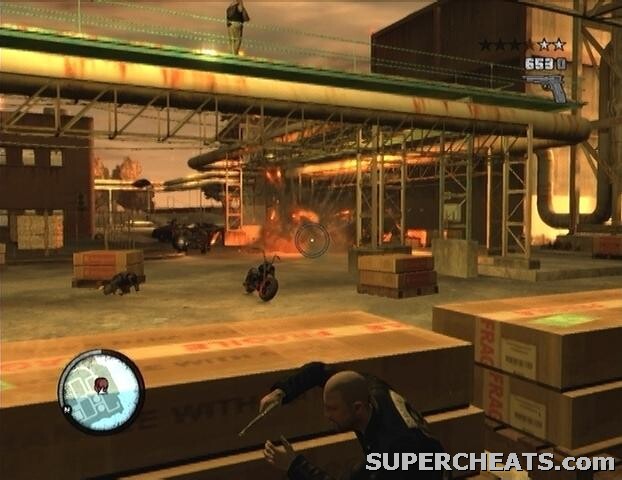
Race Jim to the marker outside of the police station to trigger a cutscene. After the cutscene, start toward the yellow marker on your radar. You have to lure the crooked cops to an ambush spot, so don’t ride too fast, otherwise they’ll lose sight of you. When you reach the spot, get ready for a fight. Drive to two stacks of oblong boxes at the back of the area and take cover there.
The two cops that were pursuing you call in backup, and a lot of backup at that. Luckily there are some conveniently placed explosive barrels that the cops tend to huddle around. If you take advantage of these barrels, surviving here shouldn’t be overly difficult. If you’re taking cover behind one of the stacks of boxes, you should be able to spot a pair of explosive barrels out in the open further ahead. Blast one of these until it goes off, hopefully clearing out some of the enemies. Take out as many of the enemies as you can from your current shelter and then move over to the west side of the south-most building.
 |
If you peek around the corner here, you should be able to spot another pair of explosive barrels. Set these off to wipe out more enemies. Your best bet afterwards is to run around to the other side of this building, and hit the remaining enemies from behind. Take cover behind the base of the post at the west end of the area, and pick off as many of the enemies as you can from there. Crouch down and move up slowly if the remaining enemies are too far off to hit.
Clear each and every one of the marked enemies on the GPS, and then get on your bike and shake the cops to complete the mission.
Mission 3: Hit the Pipe
Sometime after completing “This Shit’s Cursed” in Billy’s mission line, you’ll get a call from Jim. You can then begin this mission. The starting point for this mission is in Northwood, Algonquin. Follow the “J” symbol on the GPS and hit the marker there to get started.
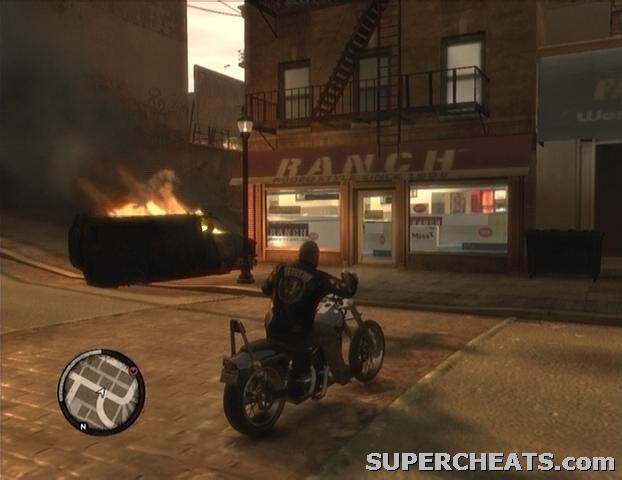
You’re given a small supply of Pipe Bombs, which can be used to destroy the three Angel of Death vans that are driving around Alderney. Pipe bombs can be thrown while on a bike. When LB is pressed, Johnny will lob one of the Pipe Bombs to his left. The longer the LB button is held, the shorter the fuse, and the sooner the bomb will go off.
Since it takes a moment for the bomb to go off, your best bet is to drive a bit ahead of the target while holding the LB button, release the LB button to lob the bomb in its path, and then speed past it. The Pipe Bombs have a decent blast radius, so you don’t have to have impeccable aim or timing to demolish one of the targets. Just be careful that you aren’t caught in the blast yourself.
 |
The goon in the passenger’s seat of each van will open fire as soon as you come into view, so it might be best to take out the vans as they’re coming toward you. This way you won’t need to trail after them, and can avoid taking some damage. If you just drive on the side of the road opposite that the target vehicle is headed down, you can simply toss a live bomb in its path and continue on your way.
One or more of the vans (most certainly the last) will have a number of escorts on motorcycles. Another motorcycle will spawn if manage to take one of the escorts out, so don’t bother. At this point it’s definitely best to hit the van as its coming toward you, since the escorts always follow behind the van.
It’s not imperative that you use the Pipe Bombs to destroy the vans; you can switch between weapons in your inventory while driving by pressing the X button. Furthermore, if you happen to have an RPG in your possession, it takes little effort to wait in a van’s path and send a rocket straight for it once it comes into view.
Destroy all three vans to complete the mission.
Mission 4: End of Chapter
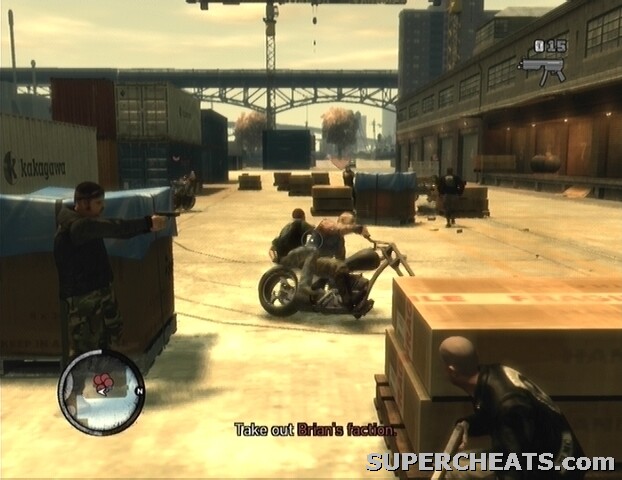
Make your way to Port Tudor to meet with Brian. Hit the marker there to trigger a cutscene. After the cutscene, remain crouched behind the stack of boxes and start blasting the enemies as they drive by on their motorcycles. They just continually circle the boxes in the middle of the dock, so stay behind cover until they’ve all been taken care of.
If you have leftover Pipe Bombs from the previous mission, they’ll be useful here, however be sure to save a good number of them for later on in the fight, when several vans full of enemies show up. As per usual, there are a number of explosive barrels scattered about the battlefield. Use these to your advantage, but make sure that none of your allies are standing by before setting one off.
 |
Once the first batch of enemies have been dealt with, move up to one of the pieces of cover further ahead. A van full of enemies will eventually appear, so throw a Pipe Bomb next to it if you have one handy. A couple more vans will appear soon after, so be ready with an explosive. A pair of bikers will then enter the fray, so have a Sawed-off Shotgun or similar weapon out so you can quickly knock them off their bikes.
The last wave of enemies comes from the south; there’s a large propane tank by the fence that they scale, so set it off with gunfire when they appear.
Afterwards, you’re tasked with taking out the remainder of Brian’s faction. These guys promptly take off on motorcycles, so you’ll have to go after them. Trail after the enemy bikers and send them to the asphalt. Once the stragglers have been dealt with, regroup with Jim to complete the mission.
Mission 5: Bad Standing
Brian’s safehouse is located in Tudor, so make your way over there and hit the marker outside to trigger a cutscene. The safehouse is heavily guarded, so phone Clay or Terry for backup before heading in. When Terry and Clay arrive, they’ll head to the back of the house and cover the rear exit. Once Terry and Clay are in position, stand in front of the safehouse and ready a Pipe Bomb. Aim the Pipe Bomb at the second floor, right-most window, and lob it through.
As soon as the Pipe Bomb goes off, dash to the back of the house with a gun ready. There’s a getaway bike waiting for Brian behind the house, and if he’s able to escape, you’ll have to chase him through the streets. If you can kill Brian before he can escape, all you’ll have to do then is clear out the safehouse.
There is another way you can go about completing this mission: if you actually go inside of the house first, rather than using a Pipe Bomb to smoke Brian out, you can fight your way to Brian and have the option of killing or sparing him. If you spare him, he will later appear as a Random Character. Note, however, that the mission associated with Brian’s random encounter does not count towards the 100% completion stat, so completing the mission as outlined above is probably your best bet.
With this mission complete, you can now stop by Brian’s old safehouse and save your game there.
More for this game on SuperCheats
No comments yet. Tell us what you think to be the first.