Animal Hospital - Items and Fighting Tips
PC, ROBLOX
Last Updated: by Team SuperCheats
Find out how you can use the items in Animal Hospital to advance faster in-game.
Animal Hospital - Items and Fighting Tips
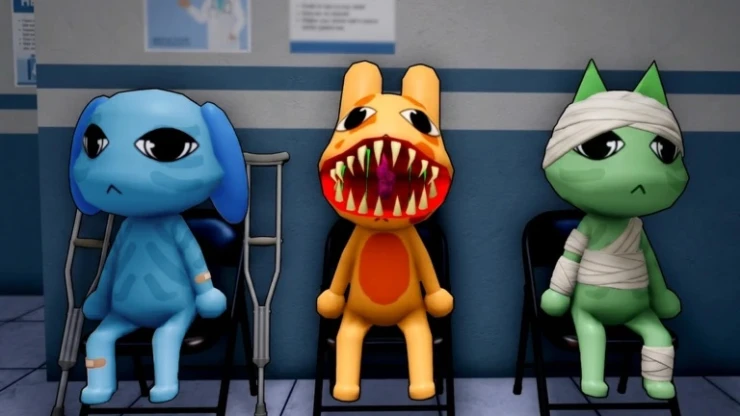
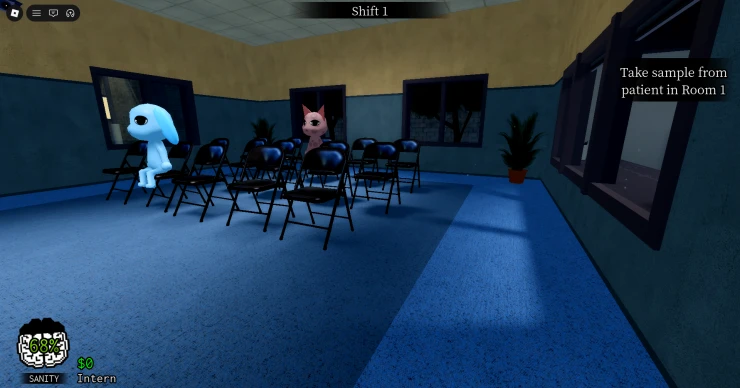
Animal Hospital is a Roblox horror survival game where you work the night shift at a veterinary hospital. Your job is to admit and treat animal patients while spotting dangerous anomalies disguised as normal animals. As you progress through each shift, you'll need to manage patients, use medical supplies, and survive increasingly strange and deadly encounters.
⚙ In this Guide
Active codes Expired codes How to get free things in Animal Hospital How to redeem Animal Hospital codes All items in Animal Hospital How to beat monsters in Animal Hospital Animal Hospital beginner tips Animal Hospital FAQ Helpful Animal Hospital links
Roblox Redeem Codes
Discover which other Roblox codes have been checked and updated recently.
All Animal Hospital codes
There are currently no codes available that you can redeem for rewards.
☑ We last checked for new codes on 21st October, 2026
- There are no codes.
Expired Animal Hospital codes
There are no expired codes.
Animal Hospital Items and Codes
How to get free things in Animal Hospital
- Intern class - free and equipped by default for every player. It gives bonus starting Sanity, which is the stat that ends your run if it empties.
- Every other class except two - bought with Animal Coins at the Class Shop in the lobby (walk into the yellow circle by the ambulance, or hit the Class button on the left of the screen). There are no quests or unlock conditions, just the coin cost. Only Head Nurse and Secret Agent are Robux-locked.
- Class levels - each class has three upgrade levels, and you raise them with Experience earned from checking in and treating patients. Robux only buys the shortcut, not the levels themselves.
- Animal Coins - earned by completing shifts. Treating more patients and finishing with a better Hospital Performance grade pays more; animal deaths during a shift deduct from your total, so a clean run is worth more than a fast one.
- Animal Coins from the Supplies Shop - coins occasionally appear in the shop's rotating stock and can be bought with in-run cash. They're a rare roll, so grab them when they show.
- Skins - purely cosmetic, bought with Animal Coins from the Skins button above the class model in the Class Shop. Every class that's been redesigned also has a classic skin from before the July 10th update.
- Treatment items - the medical supplies you need for patients are free and sit outside the patient rooms. You never pay for the items the job itself requires.
- Coffee - the free, renewable Sanity restore. Take it from the coffee machine in the Reception Office; it's three sips at 5% Sanity each. Chocolate does four times as much per bite but costs cash or Robux and isn't renewable, so coffee is the free-to-play answer to Sanity management.
- Shop tools and hospital upgrades - the Supplies Shop at the back of the hospital stocks three random items at a time and runs on in-run cash you earn from shifts, not Robux. That covers the Taser, Fire Extinguisher, Teddy Bear revive, the Gun, and the permanent upgrades like faster DNA analysis and patient recovery. Robux buys some of the same items, it doesn't gate them.
- Progression generally - there's no energy system, no lives, and no timed gate. Longer shifts and cleaner anomaly-spotting are the only real farming method.
How to redeem Animal Hospital codes
Unfortunately, there are no active codes for this game right now. Instructions on how to redeem codes will be added here as soon as a redemption function has been implemented into the game.
A few Roblox games that have recently dropped fresh codes include Open Sea For Animals, Duel Warriors, Roblox MAFIA, Echocalypse, and Blue Lock Farm.
We've also checked some of the most popular Roblox games for new codes recently, including Football Legends, No Limit Lifting Simulator 2, and Monkey Bomb Tag.
Find even more Roblox Redeem Codes here to grab the latest freebies before they expire.
All items in Animal Hospital
In Animal Hospital, items play a huge role in helping you survive each shift and keep patients healthy. Some items are used to treat illnesses, while others give useful buffs or help deal with dangers around the hospital. There are also several upgrades that can make your job much easier as you progress. Below is a breakdown of every item currently available in the game and what each one does.
Tools
Tools are special items that give temporary bonuses or help you stay alive during a run. Most of them can be bought from the Supplies Shop.
- Teddy Bear Lets you revive a teammate who has been knocked down. The only catch is that you can't use it on yourself, making it much more useful when playing with friends.
- Taser Can be used to stun anomalies and crazed patients. Using it costs a small amount of Sanity, so don't spam it unless you really need to.
- Cola Gives you a temporary speed boost, making it easier to move around the hospital quickly.
- Fire Extinguisher Used to put out fires that can appear throughout the hospital and inside patient rooms.
- Gun Allows you to eliminate anomalies. You can find one at the check-in area, or get access to it by using the Secret Agent class.
- Coffee Machine Restores Sanity when used. Each drink gives you 5 Sanity, and you can take up to three drinks before it's empty.
Upgrade Equipment
These upgrades improve different parts of the hospital and can be purchased with money earned from completing shifts.
- DNA Analysis Machine Increases DNA analysis speed by 50%, helping you diagnose patients much faster.
- Printer Boosts printing speed by 25%.
- Patient Recovery Speed Makes patients recover 25% faster once treatment has been completed.
- Patient Check-In Speeds up the check-in process by removing some of the dialogue options.
- Check-In Window Adds a second check-in window so two patients can be processed at the same time.
If you're wondering which upgrades to buy first, focus on DNA Analysis and Patient Recovery Speed. These upgrades save the most time and make treating patients much more efficient.
Treatment Items
Treatment items are the tools you'll use to heal patients in Animal Hospital. Each item treats a different condition, so getting the diagnosis right is important before starting treatment. Below is the latest list of treatment items and what they're used for.
- Scalpel - Used during surgery procedures.
- Scissors - Used during surgery procedures.
- Organ - Used during surgery procedures.
- Transplant - Used during surgery procedures.
- Herbs - Cures headaches.
- Medicine - Cures stomach aches.
- Thermometer - Treats fever.
- Medkit - Treats bruises and cuts.
- Ointment - Treats burns and rashes.
- Bandage - Stops bleeding.
- Cough Syrup - Treats flu symptoms.
- Maple Syrup - Treats low sugar.
- IV Drops - Treats dry eyes.
Most treatment items can be found around the hospital near patient rooms, so you'll rarely need to spend money on them. Just make sure you diagnose patients correctly before grabbing a treatment, otherwise you'll waste valuable time during your shift.
How to beat monsters in Animal Hospital
How to beat the Bed Monster in Animal Hospital
You can't actually kill the Bed Monster in Roblox Animal Hospital, so you'll have to deal with it whenever it shows up. The easiest way to stop it is by giving it Maple Syrup or an Organ from the surgery room. Just equip one, walk into the red area in front of the bed, and it'll grab the item and disappear. If it's dragging a patient away, this works then too. You can also try fighting it to break free, but you'll lose a lot of Sanity, so it's usually not worth it.
How to beat the Purple Monster (Tendril) in Animal Hospital
The Purple Monster, also known as Tendril, only appears in Room 8 (the surgery room). You don't beat it by fighting it. Instead, finish the patient's surgery before the timer runs out. If you don't, the patient dies. Don't use a Gun or Taser on Tendril. Attacking it will kill your patient instead.
How to beat the Mass of Eyes in Animal Hospital
The Mass of Eyes can spawn in patient rooms and the reception area. If you walk into a room and see 'Don't Look Up' on your screen, it's there. You can't defeat this monster. Just keep looking down and avoid staring at the ceiling. Looking directly at it drains up to 10 Sanity every second, so get out of the room as quickly as you can.
How to beat the Stalker in Animal Hospital
The Stalker hides around corners and quietly follows players around the hospital. It doesn't attack unless you look straight at it. If you do, you'll lose 10 Sanity, and it'll run away. There's no way to kill the Stalker, so your best option is to avoid looking at it. Keep your sound on so you can hear it moving, and be careful when turning corners.
How to beat the Hiders in Animal Hospital
Hiders blend into the hospital walls, but you can usually spot their glowing eyes and creepy smile. If you get too close, they'll chase you. You can either run away or fight back with a Gun or Taser if they catch up. Hiders can appear in both patient rooms and hallways, and there can be more than one at a time, so stay alert.
If a Hider runs into the Bed Monster's red zone while chasing you, the Bed Monster will drag it under the bed and disappear without hurting you or your patients.
How to beat the Skinwalker in Animal Hospital
If a Skinwalker gets inside the hospital as a fake patient or visitor, it'll eventually attack. There are two ways to deal with it:
- If it's a patient, give it the wrong medicine. It'll die, but it won't count as a patient death.
- If it attacks you, fight it off first, then quickly finish it with a Gun or Taser.
If you learn how to spot Skinwalkers early, you can stop them before they ever become a threat.
How to beat the Camera Monster in Animal Hospital
The Camera Monster only appears while you're watching the security cameras in reception. If it shows up, quickly press Exit or switch to another camera before it reaches you. Broken cameras have a much higher chance of spawning this monster, so repair them whenever you can. If you don't react fast enough, it'll jumpscare you and you'll lose 20 Sanity.
If you're trying to survive longer shifts, it's also worth learning how every anomaly and emergency works. Knowing how to deal with them makes the game a lot easier and helps you keep your shift going for much longer.
Animal Hospital beginner tips
- Learn what normal patients look like before worrying about anomalies During your first few shifts, pay attention to ordinary patients so unusual features stand out immediately later on.
- Always compare patients with their admission photo Some anomalies only reveal themselves when you compare the patient standing in front of you with the picture they submitted.
- Use every inspection method before admitting a suspicious patient Don't rely only on what you see - check their admission photo and CCTV feed before making your decision.
- Check the CCTV regularly between patients Some anomalies are much easier to spot through security cameras, making them one of your most useful tools.
- Watch your Sanity from the start of every shift Waiting until it becomes dangerously low makes later encounters much harder to handle.
- Use the Coffee Machine before your Sanity reaches critical levels Coffee is one of your easiest ways to recover, so don't save it until you are already struggling.
- Learn what every treatment item does before difficult cases appear Knowing where your tools are and when to use them saves valuable time during busy shifts.
- Unlock and learn the DNA Analysis Machine as soon as possible It becomes increasingly important when dealing with more complicated cases.
- Don't rush patients through Check-In Taking a few extra seconds to investigate a suspicious patient is better than admitting the wrong one.
- Pay attention to behaviour as well as appearance Some anomalies are easier to identify by what a patient does rather than how they look.
- Memorise where important equipment is located Knowing the locations of the Coffee Machine, DNA Analysis Machine and treatment supplies helps you react faster.
- Keep treatment supplies ready before you need them Searching for equipment while multiple patients are waiting can quickly turn a manageable shift into chaos.
- Investigate anything that feels unusual Animal Hospital rewards careful observation more than rushing through every patient.
- Listen for strange sounds around the hospital Audio clues can warn you that something unusual is happening before you see it.
- Learn the common anomaly patterns first Recognising repeated behaviours makes identifying future anomalies much easier.
- Keep checking patients even during quiet moments Some anomalies are easiest to miss when you start assuming everything is normal.
- Help Barney whenever he appears Completing his event can unlock another Coffee Machine, giving your team an additional way to recover Sanity.
- Share Coffee with teammates who need it most Keeping everyone's Sanity high makes the whole team more effective during difficult shifts.
- Work together when you are unsure about a patient Another player may notice a clue that you missed before you make the final decision.
- Don't assume every emergency is a normal medical problem Some of Animal Hospital's biggest dangers come from supernatural events and anomalies.
- Double-check suspicious patients before starting treatment Identifying an anomaly early prevents wasted time and resources.
- Prioritise upgrades that improve diagnosis and investigation Better tools make difficult cases easier to identify correctly.
- Learn anomaly behaviour instead of memorising individual patients Understanding patterns helps you handle new situations and future updates.
- Learn the hospital layout until you can move around quickly Faster movement between rooms gives you more time to investigate and treat patients.
- Stay calm when several strange events happen at once Rushing makes it much easier to miss important clues.
- Use quieter moments to prepare for the next wave Recover Sanity, organise supplies and make sure your equipment is ready.
- Play with friends whenever possible One player can inspect patients while another watches CCTV or prepares treatment items, making difficult shifts much easier.
- Practice spotting anomalies instead of only focusing on completing treatments Observation is the most important skill you can develop in Animal Hospital.
- Remember that surviving is about more than healing patients Managing Sanity, checking CCTV, comparing admission photos and identifying anomalies are all part of succeeding.
The best Animal Hospital players notice the smallest details. Finding anomalies quickly, using the right equipment and keeping control of the hospital during strange events is what separates experienced players from beginners.
Animal Hospital FAQ
- What are Animal Hospital codes? Animal Hospital codes are free redeemable codes that the developers may release to reward players with free items or other bonuses. At the moment, there aren't any active codes, but we'll add them here as soon as they're released.
- Are there any Animal Hospital codes? No. The current version of Animal Hospital doesn't have a code redemption system. If the developers add one in a future update, we'll keep this page updated with every active code.
- How do I redeem codes in Animal Hospital? There isn't a code redemption menu yet. If codes are added in the future, we'll update this guide with step-by-step instructions showing exactly how to redeem them.
- Why doesn't my Animal Hospital have a Codes button? That's because the game currently doesn't support redeemable codes. If the developers add a Codes button in a future update, you'll find full redemption instructions here.
- How often is Animal Hospital updated? Animal Hospital receives regular updates that add new content, balance changes and bug fixes. Major updates are also the most likely time for the developers to introduce a code system.
- What's the goal of Animal Hospital? Your objective is to keep the hospital running by admitting patients, identifying anomalies, diagnosing illnesses, carrying out treatments and surviving increasingly difficult shifts filled with supernatural events.
- What's the fastest way to earn money? Treat patients efficiently, avoid unnecessary mistakes and keep the hospital running smoothly. Completing shifts successfully is the most reliable way to earn money for new equipment and upgrades.
- Which upgrade should I buy first? Prioritise equipment that helps you complete treatments more consistently before spending money on cosmetic unlocks. Permanent upgrades make every future shift easier.
- How does Sanity work? Sanity is one of the game's most important mechanics. Looking at certain anomalies or cursed events can reduce your Sanity, so you'll need to keep an eye on it throughout every shift.
- How do I restore Sanity? The easiest way to recover Sanity is by drinking Coffee from the Coffee Machine. Try not to let your Sanity drop too low, especially during longer shifts when anomalies become more common.
- Is the Coffee Machine worth using? Definitely. Coffee restores Sanity for free, making the Coffee Machine one of the most valuable pieces of equipment in the hospital.
- What does the DNA Analysis Machine do? The DNA Analysis Machine helps diagnose certain patients correctly. Learning when to use it is an important part of treating more advanced cases.
- What are anomalies? Anomalies are strange supernatural events or fake patients that appear throughout your shift. Spotting them before they cause bigger problems is one of the main challenges in Animal Hospital.
- How do I spot anomalies? Pay close attention to every patient. Compare their appearance, behaviour, photographs and security camera footage because some anomalies only reveal themselves through one method.
- Why should I check the security cameras? Some fake patients appear completely normal in person but reveal unusual features on the CCTV system. Checking the cameras regularly makes identifying anomalies much easier.
- Why should I take photographs of patients? Certain anomalies can only be detected by comparing a patient's photograph with their appearance in the hospital. Taking photos carefully is one of the safest ways to spot imposters.
- What happens if I miss an anomaly? Missing anomalies allows strange events to continue affecting the hospital, making later parts of your shift much more difficult to manage.
- Who is Barney? Barney is a special visitor who occasionally appears asking for Coffee. Helping him can unlock an additional Coffee Machine, giving your team another way to restore Sanity during longer shifts.
- Can I play Animal Hospital by myself? Yes, but playing with friends makes the game much easier. Working together lets one player treat patients while others investigate anomalies or respond to emergencies.
- What's the biggest mistake beginners make? Most new players focus entirely on treating patients and forget to watch for anomalies. The best players constantly check patient behaviour, security cameras and photographs while keeping an eye on their own Sanity.
- What's the best advice for new players? Learn the hospital layout first, understand what each piece of equipment does and never rush patients through without checking for anomalies. Staying calm and recognising unusual behaviour will help you survive much longer than simply treating patients as quickly as possible.
Helpful Animal Hospital links
Since game codes can drop without warning, grabbing them right away isn't always easy. Thankfully, there are a few simple steps you can take to stay on top of new releases.
These include engaging with the game's community by following the developers' Roblox Group. You can also get the latest stats on the game on their RoMonitor page.
If you found this article useful, saving our page is a great way to make sure you can find us again for more game codes.
If you want some more free rewards you may also be interested in these Roblox games that have also recently had some code updates:
Have a question for Animal Hospital?

