Mission 2: Battle for Sulaco
Thank you for printing this page from www.SuperCheats.com.
Remember to come back to check for updates to this guide and much more content for Aliens: Colonial Marines
Follow this guide to hear about updates
Last Updated:
3 Dog Tags
2 Audio Tags
Head to the other door of the control room and take out the human enemies. Head to the next room and clear it out as well. Proceed to the corridor but instead of going right, head to the left first to find a full suit of armor. Follow Oneal until you reach a bay with a power loader. Once prompted, operate the power loader.

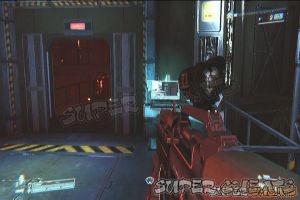
Bring the powerloader to the hatch to the right and open it. Once inside the infested room, check the body on an open container to the left to find the mission's first dog tag.

Body container
Follow the path through the winding corridor until you reach the next room. Turn to the right and proceed to the door to find an audio log on the crate.
Transfer request denied
Head to the other door and cut open the door with a flashing sign. Proceed through the door and continue forth. Be careful of the facehuggers you'll encounter along the way. Continue along the straightforward path until you reach Bella.

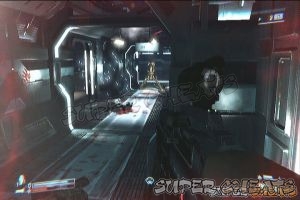
Cut the next door open and follow Oneal to the right. Follow the trail of blood on the floor and turn to the right. Near the broken lies another dog tag.

Bloody Remains
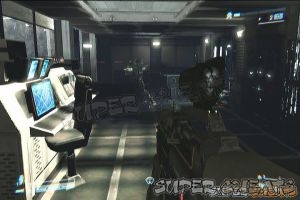
Continue forth and cut the next door open. Proceed through the hallway until you encounter some PMCs. Take cover and take them out. Don't forget to grab ammo and armor pickups along the way. Head to the next hatch. A heavily armored PMC will appear. Concentrate your fire to take him out.

Proceed to the next door and clear this area of enemies. Once done, follow Bella and Oneal until you reach the elevator. Call it in and ride it up. After disembarking from the elevator, more enemies are waiting outside. Take them out and proceed.

More PMCs are waiting so deal with them and continue forth. Continue through a few more tight corridors with a handful of enemies are waiting. Once you've reached a large area with tanks, dig in and take out more PMCs.

Push through the control room ahead. There's another dog tag on top of a console in the upper left side of the room.

Engineering Dog Tag
It's a straightforward path to the next control room with a few enemies along the way. Once you've reached the engineering room, turn to the right from the entrance to find the last audio log of this mission on top of a machine.

Not for your own safety
Operate the terminal to activate maintenance mode. This will open the door. Fight through a couple of narrow corridors until you reach the central shaft where a heavy gunner is located. Kill him and go past the shaft. Follow the corridor to the left until you reach the next elevator. Ride it up again to reach central command.

Proceed to the briefing room. There are auto-turrets guarding both exits. Don't worry since both turret emplacements have an alternate route which you can take to route and flank them. Once you've reached the turrets, get behind them and disarm them.
Head to the main command room and take out the heavy gunners behind cover. There's also a turret in the middle so take out the initial wave of enemies before proceeding forth. Push through the remaining enemies until you reach the bridge. Deactivate the weapon systems to complete the mission.


Anything missing from this guide?
ASK A QUESTION for Aliens: Colonial Marines
Comments for Mission 2: Battle for Sulaco
Add a comment
Please log in above or sign up for free to post commentsTable of ContentsClose
Guide Updates
Get notified of updates to this guide
Many of our guides get updated with additional information. To get an email when this guide is updated click below.
 Join us on Discord
Click to close
how d you place the machine gun in the command center,next to ammo box?please someone help winters