Mission 1: Distress
Thank you for printing this page from www.SuperCheats.com.
Remember to come back to check for updates to this guide and much more content for Aliens: Colonial Marines
Follow this guide to hear about updates
Last Updated:
Special Projects:
- 3 Dog Tags
- 1 Audio Tag
- Hick's Shotgun
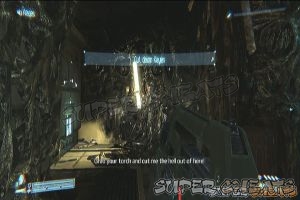
Open the airlock door and cross the umbilical. After the decompression, continue to the Sulaco. Pull up your motion tracker when prompted. Take note of the tutorial to know how to use it. Hollow blimps represent allies, solid blimps represent unknown or hostile targets. Wait until Oneal opens the gates and open the next door to the right. Use your flashlight and continue until you encounter a door that you can cut open. Continue inside the room and locate Keyes.

Attempt to cut him down, only to be attacked by a xeno. Track it down and take it out. Take note that you can't just rely on your motion tracker since it won't be able to give the position of a stationary target. The xeno should be hanging on the ceiling in the narrow corridor to the left of the first room. After taking it out, cut Keyes down. Follow him to get the flight recorder.

In the next room, your motion tracker should trigger a number of solid blimps. Multiple xenos will begin to attack. Before moving forth, head to the right side from the entrance and check the corner near the railing for the first dog tag.

Hoorah to the ashes
Continue upstairs and get inside the room. Recover the flight recorder and give it to Keyes. As soon as Keyes open the door, turn to your left to find a few rifle rounds and an armor.

Grab them and kill the xeno ahead. Proceed forth and continue taking out the xenos along the way. Follow Keyes to another room where there are armor and ammo. You'll be back to the hangar afterward. You'll then have to regroup with your team and defend the position from advancing xenos. Wait until the door is bypassed. Once done, fall back and regroup with your team. Grab the armor and ammo in the next room. Cross the umbilical afterward.

After the scene, you'll have to make your way to the cargo bay. Follow Oneal to the lower level and proceed to the monitoring room. Continue following Oneal to the gravity well and fight off more xenos along the way.

Head to the next door that will lead to another room. Beside the decapitated corpse on the floor is a table with a glowing laptop. Examine it to get the first audio log.

Audio Log
Continue to the next hallway and kill xenos that will ambush you. Before exiting to the next catwalk, pick up the second dogtag on the shelf beside the door.

Hoorah to the ashes
Continue to the walkway and kill more xenos along the way. Once you've reached the next door, enter the hallway and check the room to the right to find the legendary weapon in this mission and a full set of armor.

Hoorah to the ashes
Follow Oneal to the catwalk again and repel multiple xeno attacks. Make your way to a long corridor and make your way to the cargo bay. Find the stairs in the corner to the right and continue moving until you reach the control room. Oneal will start cutting the door open so stand your ground and take out the xenos until it is opened. Once inside the control room, grab the last dogtag on top of a crate on the way to the other door.

Hoorah to the ashes
Once done, operate the highlighted terminal to purge the cargo bay and complete the mission.

Anything missing from this guide?
ASK A QUESTION for Aliens: Colonial Marines
Comments for Mission 1: Distress
Add a comment
Please log in above or sign up for free to post commentsNo comments yet. Tell us what you think to be the first.
Table of ContentsClose
Guide Updates
Get notified of updates to this guide
Many of our guides get updated with additional information. To get an email when this guide is updated click below.
 Join us on Discord
Click to close