NMPD HQ
Halo 3: ODST Walkthrough and Guide
Halo 3: ODST Guide - Walkthrough
NMPD HQ
Mombasa Streets
Character: The Rookie
Note that you can tackle the Kizingo Boulevard, ONI Alpha Site, NMPD HQ, and Kikowani Station missions in any order you wish. To set a different Beacon on your compass, first press the Back button to access your VISR NAV and then use the up and down buttons on the D-pad to switch between the available Beacons. Press the A button to set the selected Beacon to the compass.
Objective: Search NMPD Headquarters for ODST squadmate
Activate VISR and look up for a Sniper Rifle hanging from the steel wires above the west end of the plaza. Inspect the SNIPER RIFLE to get started.
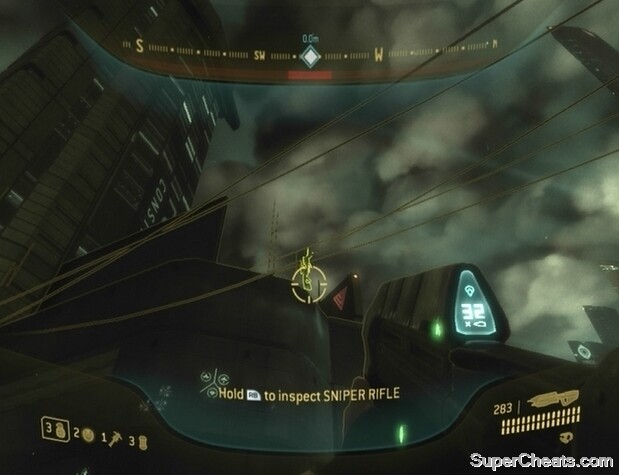 Inspect the hanging Sniper Rifle to start the mission. |
NMPD HQ
Character: Romeo
Achievements: NMPD HQ, Dome Inspector (get 15 headshot kills).
Objective: Find Mickey and Dutch’s Pelican
Follow Buck up the ramp and through the security doors. Upstairs, head through the security door and with your Sniper Rifle equipped, take aim at the Brute among the Grunts to the south. Shoot him in the head once to remove his armour and then again to end him. Switch to your Magnum and pick off the two scurrying Grunts with headshots.
There’s a Shade turret at the southeast end of the platform. Move a bit further south and aim for the Grunt gunner while he is busy targeting Buck. As long as you’re on the upper walkway, you should be able to spot the top of the Grunt’s head even if the Shade is turned toward you. Two Brutes and some Grunts will soon come through the doorway along the east side of the platform. Remain on the walkway and help Buck take down the two Brutes. A Phantom will also appear and drop off a group of Grunts nearby; use this opportunity to rack up some headshots for the Dome Inspector achievement.
 Use your Sniper Rifle to knock out the Shade turret gunner. |
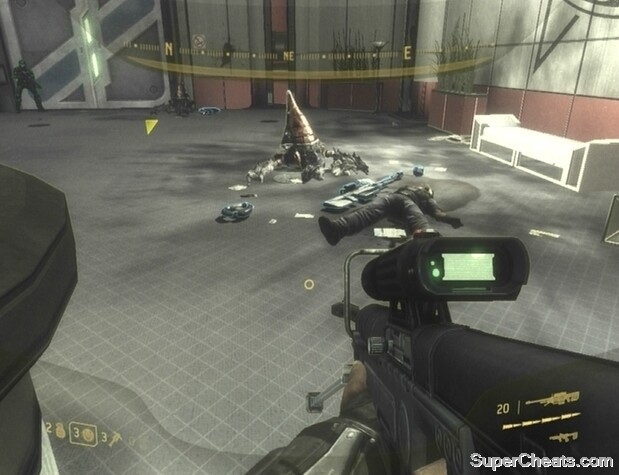
When the first area is clear, continue through the first doorway at the east end of the platform. Start firing at the Jackal infantry and Grunts through the open doorway on the other side of the lobby. There’s a Grunt on a mounted Plasma Turret at the top of the steps to the right; use your Sniper Rifle to take him out.
With the immediate area clear, head up the steps and quickly take to killing the Carbine-wielding Jackals up the steps at the north end of the area. There are four of them. Duck behind the metal crate to allow your Stamina to restore if necessary. After clearing away the Jackals, make your way up the steps at the north end of the area. You’ll encounter two Brutes and some Grunts. Use your Magnum to clear away the Grunts, falling back if necessary, and then take to the Brutes. If the Brutes are at a distance, take cover behind one of the pillars at the west end of the platform and take them out with your Sniper Rifle.
Once the area is clear of enemies, look for a Silenced SMG on the ground at the west end of the platform. Swap out your Magnum if its ammo is low, but hold on to your Sniper Rifle. Continue through the door at the northeast end of the platform. Pick up the Sniper Rifle ammo by the corpse across from the eastern corner of the desk and then follow Buck through the security door at the northeast end of the room.
 Pick up this Sniper Rifle ammo before moving on. |
Outside there are three Jackal Snipers on the balconies attached to the building to the northeast and two more on the bridge to the east. Don’t move past the pillar and start by taking out the snipers on the balcony. Two are on the lowest balcony and one is on the middle balcony. The two snipers on the bridge to the east for sure have Beam Rifles; on the Heroic difficulty level, two shots from one are enough to kill you, so hit them quickly.
Move up once the snipers are out of the way. A Phantom will appear beyond the bridge and drop off some Jump Pack Brutes. Move to the pillars at the north end of the walkway and use your Sniper Rifle to take out the Shade gunner in the northeast corner of the platform. The Brutes can commandeer the Shade, so keep it clear. Kill the two Brutes that are armed with a Carbine using your Sniper Rifle, as they’ll most likely hang back and take shots at you from afar. Two of the Brutes are wielding a Brute Shot as well, so be careful.
After the skirmish, proceed through the doorway at the northeast end of the platform. Look for a health pack and some Silenced SMG ammo next to the dead soldier in the southeast corner of the room.
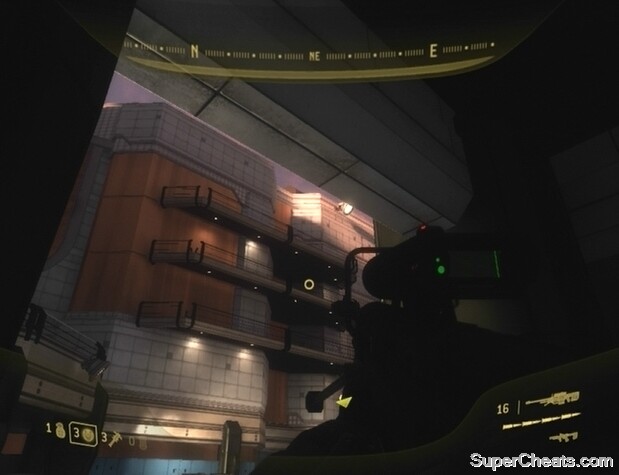 Take out the snipers before moving into the area. |
Upon entering the next area, immediately target the Jackal Sniper on top of the shelter up the steps at the northwest end. There’s also a Grunt on a mounted Plasma Turret at the top of the stairs at the southwest end. With the sniper down, step onto the platform at the east end of the area and kill the Jackal infantry there.
Four Brutes will then come through the door at the top of the stairs across the way. A Brute Chieftain armed with a Plasma Turret is among them. He requires a ridiculous amount of fire to take down; if you’ve managed to kill his entourage, try to get to the Plasma Turret at the top of the steps at the southwest end and detach it for use against him. Then it’s just about dodging his fire and taking him down. If you’re low on health, look for a health pack on the wall through the security door at the north end of the area.
Continue through the doorway at the northwest end once the area is clear. Be sure to bring along the Brute Chieftain’s Plasma Turret. Continue through the security door at the bottom of the stairs. Mow down the Jackal Sniper on the platform and then cross the bridge to reach Mickey and Dutch. A couple of Banshees will fly overhead partway down, but just keep moving.
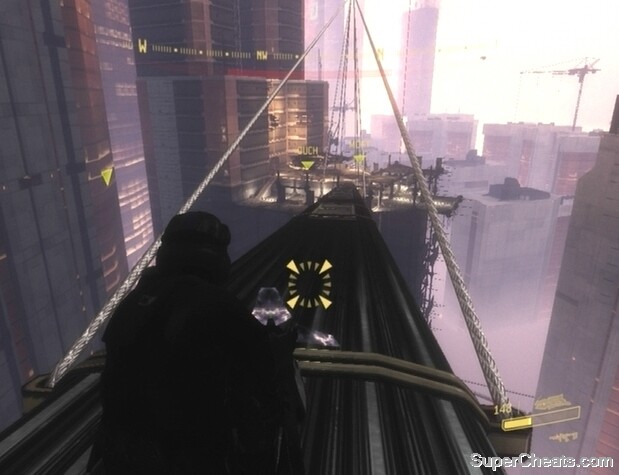 Cross the bridge to join your allies at the crash-site. |
When you reach the very end of the bridge, remain there and use the Plasma Turret to clear away the Brutes and Grunts below. With that done, hop down and join your allies on the platform.
Objective: Defend Pelican crash-site
Immediately get on one of the mounted Missile Pods on either side of the platform. The Missile Pod has infinite ammo while mounted, so fire profusely at the incoming Banshees. When a Phantom appears, immediately divert your fire to the engines on its visible side. Make sure you’re not aiming at the gun on the front of the ship, but at the engines on its side. If you’re quick enough, you can destroy the Phantom without having to deal with the enemies it’s set the drop.
If a Phantom manages to unload, get off of the Missile Pod (don’t detach it) and look for a detached Missile Pod on the ground by the crashed Pelican. Use it to quickly clear away the Covenant dropped by the Phantom.
 When a Phantom appears, continuously fire at the engines on its visible side to destroy it. |
Banshees and Phantoms will come from both sides, but each mounted Missile Pod has limited coverage. If you hear your allies call out a Phantom and your side isn’t busy, step off of the Missile Pod and hop on the other so you can reach the approaching craft. You can push off an ally if it’s occupied.
Your AI allies are actually a huge help here, so you should be able to complete this objective with little difficulty. Continue shooting the Banshees and Phantoms out of the sky until the final Phantom appears, triggering the end mission cutscene.
Using Missile Pods to defend the Pelican crash-site.
More for Halo 3: ODST on Super Cheats
thanks[video][quote][/quote] [/video]
quality it really helped thanks