The Atlantic Express
BioShock 2 Walkthrough and Guide
The Atlantic Express
Goal: Get to Brigid Tenenbaum
Move along until you come to a locked Securis door. Enter the room marked “Tool Storage” right next to the Securis door and pick up the highlighted Hack Tool on the table. Pick up the Remote Hack Dart right next to it. With the Hack Tool, take aim at the highlighted control panel visible through the broken glass and hit it with a Hack Dart.
Hacking is simple: press the A/X button while the moving needle is on a green section of the meter for each stage. Attempt to hack while the needle is on a white section of the meter and you will take damage. Soon enough, the machines you are trying to hack will have red sections as well. Land on one of these and you'll trigger an alarm, which will send a couple of pesky Security Drones after you. Quickly try again and hack the machine successfully to turn off the alarm and send back the drones.
 Press the A/X button while the moving needle is on a green section of the meter for each hacking stage. |
In this case, successfully hacking the control panel will open the locked Securis door. You can use the Hack Tool to hack Security Drones, Turrets, and Security Cameras from afar, turning them into allies. Or, if you're close enough, you can hack a machine without using a Hack Dart. Note that unlike in the first BioShock, hacking takes place in real-time. So when attempting to hack something, take the shot and then grab some cover.
There is a deactivated Security Drone in the room beyond the Securis door. Hack the drone and it will follow you and automatically target any enemies it encounters. Land the needle on a blue section of the meter while hacking to boost the drone's damage.
Move down the corridor and you will soon reach the Repair Platform. There are a couple of Splicers here. You can make short work of them with your Rivet Gun and the Security Drone by your side. Enter Workshop 6A along the south side of the platform and look for an Audio Diary (The Great Chain Rattles) on the table inside.
Head through the door marked “Gate Control” in the northwest corner of the Repair Platform. Interact with the Control Panel there to trigger an event. Don't bother trying to fight the Splicers on the other side of the window; just crouch down and wait until the floor falls through. Use a First Aid Kit if you're about to die, though.
 Stay alive. The floor will eventually collapse. |
Make your way through the submerged corridor and head up the steps you come to once out of the water to enter the Atlantic Express Administrative Storage area. Continue up the steps past the Vita-Chamber and take note of the Security Camera through the window up ahead. Switch to the Hack Tool and fire a Hack Dart at the Security Camera. Land the needle in a green or blue section to hack the camera, converting it to a friendly unit. If you don't have a Hack Dart, there are a couple on the desk and the overturned file cabinet.
The hacked Security Camera will now trigger an alarm if it spots an enemy, calling forth two friendly Security Drones. There's a Splicer in the next room, so provided you have yet to stir him, the alarm should soon go off. Let the drones take him out and then exit through the doorway in the southwest corner of the room.
Eleanor Lamb has left you the Telekinesis Plasmid in the post office. Take the Plasmid to gain the Telekinesis power. There is an Audio Diary (Mr. Tape Recorder) you can collect now that you have Telekinesis, but you'll have to backtrack. Make your way back to the end of the submerged corridor and look for the diary behind the large fan to the left of the stairs. Use Telekinesis to grab it.
 Collect Eleanor's gift in the post office. |
Return to the post office, continue through the doorway and head up the stairs at the other end of the room. An Audio Diary (Just a Fad) is on the table at the far end of the platform at the top of the steps.
After collecting the diary, pick up one of the red, explosive containers with Telekinesis and launch it at the group of Splicers gathered around the flaming oil drum below. More Splicers will enter the area through the door across from the drum, so be ready with another explosive container.
When the room is clear of enemies, look for another Audio Diary (What Happened to the People?) next to the mattress in the northwest corner of the room. There's one more Audio Diary (Ryan vs. Lamb: Reality) to collect before moving on. Head through the doorway marked “Cafeteria” across from the flaming oil drum in the middle of the station. Make your way to the room at the very back of the Railway Cafe and look for the audio diary in an open suitcase next to the “Health and Happiness” poster.
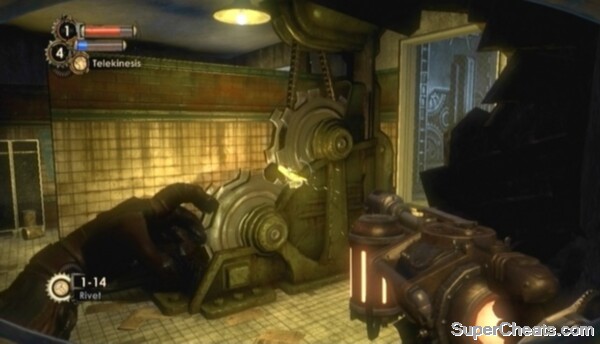 Use Telekinesis to remove the pipe jamming the gears to open the door. |
The large, mechanical door at the west end of Train Workshop 6B is locked. There's a pipe jamming the gears that operate the door in the next room. Facing the door, turn left and head through the adjacent doorway there. Turn right and approach the hole in the wall up ahead. Use Telekinesis to remove the pipe jamming the gears to open the door.
Once the door is open, proceed through to enter the Control Room. Turn right to find a Vending Machine. Hacking Vending Machines will lower the prices of the items available for purchase, and sometimes unlocks new items for purchase. If you land the needle in a blue section of the meter during the hacking process, you'll get a free item. Stock up on Rivets and First Aid Kits if you're low.
Look for an Audio Diary (Know the Beast) on the overturned filing cabinet at the bottom of the steps on the side of the room opposite the Vending Machine. After collecting the audio log, continue through the doorway next to the Vending Machine and start up the steps.
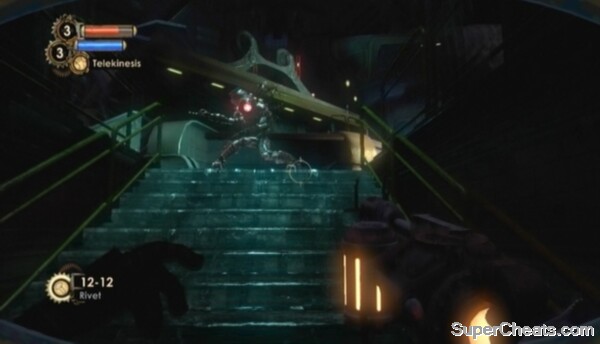 You don't have to fight her just yet. |
Be ready with Telekinesis and your Hack Tool selected. Ignore the Big Sister here -- she's not going to hurt you. At the top of the steps, look for a Security Camera on the wall at the far end of the room. Take aim and hit the Security Camera with a Hack Dart. Back up while attempting to hack, as a group of Splicers will soon enter the area.
Use Telekinesis to pick up one of the red, explosive barrels along the wall and fallback. One of the Splicers should come forward; launch the explosive barrel to destroy him. There are several more explosive barrels which you can use to kill the remaining Splicers. The Security Drones sent by the hacked Security Camera should help you out here as well.
Killing the Splicers on the way to the elevator.
When the area is clear, enter the elevator at the other end and hit the switch to start it up. When the elevator reaches its destination, step out and pick up the Trap Rivets on the filing cabinet to your right. Continue up the steps, past the set Trap Rivets, and turn left. Enter the small office here and look for an Audio Diary (Improving on Suchong's Work) inside the filing cabinet at the back.
After collecting the diary, exit through the door at the south end of the area. Stock up on First Aid Kits and Rivets using the Vending Machine here, as you'll need them for the next area. Continue through the door at the west end of this area to enter the Train Station.
Goal: Hold Off Sofia Lamb's Splicers
Activating the highlighted Intercom Switch in the Train Station will trigger an event, causing a mess of Splicers to enter the station, so make sure you're prepared before doing so. There's a Security Camera beyond the gate, which you can hit with a Hack Dart and turn friendly. With that done, equip the Rivet Gun and press down on the D-pad to select Trap Rivet ammo.
 Use the Hack Tool to hack the Security Camera through the gate. |
Set Trap Rivets go off when tripped by an enemy, damaging and momentarily stunning them. Place an equal number of Trap Rivets on the floor in front of both gates, spreading them out to avoid having a single Splicer set them all off.
Once you're ready for the onslaught, use the Intercom Switch to speak to Tenenbaum. Remain on this side of the gate for the entirety of this segment. Take cover behind the station map and let your Trap Rivets do the work, but be ready with your Drill for any Splicers that make it through. There are two explosive containers next to the opening in the wall beyond the south-most gate. Use Telekinesis to pick it up and then launch it and the Splicers as they come through the opening.
Surviving Lamb's Assault
Goal: Board the Train
There's an Audio Diary (The Situation) to collect before leaving this level. The diary is sitting on the bench in front of the schedule board near the front end of the train. When you're ready to move on, enter the train and flip the Switch to complete the level.
No comments yet. Tell us what you think to be the first.