Port Valdez
Battlefield: Bad Company 2 Walkthrough and Guide
Port Valdez
Overview:
Port Valdez was the map used to showcase what Bad Company 2 had to offer, appearing in the game's demo. It is a snowy map, stretched across the coast in Rush's trademark linear fashion. There are four bases that must be attacked (or defended), with two M-COM stations at each. The Russians are attacking, with the US defending. Gameplay passes from a mountainous start through a construction area, into a village, to a docking site and then back up into the hills for the grand finale. There are many vehicles on this map, but they do not dominate the map as much as one might expect. Helicopters and a lack of anti-aircraft turrets mean you must watch out in the skies, but the B3A3 Bakhcha comes in its AA variety for this map, helping somewhat. Despite the entire map being flanked by water, no boats feature, and it is largely an infantry/sniper map. There is one main road that runs through the entire level, frequently passing at least one of the M-COM stations in each base.
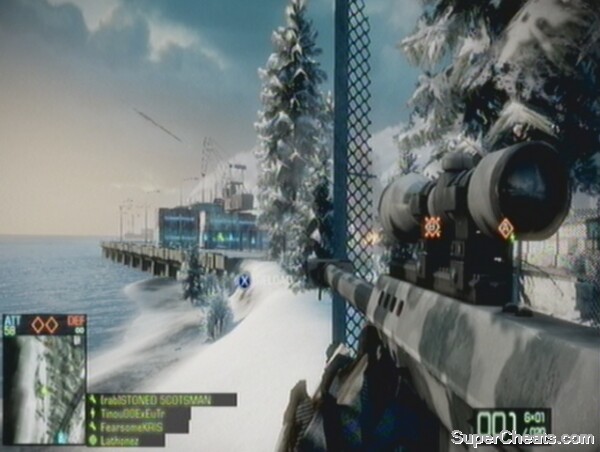
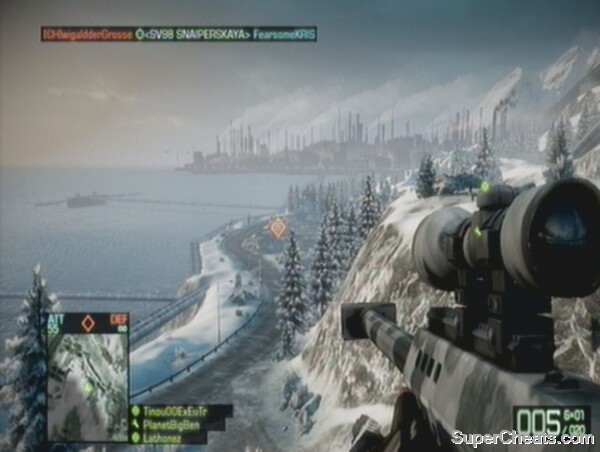 Snipers can dominate the first base. |
Class Recommendations:
1) Recon: This is one of the best Rush maps for snipers. The first base in particular often sees snipers attacking using the mountainous terrain, and defending from the tall construction building. Mortar strikes are effective in destroying the Alpha building here as well. For the other bases, attacking snipers can often find angles to kill defenders out towards the sea, looking along the coastline. Of course, the natural counter to this is to have plenty of snipers defending, and the tall construction buildings play into this strategy.
2) Medic: The high power of the LMGs combined with their ability to kill enemies over great distances and suppress targets is very useful on Port Valdez. Medics are usually better recommended for attackers, who have limited ticket numbers, and it is true that they will only have a very limited role if you are defending.
3) Assault: As this map is useful for snipers, the good distance of the game's assault rifles is also worth exploiting. Coupled with this, the 40mm grenades that can be bundled with the weapons can take down the M-COM buildings most effectively. The fact that those in the Assault class can resupply their complement of grenades is an added bonus. For defenders, it is not so highly recommended, and players may wish to choose Engineers over Assault, due to their anti-vehicle qualities.
4) Engineer: As mentioned above, defenders should prefer the Engineer class due to its variety of explosive options that can be used against tanks, helicopters and jeeps. It can, of course, also be used to repair defensive vehicles and turrets, of particular use when helicopters are involved. Anti-tank mines can be used along the main road and to protect areas around the M-COM stations.
Bases:
Attackers Deployment:
Nestled high up in the mountains, this spawn is a haven for snipers, camping on the edge of the mountain overlooking the Construction Site below, or in the more tricky terrain to the side along the pipeline that follows the entire level to its conclusion. The attackers are granted a T-90 tank, one BMD-3 Bakhcha (AA variant), two quad bikes and a UAV. The UAV is particularly crucial for destroying the defences around the Alpha building at the Construction Site. The defenders also have a UAV. There are many routes down the mountain. There are roads to the right and left which the tanks must pass down, so beware for anti-tank mines blocking the road. The right hand road is a particular favourite with T-90 drivers, as it can pummel the Construction Site from the hill before retreating back for repairs. There is also a path through the trees for infantry off the right hand road, eventually leading to the Alpha M-COM building. The road to the left leads to the Bravo M-COM station. You can also descend the main mountain, either on foot or using a quad bike, though the ride is bumpy. While spawn killing is not allowed in Rush, enemies often congregate in the bushes below Attackers Deployment, and possess the element of surprise.
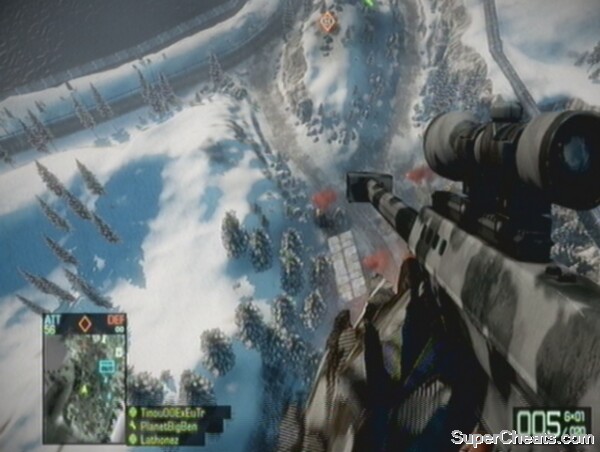 Here the two roads out of the Attackers Deployment are clearly visible, as well as the pipeline on the right. |
Construction Site:
Those charged with defending the Construction Site have much at their disposal. It is one of the easiest areas to defend on Port Valdez. The defenders do not start with any vehicles, but are given anti-tank launchers (one near Alpha and the other in the tall construction building). There are machine gun emplacements too – one directly overlooking the Alpha building, in the house behind it (from the attackers point of view), and another in the construction building.
Alpha:
The Alpha M-COM station is in a two-storey house, with one side facing the main road, and the other a wintry path through some trees. The station is on the ground floor, and so can be quickly armed before a retreat. Attackers often arm the station and then move back outside amongst the trees to wait for any attempts to disarm the charge. The building can be destroyed. Defenders and attackers can hide on the upper floor and get a jump on anyone entering.
 Alpha is overlooked by a machine gun emplacement. |
Bravo:
Bravo is in the open, on the opposite side of the Construction Site. It is nestled in a crater, so is protected to some extent from enemies (in particular snipers). The construction building behind the crater has a perfect view of the M-COM, however. There is a small concrete building at one end, popular with attackers (somewhere for them to retreat once the charge is set), and nearer to the Attackers Deployment. Bravo is probably the most difficult to arm and destroy, due to its more open location, while the Alpha building can be taken out with Mortar Strikes and C4. Quad Bikes piled with C4 and then detonated at Bravo is a possible tactic.
Office Site:
The office site is rarely successfully held against attackers, largely due to the distance between the two M-COM stations. This makes a two pronged attack, where one box is armed and then another, the best tactic for the Russians. When one is armed, defenders run across to disarm it, and cannot get back to the other in time to prevent a further attack. Alpha is located on the main road, while Bravo is higher up, primarily accessible over a crest covered by a mounted machine gun and numerous buildings. The attackers spawn at the Construction site, where they have access to an M-90 MBT and a BMD-3 Bakhcha AA tank. The defenders have anti-personnel and anti-tank gun emplacements at the rear of the Office Site base.
Alpha:
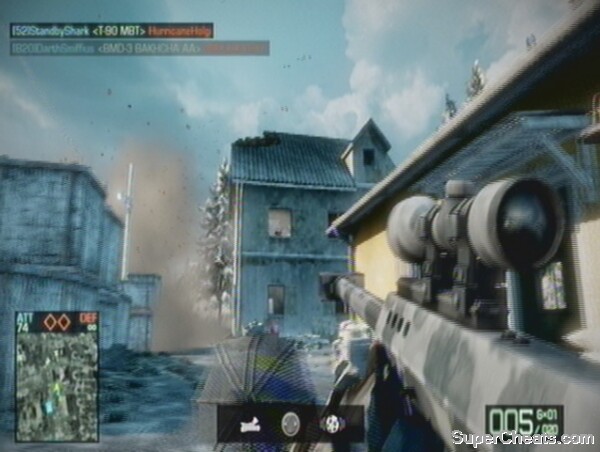
Located on the main road from the Construction Site, Alpha can be plagued with tanks, which may then blast new pathways into the otherwise secure building housing the M-COM station. On one side is a hill, leading up to the Bravo area, but the main threat is along the road, which is guarded by buildings on one side. Anti-tank mines and infantry defending the entrance to the area are key. The building itself can be destroyed.
 This building houses the Alpha M-COM station. |
Bravo:
Bravo is in a small village above the Alpha station and road. It is accessed by the attackers over a ridge along a path off the main road. There are two large houses in the row of buildings before it, and attackers should be sure not to enter the wrong one. The first house has a mounted gun emplacement, watching the ridge, but this can be taken out with a well placed 40mm grenade, mortar strike or an RPG. The M-COM station is upstairs in the third building. The stairs to the first floor are often watched by camping defenders.
Harbor:
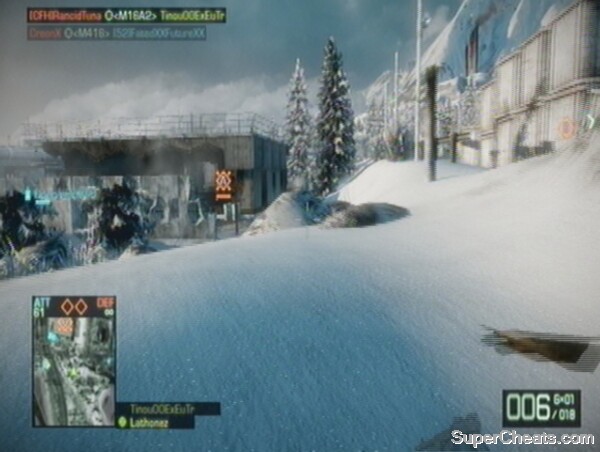
Attackers will now have access to the Russian GAZ-3937, which is an APC, allowing quick but lightly armoured access to the enemy base. The two M-COM stations are close together, making defence easier, and both of the buildings are invulnerable. This is possibly the easiest base on Port Valdez to defend. Defenders are given a variety of gun emplacements, but most importantly, a Bradley tank and an Apache helicopter (which can of course be stolen by the attackers as well). This can give the defenders the edge, as long as these vehicles are used responsibly. As well as the main entrance via the road (which is blockaded initially), there is a side entrance used by infantry which follows the coast-line. This is a very effective method to reach Bravo. The main road also forks off to the right just before reaching the harbour. Following this or going through the fences that line the fork are other ways to enter the base for infantry.
 The side entrance to the Harbor is popular with infantry. |
Alpha:
The Alpha building is located off the main road as it enters the harbour complex. It is a small and narrow building with open ground surrounding it. This makes it easy to defend from afar, but tough to keep players at bay if you are near the M-COM box itself. Once all the walls are taken out (the building cannot be destroyed), accessing the M-COM to arm it becomes much easier, and it is generally the less difficult of the two bases to destroy at the harbour.
Bravo:
Bravo is a large hangar located near the Apache helicopter. It is on the main road, allowing tanks to eventually access it. The openings are blocked by crates, preventing a vehicle from entering and monopolising control of the M-COM. Vehicles can of course fire through any walls that have been destroyed, and this is a great tactic for both defenders and attackers – whoever has a tank in the base at the time. There is also an entrance to the hangar at the back, towards the water. Possibly the best way to attack is via the cargo containers at the side, along the infantry path by the sea. This will usually outflank any defenders in the hangar.
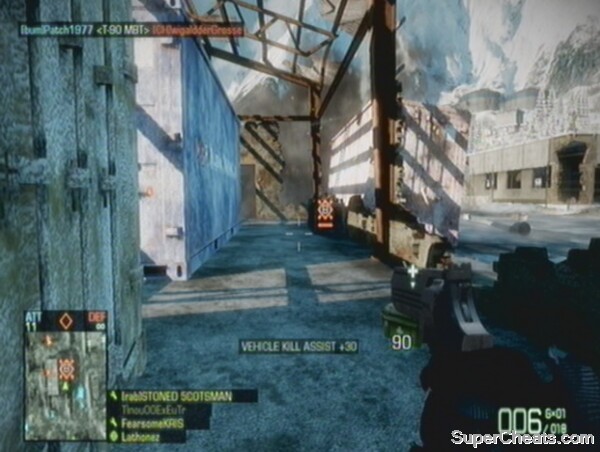 Bravo is easy to arm, but just as easy to disarm. |
Comm Depot
The final area of Port Valdez is a communications depot, sitting atop a mountain and accessible by one main road and a narrow path. Attackers will now have access to a T-90 MBT, a Bakhcha AA to deal with the defenders' helicopter, and a UAV station. Defenders have a Black Hawk helicopter to attempt to prevent enemy vehicles from ascending the mountain, and to keep any infantry suppressed. The M-COMs are again close together, with Bravo right on the crest of the mountain, and easily accessible, but easy to defend, and Alpha further back, difficult to get to over open ground. While the main road up to the Comm Depot is the route any vehicles must take, infantry can leave the road earlier and climb up to the building at the top. There is also a road below the mountain and a path that follows the ever-present pipeline. This pipeline can be used by infantry, either as a path in itself, up to the flank of the Comm Depot, or as cover, for stealthier infantry seeking to move below it.
Alpha:
The Alpha M-COM is at the back of the flat area at the top of the mountain. It is located in a two-storey, thin building. The only way to get to it is across open ground, and there is a concrete wall preventing entry from a variety of angles. There are structures overlooking the M-COM building that can be used by defenders, and by attackers to protect their armed station. The building cannot be destroyed.
Bravo:
This M-COM is inside the Comm Station itself. This is a large, indestructible building with many rooms and points of entry. The main room, housing the M-COM, is accessible via a number of doorways, one almost directly from the outside (the walls can also be blown out). Defenders can use the computer consoles for cover, however, and camp in the corners to stop any attackers. The building has an accessible roof, which can help in attacking the central chamber.
No comments yet. Tell us what you think to be the first.