The Details
Kane and Lynch 2: Dog Days Walkthrough and Guide
The Details
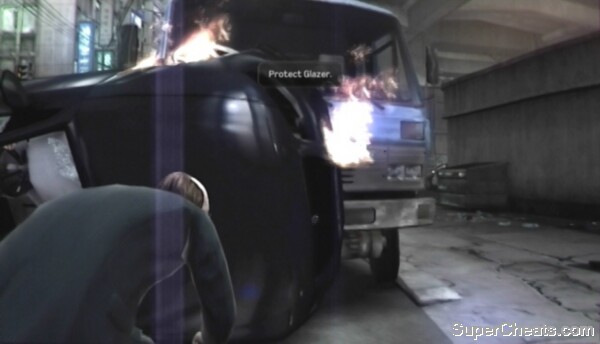
You must protect Glazer's car from the mess of enemies now on the highway. The white bar inside the distance marker pointing to the car indicates how much damage the car has sustained. It's your job to prevent your foes from damaging Glazer's car enough to completely deplete the meter.
As soon as you gain control over Lynch, sprint forward and duck behind the white van to your right. You'll have the weapons you had when you completed the previous chapter, so you're in good condition if you still have a shotgun. If you have a pistol, you can easily unlock the “Trigger Happy” Xbox 360 achievement or PlayStation 3 trophy at the start of this chapter by killing five enemies with any pistol in 15 seconds.
While covering behind the white van, look to the left and take down the two enemies that come running toward you. Then, move around the right side of the van, kill the goon covering behind the car up ahead, the guy behind the taxi in the middle lane and then the goon covering in front of the white van. You'll unlock the achievement/trophy if you were quick enough. Be careful, as the enemy covering at the front of the white van may run at you, so you may have to gun him down first.
Unlocking the Trigger Happy achievement/trophy
Move up to the car in front of the white van once you've killed the first few enemies. Continue picking off enemies with headshots as they pop out from cover to fire. Move up and take cover behind the white pickup truck when the area is clear.
Be careful when moving forward, as there may still be an enemy covering nearby. Ensure any nearby pieces of cover are unoccupied when switching cover, otherwise you could leave yourself open to enemy fire.
Clear away the remaining enemies on the highway and then follow the car to an off-ramp. After Glazer's car drives down the ramp, two enemies on motorcycles will drive up the ramp and dismount to confront you. Be careful, as the motorcycles can run you over as they screech to a halt. Target one of these enemies and blast him with your shotgun as soon as he dismounts. Kane will take out with the other.
Start toward Glazer's car once the ramp is clear. When you reach the bottom of the ramp, step onto the sidewalk to your right and move toward the electrical box. Get up and take cover behind the box when the enemy at the other end of the sidewalk knocks you down. A truck will then ram Glazer's car, pinning it on its side.
 Pull Glazer from the wreckage before he expires. |
You must get Glazer out of the wrecked car. His health is deteriorating, so act quickly. Move out from cover, approach the wreckage and press the X/Square button to free Glazer when prompted. Once Glazer is out of the car, kill as many of the enemies up ahead as you can while they scatter for cover and then duck behind one of the dumpsters on the sidewalk. Ensure there aren't any enemies on the left side of the truck before moving up to the green car.
Clear the enemies beyond the green car and then move up to the front of the taxi at the other end of the crosswalk. A couple of these enemies are wielding shotguns, so be sure to pick these up once they've been dealt with.
You'll have to take out the cops at the police barricade before you're able to escort Glazer to the parking garage. A couple of these guys are armed with shotguns, so keep your distance. Take cover behind the grey van by the lamppost and use your shotgun to dispatch the cops at the barricade. You should be able to headshot these officers with your shotgun even from this distance as they peek out from cover, though doing so may require a couple of shots.
Be sure to collect the shotgun and revolver used by the police before following Glazer and the others down the ramp and into the parking garage. Once inside, sprint to the other end of the first level and head up the ramp there. You'll encounter a large number of cops on the second level, so take your time once you're at the top of the ramp.
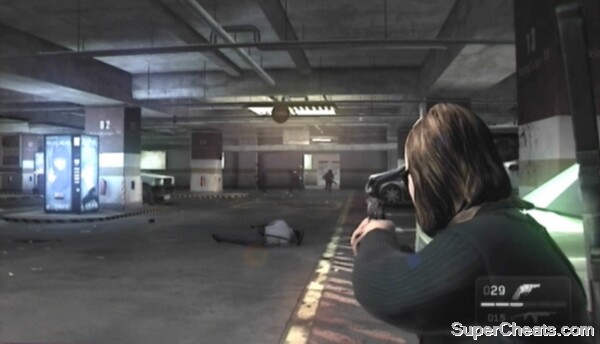 The second floor of the parking garage is swarming with cops. |
Move forward and turn left at the top of the ramp. The police will appear as you near the second column, so immediately enter cover there to avoid taking fire. Make heavy use of the fire extinguishers attached to many of the columns here while engaging the police. These fire extinguishers can be picked up, thrown and then shot to create a small explosion. Pick up the fire extinguisher attached to the column you're covering behind, hurl it toward the two cops up ahead and shoot it once it reaches them to set it off.
A thrown fire extinguisher will bounce and travel quite far, so give it time to reach your target before shooting to detonate it. There's no need to take aim when shooting to detonate an explosive; just hit RT/R1 and the auto-aim will take care of it. This holds true for other thrown objects, such as fuel cans.
Also target fire extinguishers attached to columns if there are one or more cops covering nearby. These extinguishers have a considerable blast radius, so it's worth targeting one even if an enemy is behind a vehicle on the other side of the column.
The police have a couple of dogs with them. One of these dogs will come after you soon after the first two cops appear. Dogs can be a problem, as they are able to run behind your cover and knock you to the ground. Fortunately, they're quite easy to kill. When a dog is charging toward you, back out of cover, use the Right Stick to tilt the camera down and shoot a couple of times without aiming. Don't use LT/L1 to aim, as auto-aim should be sufficient here.
Move from cover to cover to get closer to the fire exit at the other end of the garage. Keep an eye out for fire extinguishers and use them to take out covering enemies. Also keep your ear open for dog barks, as there's still one dog left.
Escorting Glazer through the parking garage
Once you've cleared the garage of enemies, move through the doorway at the other end and lift the door you come to. Continue down these stairs until you're outside. You'll encounter more police officers once outside. Use the crumbling walls as cover and fight your way to the other end of the yard. Once you've dealt with these enemies, search the area for ammo and then proceed up the steps at the other end. Ensure you have one of the TOQ Model 18 shotguns used by the police entering the building.
Immediately take cover behind the overturned pillar once inside the building and use your shotgun to headshot the cops here as the pop out from cover to fire. Clear the next room and then, rather than following your allies outside, head up the stairs to reach the second floor. There are several fuel containers on this floor as well as a large opening in the wall that affords you a nice view of the street below. Use the fuel containers to clear out the cops at the seating area on the left as well as those in front of the store on the right.
When the seating area below is clear, pick up another of the fuel containers and drop down to street level. Take cover behind one of the tables facing the cop cars across the street, then throw the container toward the police covering there and shoot it to clear the area. With that, sprint to the getaway van left of the police cruisers to complete the chapter.
Escorting Glazer to the getaway van
No comments yet. Tell us what you think to be the first.