Billy's Missions
Grand Theft Auto 4: The Lost and Damned Walkthrough and Guide
GTA 4: The Lost and Damned Guide
Billy's Missions
Mission 1: Clean and Serene
Follow the marked route on the GPS to The Lost clubhouse. Stick close to the gang on the way there to hear their chatter. When you reach the spot, hit the yellow marker to trigger a cutscene.
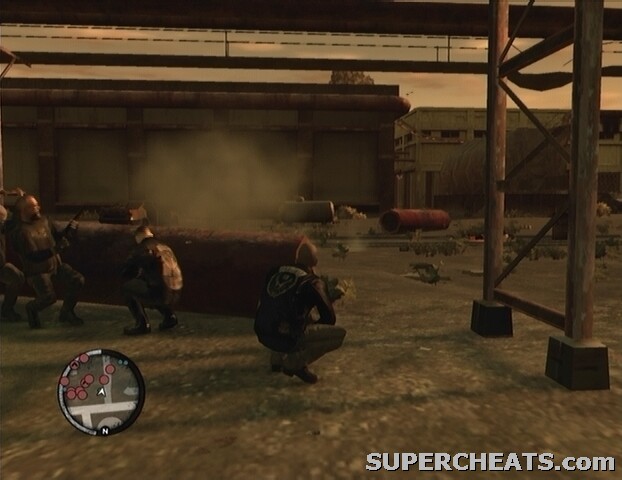
Your first task is to retrieve Billy’s bike from the chop shop in Bohan. Make your way to the chop shop and hit the yellow marker outside to trigger another cutscene. Unfortunately, Billy’s bike has long since changed hands, and is currently in the possession of a rival gang, known as the Angels of Death. Their hangout is located in Northwood, Algonquin. So start towards there.
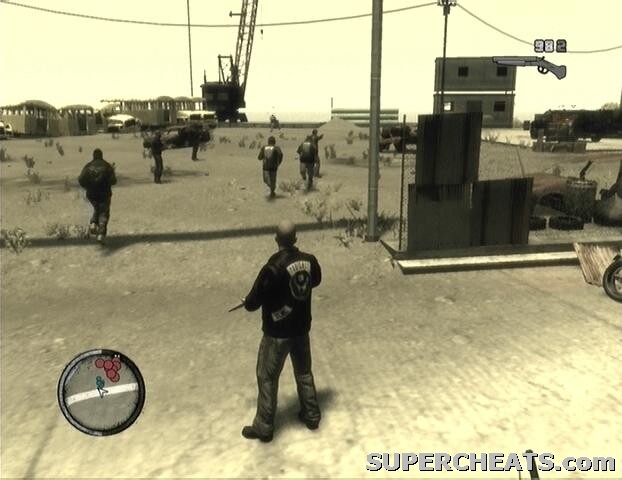 |
When you reach the place, a number of red markers will appear on the GPS. These markers denote enemies, and there are about eight of them. Fortunately you aren’t flying solo, so clearing the place and procuring Billy’s bike is not an overly difficult task. You’re armed with only a Sawed-off Shotgun, so you’ll have to get fairly close to your target to do any real damage. There are a couple of wrecked cars at the top of the area that can be used as cover. There are also several explosive barrels scattered about, so take advantage if an unwitting enemy decides to seek cover by one.
 |
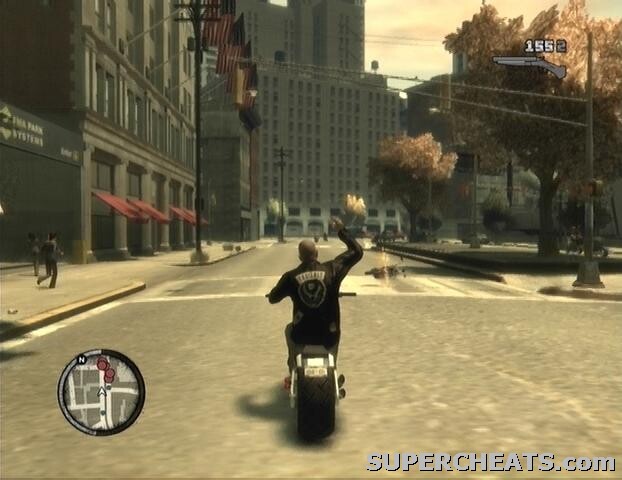
Once the Angels of Death have been dealt with and Billy has his bike, hop on your own bike and trail after him. While Billy is leading the gang, periodically a gang badge will appear on the road in the middle of the formation. If you keep in the badge for a short while, you’ll gain some health back and have your bike repaired. Follow Billy and the gang back to The Lost clubhouse to complete the mission.
Mission 2: Angels in America
You’re tasked with taking out some fleeing Angels of Death members. You have gang support here, but your allies tend to be more of a hindrance than a help, so it’s essentially up to you. Armed with a Sawed-off Shotgun, drive up behind a fleeing biker and use LB and the Right Thumbstick to send him to the asphalt. Be sure to take out the driver, as well as the passenger.
There are six bikes total to pursue; try to take as many of them out as possible before they reach the end of the line. If you take too much time in stopping the enemy bikers, you’ll have to face the remaining Angels of Death outside of their clubhouse in Middle Park, without any support from your allies.
 |
When every one of the fleeing bikers has been taken care of, you’ll get a call from Billy, instructing you to meet with the gang in Northwood. Make your way to the meeting spot to complete the mission.
Mission 3: It’s War
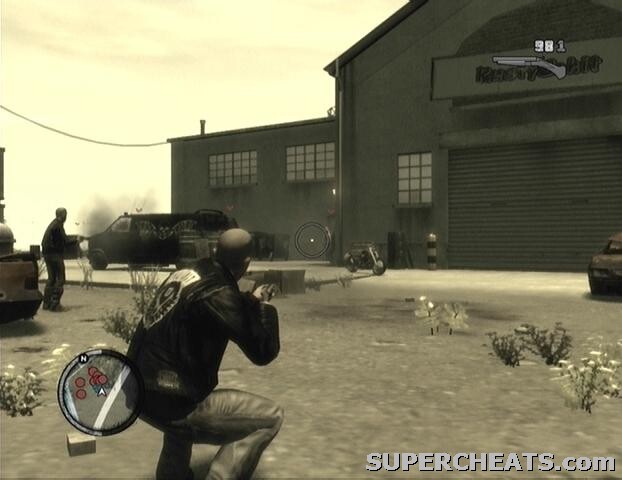
Something more suitable than a Sawed-off Shotgun will be necessary here. You can get a fully-loaded Micro-SMG by calling Jim. From Jim’s phonebook menu, select “Weapons” and then “Micro-SMG” to have him leave the weapon for you in The Lost clubhouse. Once you’ve spoken to him, you can find the weapon on a table in the arm-wrestling room on the second floor.
A.O.D. members have been actively attacking members of The Lost MC, so you’re going to have to hit two of their compounds to send a message. Follow Billy and the gang to the first spot, dismount, and then quickly grab some cover. There are several large propane tanks scattered throughout the area, and shooting at one will eventually cause it to explode. Be wary of taking cover behind one of these tanks yourself, because even a single bullet will puncture the tank and send flames streaming out. Keep a safe distance from the propane tank before setting it off, hopefully taking out any enemies that happen to be within its blast radius.
 |
There are a couple of enemies on the rooftop as well; you’ll want to take these guys out first, since they can easily get a bead on you even while you’re behind cover. Check your radar for markers with an arrow pointing upward, as these denote enemies that are above. There is plenty of cover to choose from in the field, so don’t stand out in the open. A health pack can be found by the trailer parked at the south end of the compound.
Once the first group of enemies have been taken care, return to your bike and follow Billy and the gang to the next compound. There are even more enemies here, and several of them have taken to the elevated pipeline. Take cover behind the red pipe piece by the entrance and start picking off the enemies visible in the distance. There is a health pack near some rubble on the west side of the road. Some Body Armor can be found in the small building along the west side of the stone wall, however there are likely enemies hiding inside, so leave it alone until the area is clear.
 |
When the enemies at the front of the compound has been dealt with, move around to the back. A couple of vans will soon drive up and park nearby; they should park right by an explosive barrel, so set it off as soon as the enemy gang members step out. Throughout the battle, keep an eye on your GPS for any enemies that have migrated to the pipeline. When each and every marked enemy has been taken care of, scour the battlefield for ammo, and grab the Body Armor in the small building where The Lost gang parked their bikes. When you’re ready to move on, approach Johnny’s Hexer to complete the mission.
Mission 4: Action/Reaction
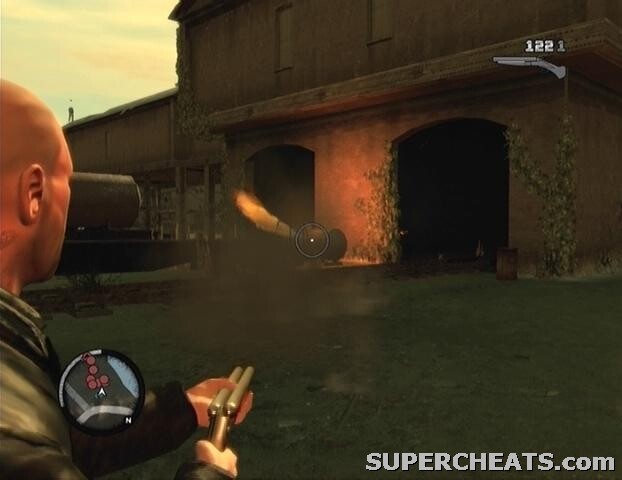
It’s time to take this fight straight to the A.O.D. clubhouse. Follow Billy and the gang until a marked route appears on the GPS, and then race for the clubhouse in Middle Park. When you reach the place, you’re handed a Grenade Launcher and instructed to launch a grenade through the second-floor window. Enter Free Aim by holding LT and aim slightly higher than your target. Aim just below the top of the window frame and the grenade should make it through.
Immediately after the grenade goes off, a drove of enemies will funnel out of the clubhouse and into the street. Keep your head down and launch a grenade or two into a cluster of enemies. These grenades take a bit of time to go off, which unfortunately affords your adversaries plenty of time to scatter. Nevertheless, the grenades can quickly destroy the parked van by the alleyway, likely taking out a number of enemies in the explosion. Stay behind the barrier and pick off the marked enemies until their spawning ceases.
The next step is to enter the clubhouse. Follow Billy through the front entrance and take cover by the door at the end of the hall. Blast the enemies that are visible in the bar, and then move in and take cover behind the counter. An enemy armed with a Sawed-off Shotgun sits behind the bar, so quickly blast to avoid taking a hard hit. Grab the health kit behind the counter if necessary, and remain then remain behind the counter and pick off any enemies that enter from the next room.
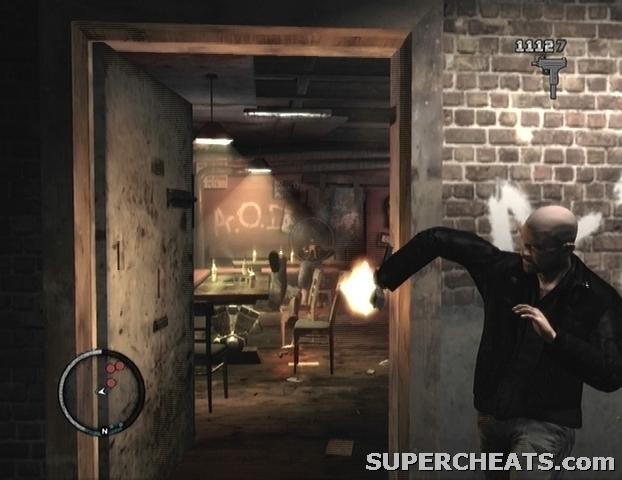 |
When the bar is clear, follow Billy downstairs and take out the guys there. After the cutscene, head back outside, hop on the Hexer, and clear the area before the cops arrive to complete the mission.
Mission 5: This Shit’s Cursed
Complete “Off Route” in Stubbs’ mission line to trigger this mission. While following Billy and the gang, get in formation as often as the gang badge appears, because you’ll need the extra health and armour for the firefight to come.
When you reach the marker, a couple of cutscenes will ensue. After the second cutscene, as soon as you gain control over Johnny, grab some cover behind the nearby generator. There are two Triads on the walkway, and one on the roof. Concentrate on taking out the two guys nearest to the generator first, however. Keep to the left end of the generator and blast them before they can get too close.
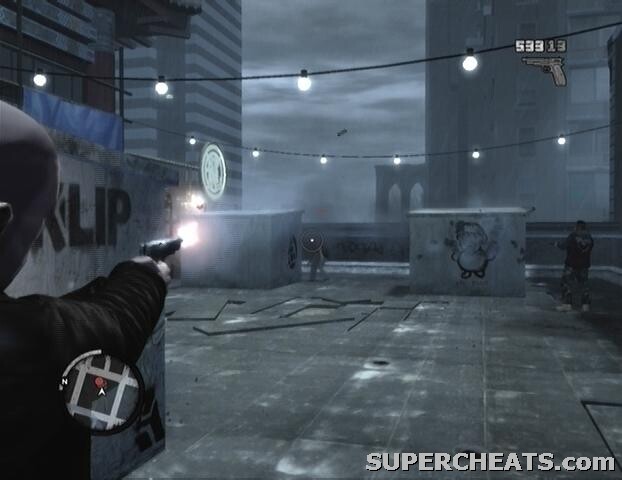 |
Pick off the Triads up above, and then help Jim take out the remaining enemies at the other end of the roof. Afterwards, start following Jim around the side of the building. Keep an eye on your radar, because a couple of enemies will slide in as you near the corner. You’ll eventually come to an open room. This room is, of course, full of enemies, so don’t rush in there. Stay outside and eliminate as many of them as you can see, and then slowly move forward and take out those that were out of view. A health kit can be found at the end of the walkway, so once the room is clear, be sure to collect it before moving on.
Your next task is to make it back to street level. You’ll meet more enemies along the way, but luckily you’ll have a height advantage this time. Before climbing down one of the ladders, be sure to clear the enemies on the floor below from up above. Once you’ve made your way to the second floor, a cutscene will ensue.
After the cutscene, return to the parked Hexer, hop on, and lead the gang back to The Lost clubhouse to complete the mission.
More for this game on SuperCheats
No comments yet. Tell us what you think to be the first.