01: Your Farmer
Farmville Walkthrough and Guide
by CMBF ![]()
Chapter 01: Your Farmer
Farmville is a game about farming, and its central focus includes the avatar that represents you in the game -- a farmer who does all the farming!
Because of this there are a number of issues that pertain to your Farmer/Avatar, and we cover them all here, in this section of the guide, which naturally appears at the beginning, since that is where you undertake to prepare your game play foundations, and your Avatar and Farmer is a major part of that. We have yet to discover the glossary of words that are a particular element in game play and your use of this guide, so we are going to address many of these issues in a rather basic and hopefully easy-to-follow fashion -- so please bear with us while we address all of that and more!
The game play process begins with the creation of the Avatar of your Farmer -- an image of a person who is meant to represent you in the game. Accomplished via the Avatar Creation Menu when you first begin to play the game, your Farmer can be customised to resemble you, as a person, as closely or as little as you like -- it is entirely your call mates!
Customizing your Avatar |
-- The Basics of You --
When you create your account at the start of your farming career you make some basic decisions, starting with the sex and appearance of your Farmer/Avatar, including the clothes they wear. Later you will have the opportunity to add more clothes to your farmer's wardrobe, but for now the basic set that you start out with should be more than sufficient since you are not, at this point, setting out to make any sartorial or social statements.
-- Basic Statistical Information --
The name of your farmer is dictated by the name on your Facebook account -- so if for any reason you want to change the name of your farmer in Farmville, you must therefore change your Facebook Account name, a decision that should not be taken lightly since it is how your mates and others know you on the site...
To make your Farmer look unique you can change the appearance and clothing as you create them -- but do not worry about the choices that you make here because you can access the farmer customization menu later on and throughout your game play, and you will want to alter some of this anyway -- mostly their outfits, since there is an Achievement associated with that -- but we will get to that later!
-- Customisation of your Farmer --
In the customisation menu there are choices for each major element of your farmer's appearance -- for example when you select “Facial Features” this pulls up a sub-menu that lists all of the features that you can change in your farmer's face.
Your options for customizing your farmer's face include:
Ears
Eyebrows
Eyes
Face
Facial Hair
Hair
Mouth
Nose
Skin
Select an area that you want to change and then add it to your avatar to see if you like it -- the item or choice will be reflected in the image of your avatar in the menu. Once you have adjusted your avatar's face to your satisfaction, accept the changes and move on to the next area!
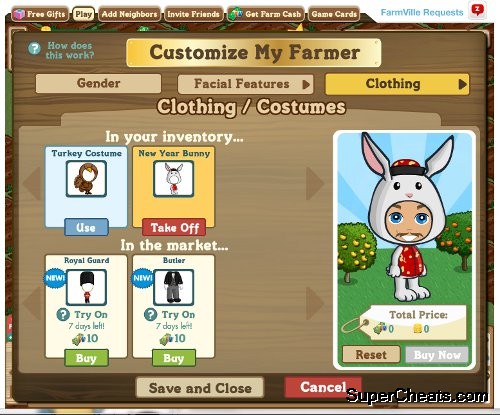 Clothes include Holiday Event Costumes |
-- Clothes Make the Farmer -- Sartorial Expression in Farmville --
The final stage for creating your new avatar is selecting the clothing that they will wear each time that you log into the game. Select "Clothing" from the main character customization menu, and then begin dressing them up using the sub-menu choices listed.
Clothing is one of the primary game play features in Farmville that allows each player to make their Farmer Avatar distinctly different from those of their mates and other players, a significant set of choices both because it adds to your overall expression in the game, and because
The clothes are available to level 1 farmers and above. Some are for free and can be found in farmer's inventory, while others can be purchased from the Market for Coins or Farm Bucks, and yet others are obtained as rewards for accomplishments in the game -- for instance there is a set of T-Shirts that are the same colour as the Achievement Ribbons in the game that can be obtained for unlocking X-number of Ribbons...
You can select clothing for the following garments:
Hats
Shirts
Bottoms
Shoes
Accessories
In addition to the above, you can select from pre-set outfits, and later after you purchase them, you can also select Costumes -- for instance during the Thanksgiving Holiday in America they added a Turkey Suit to the clothing you can purchase, and for Halloween they added a Ghost Costume.
Each choice that you make is reflected in the image of your avatar that is part of the menu -- and once you have obtained the outfit that you like, all that you need to do is save the avatar form and you are done! Well, sort of done -- you still have to play the game of course!
-- Basics on Levels and Leveling --
This section of the guide addresses levels and leveling in some detail, and is intended to be a general introduction to the concept that underscores the importance that your level plays in the game due to the fact that many of the crops in the game are level-locked, and cannot be accessed until you reach the minimum level listed in the guide for each.
All farmers begin the game at Level 1 -- and gaining levels means collecting XP (experience points) -- but fortunately you gain XP from almost everything that you do in the game, so it is more a process of putting in the time and effort than it is doing any one particular thing.
As you acquire XP for most actions -- planting crops and trees, placing and constructing buildings, and buying items from the market -- all of these activities can earn you XP. You can also earn XP through helping out on your neighbors on their farms -- actions that also count towards unlocking some of the in-game achievements as well as that factor as an important part of being a good neighbor! This is covered in some detail in the chapter on Being a Good Neighbor, so for now just be aware that it is one of the methods that you will use. For now simply bear in mind that most of your actions will result in acquiring XP, and with each new level you reach in addition to unlocking new crops you also earn a new title.
Levels and Related Level-Based Unlockables
|
Lvl No. |
XP Required |
Level Title |
Unlocked Specials / Buildings / Machines |
Unlocking of Gift Selections |
|
1 |
0 |
Field Hand |
|
|
|
2 |
15 |
Kinderfarmer |
Stone Villa |
|
|
3 |
30 |
Amateur Farmer |
|
Green Hay Bale |
|
4 |
70 |
Able Farmber |
Rest Tent |
Chicken |
|
5 |
140 |
Handy Farmer |
Greenhouse, Turkey Roost, Winter Workshop |
Shovel Set |
|
6 |
250 |
Nimble Farmer |
|
|
|
7 |
400 |
Savvy Farmer |
|
Sheep |
|
8 |
600 |
Fancy Farmer |
Tool Shed |
|
|
9 |
850 |
Sophisticated Farmer |
|
|
|
10 |
1150 |
Splendid Farmer |
Bike Shop, Fruit Stand |
Pig |
|
11 |
1500 |
Farming Magician |
|
|
|
12 |
1900 |
Farming Wizard |
Red Tractor, Pink Tractor |
Rabbit |
|
13 |
2400 |
Jolly Rancher |
Grain Silo / Harvester |
|
|
14 |
3000 |
Produce Professional |
Seeder |
|
|
15 |
3700 |
Professor of Agriculture |
Craftshop, Market Stall, Workshop |
Duck |
|
16 |
4500 |
Hot Shot Farmer |
Storage Cellar |
|
|
17 |
5400 |
Super Shoveler |
Post Office |
|
|
18 |
6400 |
Super Grower |
School House |
Goat |
|
19 |
7500 |
Professional Plower |
Plain-Pink-Black Cottage |
|
|
20 |
8700 |
Green Giant |
General Store, Wedding Gazebo / Co-Op Farming |
|
|
21 |
10000 |
Rockstar Farmer |
|
Horse |
|
22 |
11500 |
Barnyard Behemoth |
Garage / Baby Bunny Rescue Job |
|
|
23 |
13500 |
Magnificent Farmer |
|
|
|
24 |
16000 |
Cream of the Crop |
Log Cabin |
|
|
25 |
19000 |
Sensational Sower |
|
|
|
26 |
22500 |
Sultan of Soil |
Farmhouse |
|
|
27 |
26500 |
Thrill of the Till |
|
|
|
28 |
31000 |
Master of Pasture |
|
|
|
29 |
36000 |
Sensation of the Plantation |
Estate |
|
|
30 |
42000 |
Lord of the Plow |
Glass House |
|
|
31 |
49000 |
Bastillion of the Barn |
Lodge / Combine / Tea Party Job |
|
|
32 |
57000 |
Ace of Acerage |
|
|
|
33 |
65000 |
Livestock Lord |
|
|
|
34 |
74000 |
Practiced Farmer |
Villa / The Hottest Chili in Town Job |
|
|
35 |
83000 |
Skilled Farmer |
|
|
|
36 |
93000 |
Green Ribbon Farmer |
|
|
|
37 |
103000 |
Clever Farmer |
|
|
|
38 |
113000 |
Great Farmer |
|
|
|
39 |
123000 |
Smart Farmer |
|
|
|
40 |
133000 |
Model Farmer |
|
|
|
41 |
143000 |
Frugal Farmer |
|
|
|
42 |
153000 |
Hot Shot Farmer |
|
|
|
43 |
163000 |
Proficient Farmer |
|
|
|
44 |
173000 |
Sophisticated Farmer |
|
|
|
45 |
183000 |
Accomplished Farmer |
Wind Turbine |
|
|
46 |
193000 |
Brilliant Farmer |
|
|
|
47 |
203000 |
Prominent Farmer |
|
|
|
48 |
213000 |
Expert Farmer |
|
|
|
49 |
223000 |
Genius Farmer |
|
|
|
50 |
233000 |
Big League Farmer |
|
Azaleas |
|
51 |
243000 |
Master Farmer |
|
|
|
52 |
253000 |
Grand Master Farmer |
|
|
|
53 |
263000 |
Farming Authority |
|
|
|
54 |
273000 |
Yellow Ribbon Farmer |
|
|
|
55 |
283000 |
Farmer Cash Crop |
|
|
|
56 |
293000 |
The Real Deal |
|
|
|
57 |
303000 |
Killer Tiller |
|
|
|
58 |
313000 |
Farm-O-Saurus Rex |
|
|
|
59 |
323000 |
White Ribbon Farmer |
|
|
|
60 |
333000 |
I Can Haz Farm? |
|
|
|
61 |
343000 |
Old Mc-Who? |
|
|
|
62 |
353000 |
Educated Farmer |
|
|
|
63 |
363000 |
Red Ribbon Farmer |
|
|
|
64 |
373000 |
Hay Roller |
|
|
|
65 |
383000 |
Farming Virtuoso |
Silo Home |
|
|
66 |
393000 |
Blue Ribbon Farmer |
|
|
|
67 |
403000 |
Purple Ribbon Farmer |
|
|
|
68 |
413000 |
County Fair Champ |
|
|
|
69 |
423000 |
State Fair Champ |
|
|
|
70 |
433000 |
World Fair Champ |
Mansion |
Floral Container |
|
71 |
443500 |
Beyond Fairs Farmer |
|
|
|
72 |
454500 |
Farm Fanatic |
|
|
|
73 |
466000 |
Head Honcho |
|
|
|
74 |
478000 |
Livestock Broker |
|
|
|
75 |
490500 |
Tractor Tycoon |
|
|
|
76 |
504000 |
Market Master |
|
|
|
77 |
518500 |
Talk of the Town |
|
|
|
78 |
534000 |
Plant's Best Friend |
|
|
|
79 |
550500 |
Cow Whisperer |
|
|
|
80 |
568000 |
Farm Hero |
|
Mangrove Decoration |
|
81 |
587000 |
Farm Idol |
|
|
|
82 |
607500 |
Agriculture Aficionado |
|
|
|
83 |
629500 |
Soil Sage |
|
|
|
84 |
653000 |
Crop Connoisseur |
|
|
|
85 |
678500 |
Dirt Disciple |
|
|
|
86 |
706000 |
Big Ole' Boss |
|
|
|
87 |
735500 |
Farm Fiend |
|
|
|
88 |
767000 |
Plow Plant Reap Repeater |
|
|
|
89 |
801000 |
High Harvester |
|
|
|
90 |
837500 |
Farm Freak |
|
Dutch Rabbit |
|
91 |
876500 |
Veni Vidi Agri |
|
|
|
92 |
918500 |
Incomparable Farmer |
|
|
|
93 |
963500 |
Soil Savant |
|
|
|
94 |
1012000 |
Farm Overlord |
|
|
|
95 |
1064000 |
Stellar Farmer |
|
|
|
96 |
1120000 |
Transcendent Tiller |
|
|
|
97 |
1180000 |
Universal Farmer |
|
|
|
98 |
1244500 |
Paragon Farmer |
|
|
|
99 |
1313500 |
Epic Farmer |
|
|
|
100 |
1387500 |
Omnipotent Agriculturalist |
|
Jacaranda Tree |
|
101 and Up |
150000 Plus 1-Level Per 100,000 |
N/A |
|
|
Note: The table above does not include items and unlockables that are accessible at Level 1, as that is the starting level of the game. If the building or item you are looking for does not appear in this table, chances are it is a Level-1 Base Item.
-- Avatar Traps --
The game play design for the world interface is avatar-centric, which means that the mechanism for play and for actions is avatar-based, requiring the avatar to interact with the object or objects being manipulated, the crop being planted, or building being used and, as such, the avatar will try to walk to the location of the game object or get as close as it physically can if it encounters environmental objects that block its access to the game object.
This is also true when your avatar is visiting another farm (not your own), in which case when you click on the Feed Chickens Icon on the left side of the screen, your avatar will then seek out the physical location on the farm for the Chicken Coop, since that is the game object that is relative to the command to feed the chickens.
When a farm has been expanded to the very large sizes the process of the avatar seeking out and moving to the related game object can take a considerable amount of time, especially when it must negotiate a path when it is partly blocked. Many players find this to an annoying game play element, and to avoid what is commonly viewed as an unnecessary delay, build into their farms a strategically constructed intentional terrain-blocking construct that is commonly called an Avatar Trap.
Contrary to the negative implications of its name, an Avatar Trap is widely viewed as a positive -- or good -- object to have on your farm and to encounter on the farms of your neighbors. In fact many players will refuse to visit farms that do not provide the basic courtesy of an Avatar Trap, and in view of the fact that there are certain events and/or special activities in which having other players visit your farm and complete specific co-operative actions, it is in your best interest to construct and maintain an Avatar Trap on your farm!
While it is not as crucial a courtesy when your farm is Level 0 or Level 1, once you get beyond Level 1 it is generally considered to be a courteous act to construct an effective Avatar Trap, which is at its most basic a simple set of blocking objects that are placed around the edges of the square on the grid where avatars will arrive on the map when the farm is loaded. This square is the default entrance to the map and is generally located in a spot slightly-offset-from-center on the map. When the size of a farm is increased, the square is relocated one diagonal square southeast from its original spot for each level the farm is increased.
That being the case, whenever you increase the size of your farm you will need to relocate the Avatar Trap so that it now occupies the current entrance square for the map. The images above depict typical Avatar Traps and their construction, however you can be creative in making yours as long as it fulfills the basic requirement of the Avatar Trap -- that is to say it is constructed from objects that both your Avatar AND the Avatars of visiting players cannot pass through.
-- Courtesy Buildings and Structures --
A number of optional buildings/structures exist in the game that can be used by players visiting your farm to obtain XP and/or special items and rewards, and as such the deployment of these buildings and structures is considered to be a polite courtesy by many players, who consider their presence on a map to be desirable, and their lack on a map to be reason not to visit that player's farm in the future.
That being the case, and to ensure that you are providing the basic game elements that other players expect to find and that they, themselves provide on their farm, every effort should be made to deploy the following buildings/structures on your farm and on any additional farms that you may leave your Avatar on (and thus leave as the "active" farm for your account):
(1) Chicken Coop (Required Level: 1)
The feature of feeding your neighbor's chicken coops was introduced to the game on 6th January 2010, and when you visit a neighbor's farm (or they visit yours) an icon of a white sack with blue lettering appears on the left-hand-side of the screen indicating that you can feed the chickens on this map.
Because the mechanism for awarding XP and items on a visited farm is predicated upon the visitor assisting their neighbor by helping them with crops, some reward elements are not available unless the visitor first either selects the five (5) crop actions that they can effect each day when they visit, or completes the five (5) animal actions that they can effect each day when they visit. Failing to first complete the Crop/Animal Actions can result in failure to obtain XP for other Visiting Actions, so it is generally considered to be a wise practice to get into the habit of completing Crop/Animal actions prior to accessing any other action on the map.
Crop Actions include but are not limited to plowing a fallow field, fertilizing a plowed or planted field, and/or fertilizing a fully-grown crop square, as well as harvesting any Tree-object with an active harvest symbol above it. Animal Action are restricted to harvesting of any animal that has the harvest indicator above its head. Note that while these actions are recorded on your game window as having taken place, they do not actually occur until the player whose farm you are visiting confirms the action on their game screen. When you revisit their farm after having completed an assistance action if the owner has not confirmed and accepted your assistance action it will not appear on the updated map, so it is possible to accidentally complete an assistance action on the same square more than once. Each day you can complete a total of five (5) Crop or Animal assistance actions per farm/farmer...
In addition to obtaining a small amount of XP for the effort, feeding the chickens may result in the discovery of a Mystery Egg -- the color of the Mystery Egg the visitor may discover is based largely upon type of chickens that live in the coop; having more of a particular chicken type in the coop will influence the chance of finding that chicken's egg, however it is still possible to obtain a lower-colored egg as a result of the RNG controls for the structure...
When the farmer finds a Mystery Egg on his own farm (in a Chicken Coop that belongs to them), they will NOT receive that egg in their Gift Box, but rather will be given the option of sharing the egg with their neighbors, via their feed. They will obtain a small amount of XP as their karmic reward however. When a player finds a Mystery Egg in the Chicken Coop of their neighbor one copy of the egg that is found is placed in the gamer's Gift Box, and they are given the option to share another copy (or copies) of that Mystery Egg with their neighbors via their feed. It is generally considered to be a good and friendly gesture to always share the eggs you find...
In addition to a very small chance of the egg you find yelding a live chicken of one of the species that is associated with that egg, there is a much larger chance of receiving a special item or game object as your reward. The general consensus is split on whether or not it is better to receive a live chicken or a game object -- most players consider the live chicken to be the better reward, especially when it is one of the rarer species, some of which were a product of special events and thereafter can only be obtained in this fashion.
The Chicken Coop is widely listed in polls as the primary motivation that most players have for visiting their neighbor's farms, and many players indicate that they favor (and thus visit more frequently) players who take care to ensure that their Chicken Coop is the largest size, and contains a selection of the rarer species of chicken (and specifically does NOT contain common species). The act of placing a representative sample of one of each of the chickens that occupy the coop outside and nearby it is generally considered to be a courteous gesture.
-- Mystery Eggs and Their Rewards --
Each type of Mystery Egg has a different collection of possible rewards associated with it, many of which are highly desirable and rare. The following list is not a complete list of the possible rewards that can be obtained from the designated egg colour, but rather is a list of the rare and/or highly desirable items associated with that egg.
Listed below are each of the Mystery Egg types that can be encountered by feeding the chickens of your neighbor, followed by the type of live chicken that can be given as the reward (this is a very rare occurrence however) and then the more desireable of the object rewards that can also result. The awarding of the actual reward is a product of the Random Number Generator (RNG) and cannot be influenced by the player's actions.
The Mystery Eggs are listed below in alphabetical order, and the order in which they are listed in no way reflects their relative or presumed value or scarcity:
|
Mystery Egg Name |
Possible Live Chicken Reward |
Other Possible Rewards |
|
Aloha ** |
Aloha / Giant Aloha |
|
|
Apple |
Dorking / Old English Hen / Rainbow / Silkie |
|
|
Araucana |
Araucana / Dorking / Old English Hen / Orpigton / Rainbow / Sebright / Silkie |
Chicken Gnome / Gold Gnome |
|
Black |
Chicken / Black / Brown / Golden |
x10 Fuel Refills |
|
Brown |
Black / Brown / Chicken |
x1 Fuel Refill |
|
Buttercup |
Buttercup / Dorking / Rainbow / Silkie |
Chicken Gnome / Gold Gnome / x20 Fuel Refills |
|
Candycane |
Candycane / Cornish / Rainbow / Rhode Island Red / Scots Grey |
Chicken Gnome / Frozen Pond / x20 Fuel Refills |
|
Candycorn |
Candycorn / Dorking / Old English Hen / Rainbow / Silkie |
Chicken Gnome / Gold Gnome / x20 Fuel Refills |
|
Carnival |
Carnival |
Chicken Gnome |
|
Cochin ** |
Cochin |
|
|
Cornish |
Black / Brown / Chicken / Cornish / Golden |
Chicken Gnome / Windmill / x20 Fuel Refills |
|
Crystal ** |
Crystal |
|
|
Cupid ** |
Cupid |
|
|
English |
Black / Brown / Chicken / Cornish / Dorking / Golden / Modern Game Hen / Old English Hen / Rhode Island Red / Scots Grey / Sebright / Silkie / Susex |
Butler Gnome / Town Fountain / x20 Fuel Refills |
|
Faverolles |
Dorking / Faverolles / Old English Hen / Rainbow / Sebright / Silkie / Sussex |
Chicken Gnome / Gold Gnome / x20 Fuel Refills |
|
Fall Fairy ** |
Fall Fairy |
|
|
Golden |
Black / Brown / Chicken / Clover / Cornish / Golden / Pilgrim / Plush |
Gold Gnome / Shoolhouse / x20 Fuel Refills |
|
Green Silkie |
Green Silkie / Silkie |
|
|
Hawaiian ** |
Hawaiian |
|
|
Headdress ** |
Headdress |
|
|
Love |
Love / Big Love |
|
|
Marans |
Clover / Cornish / Dorking / Marans / New Hampshire Red / Old English Hen / Silkie |
Butler Gnome / Town Fountain / x20 Fuel Refills |
|
New Year |
New Year |
|
|
Party |
Dorking / Party / Old English / Rainbow / Sebright / Silkie |
Chicken Gnome / Gold Gnome / x20 Fuel Refills |
|
Rainbow |
Cornish / Rainbow / Rhode Island Red / Scots Grey |
Chicken Gnome / Gold Gnome / Rainbow Cottage |
|
Rhode Island Red |
Black / Brown / Chicken Cornish / / Golden / Rhode Island Red / Scots Grey |
Chicken Gnome / Post Office / x20 Fuel Refills |
|
Scots Grey |
Black /Brown / Chicken / Cornish / Golden / Rhode Island Red / Scots Grey |
Chicken Gnome / Red Barn / x1 Farm Buck / x20 Fuel Refills |
|
Shamrock |
Shamrock |
|
|
Snowflake |
Skiing / Snowflake |
|
|
Tourist |
New Year / Tourist |
|
|
White |
Brown / Chicken / Chicken Cheer / Chicken Joy |
x20 XP Star |
** Unreleased Chicken and Unreleased Egg -- The chicken and the egg are listed here so that the list is complete and reflects all of the combinations that are present in the game code, however this particular chicken and egg has yet to be added to the live version of the game...
Mystery Eggs are related to the "Egg-celent Discovery" Achievements (discover x5 Mystery Eggs for Yellow Ribbon / x25 Mystery Eggs for White Ribbon / x50 Mystery Eggs for Red Ribbon / x100 Mystery Eggs for Blue Ribbon), and the "Cracked" Achievements (crack open x5 Mystery Eggs for Yellow Ribbon / x25 Mystery Eggs for White Ribbon / x75 Mystery Eggs for Red Ribbon / x150 Mystery Eggs for Blue Ribbon).
(2) Fishing Hole (Required Level: 1)
The following materials are required for you to actually build and then upgrade the Fishing Hole on your Farm:
Stage 0: x10 Lily Pad x10 Fishing Poles x10 Lures
Stage 1: x12 Lily Pads x12 Fishing Poles x10 Lures
Stage 2: x14 Lily Pads x14 Fishing Poles x11 Lures
Stage 3: x16 Lily Pads x16 Fishing Ppoles x12 Lures
Once the Fishing Hole is actually placed and constructed, each day you -- and your farm visitors -- can harvest it to obtain Special Delivery Boxes as its reward (Special Delivery Boxes can be exchanged for random rewards, including building materials) according to the following schedule:
Level 1: 1 Special Delivery Box
Level 2: 2 Special Delivery Boxes
Level 3: 3 Special Delivery Boxes
Level 4: 6 Special Delivery Boxes
The presence of a leveled Fishing Hole is considered to be a very courteous gesture on the part of each farmer and is one reason why other farmers might visit your farm on a daily basis.
(3) Greenhouse (Required Level: 5)
Introduced on February 05, 2011 the Greenhouse is the crafts building on your farm that is used to cross-breed different crop seeds to obtain specialized crops.
Once a tray is planted with seeds to create a Hybrid crop, it takes 3 full for the new seeds to grow unless your visiting neighbors help you by clicking on your Greenhouse, shortening the growth time by one day. In addition to helping you out, your neighbor receives a random packet of 5 seeds for their efforts as reward.
(4) Water Wheel (Required Level: 1)
Placed on your farm in kit form, using Axles, Gears, and Rope the primary stage is built and can be harvested once per day for the chance to obtain x1 Watering Can; the structure can then be upgraded twice, adding an the possibility of an additional Watering Can for each upgraded stage, for a total of x3 Watering Cans possible for the final stage each day.
The Water Wheel is harvestable by visitors to your farm, who also have the chance to obtain Watering Cans.
(5) Other Clickables
In addition to the buildings noted above, your visitors can also access your various collection storage buildings by accessing the following:
-- Animal Mastery Billboard: to see your Animal Mastery Sign Collection
-- Crop Mastery Billboard: to see your Crop Mastery Sign Collection
-- Tree Mastery Billboard: to see your Tree Mastery Sign Collections
-- Gnome Garden: a special building for storing a player's collection of Gnomes and for showing them off. Visitors can click upon the building to access it and review the collection of Gnomes that belongs to their neighbor.
In addition to the above, during special events and holidays there are event-specific buildings that visitors are encouraged to click upon.
More Farmville on SuperCheats.com
No comments yet. Tell us what you think to be the first.