Airfield
Wolfenstein Walkthrough and Guide
Wolfenstein Guide - Walkthrough
Airfield
Set “Find Erik Engel” as your active mission and follow the marker on your compass to the Golden Dawn Safe House in Downtown Isenstadt. Speak to Erik Engle there and he’ll point you to the Airfield outside of town. Then, start following the marker on your compass to Downtown West.
Once in Downtown West, you must kill some troops and destroy an enemy tank. After clearing the soldiers, equip your Panzerschreck and recharge your medallion using the Veil Pool at the west end of the street. Then, start toward the tank, moving to the side to dodge cannon fire when necessary, and activate Empower. A rocket or two with Empower enabled is enough to destroy the tank. With that, clear away the other enemies down the street and then use the truck near the tank to travel to Airfield West.
Using the Panzerschreck and Empower to destroy the enemy tank in Downtown West.
Objective: Infiltrate the Airfield.
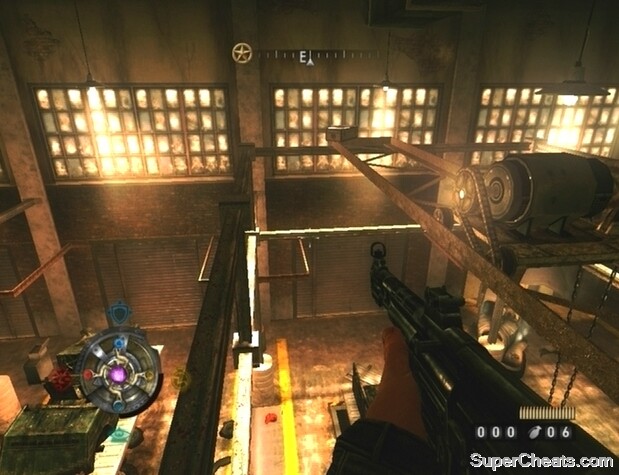
Start by killing the enemies on the upper walkway. There is a Scribe among them, so use Empower to send your bullets through their shields. GOLD (1/21) is in the pit below the truck that you start by; fall through the gap in the tracks and climb back up using the ladder after collecting it. GOLD (2/21) is on the bottom of the shelf along the south wall. When you have the Gold, exit via the doorway at the northwest end of the room. Kill the enemies in this room, and then look for INTEL (1/8) on the table on the east side. GOLD (3/21) is between the shelf and workbench across from the Intel.
Proceed up the stairs through the doorway at the south end of the room. When you step onto the walkway, look north to spot a Drache Trooper. Activate Empower and gun him down with your MP43 or MP40 before he can get too close. When the walkway is clear, hop onto the metal barrels across from the doorway you just came through and then onto the steel bars alongside the platform. GOLD (4/21) is in the container along the adjacent steel bar.
 Walk along the steel bars connected to the upper walkway to reach the container that holds the Gold. |
Enter the room at the north end of the walkway and look for GOLD (5/21) on top of the file cabinets along the south wall. Collect the ammo in the next room (the Leichenfaust 44 ammo especially), and then look for INTEL (2/8) on the desk in the northwest corner. With that, exit through the door at the north end of the room.
Objective: Access the Hangar.
Outside, a group of enemies will approach from the north. Quickly drop down from the platform and take cover by the Veil Pool below. Just be sure to set off the explosive barrel nearby to prevent future incident. The enemies have shields and there’s a Scribe too, so use the Veil Pool to restore your Veil Energy if necessary, and then use Empower and your MP43 or Kar 98 to push through. When the area is clear, look for GOLD (6/21) behind the sandbags at the northwest end of the field.
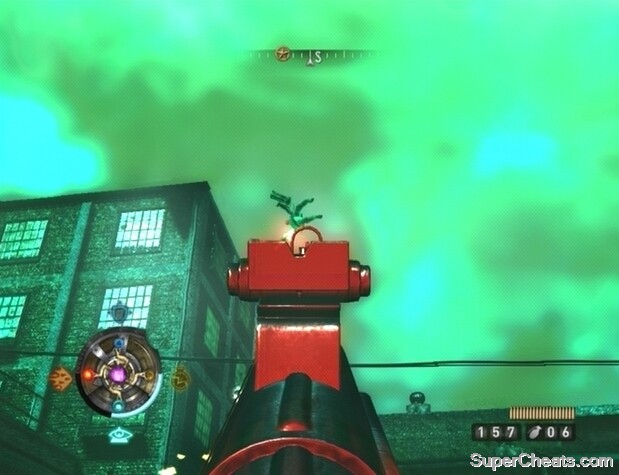
Make your way east and keep an eye out for Jetpack Troopers in the sky. Activate Empower and gun them down with your MP43 before continuing on. When you pass the brick walls, booth, and pass a checkpoint, kill the Sniffers that appear, and then make your way northwest to a second booth and look for GOLD (7/21) by the walkway. Make your way to the south end of the field and look for GOLD (8/21) among the breakable crates and skids. After collecting the Gold, follow the marker on your compass into the next area.
 Activate Empower and use your MP43 to shoot the Jetpack Troopers out of the sky. |
Climb up the steps and move down the walkway to the control room. Look for GOLD (9/21) by the machine in the northeast corner. Proceed through the door at the opposite end of the control room and descend the stairs to the large machine in the middle of the hangar.
Objective: Destroy the Machine.
The Leichenfaust 44 is the gun for this job. Make sure the weapon is fully-loaded and activate Veil Sight before approaching the machine. Start toward the machine and look for three highlighted generators along the west side of it. Run north and blast each of the generators with your weapon as you approach
The enemy inside the machine is able to spawn Despoiled, and will spawn an additional one for each generator that is destroyed. Facing four Despoiled at once is no easy task, so you’ll have to run to somewhere more suitable. Right after destroying the third generator, activate Veil Shield, switch to your MP40, and start heading east to the chain-link fence at the other end of the hangar. On your way there, be on the lookout for a Veil Energy container near an unremarkable generator. Use the container to recharge your Veil Energy as you run by and continue sprinting until you are behind the fence.
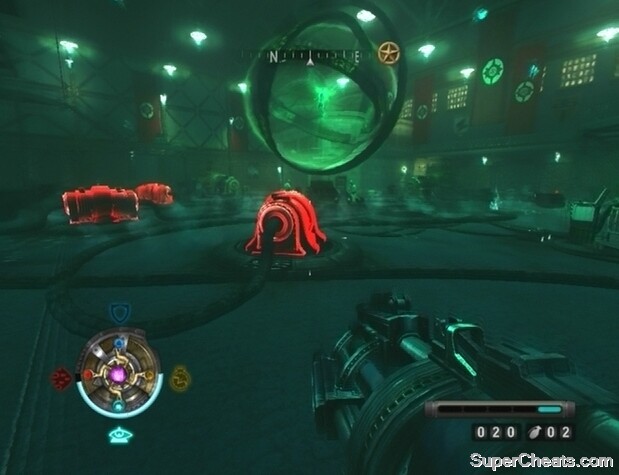 Activate Veil Sight and destroy the highlighted generators to destroy the machine. |
Once behind the fence, whip around, equip the Leichenfaust 44, and wait for the Despoiled to appear. When you spot one of her minions, hit him with the L44 to launch him up into the air and then back to the ground if not kill him. If you’re facing more than one Despoiled at once, immediately hit the second one after the first if both weren’t affected by the first shot. If the Despoiled is still alive and gets back up, hit him with another shot to most likely end him. Trouble may come if you have to reload, but try your best to dodge the enemies’ projectiles until you are able to shoot again.
The woman who was in the machine will come after you as well; she’s carrying a long-range weapon—a whip that can launch projectiles—so be ready for her. Shoot at her with the Leichenfaust 44; if she survives and gets back up, hit her again.
If you’re having difficulty facing the four Despoiled at once, another way to go about completing this objective is to only destroy one generator at a time. Then, when you’ve dealt with the Despoiled the enemy spawns, destroy another one. Repeat this until all three generators have been destroyed and the woman is dead.
Destroying the machine and dealing with the enemies that spawn.
Objective: Make your way East.
Proceed through the door in the southeast corner of the room and climb up the steps there. Kill the Sniffer in the room at the top and then look for INTEL (3/8) on the middle desk along the north wall. Continue through the door at the southeast end of the room and head to the other end of the walkway.
Kill the officers in the room at the end of the walkway and then look for GOLD (10/21) on one of the desks behind the low wall. Collect the ammo here (especially the Tesla batteries and Leichenfaust 44 ammo) and then head back to the stairway at the other end of the walkway.
Follow the marker on your compass out of the hangar. Outside, activate Empower, equip your MP43 or MP40, and be ready to gun down the Drache Trooper that breaks through the adjacent door. When the Drache Trooper is dead, enter the small building southeast of there and open the container in the back room to find GOLD (11/21). After collecting the Gold, follow the marker on your compass to the door that the Drache Trooper came through. GOLD (12/21) is by the steps behind the truck, and INTEL (4/8) is attached to the west wall at the north end of the room.
Activate Empower and use your MP43 to quickly kill the Drache Trooper outside. |
Interact with the trap door to travel to Airfield East.
Objective: Search the Tunnels.
Set off the explosive barrels below to kill the officer standing there and then look for GOLD (13/21) underneath the steps. Equip your MP43 if you haven’t already and start down the tunnel. You’ll encounter another Drache Trooper, so be ready to activate Empower to easily take him out. When you reach some stairs, look for GOLD (14/21) on the ground by the tanks along the north wall.
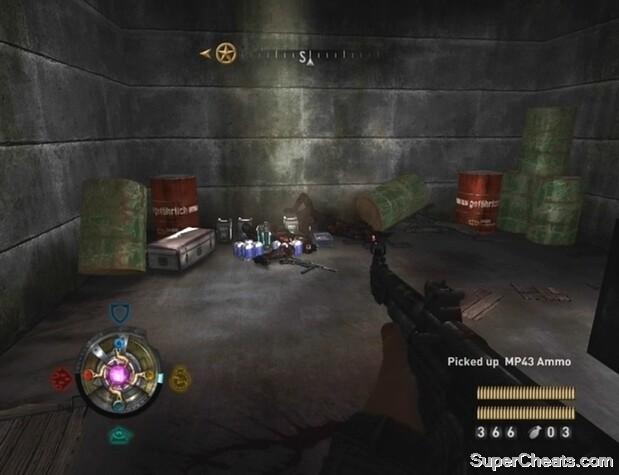
Continue up the steps and look through the first doorway on your left. Set off the explosive barrel at the other end of the room to hopefully kill the two soldiers and destroy the Veil Inhibitor. If not, do so yourself and then look for GOLD (15/21) on the ground behind the broken Veil Inhibitor. There’s a bunch of ammo in the room through the doorway a bit further up, so set off the explosive barrels in there too and then clear out any enemies that remain. GOLD (16/21) is inside of the container in this room.
After collecting the Gold and ammo, continue down the stairs at the other end of the corridor. Kill the troops in this area and then look for GOLD (17/21) below the large pipe at the east end. Climb up the steps, use the Veil Energy container to recharge your medallion, and proceed through the double-door to complete the objective.
 Refill your weapons before moving on. |
Objective: Storm the Hangar.
There’s a couple of Scribes, a Drache Trooper, and some soldiers in the hangar, so don’t just rush in. Have your MP43 equipped and be ready to activate Empower to quickly gun them down. When the hangar is clear of enemies, look for GOLD (18/21) by the side of the ramp on the west side of the platform. INTEL (5/8) is on the table in the northeast corner of the walkway at the north end of the hangar. With that, use the switch in the middle of the walkway to disable the shield door.
Once the shield door is down, use an intact Veil Energy container to recharge your medallion, then proceed through the doorway and look for INTEL (6/8) on the containers just outside. Gun down the troops that appear at the east end of the hallway; there’s a mounted MG42 there, so be careful. GOLD (19/21) is by the propane tanks at the south end of the hall
When you have the Gold, activate Veil Sight and enter the large room through the doorway at the start of the hall. A Scribe and a couple of Veil Assassins will enter the room soon after you do, so you must be extremely cautious. There are plenty of Veil Energy containers around the room, so sprint over and use one to recharge your medallion if necessary. Use Empower to demolish the trio and then look for INTEL (7/8) on the table along the south wall of the room. Proceed through the deactivated shield door. Look for GOLD (20/21) behind the stack of containers at the start of the hall.
 Stand against the wall and use Empower to destroy the Veil Inhibitor through the shielded door. |
There’s a Veil Inhibitor between two shield doors at the other end of the corridor. Hug the wall across from the shield door, activate Empower, and shoot through the shield door to destroy the Veil Inhibitor. Then, stand in front of the shield door, activate Empower, and shoot through the shield to set off the explosive barrel near the door. Doing so will damage the first shield door and completely disable the second; activate Mire and slip through the first door when the shield flickers off.
Move through the second shield door and approach the platform in the middle of the room. Two Scribes and a Drache Trooper will enter the room through the door along the west wall as soon as you step onto the platform. Activate Empower and start firing at the enemies. If you’re taking a lot of damage, activate Shield. Shield and Empower use a lot of Veil Energy, so look around for a Veil Energy container to recharge your medallion if necessary.
When the first batch of enemies has been taking care of, the shield door covering the elevator will lower and a few more troops will enter the room. Kill the troops, step onto the lift, and use the switch to ascend to the upper floor.
Objective: Reload and Rearm.
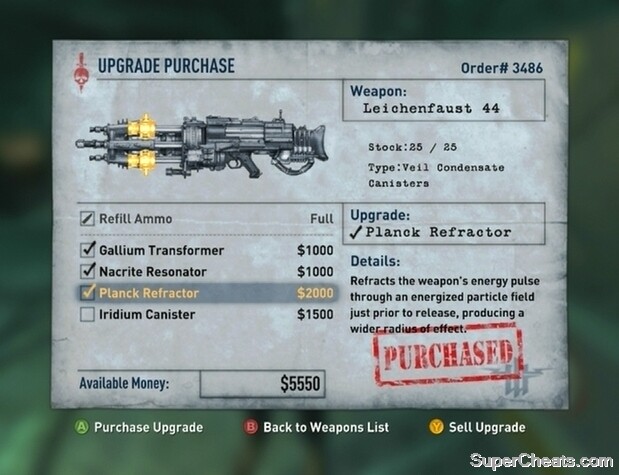
Open the container on the ground next to the man to find GOLD (21/21). Speak to the Black Market representative to purchase upgrades for your weapons and Veil Powers. This is your last chance to do so unless you abort the current mission and return to Isenstadt, so make sure you buy everything you can afford. A fully-upgraded MP43, Particle Cannon, and Leichenfaust 44 would serve you well in the final battle. Most importantly, purchase as many of the upgrades under the “Veil” menu as you can. The upgrades available depend on the Tomes of Power and Intel you have collected.
 The Black Market representative near the end of the level is your last chance to use collected Gold to purchase upgrades for your weapons and Veil Powers. |
Objective: Board the Zeppelin.
The way to the Zeppelin is peppered with enemies, so take your time moving through. Use your Kar 98 to pick off the sniper on the walkway at the west end of the area. There is an Elite Guard, a Despoiled, and some more troops at the other end of the bridge. Activate Empower, gun them down with your MP43, and then head up the steps at the northwest end of the platform. Fight your way up to the control room and use Empower to take out the Scribe and soldiers inside.
INTEL (8/8) is on the terminal at the south end of the control room. Use the switch next to the stairs to lower the bridge and cross to the Zeppelin mission start point.
On the destroy the machine part if you go left as soon as you enter the area through the door you can jump over the barrier and land on a turbine,found it easier to shoot despoiled and power sources from there but you can get knocked off it so do them one at a time.
once you've started the airfield mission the only way back is to wait until the game has finished saving then go to the objectives log, highlight a completed mission and replay that. once you get to the airfield and the game is saved you can always press revisit
i don't know if this would be considered a glitch or just an oversight but before you go outside if you equip the bazooka and activate empower before you open the door you can fire a rocket at the door across and to the left (near the machine gun)and take out everyone there, including the scribe. when you get on the ground 3 more appear and they will be shielded, even though there is no scribe.
is there a way to go from the air field back to either downtown or midtown. i would like to go back and shoot some more before it get on the Zeppelin?
This whole guid has been very helpful to me.
Got me through the hanger bit, I had been stuck for hours. Thanks [size=12][/size]
Only comment, is job well done.
I have been searching for a website such as this.
On the stair when u first go trough were the guy is hiding take those there Is a guy with pArtical cannon
Just go down the street towards the tank after you destroy it. An Elite Gaurd and a Despoiled will enter from the alley to the right. Kill them and the troops with them and your guide will lead you to the truck.
Is there a problem with my game? I killed all the enemyes, I destroied the tank but I can't get to airfield. I searched for other troops thinking that I've missed some but the guy that is waiting for me keeps telling me that I must kill all germans....please help me!!!
Is there a way to make it onto the zeppelin platform? When I start up the steps a soldier appears on the other side and raises his half of the bridge.
I have the same question anyone know the answer? How do you pick up ammo on the other side.