Enemy Guide
The Legend of Zelda: Twilight Princess Walkthrough and Guide
by SPV999
Enemy Guide - Zelda: Twilight Princess
 Enemy Guide |
Here we'll take a more in-depth look at the enemies in the game, where to find them, how to avoid them, and how to take them down!
Bosses and any mini-enemies associated with them are listed individually in the Boss Guide.
Aeralfos
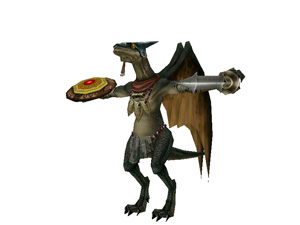 Aeralfos |
Locations: City in the Sky, Hyrule Castle
Threat Level: 8/10
Effective weapons: Clawshot, Sword
Breakdown:
They like to fly overhead and dive bomb you. When they are about to charge, use the clawshot to draw them down and hack them. When on the ground, they cannot be hit safely, so keep your distance.
Armored Dynalfos
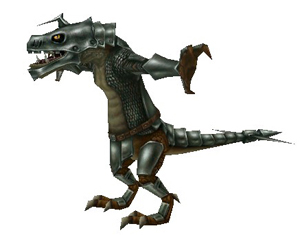 Armored Dynalfos |
Locations: Temple of Time, City in the Sky, Hyrule Castle
Threat Level: 7/10
Effective weapons: Sword
Breakdown:
There's not much to these other then basic attacks. The armor makes them hard to damage and they can see through/are too fast for some hidden skills. Still, the Helm Splitter and Backslice work well. If you can, the Jump Strike also works, as well as a bomb arrow to the head if they haven't noticed you.
Armos
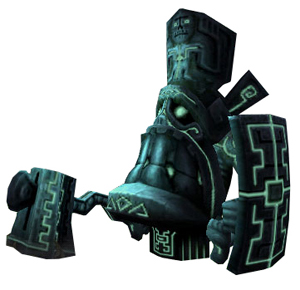 Armos |
Locations: Temple of Time
Threat Level: 4/10
Effective weapons: Bow, Clawshot
Breakdown:
They will only come to life if you get too close in front of them. The trick is to only activate one at a time. Their weak spot is the jewel on their back. Circle strife them by locking on and sidestepping around their shield side, then use a projectile to get at the jewel. It takes three shots, and after every one they get a little faster. After the third they go hyper then explode.
Baba Serpent
 Baba Serpent |
Locations: Hyrule Field, Forest Temple, City in the Sky,
Twilight Palace, Hyrule Castle
Threat Level: 3/10
Effective weapons: Sword, Bow
Breakdown:
They'll lunge forward and grab you, sucking out health while holding you. Even after their vine is cut, they still chase after you on the ground. A spin attack can normally finish them off, vine and all. They often hang from the ceiling as well, so watch out.
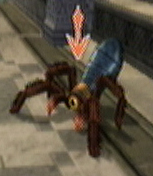
Baby Gohma
 Baby Gohma |
Locations: Temple of Time
Threat Level: 1/10
Effective weapons: Sword, Clawshot, Bow
Breakdown:
Little scared spiders. Alls they have is numbers, and even that doesn't mean anything when you always run away.
Bari
 Bari |
Locations: Lakebed Temple
Threat Level: 4/10
Effective weapons: Clawshot
Breakdown:
If you get close, they electrify themselves for a short time, making them invulnerable (the shock will even travel up the clawshot if you hit it). The trick is to stay back and use the clawshot to grab out the core.
I also think these look a lot like Metroids, which makes them awesome. :)
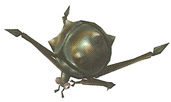
Beamos
 Beamos |
Locations: Goron Mines, Temple of Time
Threat Level: 3/10
Effective weapons: Bow
Breakdown:
When you get close, they will fire a beam out their eye that can eat away at your health. However, these beam does not reach far. Keep your distance and shoot the red eye with an arrow.
Bee
 Bee |
Locations: Hyrule Field, Ordon Village
Threat Level: 1/10
Effective weapons: None
Breakdown:
If you come near or otherwise agitate the nest without destroying it, the bees will swarm you. The only way to get rid of them is to leave the area or jump in water. To bring down the nest, hit it with something hard like the Bow, Bomb arrows, or Clawshot sometimes works.
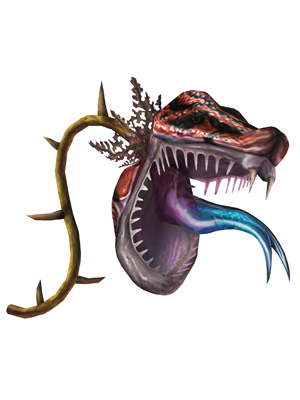
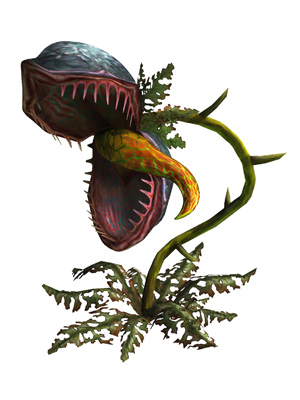
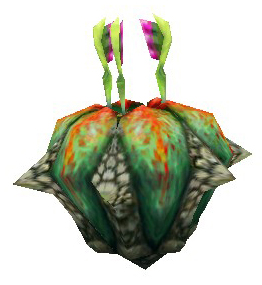
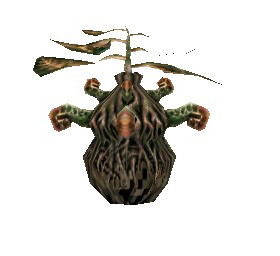
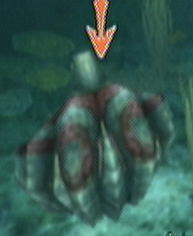
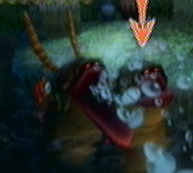
Big Deku Serpent
Big Deku Serpent |
Locations: Forest Temple, City in the Sky
Threat Level: 6/10
Effective weapons: Sword, Bombs
Breakdown:
These huge plants are unknown in origin. You have to take out the head with your sword first, then the Deku Like in the center opens up to bombs.
Blade Trap
 Blade Trap |
Locations: Hyrule Field, Arbiter's Grounds, Hyrule Castle,
Temple of Time
Threat Level: 2/10
Effective weapons: None
Breakdown:
These go up and down Spinner track, blocking your way. They are impervious to most attacks, the only way to kill them is in the Temple of Time you can use the statue's hammer. 100% of the time you can dodge them by walking carefully or jumping to another spinner track.
Bokoblin
 Red Bokoblin |
 Blue Bokoblin |
Locations: Hyrule Field, Goron Mines, Hyrule Castle
Threat Level: 5/10
Effective weapons: Sword
Breakdown:
They're only so much of a threat because they are almost always in large groups. The blue will fall with a single strike, but the Red are much tougher, generally taking 4 hits and sometimes an ending blow.
Bombfish
 Bombfish |
Locations: Lakebed Temple
Threat Level: 1/10
Effective weapons: None
Breakdown:
These are here to help the people that run out of bombs while in the Lakebed Temple. You cant keep them, but where there is one there is usually a bombable rock nearby.
Bombling
 Bombling |
Locations: Forest Temple
Threat Level: 1/10
Effective weapons: None
Breakdown:
These little bugs are here to help you before you get your bomb bag. Whack them to set the fuse, then pick it up and throw it at the target. Not the same as the Bomblings you buy in stores.
Bombskit
 Bombskit |
Locations: Hyrule Field
Threat Level: 1/10
Effective weapons: Bow
Breakdown:
These wonder Hyrule Field dropping little bombs when scared. They try to keep a huge distance, so hitting them with anything other then the bow is hard. After you kill them, they will drop a worm on the ground that you can scoop up and use as bait.
Bubble
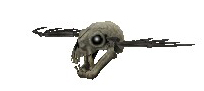 Bubble |
Locations: Arbiter's Grounds, Snowpeak Ruins, Hyrule Castle
Threat Level: 3/10
Effective weapons: Sword, Bow
Breakdown:
The flying skulls you often see. These weird enemies generally stay grounded till something nears, then they take to the air and float around. They come in three varieties: regular, flaming, and frozen. Regular are no real threat, but the flaming can burn wood shield and set you on fire for a few seconds and the frozen can freeze you on contact (don't use the clawshot!).
The first swing you take will knock their wings off, and they'll start hopping on the ground. If you don't finish them, they will take flight again (only the next shot will kill them anyway).
Bulblin
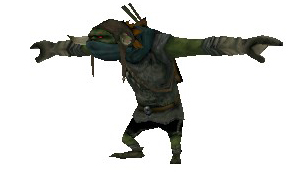 Bulblin |
Locations: Everywhere
Threat Level: 4/10
Effective weapons: Bow, Sword
Breakdown:
Twilight Princcess's answer to Zelda's standard Molblin enemy. Bulblin are semi-intelligent thieves. They use two basic weapons: clubs and bows. Clubs are easy to kill with just a hit or two. The bows are harder, as they are flaming bows with the same draw time as you, making them hard to snipe, yet they run away really fast as well, making them hard to get with your sword.
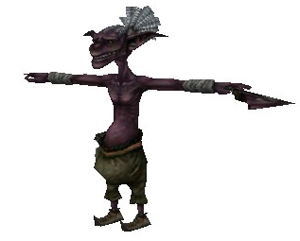
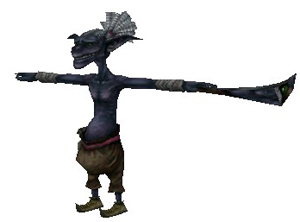
Chilfos
 Chilfos |
Locations: Snowpeak Ruins
Threat Level: 6/10
Effective weapons: Ball and Chain, Bomb Arrows, Sword
Breakdown:
They use Javelins as their main weapon; Javelins that they can regenerate after being thrown. They'll throw them from a distance and up close use it like a spear. The javelins are made of hardened ice, meaning they can take several hits from your sword before breaking. Best bet is to either disarm them with a bomb arrow, then use a second to finish them before they rearm, or use a jump attack to destroy the javelin, then unleash a flurry to finish them.
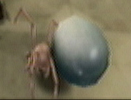
Chu Worm
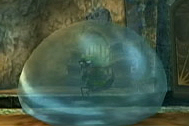 Chu Worm |
Locations: Lakebed Temple
Threat Level: 1/10
Effective weapons: Clawshot, Sword, Bomb Arrows
Breakdown:
These little bugs roll around in bubbles made of, I would guess, Chu. These bubbles are impervious to damage from anything other then explosives. You have two options when killing them: use a bomb arrow to completely destroy the bubble, or use the clawshot to snatch them out then kill them before they get back in.
ChuChu
 ChuChu |
Locations: Everywhere
Threat Level: 1/10
Effective weapons: Sword, Clawshot
Breakdown:
These are actually a helpful enemy, as when you kill them they reduce to jelly that can be scooped up and stored. They like to cling to ceilings and drop on your head. They also have a nasty habit of absorbing one another to form a giant chuchu that takes much longer to kill (you have to break it into pieces first), and is always Purple, the most useless of the jellies.
Purple Chu: Random effect (usually hurts you)
Yellow Chu: Acts as oil for Lantern
Red Chu: Replenishes 8 hearts
Blue Chu: Replenishes all hearts
Rare (Gold) Chu: Replenishes all hearts and increases attack power
Darknut
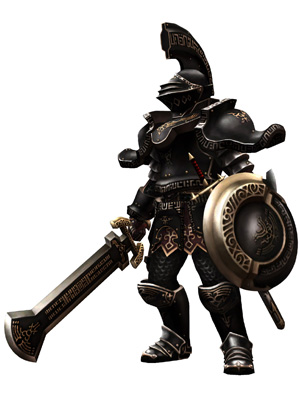 Darknut |
Locations: Temple of Time, Hyrule Castle
Threat Level: 9/10
Effective weapons: Sword, Bomb Arrows
Breakdown:
Darknuts are probably the hardest enemies in the game, excluding bosses (even including bosses, they still rank up there).
In their first stage, they are clad head-to-toe in thick armor and carry a huge shield. They use one of two huge weapons: Club or Sword. Clubs do more damage, but are more open to counterattacks after swinging. Your only chance it to either get them after they swing for the brief window they are open, use the Backslice, or use the Helm Splitter. Bomb Arrows also kind of work if you can get at a distance and get them to stand up and start walking normally (when they are crouched over behind the shield they wont work).
After you knock off all their armor, they will throw their large weapon at you and draw a smaller (yet still huge) sword. You'd think them easier to hit, but not. They can block anything with the sword. Further, they are a lot faster, and favor lunging attacks that don't leave them open. Your only hope here is to use the Backslice or Jump Strike to break their guard.
Darknuts also come in three types: Black, Red, and Blue. Black is the weakest, yet the only one you'll face outside the Cave of Ordeals. Red is a lot faster and more aggressive, but wears less armor. Blue is the best; it shares the same traits as the Red, yet has more armor then the Black.
Deku Baba
 Deku Baba |
Locations: Everywhere
Threat Level: 2/10
Effective weapons: Sword
Breakdown:
Use your sword to kill them. Not hard. They will lunge at you if you aren't careful, but you will usually kill them before that.
Deku Like
 Deku Like |
Locations: Forest Temple
Threat Level: 1/10
Effective weapons: Bombs
Breakdown:
If you get close or try to jump over them, they'll eat you and do some damage. However, this is easily avoided by paying attention and throwing a bomb (er, bombling, as you wont have bombs yet) into them.
Dodongo
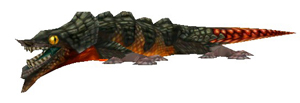 Dodongo |
Locations: Goron Mines
Threat Level: 4/10
Effective weapons: Sword, Bow
Breakdown:
These oversized lizards like hot places and breath fire (...or they just breath fire and MAKE it hot...). they are only vulnerable in the tail, but are too fast for you to get behind after the notice you (before that you can snipe them). You have to wait for them to start breathing fire, then strife beside them and use a spin attack.
Freezard
 Freezard |
Locations: Snowpeak Ruins
Threat Level: 7/10
Effective weapons: Ball and Chain
Breakdown:
These giant ice sculptures cant move, but they are rock solid and cant breath a frigid breath that will freeze link and do constant damage. The ball and chain is it's only weakness. You have to hit it twice. Worse yet, the range of his breath is the exact length of the ball and chain, meaning you have to get in range to hit it. Wait for it's breath to stop, then roll in and swing quickly! After being demolished, they will reduce down to several mini-freezards.
Also, they get bonus points for looking like Sheegoths from Metroid Prime. :)
Gohma Larva
 Gohma Larva |
Locations: Temple of Time
Threat Level: 4/10
Effective weapons: Sword, Bow
Breakdown:
A slightly larger version of Baby Gohma. Still not a threat. They attack slowly and don't do much damage.
Guay
 Guay |
Locations: Hyrule Field, Gerudo Desert
Threat Level: 1/10
Effective weapons: Sword, Bow, Clawshot
Breakdown:
Annoyance level: 10/10. These things are like over-aggressive Keese that travel in swarms. Just as you climb to the top of a platform, bam! Back down again. Luckily, they are positioned in any key areas, so you likely wont run in to any at all.
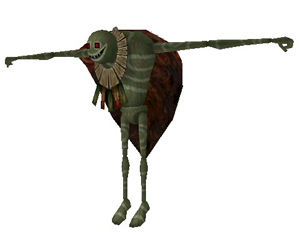
Helmasaur
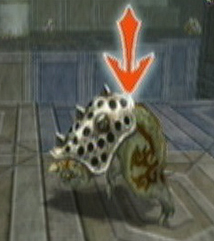 Helmasaur |
Locations: Hyrule Field, Lakebed Temple, Temple of Time, City in the
Sky
Threat Level: 3/10
Effective weapons: Clawshot, Sword
Breakdown:
They wear a steel-type helmet on their head and charge at anything that moves. You can easily get behind it and attack, but you can also use the clawshot to snatch their helmet off, making them vulnerable from all sides.
Helmasaurus
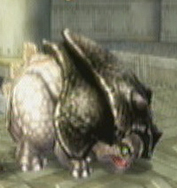 Helmasaurus |
Locations: City in the Sky
Threat Level: 5/10
Effective weapons: Sword
Breakdown:
An older Helmasaur, their bodies have formed around the steel helmet, making it part of their body. Their larger size also means more damage. Roll to the side and attack from behind.
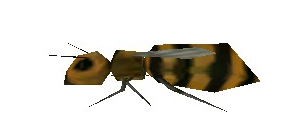
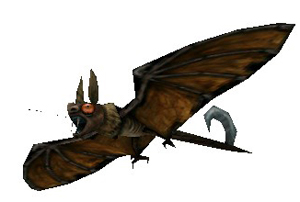
Kargarok
 Kargarok |
Locations: Hyrule Field, City in the Sky, Hyrule Castle
Threat Level: 3/10
Effective weapons: Sword, Bow
Breakdown:
They will fly around and attack anything that gets within their range. Their large size makes them much easier to snipe from a distance. Note that they take two sword attacks to bring down, so just because they've been lying on the ground for five minutes doesn't mean they're dead.
Keese
 Keese |
Locations: Everywhere
Threat Level: 1/10
Effective weapons: Sword, Bow, Clawshot
Breakdown:
The bats of the Zelda world. These annoying creatures are everywhere there isn't any light. They fly erratically and are so small they are hard to snipe. You'll have to get their attention and wait for them to get close before attacking.
They also come in three types: Regular, flaming, and frozen. As usual, the flaming will burn wood equipment and the frozen will freeze link (you can still use the clawshot, as it will push them back).
Leever
 Leever |
Locations: Hyrule Field, Gerudo Desert, Arbiter's Grounds
Threat Level: 6/10
Effective weapons: Sword, Bow
Breakdown:
Leevers stay underground and wait for vibrations of something above it. They also live in colonies and hunt in circular formations. If you wonder over one, they will pop up and surround you, circling around you, then close in and charge, only to dig back in afterward. Your best shot is to use a spin attack as they close in.
Lizalfos
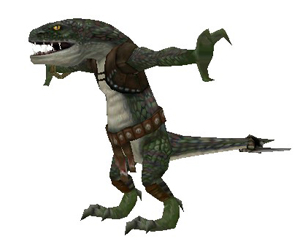 Lizalfos |
Locations: Hyrule Field, Temple of Time, City in the Sky
Threat Level: 5/10
Effective weapons: Sword, Bow
Breakdown:
Lizalfos are aggressive and unrelenting, if not a little stupid. You can easily take them out with regular sword combos.
Mini-Freezard
 Mini-Freezard |
Locations: Snowpeak Ruins
Threat Level: 4/10
Effective weapons: Sword, Ball and Chain
Breakdown:
These are more deadly on ice, as they slide around like a hokey puck when you hit them, and they'll freeze you on contact. Your best shot is to take a group out at once with the Ball and Chain. If you cant, spam the spin attack to prevent them from coming up behind you.
Moldorm
 Moldorm |
Locations: Gerudo Desert, Arbiter's Grounds
Threat Level: 2/10
Effective weapons: Sword, Bow, Clawshot
Breakdown:
These moles burrow through the ground at astonishing speed. Once by their prey, they leap up and bit. Your only chance is after they leave the dirt. Alternately, you can use the clawshot and pull them out yourself. The larger ones aren't any different, just easier to hit.
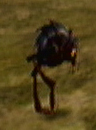
Peahat
 Peahat |
Locations: Hyrule Field, Gerudo Desert, City in the Sky
Threat Level: 0/10
Effective weapons: Clawshot
Breakdown:
Not enemies in the least. They act as mobile clawshot targets. And to think, these are the razor-bladed, blood-thirsty things that chased you all around Hyrule in OoT.
Poe
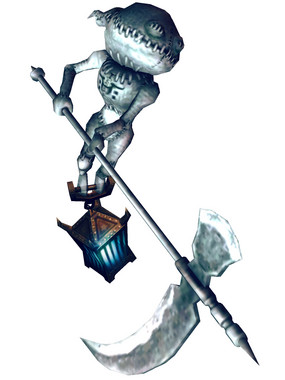 Poe |
Locations: Everywhere
Threat Level: 3/10
Effective weapons: Fangs
Breakdown:
Poes are special enemies that are needed for the Poe Soul side-quest. You can only attack them in Wolf form, and they only appear at night. In human form you can only see the lantern. You'll hear the menacing laugh and deep breath before they swing their large scythe. After two jump attacks, you HAVE to use the prompt to finish them.
Poison Mite
 Poison Mite |
Locations: Arbiter's Grounds
Threat Level: 0/10
Effective weapons: Sword, Lantern
Breakdown:
Despite their name, they do no damage to Link. Rather, they just slow you down and make you sink faster. A simple spin attack will disperse them for good; the lantern will keep them at bay.
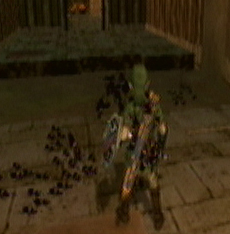
Puppet
 Puppet |
Locations: Sacred Grove
Threat Level: 6/10
Effective weapons: Sword, Bow
Breakdown:
These wooden monsters are summoned by the Skullkid to keep you on your toes while wondering the Sacred Grove. They are literally infinite in number. It only takes two swings to bring them down however.
Rat
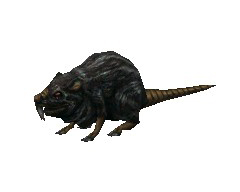 Rat |
Locations: Everywhere
Threat Level: 1/10
Effective weapons: Sword, Bow, Clawshot
Breakdown:
Rats often travel in groups. They can be hard to spot due to their size and color. Listen for the squeaks. Easily dispatched with a spin attack.
They also have a cousin in the form of a ghost. Ghoul Rats appear in the Arbiter's Grounds and Hyrule Castle. They can only be seen and attacked in Wolf form and act similar to the Poison Mite.
ReDead Knight
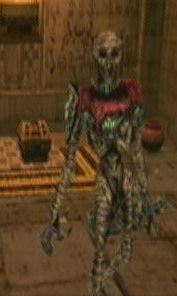 ReDead Knight |
Locations: Arbiter's Grounds
Threat Level: 7/10
Effective weapons: Sword, Ball and Chain, Bomb Arrow
Breakdown:
Basically the same as Redeads, only they carry a huge sword. I guess they prefer purée instead of soup. They'll only activate when you come near. They will let out an ear-shattering scream that leaves link frozen. Shake the controller to break free, then dodge quickly. The ball and chain can take them out with one shot, and the bomb arrows three. Their slow speed makes the sword work just fine, however.
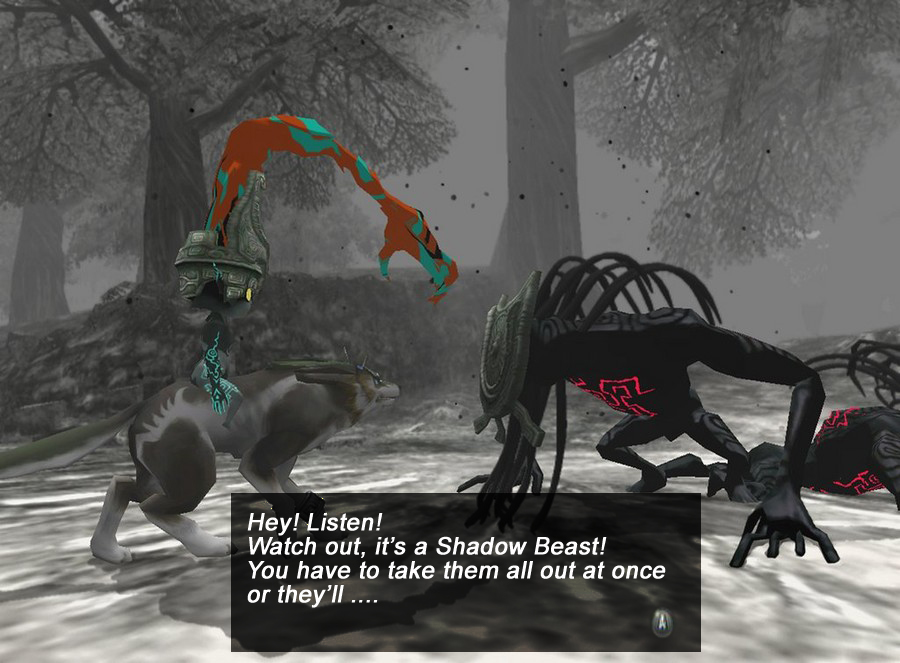
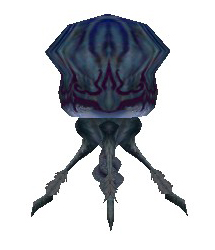
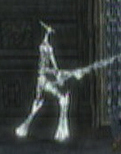
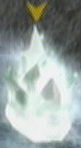
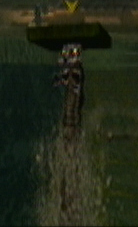
Shadow Beast
 Shadow Beast |
Locations: Everywhere
Threat Level: 8/10
Effective weapons: Sword
Breakdown:
Shadow Beast and Zant's right hand. They can create warp points and fall right on top of you. However, defeating them gives you power over the point they created. They are large and tough beast, taking several strikes to bring down. Further, if you only leave one left standing, it will revive his comrades, meaning at some point you have to take at least two out at once. Spin attacks work best.
There is also a special Shadow Beast shown during the cutscenes that are larger and obviously more powerful. While they have no official name, they are often called Twilight Assassins or Twilight Guards.
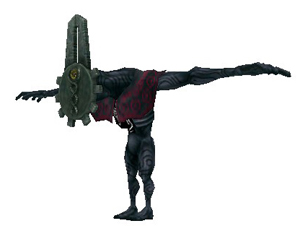 Twilight Assassin |
Further, the disk contains what is an early beta version of a Shadow Beast that can give you nightmares O.o
Personally, I think they should have stuck with it.
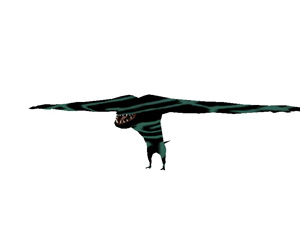 Beta Shadow Beast |
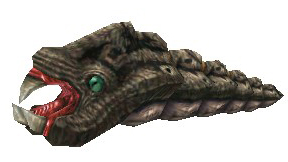
Shell Blade
 Shel Blade |
Locations: Lakebed Temple
Threat Level: 5/10
Effective weapons: Clawshot, Sword
Breakdown:
Shell Blades are only vulnerable right before they attack. They'll open their shell revealing the adductor muscle. Hit it with the clawshot if you want to stun it, but you'll have to use your sword to finish it.
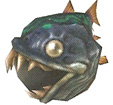
Skullfish
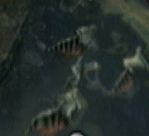 Skullfish |
Locations: Lakebed Temple
Threat Level: 1/10
Effective weapons: None
Breakdown:
Piranhas. That's all. If you see them in the water, swim out! There's no way to kill them.
Skulltula
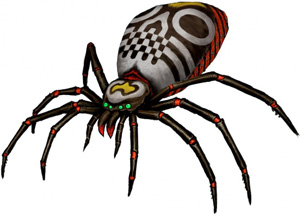 Skulltula |
Locations: Hyrule Field, Forest Temple
Threat Level: 3/10
Effective weapons: Sword, Bow
Breakdown:
Skulltula will block most in coming attacks with it's front legs. You can knock it off balance with the bow, then hack away. I've never really been hit by one, so I guess they aren't that bit a threat :/
Skullwalltula
 Skullwalltula |
Locations: Everywhere
Threat Level: 1/10
Effective weapons: Bow, Clawshot, Slingshot
Breakdown:
These little spiders hang on the vines you often climb. If you don't take them off, they'll come over and knock you off. One shot is all it takes.
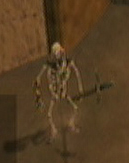
Stalfos
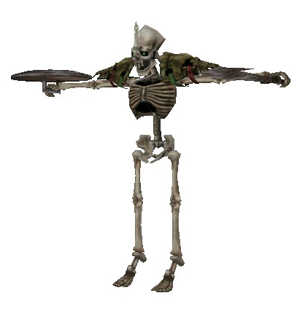 Stalfos |
Locations: Hyrule Field, Arbiter's Grounds, Hyrule Castle
Threat Level: 2/10
Effective weapons: Bomb arrow, Sword
Breakdown:
They look really menacing, and in pervious games were really menacing, but in Twilight Princess the bomb arrows can kill in one shot. Otherwise, the Helm Splitter takes them down in one shot, but only reduces them to bones, you'll have to plant a bomb on the bones to finish them off.
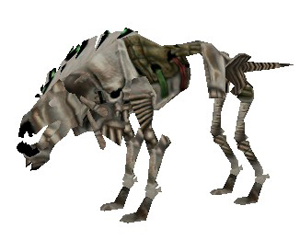
Stalhound
 Stalhound |
Locations: Hyrule Field, Hyrule Castle
Threat Level: 4/10
Effective weapons: Sword
Breakdown:
They'll come out of the ground with little warning and often are in packs. They're not very aggressive, so no worries there. Spin attacks are most effective.
Stalkin
 Stalkin |
Locations: Arbiter's Grounds
Threat Level: 5/10
Effective weapons: Sword
Breakdown:
They're only a threat because they attack in droves. Seriously, I don't think you EVER fight less then 12 at once. Though they go down in one shot, their sheer numbers makes the fight difficult, little pointed sticks poking you (and we only learned how to defend against bananas :( )
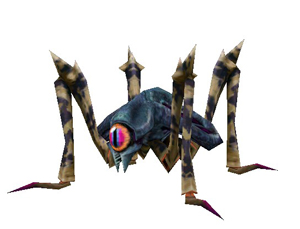
Tektite
 Tektite |
Locations: Hyrule Field, Lakebed Temple, Temple of Time
Threat Level: 3/10
Effective weapons: Sword
Breakdown:
Hoping around constantly, jump attacks are a bad idea. Spin attacks, however, are the answer to everything, just one cuts their legs. The difference between the red and blue is that the blue can travel on water while the red are more aggressive.
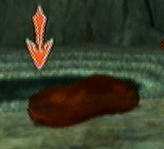
Tile Worm
 Tile Worm |
Locations: Forest Temple, City in the Sky
Threat Level: 3/10
Effective weapons: Boomerang, Sword
Breakdown:
These nuisances disguise themselves by putting tiles on their head and digging in the dirt. Step on the tile and you're in for a ride. The trick here is the Boomerang will rip them right out of the ground, making them easy pray. However, if you don't take them down, they'll dig back in.
Toadpoli
 Toadpoli |
Locations: Hyrule Field, Goron Mines
Threat Level: 1/10
Effective weapons: Bow
Breakdown:
Toadpoli are... strange frogs. Probably and older form of the Toado. They only appear in two places that I'm aware of: In Goron Mines in a couple lava pools, and in a Hidden Grotto in Lake Hylia. They'll spit rocks at you that are easy to dodge. (they're probably linked to the Octoroks).
Torch Slug
 Torch Slug |
Locations: Goron Mines
Threat Level: 1/10
Effective weapons: Bow, Clawshot
Breakdown:
They apparently are animated lava. If you get close they let out a plume of the stuff. Keep your distance and snipe them.
White Wolfos
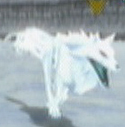 White Wolfos |
Locations: Snowpeak Ruins, Snowpeak
Threat Level: 6/10
Effective weapons: Sword
Breakdown:
Unlike the easy one from OoT, these hunt in packs and have the ability to pop out of the snow, attack, and go right back in. They like to encircle you, and wont attack if you're already swinging your sword or have Midna's energy ring up. They are rather hard to kill because of this and the fact that they can take a lot of hits.
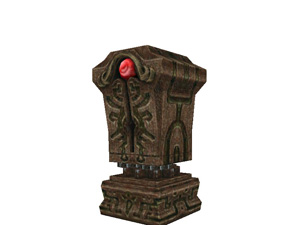
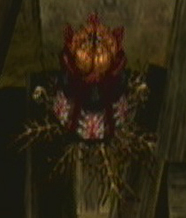
Zant Head
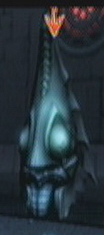 Zant Head |
Locations: Twilight Palace
Threat Level: 3/10
Effective weapons: Sword
Breakdown:
You'll have to defeat the Zant Heads to get keys to progress through the Palace. This is easy enough. They are large, relatively immobile targets. Their only real attack is a slow moving energy ball that is generally inaccurate to boot. The only thing they have going is that they can teleport around the room.
Ummm… there's a weird lantern dude thing that I saw in one of the things in the layanru province or something like that. Do you know what they are and how to kill them?
Ya know, Yer guide isn't that good if ye lie. Skullfishes is the easiest mob to kill... or almost. I came here to know if ye can fish 'em. No answer.
hey what is that big eels name that u have to fight in the lakebed temple?
you CAN kill a skullfish. go fishing or swim. when they grab you get your iron boots to sink down. then take your sword and BAM! instant dead fish
ReDeads are as SCARY as HELL
They scream out as if they're in pain and that scream paralyzes Link and then they attack. Are they people from the dead?O O
_
beta twilight beast....
my sister + beta twilight beast = *scream*
me + beta twilight beast = I THOUGHT THIS WUZ SUPPOSED TO BE SCARY!!!!!!
what about ghoul rats...
That Skulltula thing is creepy O_O
what about that baboon or the giant plant in forest temple
Oh man this so needs to be updated right guys like whoever did this missed so many enamies like ghoul rats shadow monsters mot counting ze twilight assain and the regular shadow beast for one the twilight kargarock the twilight keese and most importantly the shadow deku babby then there is king bulblin and i could go on forever almost.
Ok kids I will tell you the enemies missing in here for starters Kargarock, Dark Link, ice,fire keese, and those shadow gaurd things found whaen entering eldin province as the wolf link hope this helped you guys.
you forgot ghoul rats!!!
You can easily kill the skullfish; you can use a water bomb, you can just swing your sword (with the help of your trusty iron boots!) or you can simply go fishing. The catch is "forbidden" so it won't be added to your fishing log, but you can easily dispatch them on land with your sword before they jump back into the water.
What about the giant poes that grab the blue light in the sand temble? They are much larger than regular poes and when you kill them dust comes streaming out of his cloak.
The Shadow Beast always freakin me out hahaha i gotta tell myself 'its a game mayn'
But they are really scary haha
The same for Beamos o.O