Bravil Quests
The Elder Scrolls IV: Oblivion Walkthrough and Guide
The Elder Scrolls IV: Oblivion Guide - Side Quests
Bravil Quests
This side quest contains the following sections, just scroll down to read, or use the anchor links in the list below to jump straight to the section you are interested in.
Caught in the Hunt
The Forlorn Watchman
Through a Nightmare, Darkly
Buying a House in Bravil
Caught in the Hunt
While in Bravil, you may possibly overhear NPCs discussing Ursanne Loche's husband Aleron, who has recently gone missing. Try selecting the 'Rumors' while talking to a random NPC in Bravil, and this quest should appear in your journal. Once the quest is in your journal, it's just a matter of locating Ursanne Loche and inquiring about her missing husband. Have 'Caught in the Hunt' set as your active quest, and follow the marker on your compass to locate Ursanne. Ask Ursanne about Aleron to learn that he is an avid gambler, and ended up owing money to the wrong people.
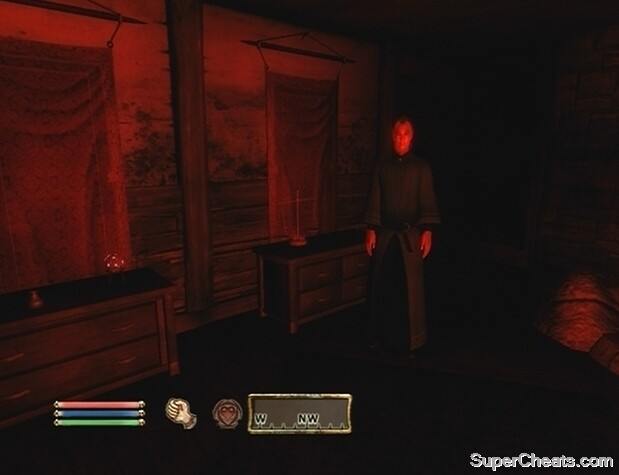
Kurdan gro-Dragol, who is an Orc usurer, can be found in the Lonely Suitor Lodge in Bravil. Locate the Lonely Suitor Lodge and step inside. Kurdan gro-Dragol should be nearby; if not, try checking upstairs. You may have to persuade or bribe Kurdan to raise his disposition before he will give you any details. Once Kurdan is willing to talk, he tells you that he knows where Aleron is, but requires that you retrieve the Axe of Dragol, a family heirloom that was lost by one of his relatives on Fort Grief Island.
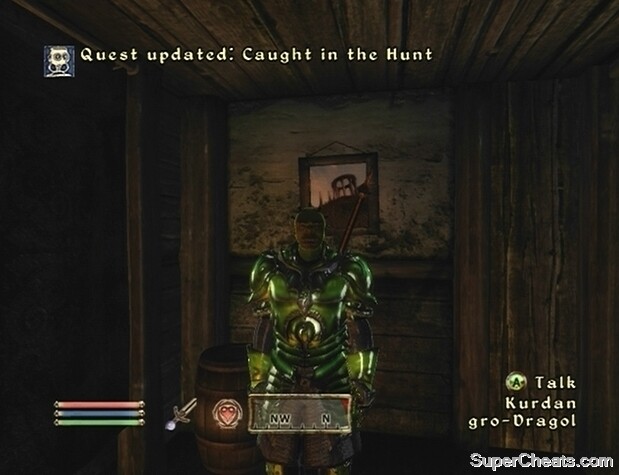 Look for Kurdan gro-Dragol in the Lonely Suitor Lodge and ask him about the missing Aleron Loche. |
Before setting out, ensure that you have a decent supply of health and magicka restoration items, repair hammers, and plenty of arrows if your character is equipped with a bow. When ready, speak to Kurdan gro-Dragol and tell him so. Make your way to the boat by the dock in Bravil, and take it out to Fort Grief Island.
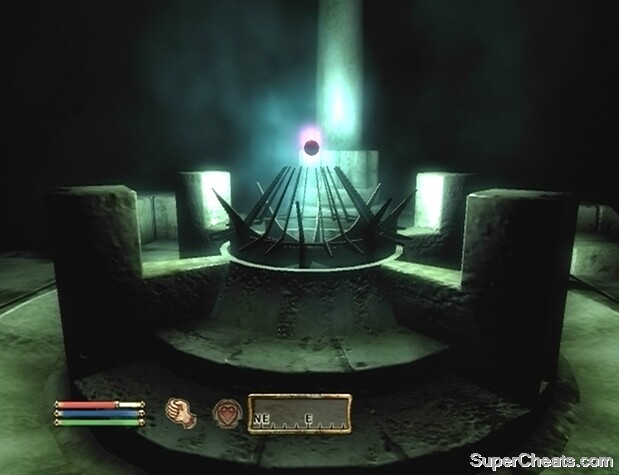
When you reach the island, approach the front gate and look for Turn Handle on the ground to the right of it. Activate the switch to open the gate, and then proceed inside to find Aleron. Speak to him to learn that there is no Axe of Dragol, as that was just a ploy to lure you to Fort Grief, where you are to act as prey in Kurdan gro-Dragol's sick game, dubbed 'Hunter's Run.' The only way to leave the island is by entering Fort Grief and killing the hunters within, as one holds the key to the front gate. Locate the door to the Hunter's Run and head inside.
Each hunter participating in the Hunter's Run will be marked on your compass, provided Caught in the Hunt is set as your active quest. You'll need to kill all of the hunters in the first area, then move on to the 'Hunter's Abyss' area and kill the last hunter there, as he holds the key to your freedom. Use your compass to locate the hunters in the initial area. Be sure to search each of their corpses and remove the key they hold. As you are walking through the Hunter's Run, be wary of the various traps that have been planted.
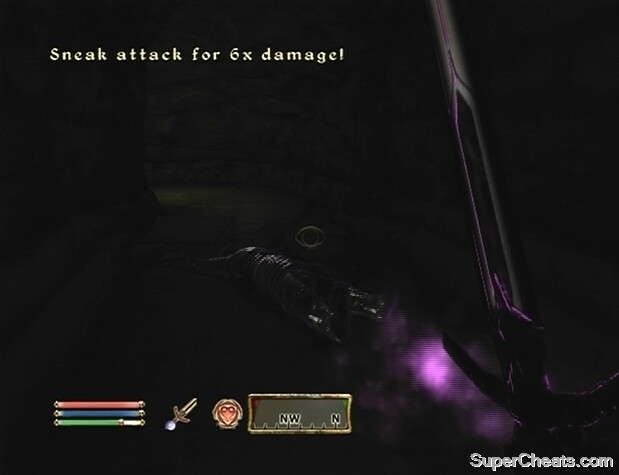 Kill Kurdan's hunters in the Fort Grief dungeon and retrieve the Hunter's Run keys. |
When you've killed the two hunters and acquired the first two keys, make your way to the southeast end of the map to find the door to the Hunter's Abyss. Don't try following the arrow on your compass to this door, as it may be pointing to another door that is unreachable. Kill the final hunter here, then remove the Fort Grief Door Key from his corpse and backtrack to the entrance.
Once outside, defeat Kurdan gro-Dragol, remove the real key from his corpse, and head back inside the Hunter's Run. Upon entering, open the door on your left, activate the switch in here to open the front gate, then return outside and take the boat back to Bravil. Once back in Bravil, locate Ursanne and fill her in; she'll reward you with the 'Biography of the Wolf Queen' book for your efforts. Read this book to raise your character's Speechcraft skill by one level.
The Forlorn Watchman
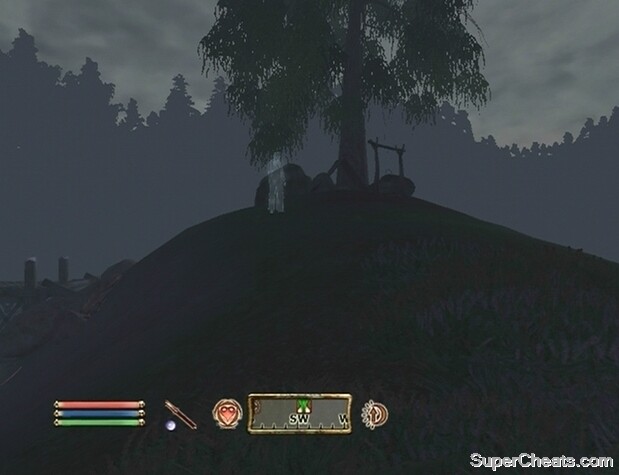
Speak to almost any NPC in Bravil and select the 'Rumors' dialogue option to learn that an old ghost can be seen wandering the shores of the Niben Bay at night. You are told to seek Gilgondorin at the 'Silverhome on the Water' inn for more information. Locate the inn and ask about the ghost. Gilgondorin will tell you about the ghost, and mark its spawn location on your map. The Forlorn Watchman appears at the Bawnwatch Camp each night at 8:00PM. When the time comes, follow your compass to the location marked on the map.
When you spot the ghostly figure along the shores of the Niben Bay, stand back and observe it for a moment. When the ghost begins to move, follow him. Eventually, after a long hike, the ghost will stop to converse with you. You are told of a location known as the 'Mouth of the Panther.' Return to the Silverhome on the Water inn in Bravil and ask Gilgondorin about the Mouth of the Panther to have the location marked on your map.
 The Forlorn Watchman appears at the Bawnwatch Camp each night at 8:00PM. |
Leave Bravil and follow your compass to reach the Mouth of the Panther. When you reach the spot, you'll find the Emma May, a small cargo ship, wrecked on the shore. Before you proceed, ensure that you have an enchanted, silver, or Daedric weapon and some way of creating light, as you will encounter ghosts in the Emma May and it is quite dark. When ready, approach the opening in the side and enter the Emma May Upper Deck.
Inside, you'll encounter the spirits of the former crew of the Emma May. Clear away the ghosts in the first area, and then look around for a wooden door. Open the door and grab the Emma May Log on the table next to the bed in this room. Then, use the Trap Door in the first area to reach the Emma May Mid Deck. Kill the spirits down here and then proceed through the Trap Door to the Emma May Lower Deck.
 Use Grantham Blakeley's Map to locate his treasure. |
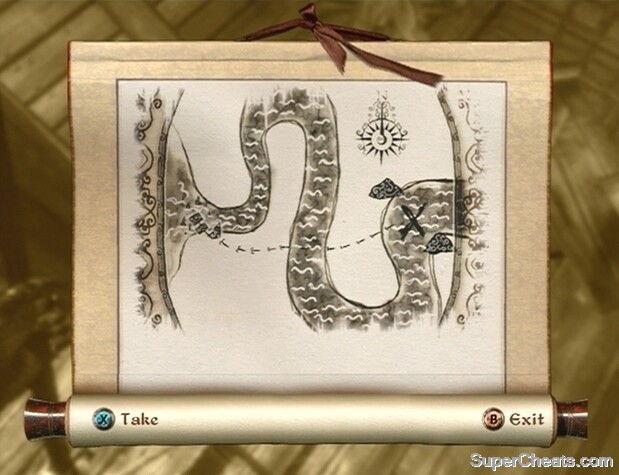
In the lower deck, you will encounter the spirit of Gable the Traitor. Defeat the ghost of Gable, and remove the small key take from its remains. With the key in hand, open the door in this area and activate the Hanging Skeleton. The Forlorn Watchman will then appear and thank you for releasing him. He will also let you take his map, which leads to a treasure chest. Take the map and exit the Emma May. Follow the arrow on your compass to reach the treasure. You'll come to a small body of water; dive down and open the treasure chest to find a wealth of gold and jewels.
Through a Nightmare, Darkly
To begin this quest, speak to Kud-Ei in the Bravil Mages Guild. Select the 'Henatier' dialogue option while speaking to her to learn about her friend. When ready to rescue Henatier, speak to Kud-Ei and tell her so. Follow Kud-Ei into Henatier's House. Inside, you'll find Henatier immobilized, supposedly trapped in his dreamworld. Work through Kud-Ei's dialogue tree to learn more about Henatier and how he came to be in this state. If you wish to assist Kud-Ei, you will need to enter Henatier's Dreamworld by equipping the Dreamworld Amulet that he created. Once you are prepared, speak to Kud-Ei and select the 'Yes, I'm ready' dialogue option. Equip the Dreamworld Amulet and use the spare bed to travel to the Henatier's Dreamworld.
Upon your arrival, you'll discover that your inventory has been wiped clean, save for the Dreamworld Amulet. You are also unable to use any magic. Speak to Henatier to learn that he has lost some things in this dreamworld, and needs you to retrieve them so the both of you can return to the real world. To retrieve Henatier's lost items, you'll have to undertake four different trials. The trials do not need to be completed in any specific order, but for the sake of following this walkthrough, complete them in the order presented here. When you're ready to get started, approach the door marked 'Test of Patience' and enter.
 Equip the Dreamworld Amulet and sleep in the bed next to Henatier's to enter his Dreamworld. |
At the start of the Test of Patience, open the study and remove the Mysterious Scroll. Ahead are some floor panels that will trigger a trap as you pass over them. If your character has a large amount of health, there is no need to be cautious here; just run straight through. Create a separate save file before attempting this, however. As you lack potions and cannot cast spells, you can instead press the Back/Select button to open up the wait menu, and then pass one hour to completely restore your character's health.
If you can't make it past the bolts without dying, you'll have to study the map to determine that path that won't set off the traps. It is quite dark in this area, so if you are having trouble finding your way, view your local area map to ensure that you're headed in the right direction. You will eventually come to another group of floor panels; you can perform a couple of jumps across here, sustaining minimal damage. If necessary, wait for an hour to fully restore your character's health before continuing. Cross the next set of floor panels and activate the 'Element of Patience' to return to the Dreamworld lobby.
Next, head through the door marked 'Test of Perception.' The trail ahead of you is littered with traps. Try to avoid the traps as best you can, though it can be difficult. If you are having difficulty seeing, you can always look to the local area map to ensure that you're headed in the right direction. You will soon reach the Element of Perception; take it to return to the Dreamworld lobby.
 Collect the lost elements of Henatier's mind to free him from his Dreamworld. |
Back in the lobby, locate the stairs on the top level and then the door marked 'Test of Courage.' Remove the Potion of Water Breathing from the Breathe jar, down it, and follow the underwater path. It's quite hard to see, but at this point just keep on swimming down. You will encounter another Breathe jar underwater, so collect the Potion of Water Breathing that's inside if necessary. Enter the 'Grotto of Courage' area when you reach the wooden door and retrieve the Element of Courage from this room.
The final test, the Test of Resolve, is a bit more difficult that the others, but that really depends on your character's level and class. At the start, look for a jar marked 'Prepare' in front of you. There should be both a heavy armour set and a light armour set inside; the type of armour will vary depending on your character's level. There are also a few weapons to choose from, namely a blunt weapon, a blade weapon, and a staff for magic users.
When you've taken what you need from the jar, put on the equipment and continue through the door. In the dream arena, you are faced with two Dreamworld Minotaurs. The basic idea here is to concentrate your attacks on one of the Minotaurs, while at the same time trying your best to avoid the other. So, you'll have to keep moving. The Minotaurs are quite slow and their attacks are easy to dodge, but since you're facing two at once, you'll have to be careful If you're really having a difficult time, consider lowering the difficulty level for the time being, since you can't leave Henatier's Dreamworld until both of the Minotaurs have been defeated.
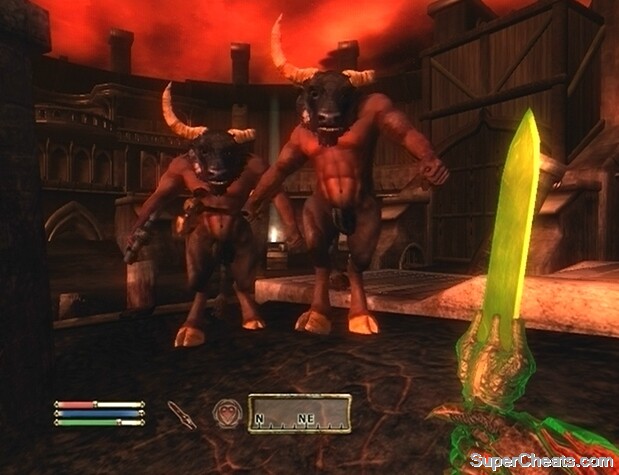 You're up against two Minotaurs in the Test of Resolve, but without your usual equipment. |
Once you have slain both of the Dreamworld Minotaurs, the path to the Element of Resolve will appear. Take the steps up to the sphere and grab it. With all four elements in your inventory, speak to Henatier in the lobby to return to the real world. Henatier will give you some magic scrolls as thanks.
Buying a House in Bravil
Speak to the Count of Bravil in the Castle Bravil Great Hall and inquire about buying a house in town. If the Count won't talk to you about the house, either persuade or bribe him to get his disposition above 60. He wants 4,000 gold for the house. Purchase the house, and he will give you the key. Follow the arrow on your compass to reach your new abode and step inside. If you wish to purchase some furnishings for your new home, visit The Fair Deal in Bravil and speak to Nilawen. You can purchase furnishings from her at a reasonable price.
There is a house on the Bravil docks that I am trying to find out how to buy. Does anyone know how I can buy it and furnish it?
I know that happened to me and I had to delete that profile and start all over again
In "Caught in the Hunt," I actually defeated Kurdan gro-Dragol in the Hunters Abyss and made my way outside then was stuck in the entryway of Hunters Run. I could not get to my weapons/magicka/map area at all, or pull out my weapon, just third person and sneak. I saved and quit thinking it just needed to reboot, and even switched players but to no avail. Please help or I am back to level 11 from reaching level 15. Yuk.