The Ronin
Saint's Row 2 Walkthrough and Guide
Saint's Row 2 Guide
The Ronin
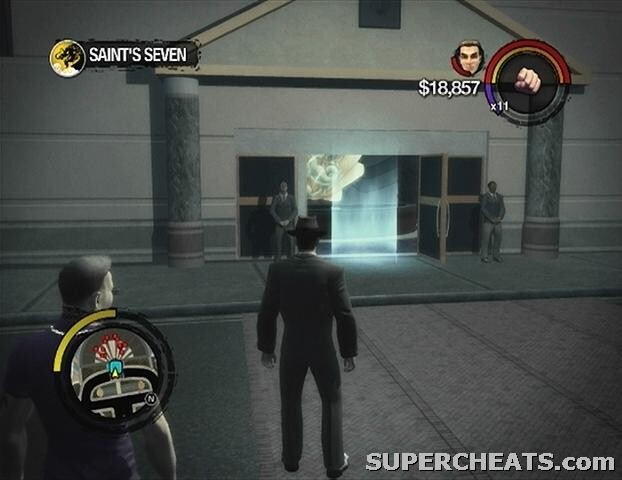
Mission 1: Saint's Seven
Get in the parked car with Johnny and follow the marked route to the Poseidon's Palace casino in the Hotels and Marina District. You may be tailed by some Ronin on the way there, but just ignore them and let Johnny do the shooting. The killing can start as soon as you enter the casino. All of the Ronin in the casino appear on your GPS; red squares denote Ronin on your level, while red triangles denote Ronin upstairs.
 |
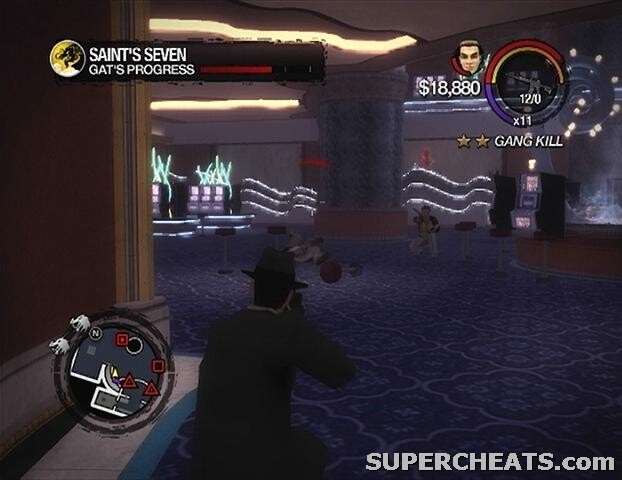
Your first objective is to kill all 15 of the Ronin guards. Luckily the guards aren't heavily armed, so clearing them out shouldn't be too much of a problem. Just be sure to take cover behind tables and slot machines if you're low on health. Once the initial batch of 15 guards has been dealt with, Johnny will take to rigging the vault room doors with explosives. You must protect him from Ronin while he does this. Remember that red triangles denote enemies above or below you, so the red triangles that appear on the GPS here mark Ronin in the rooms up the stairs that are on either side of the doors that Johnny is rigging.
You can crouch to improve your accuracy by clicking the Left Thumbstick on the Xbox 360 version and by pressing L3 on the PS3 version. Stand by Johnny and keep an eye on your GPS to determine where the enemies are coming from. Also pay attention to the 'Gat's Progress' bar in the top-left corner of the screen, because once the bombs have been rigged, you'll have to quickly clear the area to avoid getting caught in the explosion. As soon as Johnny finishes setting the bombs, sprint away from the doors to complete the objective.
 |
Now for the getaway. The Mule is a considerably sturdy vehicle, allowing you to barrel over most of the smaller vehicles on the road. Follow the route to Aisha's House and drive into the marker there to complete the mission.
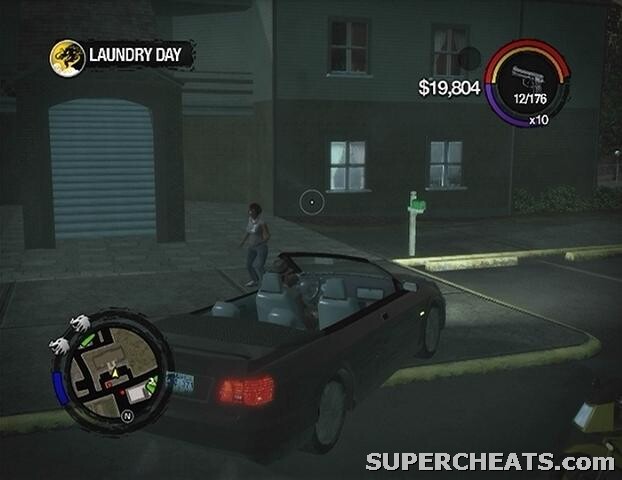
Mission 2: Laundry Day
Answer your cell phone after the cutscene and then hop in the car parked in the driveway. You're headed to see a used car salesman in the Trailer Park District. Get in the car after speaking the seller and start towards the arms dealer. You'll get a call from Pierce shortly after, informing you that the Ronin are on their way. Luckily the car you just purchased is quite fast, fast enough to allow you to avoid the Ronin completely.
When you reach the arms dealer, step out of the car and have a chat with him to obtain the powerful AR-50 gun. Unfortunately you won't be able to keep this weapon or car for very long, as your next objective is to resell the merchandise to a fence.
 |
The car must be in pristine condition or the fence will not buy it; luckily there's a repair shop right across from the fence's location. Make sure that all enemies in the vicinity have been taken care of before driving the vehicle into the garage. With the vehicle repaired, drive it back over to the buyer.
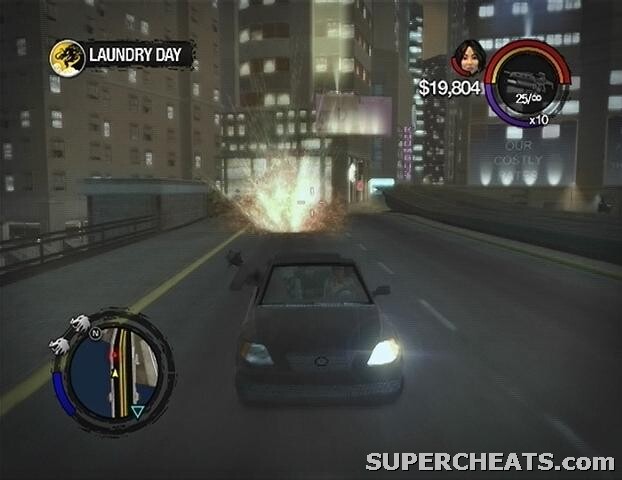
Before you're given the money, the fence first must take the merchandise to a lockup. You're riding shotgun. Armed with the AR-50, it's your job to protect the fence from the pursuing Ronin. The AR-50 has unlimited ammo, as well as a grenade launcher attached to it (pull LT on Xbox 360, press L2 on PS3). Use the AR-50's grenade launcher to blast pursuing enemy vehicles. Most of the Ronin gang members will follow on motorcycles, but there is one roadblock to watch out for. Keep an eye on your GPS to know when to look ahead.
 |
The mission is complete once the fence reaches her destination.
Mission 3: Road Rage
There are four to six Ronin bikers headed to the Saints hideout. You must disable all of the motorcycles to complete the mission. Fortunately you've been outfitted with an Uzi that has unlimited ammo for this task. There really isn't much to this; just get on the motorcycle, follow the markers on your GPS, and fire at the Ronin once they're in sight. All of the Ronin are headed in the same direction and travel down the same path, so simply following a single marker will allow you to track all of them.
You can use Saints Row 2's cruise control feature to make things a bit easier. When you're traveling at a fast enough speed, press the LB button on the Xbox 360 version or the L1 button on the PS3 version to activate cruise control. While cruise control is active, your vehicle will remain accelerated at that set speed, leaving you to only have to concentrate on steering and shooting. Cruise control is best used on long stretches of road, as it can be difficult to turn corners if you're traveling too fast.
Mission 4: Bleeding Out
There's a mess of Ronin outside, and Johnny is in critical condition. Your first task is to protect Johnny from enemies until the ambulance arrives. A timer in the top-left corner of the screen indicates how much time is left to go. The bar below it displays Johnny's health. The Ronin seem uninterested in Johnny for the most part, so your main priority here is to simply survive.
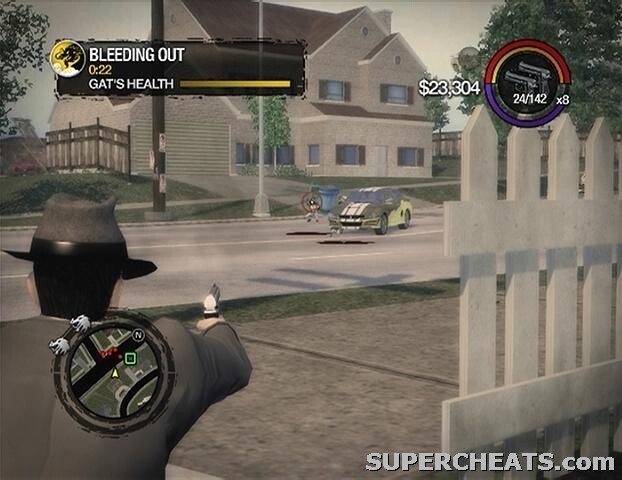 |
Crouch to improve your accuracy by clicking the Left Thumbstick on the Xbox 360 version and by pressing L3 on the PS3 version, and trigger Fine Aim by clicking the Right Thumbstick or pressing R3. Kill the Ronin in the street—running out to collect their ammo if need be—until the timer reaches zero. Unfortunately the ambulance never arrives, but your character quickly calls for another ride.
When the car arrives, you'll appear in the passenger seat armed with an RPG Launcher that has unlimited ammo. Simply turn around and blast the pursuing enemy vehicles until the driver reaches the hospital. The hospital is quite a ways out, but the car appears to be very sturdy, if not indestructible. Blasts from the RPG Launcher seem not to damage your own vehicle, so don't hesitate to fire at tailgaters.
 |
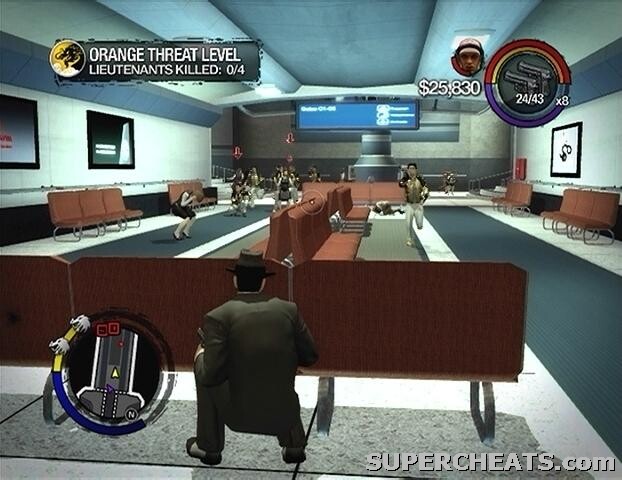
Mission 5: Orange Threat Level
The Ronin are set to arrive at the airport marked on the GPS in two minutes time. Get in the parked car outside of the mission house with Pierce and follow the marked route to reach the airport. When you reach the marker, drive around to the back entrance and hit the marker there to enter the airport.
Head for the stairs at the other end of the room and start firing at the Ronin at the top. There are four Ronin lieutenants to kill here, so take cover behind something and eliminate them, as well as the gang members surrounding them. Make your way to the second gate when the first batch of Ronin have been dealt with.
 |
After the brief cutscene, start after the two Ronin in the cart and keep up with them until they reach the exit. The two Ronin will step out of the cart when they reach the doorway that leads outside. The two Ronin then head for a parked motorcycle outside, so get out of the cart if you have to and gun them both down before they can manage to escape.
Mission 6: Kanto Connection
Get a vehicle and follow the marked route on your GPS to Kanto. When you reach the spot, step out of your vehicle, ignore the Ronin outside, and enter Kanto. Here your task is to best Jyunichi and surrounding Ronin in a sword duel.
Tap one of the shoulder buttons (LT/RT, L2/R2) just as an enemy's attack is about to connect to perform a counter attack. The normal Ronin can be killed with regular sword slices, but to kill Jyunichi you have to fully utilize counter attacks to drain his health bar. Jyunichi automatically counters normal attacks, so do not attempt to strike him. Don't get too close to him either, as he'll just throw you over his shoulder.
More lesser-Ronin will enter the fray to replace fallen ones, so don't bother with them unless they're right in front of you or about to strike. Hit Jyunichi with one or more counter attacks to bring him down and complete the mission. Completing this mission unlocks the Ronin melee style, which can be added to your character at a Plastic Surgeon's office.
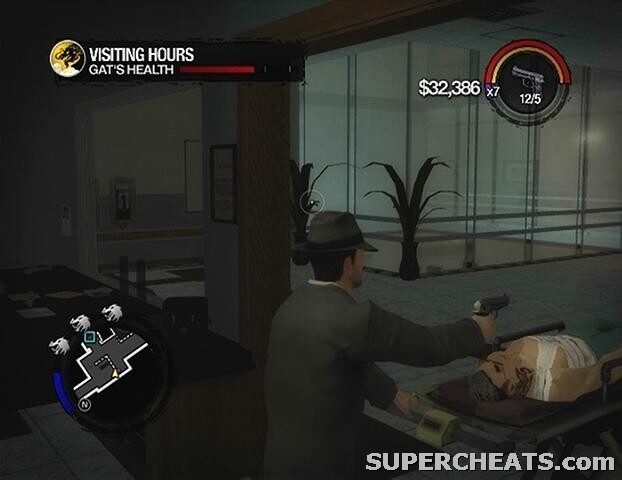
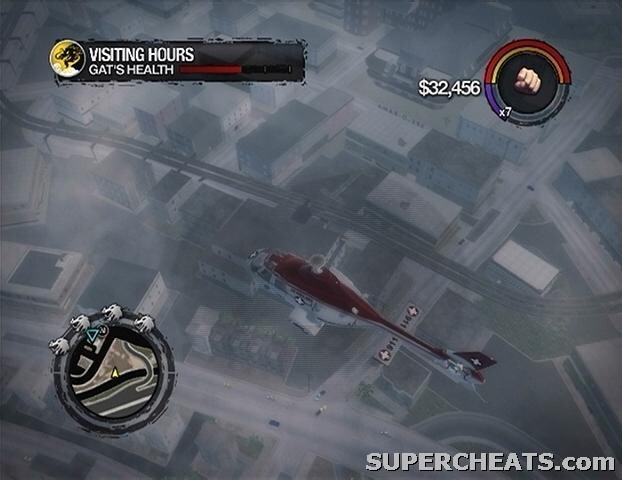
Mission 7: Visiting Hours
A bunch of Ronin have been sent to kill Johnny at the hospital he's being held in, so you're going to have to bust him out of there. Grab hold of the gurney and start pushing it down the hall. You're able to wield a weapon while pushing the gurney and you can even sprint too. There are plenty of Ronin in the hospital, and Johnny's health bar is depleting fast, so you're going to have to be quick and efficient here. Be sure to pick up the ammo dropped by the Ronin to avoid running out. Johnny can't take a whole lot of gunfire either, so clear the way quickly.
 |
Follow the marker on your GPS and gun down the Ronin in the hall until you reach the next section of the hospital. Luckily your character manages to find some medicine for Johnny which automatically restores his health bar completely. Make a beeline for the front door to find it blocked. Head back to the elevator to travel to a different floor.
Head to the other end of the hall and move the gurney into the marker on the rooftop. Again, some more found medicine restores Gat's health bar here. Fly the helicopter to the Saints Hideout building and land it near the marker in the parking lot to complete the mission.
 |
The Medical Helicopter is now available at your crib helipads.
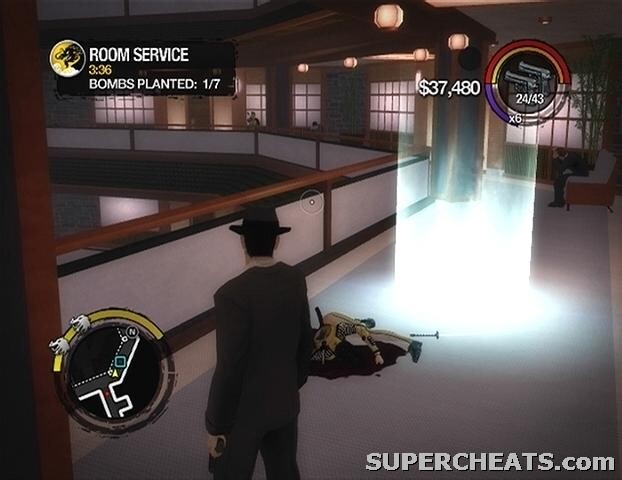
Mission 8: Room Service
Get in a car with Johnny and make your way to the hotel marked on the GPS. The hotel is packed with Ronin. Kill the five enemies on the ground floor and then head for the elevator that appears on the GPS. Your next task is to plant a total of seven bombs in the hotel. When the first bomb is set, the countdown begins, so you'll have to be quick about it.
There are two bomb spots on the second floor, marked by cyan squares on the GPS. Clear the walkway of Ronin, plant the two bombs, and then get to the stairs and take them up to the next floor. You have four minutes to plant all seven bombs, which starts when the first bomb is planted.
 |
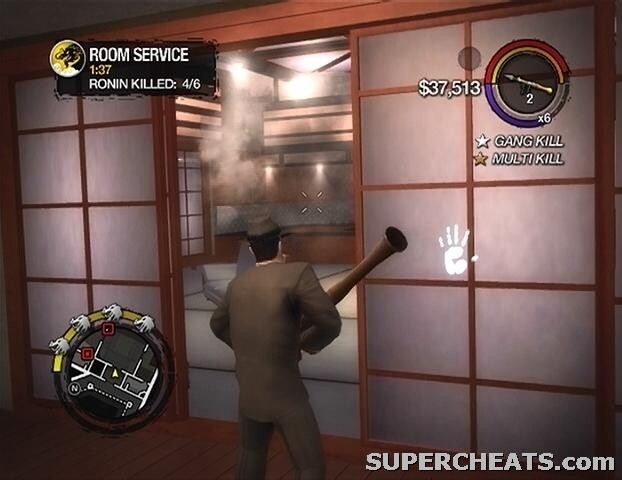
Plant the next four bombs on the two floors above, and then move on to the final floor. There is a group of Ronin waiting in the stairwell that leads up to the last floor, so be ready with a shotgun to blow them away. When the way is clear, head up the stairs to reach the top floor and place the last bomb.
Your next objective is to clear out the Ronin lieutenants in the penthouse suite. Time is still ticking, so you'll have to move fast. If you picked up an RPG Launcher from one of the downed Ronin on the walkway, use it to blast the four lieutenants in the first room, and then hit the other two in the adjacent room. If you don't have an RPG Launcher, use a shotgun or other powerful to quickly empty the room.
 |
When the suite is clear, exit the room and vault over the railing. While failing, press the Y/Triangle button to activate your parachute. All you need to do is land in the atrium to complete the mission.
Mission 9: Rest in Peace
It's time to take out Shogo here. If you have an AR-40 or a similar weapon, crouch down, enter Fine Aim, and fire at Shogo until he runs off. If you don't have a suitable weapon, pick off the lesser Ronin surrounding Shogo before filling him with lead.
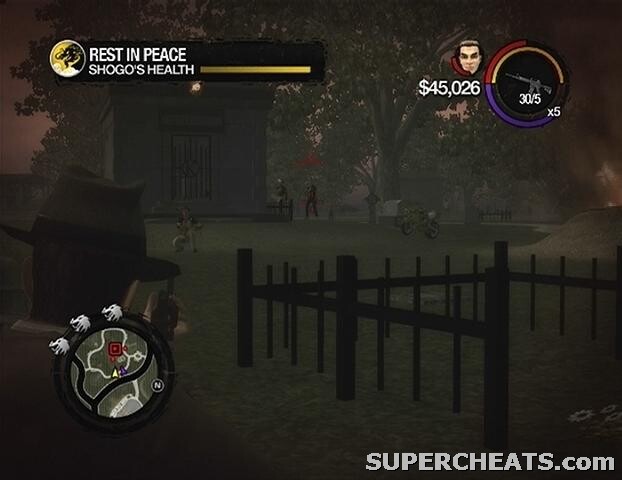 |
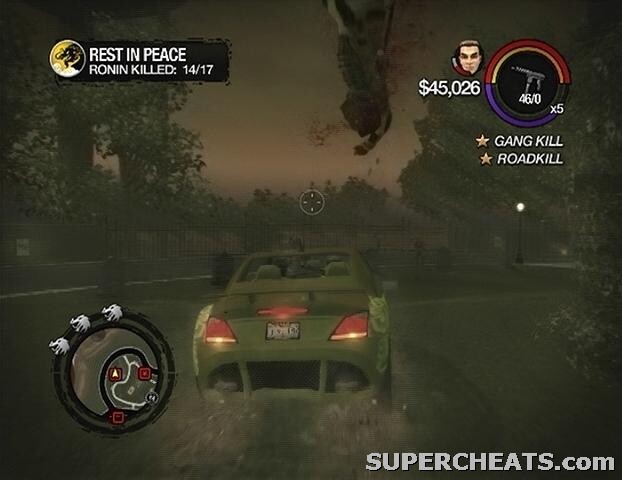
When about half of his health bar is depleted, Shogun will run off. Your next task is to kill the Ronin lieutenants marked on your radar. Immediately sprint away and take cover to avoid being overwhelmed. The easiest way to survive this fight is to take one of the Ronin cars, drive around, and hit the lieutenants in the graveyard. Wait away from the crowd of lieutenants and eventually a gang car will come after you. Kill the driver and passenger and get in the car with Johnny.
Once you're in the car, simply drive around the graveyard and ram the Ronin lieutenants with your vehicle. Of course the car can only sustain so much gunfire, so step out and get a fresh car if yours starts smoking excessively. When all 17 of the Ronin lieutenants have been dealt with, start towards the house that Shogo ran into.
 |
Shogo speeds off on a motorcycle, leaving you to chase after him. You are automatically placed on a motorcycle of your own. The hard part here are the Ronin cars that are pursuing you, as they will frequently ram the back of your bike, possibly sending your character flying off. This affords Shogo a large amount of leeway, so you're going to have to bring him down quickly. Luckily you should have just hit a checkpoint, so even if you fail you can just try again.
You can use Saints Row 2's cruise control feature to make things a bit easier. When you're traveling at a fast enough speed, press the LB button on the Xbox 360 version or the L1 button on the PS3 version to activate cruise control. While cruise control is active, your vehicle will remain accelerated at that set speed, leaving you to only have to concentrate on steering and shooting. Cruise control is best used on long stretches of road, as it can be difficult to turn corners if you're traveling too fast.
The mission ends once you've dealt enough damage to Shogo.
Mission 10: Good D
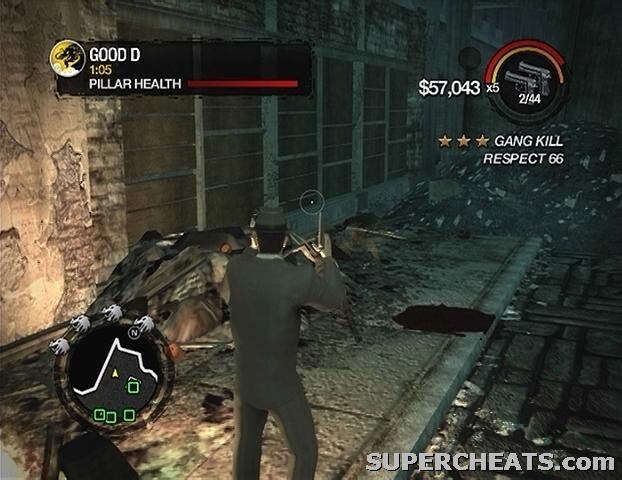
The Ronin have crashed the Saints hideout, so your job here is to defend it. Gun down the Ronin in the first room and then quickly head for the two support columns marked on your GPS. You must prevent the Ronin demolition team from destroying these pillars. The bar in the top-left corner of the screen displays how much more damage the pillars can take before they give way. The timer above the bar indicates how much longer the pillars must be defended before you can move on to the next objective.
The Ronin demolition team are packing RPG Launchers, so take them out first. Enemies do appear on your GPS as small red dots here, however you'll have to do a bit of running around since the GPS doesn't provide a very wide view. When the timer reaches zero, follow the marker on the GPS to reach the next area that needs defending.
 |
There are many more support columns to defend, but it's the same idea; just hold off the Ronin until the timer reaches zero. After killing an RPG Launcher-using enemy, be sure to pick up the dropped ammo, as it will certainly come in handy. Continue to defend the ceiling supports until the timer reaches zero.
Once the timer reaches zero, your next objective is to kill Akuji. Akuji is surrounded by several lesser Ronin. If you happened to pick up a fallen enemy's RPG Launcher, equip it and blast the group of motorcycles that Akuji and the other Ronin are standing by to quickly end this fight.
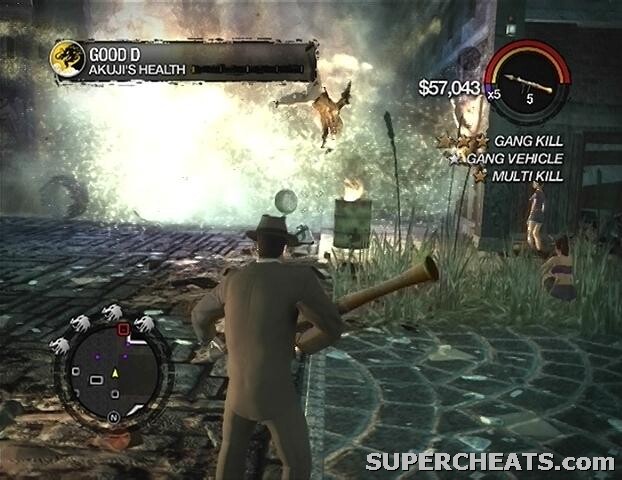 |
The mission is complete once Akuji's health bar is depleted. You'll have to capture the four Ronin strongholds to unlock the next mission. See the 'Gang Strongholds' section for more information.
Mission 11: One Man's Junk...
Once you have captured all four Ronin strongholds, make your way to the Ronin mission marker in front of the Technically Legal strip club to get started.
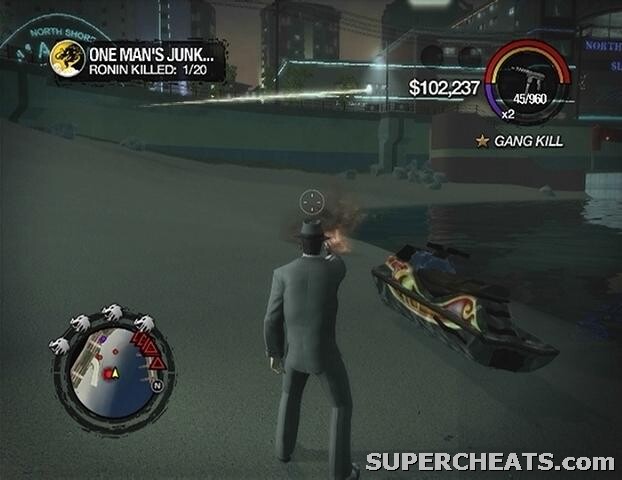
You have four minutes to reach the Heritage Festival in uptown New Hennequet. Ronin will be pursuing you, but you have no time to waste fighting them off. When you come to the spiral road, just dive off the ridges and to land on the beach below. Get out of your vehicle when you reach the docked watercraft.
Hop on the watercraft and start towards the marker on the GPS. Here an enemy helicopter will be flying overhead dropping explosive barrels down into the water. Whoever is in charge of tossing those barrels must have impeccable aim and timing, since they can be quite difficult to dodge. The best way to avoid the barrels is to slow down when you spot one and then veer off to the left or right depending on how the barrel is falling. If the barrel is curving to the right, veer off to the left and vice versa.
When you reach the docks, use them as momentary shelter while you cross the final stretch to the marker. Your next objective at the marker is to kill the 20 Ronin at the festival. Take the craft over to the beach next to the pier to avoid affording them the higher ground. Move up the beach to the street above and start towards the marked Ronin. Start out the Ronin on the street, then move down to the pier. Remember that the squares on the GPS denote enemies that are on the same elevation as you, while triangles denote enemies that are above or below you.
 |
When all 20 marked Ronin have been dealt with, get on the first junk boat and kill the two Ronin inside. You must get to Wong before the bar in the upper-left corner of the screen is depleted. Head up the stairs at the north end of the first level. Enter the second level of the boat and go through the doorway at the other end. Cross the plank over to the second junk boat and kill the Ronin waiting there. Enter the boat's interior and move across the room to the doorway at the other end.
Head down to the lower deck and enter the dining area. Locate the door along the east wall of the boat's interior and cross the bridge outside over to the third junk boat. Make your way to the marker on the second level of the boat to face Akuji.
The final fight with Akuji is similar to the battle against Jyunichi, although Akuji can take a great deal more damage. Like Jyunichi, Akuji will automatically counter all normal sword swipes, so you'll have to perform a counter attack to deal damage. Tap one of the shoulder buttons (LT/RT, L2/R2) just as Akuji's sword is about to come down to perform a counter attack. Another trait Akuji shares with Jyunichi is the shoulder toss he'll hit you with if you get too close to him, so keep your distance.
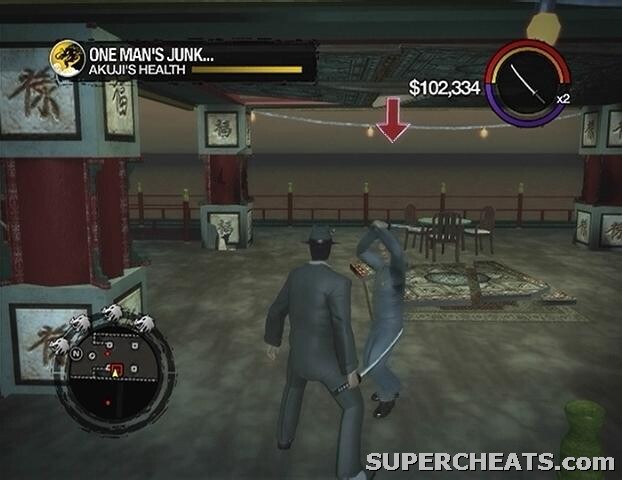 |
After countering one of Akuji's attacks, there is a small window in which you can hit him with normal sword slashes while he's on the ground and getting up. The problem here is that your character's counter attacks tend to knock Akuji away, and your character walks exceptionally slow while holding the katana so you won't really be able to take advantage of the opportunity. If you can lure Akuji over to a corner or side of the boat, you may be able to use the wall to prevent Akuji from sliding too far when your character performs a counter attack, allowing you to deal full damage to him while he's on the ground.
Best Akuji to complete the mission. This mission marks the end of the Ronin mission line. You'll earn a sizeable cash reward and the Stilwater Boardwalk territory for completing the mission. You'll also unlock the Ronin vehicles (available at your crib garage) and personality (taunts and compliments available at a Plastic Surgeon). Akuji's Prototype Bike (Kaneda) is also added to your crib garage, and you can now call Johnny Gat on mobile phone to have him join you as a follower.
Now you've unlocked the Kaneda, try this trick
Xbox 360 | PlayStation 3 | PC
the ninja suit is in the mall Halloween store
Let's Pretend in the Ultor Shopping Mall
How did u get ninja outfit o.o