Sons of Samedi
Saint's Row 2 Walkthrough and Guide
Saint's Row 2 Guide
Sons of Samedi
Mission 1: Got Dust, Will Travel
Follow the marked route on your GPS to reach Stilwater University at the southwest end of the map. There are dealers selling the Sons of Samedi's product at two different locations in the Stilwater University District. One batch is selling in Frat Row at the north end of the district, and the other batch is at the south end of the district by the observatory.
Both groups are carrying a package containing Loa Dust. You must kill both groups and collect the packages they drop. There are five dealers by the observatory, and four in Frat Row. Kill all of the dealers at both of these locations; the last one you kill at both locations should drop the stash. After collecting both packages, you'll get a call from Shaundi; she tells you that a dealer by the name of Mr. Gabby is nearby, and that he tends to bring in a lot of money for the Samedi.
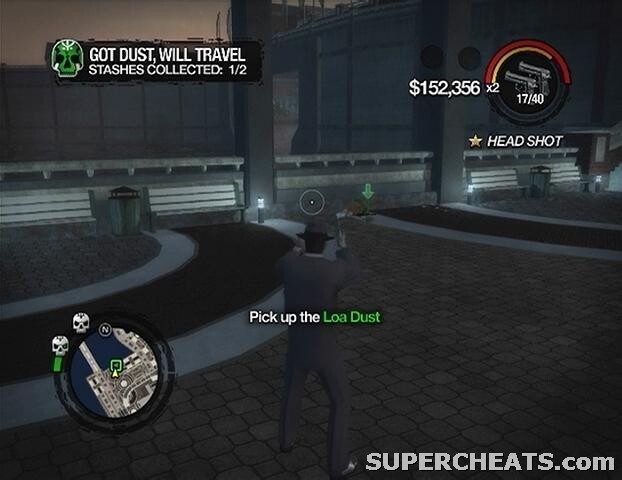 |
Mr. Gabby is at the east end of the district. Just follow the marked route on your GPS to reach him. Gabby is in a car, so if you're coming at him head on just shoot at him through the car's windshield. If he does manage to get away, the car he is driving is quite slow, so you shouldn't have too much trouble catching up to him. When Mr. Gabby is dead, get out of the car and pick up the last package.
Take the dust to Shaundi in Sommerset to complete the mission.
Mission 2: File in the Cake
You have four minutes to reach the prison before the bomb detonates. Get in the boat that's docked nearby and start towards the cyan marker on your GPS. When you reach the island, start following the marked trail.
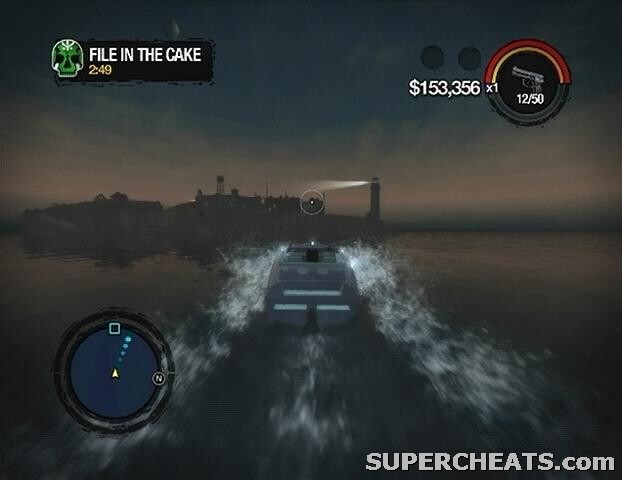 |
When you come to the secret cove, get out of the boat and start down the tunnel. Head up the steps that you come to, kill the security guard on the catwalk, and then kick open the door to the generator room. Stand in the marker here, plant the bomb, and then sprint out of the room to avoid being caught in the blast.
With the generator destroyed, return to your boat and move around to the east side of the island. Get off the boat when you reach a low hillside, climb up, and start down the curved road towards the marker on your GPS. There are plenty of security guards on the island, however most are carrying the relatively weak NR4 pistol, so taking care of them shouldn't be too much of a problem.
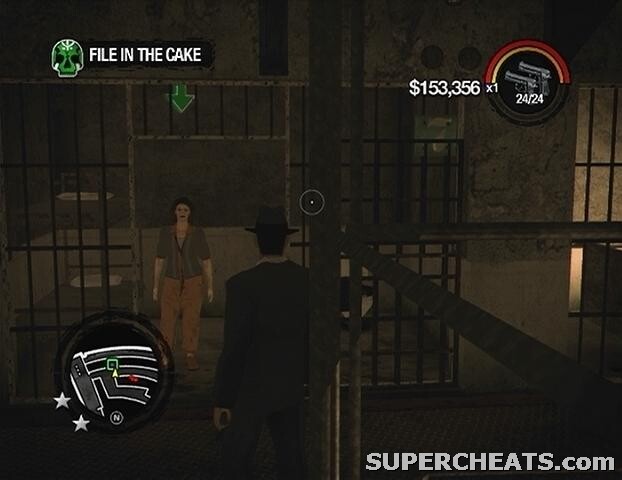 |
When you reach the correctional facility, fight your way to the stairwell door on the other side of the room. A lot of the guards here are wielding shotguns, so try to keep your distance. Shaundi's drug expert is in a cell on the third floor, denoted by a green marker on the GPS. When you find her, move towards her to have her follow you and then start back down the stairs. Note that everyone is trying to kill you here, inmates included, so there's no need to discriminate.
The string of cyan markers on the GPS will lead you to a helipad with a police helicopter on it, which you can use to take Laura back to the city. Once you're in the chopper with Laura, fly away from the island to complete the mission.
Mission 3: Airborne Assault
This is a real simple one. Your first task is to destroy the farming equipment in the field that Toby flies you over. The pieces of equipment are marked on the GPS, and evident by the large, red arrows above them. The helicopter is outfitted with a mounted AR-200 SAW machine gun that has unlimited ammo, so just fire down at any visible pieces of farming equipment while the helicopter passes over the field.
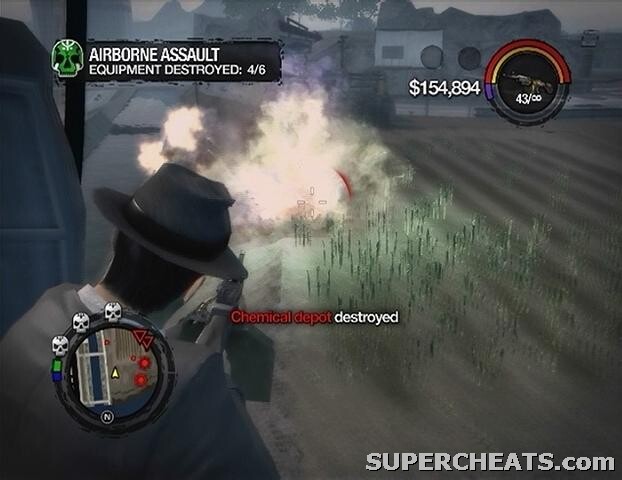 |
This mission is not without its hazards, however, as the Samedi below—including a couple armed with RPG Launchers—will fire at the helicopter in an attempt to ground it. Pick off these enemies first before you continue firing at the equipment. When all six pieces of equipment have been destroyed, four Samedi lieutenants will attempt to escape in four different cars packed with supporting gang members. Fire at each one of these cars until they explode, killing the lieutenants inside.
The mission is complete once all four lieutenants are dead. The News Helicopter will then be available at your crib helipads, and you can call Tobias on mobile phone to have him join you as a follower.
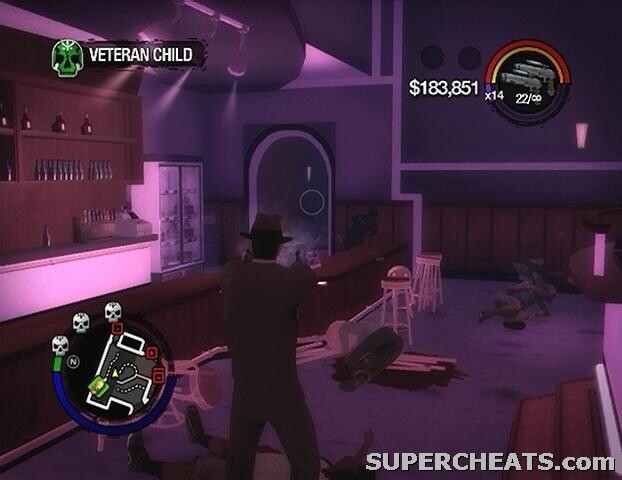
Mission 4: Veteran Child
Shaundi is being held at the Cocks night club in the High End Retail District. Follow the marked route on the GPS and then enter the club when you reach it. Your first task is to clear out all of the Samedi in the club. All of the Samedi that need to be killed are marked on your radar, so track down and eliminate each one of them to complete the objective. With that done, leave the club and follow the marked route on the GPS to the On Track club in the Barrio District.
 |
By now the Sons of Samedi are after you, and they are likely going to hit you with some major resistance since you took so many of their own. Try to ignore your pursuers if you can, because killing more of them will only make things worse. If they're really making it hard for you to get from point A to B, you're going to have to fight them off to give yourself some space.
When your reach the On Track club, step out of your vehicle and kill off any Samedi that were pursuing you in their cars before entering. Clear out the Samedi around the bar, and then step into the marker in front of the door at the other end of the room. A number of enemies will be waiting on the other side of this door, so be ready with a shotgun and pump them full of lead. Fight your way over to the marker at the end of the walkway, and then step onto the ground floor to trigger a cutscene.
Veteran Child is using Shaundi as a human shield here, so you're going to have to find some way to separate them so you can deal damage to him without harming her. There are Flash Bang grenades littered throughout the room; swap out whatever explosive you have in your inventory for one of these. Throw a Flash Bang in front of Veteran Child and Shaundi (make sure your character is faces away to avoid being stunned) and then rush in and blast Veteran Child with a shotgun if the Flash Bang managed to incapacitate him. While the two of them are stumbling about, be careful not to shoot Shaundi, as she can't take very damage.
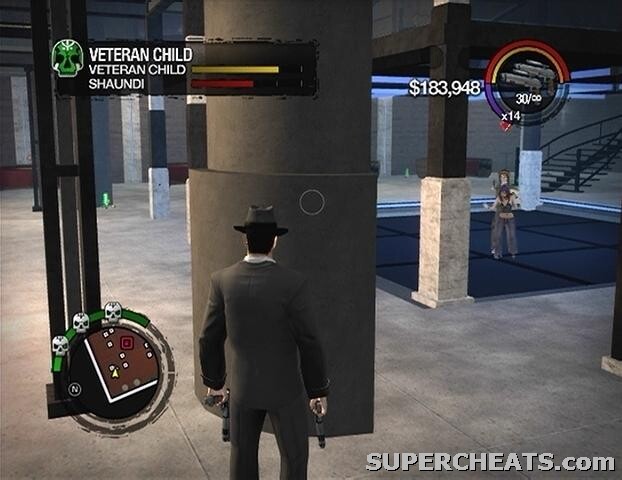 |
You can only carry one Flash Bang at a time, but all you have to do is run over one of the batches to pick up another. The best place to lob the Flash Bangs at Veteran Child is from behind one of the pillars at the north end of the room. This way you can avoid being shot by Veteran Child while he has Shaundi, and you can simply sprint over the Flash Bangs in front of the pillar when you need one.
Samedi gang members will occasionally enter the fray to help Veteran Child, so pick any of them off from behind cover before throwing the Flash Bang. All you have to do is deplete Veteran Child's health bar to complete the mission.
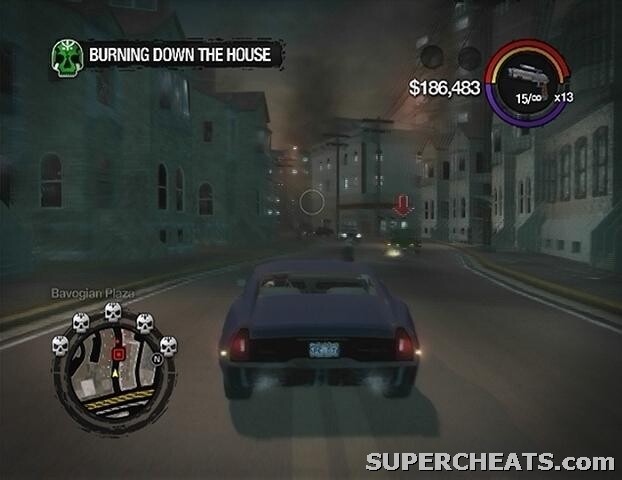
Mission 5: Burning Down the House
There are four Samedi dust labs locations in the city that must be shutdown. Follow the marked route on your GPS to reach the first location. The first building contains two dust labs. The labs explode when shot, so use this to your advantage to clear out some of the gang members inside, but make sure you're a safe distance from the explosion as well. When the first location is clear, return to your vehicle and start towards the second building.
 |
Things get progressively more difficult the more you kill Samedi gang members, since doing so builds up your notoriety with the gang. They'll send a ton of enemies when you reach the five-star notoriety level, which can make driving to the next location difficult. Before getting back in your vehicle after having shut down a lab, clear out all of the Samedi in the area to give yourself a head start before more arrive.
Fortunately the third and fourth locations aren't too far apart. There are four lab technicians to eliminate in the fourth building before you can get to the lab. Pick up the key dropped by the third technician and use it to open the locked door marked on the GPS. The lead technician runs outside and flees in a getaway car, so you're going to have to chase after him. If you're quick enough you may be able to blast him as soon as you step outside, otherwise there should be a car parked across the street that you can get in and use to chase after him.
 |
All you have to do is kill the technician to complete the mission. You can use Saints Row 2's cruise control feature to make things a bit easier. When you're traveling at a fast enough speed, press the LB button on the Xbox 360 version or the L1 button on the PS3 version to activate cruise control. While cruise control is active, your vehicle will remain accelerated at that set speed, leaving you to only have to concentrate on steering and shooting. Cruise control is best used on long stretches of road, as it can be difficult to turn corners if you're traveling too fast.
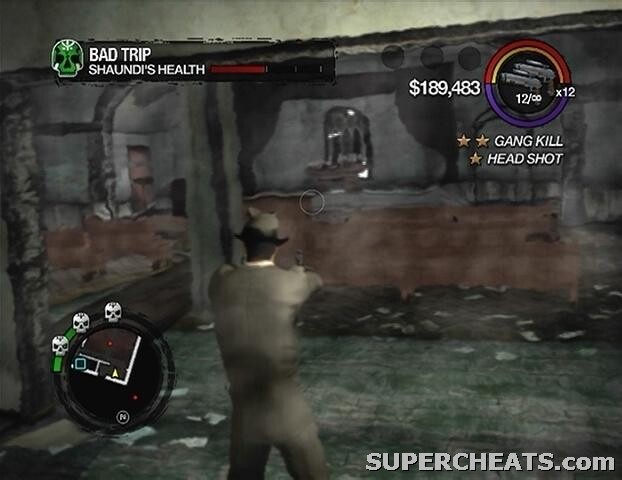
Mission 6: Bad Trip
You must make it to the Saints hideout and rescue Shaundi before her health bar is depleted. Unfortunately the short spin your character took in the smoke-filled Samedi limo has intoxicated him or her, so driving may be a bit of an issue. With your vision blurred, it can be difficult to avoid obstacles on the road, but luckily the hideout isn't too far from your current location. When you reach the hideout, clear out the enemies in the first room, and then head down the stairs to rescue Shaundi.
 |
Pierce needs rescuing next. Clear out the Samedi in the parking lot before his health bar is depleted. Eliminate all of the marked Samedi that enter the parking lot to complete the mission. There are a lot of them (60 or so), so hopefully you have plenty of ammo. Just be sure to revive Shaundi and Pierce if they're incapacitated, and sprint away to regenerate some health if things are looking dire. You must remain at the hideout, however, so don't go too far away from the parking lot.
You'll unlock the Samedi melee fighting style after completing the mission, which can be added to your character at a Plastic Surgeon.
Mission 7: Bonding Experience
Six helicopters are headed for drop-off points around the city. It's your job to shoot them down before they can make those deliveries. This is another on-rails mission; Pierce is driving, and your character is armed with an AR-50 XMAC with unlimited ammo. There really isn't much to this; just fire at each helicopter as they appear and have them shot down before they reach the drop-off point. Your weapon is exceptionally accurate, so just keep the reticule trained on your target and fire away.
The vehicle is exceedingly sturdy if not indestructible, so there's little chance of death here. The first two helicopters fly over the city, however the following two will be flying over the water. After downing the first two helicopters you'll have to follow Pierce to a docked boat and get in. The last two helicopters are flying over the city, so follow Pierce on to land when he docks the boat and wait for him to steal a vehicle.
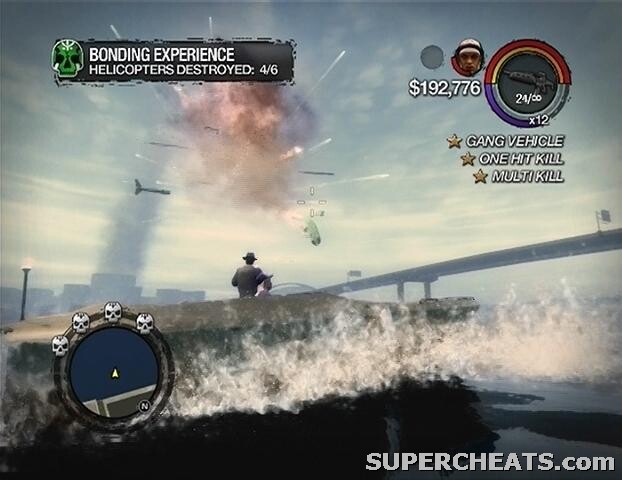 |
Down the sixth and final helicopter to complete the mission.
Mission 8: Riot Control
The starting point for this mission is over in Black Bottom, which is part of the Factories District at the southeast end of the map. Purchase a sub-machine gun and a good amount of ammo if you don't have one already, as you'll need it during this mission.
Mr. Sunshine has sent a horde of drug addicts over to the warehouse where the Saints are unloading the stolen Loa Dust. The addicts will enter the warehouse with a variety of weapons, including Molotovs, so keep your distance. Hold out in the warehouse with Shaundi while Pierce heads off to get a truck to move the drugs.
Eventually Pierce will arrive with the truck, at which point he and Shaundi will take to loading the crates onto the truck. You must cover them while they do this. The addicts can enter the warehouse through the open bay door, the side door, or through the door at the back of the warehouse, so keep an eye on these spots.
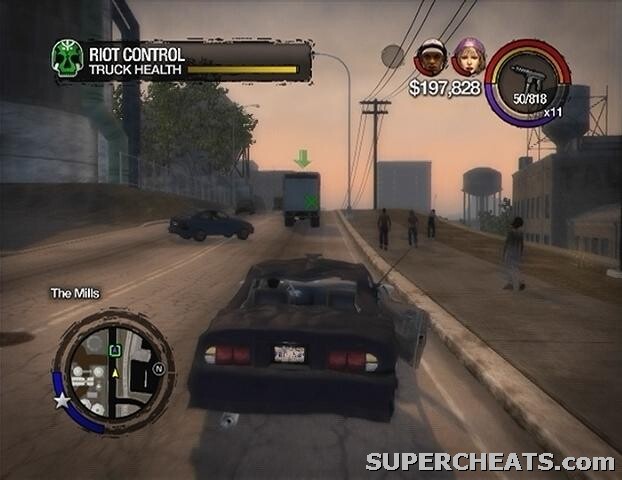 |
Fight off the addicts until Shaundi and Pierce have managed to load all 12 crates, then head for the cyan marker on the GPS and get in the car there. Now it's your job to escort the truck to safety. The truck can take quite a beating, however it does have quite a long ways to travel. Addicts will pull up behind the truck and fire at it; the addicts are denoted by red blips on the GPS just like other enemies, but you can easily distinguish them by the junk cars they drive in.
You have to remain pretty close to the truck, otherwise Pierce will slow down and wait for you to catch up. Since the truck can take such a beating relatively unscathed, the biggest threat here is having your own car destroyed. For this reason you'll have to hang back far enough to avoid getting caught in the explosions caused by enemy vehicles when they've been damaged enough. When a car pulls up behind the truck, fire at it with your weapon until it catches fire, at which point you'll want to start to slowing down. After the vehicle has exploded, move up closer to the truck. Explosions from enemy vehicles don't seem to do any damage to the truck.
Mission 9: Eternal Sunshine
The meat packing plant is crawling with Samedi gang members, and simply stepping into the area nets you a five-star notoriety level. Clear out the enemies surrounding the plant, and then follow the marker on the GPS to the entrance. Kick open the door and step inside. Fight your way to the stairs at the other end of the area and then take them up to the second floor.
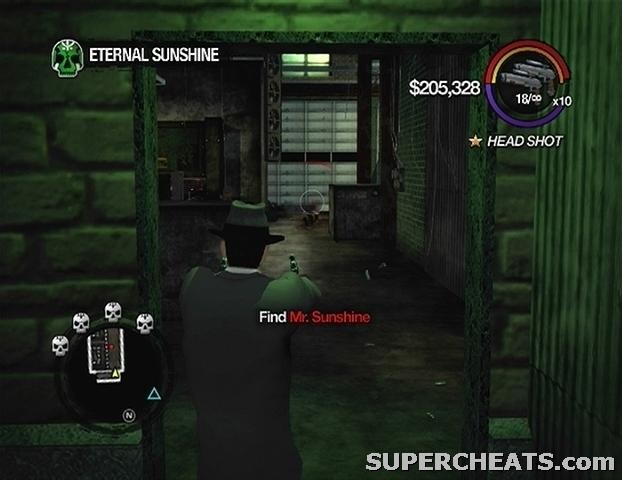 |
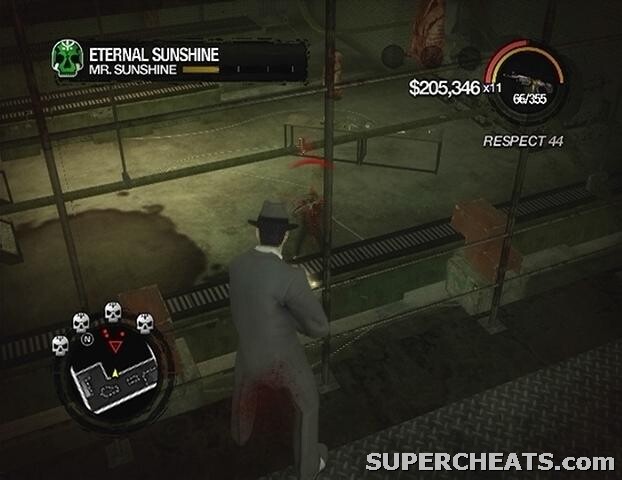
Mr. Sunshine is up on the third floor, so find your way to a second set of stairs and climb up. Hit the marker in front of the doorway to start the fight. A large number of gang members are supporting Mr. Sunshine here, so you'll want to retreat to the walkway below so you can take cover behind one of the tanks there. Mr. Sunshine is completely immune to gunfire while he's holding the voodoo doll, so to get anywhere you must shoot it out of his hand.
Wait until he stops and raises both arms in the air, at which point take aim and shoot the doll. You should be able to still see him from the second floor walkway, otherwise you'll have to head back up and hit him from the top level. When the voodoo doll is out of his hand, start firing at him to deplete his health bar. Mr. Sunshine is carrying a powerful assault rifle that can bring you down quickly if you aren't careful, so take cover behind one of the tanks on the lower walkway to regenerate health if you're close to death.
Kill Mr. Sunshine to complete the mission
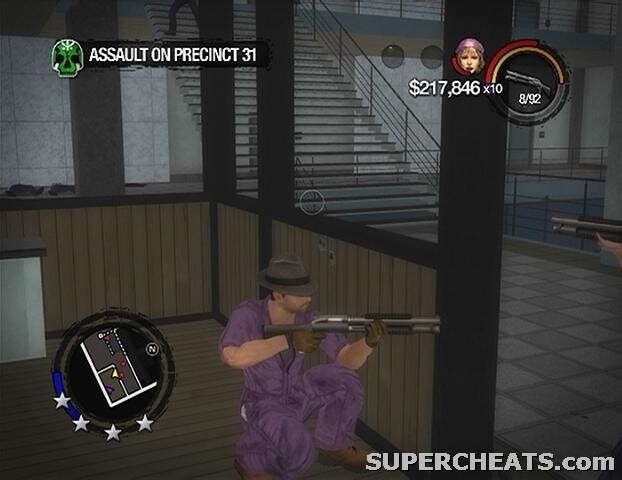
Mission 10: Assault on Precinct 31
Your first task is to acquire a repairman's uniform. Follow the marked route on the GPS to reach a parked repair van. You have less than three minutes to get to the location. Fire at the driver through the windshield and then hijack the van to put on the uniform. Next, head for the marker outside of the police station and hit it to trigger a checkpoint. Put away your weapon and enter the station.
Speak to the clerk at the front desk to learn that the camera room is on the fourth floor. Take the stairs up to the fourth floor and enter the camera room. At this point you'll earn a four-star notoriety level with the police, so prepare for some heavy resistance. If you have a shotgun in your inventory, switch to it as it will come in handy here.
 |
Crouch down by the doorway and wait for the officers to approach. Take out the officers surrounding the camera room and those that come to the door while Shaundi hacks into the system. There are tons of officers after you, and some of them are wielding shotguns, so be extra careful here, and duck down in the room to regenerate health if things are looking dire.
When Shaundi is finished with the computers, head through the door at the end of the hall and sprint to the helipad. Get in the police helicopter and start towards the helipad atop the Saints hideout. An attack chopper will be pursuing you, so try your best to swerve out of the way of its gunfire. Luckily the hideout isn't very far when traveling by air.
 |
Land on the Saints Hideout helipad to complete the mission. Now you must capture the four Samedi strongholds to unlock the final mission. See the 'Gang Strongholds' section for more information.
Mission 11: The Shopping Maul
Once you've captured the four Samedi strongholds, step into the mission marker outside of the mission house to get started. You'll want to purchase a rifle (the AR200 SAW will do) and a sub-machine gun with plenty of ammo before attempting this mission.
Get in a car with Shaundi and head for the ambush location on Nob Hill. Reach the ambush location before two minutes are up to trigger a cutscene. Your task after the cutscene is to eliminate all 11 of The General's bodyguards. Remain up on the walkway and fire down at them. Two or more of the Samedi here are likely carrying RPG Launchers, so single them out first. Be sure to collect the RPG Launcher ammo for later use.
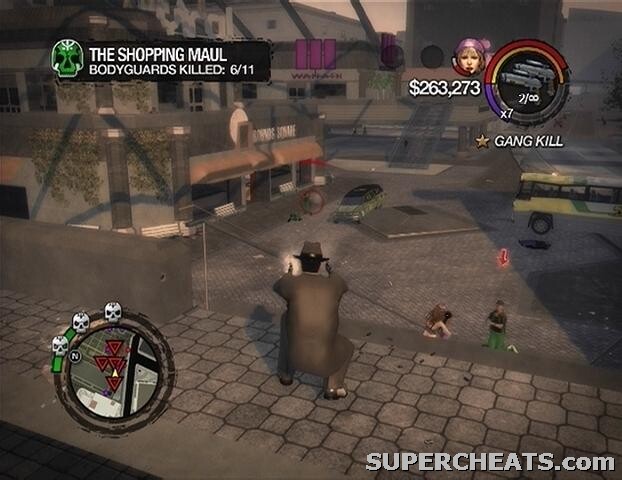 |
When all 11 of the bodyguards have been killed, The General will get out of his armoured limo and flee into the mall. Follow him.
The mall is huge, and swarming with Samedi. They even managed to get some of their vehicles into the mall. If you do encounter a car-load of Samedi gang members, kill them and get their car to make descending here a bit easier. Follow the cyan marker on your GPS to locate The General.
Unfortunately he's riding in an armoured Bulldog Humvee. As soon as you gain control over your character, hit the Bulldog with any explosives you have and then switch to another high-powered weapon (assault rifles work best) and continue firing at the vehicle. The General will drive off when the Bulldog has taken a certain amount of damage, at which point a marker pointing to a small vehicle appears on the GPS. Don't get on the quad just yet; continue firing at the Bulldog until it's completely out of sight.
|
The General then proceeds to drive the Bulldog all around the mall in a seemingly aimless manner. Hop on the quad that is marked on the GPS and trail after him. Fire at the vehicle with your sub-machine gun to further damage it. Deplete the Bulldog's health bar completely to kill The General and complete the mission.
Your reward for completing the Sons of Samedi mission line is $50,000, the Prawn Court territory, The General's Bulldog and Samedi vehicles (available at your crib garage), the Samedi Personality (taunts and compliments available at a Plastic Surgeon), and you can now call Shaundi on your mobile phone to have her join you as a follower.
Xbox 360 | PlayStation 3 | PC
Has anyone tried using the Tazer while doing Veteran Child?
I suggest always placing a bookmark thing over the mall area so you can know where it is
I'd like to know that also. Although I did find a couple good stores and 3 tagging spots. Then my game crashed and I lost a couple of hours.
how do u getout of the maul after killing the general?
dude epic
Can I ask you something?
thanks man