4-1: Caves
Resident Evil 5 Walkthrough and Guide
Resident Evil 5 Guide - Walkthrough
Chapter 4-1: Caves
______________________________________________________________________________
| ______|¯¯¯¯¯¯¯¯¯¯¯¯¯¯¯¯¯¯¯¯¯¯¯¯¯¯¯¯¯¯¯¯¯¯¯¯¯¯¯¯¯¯¯¯¯¯¯¯¯¯¯¯¯¯¯¯¯¯¯¯¯¯¯¯¯¯¯¯¯¯|
|| ____/|                  [C4-1] Chapter 4-1: Caves                           |
|| |__  |______________________________________________________________________|
||___ \ |¯¯¯¯¯¯¯¯¯¯¯¯¯¯¯¯¯¯¯¯¯¯¯¯¯¯¯¯¯¯¯¯¯¯¯¯¯¯¯¯¯¯¯¯¯¯¯¯¯¯¯¯¯¯¯¯¯¯¯¯¯¯¯¯¯¯¯¯¯¯|
| ___) ||"The answer lies in the caves up ahead".  And so Chris and Sheva find |
||____/ |themselves traversing ancient ruins of a forgotten civilization.      |
|-------|----------------------------------------------------------------------|
|ITEMS  |[] Pot x2, [] Vase, [] Topaz (Trilliant), [] Emerald (Pear),          |
|       |[] Sapphire (Square), [] Sapphire (Pear), [] Topaz (Pear), [] Ruby    |
|       |   (Pear), [] Vase x2, [] Topaz (Square), Gold (Large) x7, [] Emerald |
|       |   (Pear), [] Vase x2, [] Green Herb, [] Topaz (Pear), [] Sapphire    |
|       |   (Square), [] Sapphire (Pear), [] Gold (Large) x6, [] Sapphire(Pear)|
|       |[] Ruby (Pear), [] Vase, [] Green Herb, [] Emerald (Trilliant),       |
|       |[] Sapphire (Trilliant), Ruby (Trilliant), [] Vase,[] Grenade Launcher|
|       |[] Sapphire (Square), [] Emerald (Square), [] Idol (Gold), [] Topaz   |
|       |   (Square), [] Vase x2, [] Topaz (Square), [] 2x Flash Rounds x3,    |
|       |[] Ruby (Pear), Sapphire (Pear), [] Vase x3, [] Ruby (Oval),          |
|       |[] Soul Gem.                                                          |
|-------|----------------------------------------------------------------------|
|EMBLEMS|3x.                                                                   |
|-------|----------------------------------------------------------------------|
|ENEMIES|1. Bui kichwa.                                                        |
|       |2. Majini (Wetlands).                                                 |
|       |                                                                      |
 ¯¯¯¯¯¯¯¯¯¯¯¯¯¯¯¯¯¯¯¯¯¯¯¯¯¯¯¯¯¯¯¯¯¯¯¯¯¯¯¯¯¯¯¯¯¯¯¯¯¯¯¯¯¯¯¯¯¯¯¯¯¯¯¯¯¯¯¯¯¯¯¯¯¯¯¯¯¯
Explore the hut for two breakable [POTS] and smash the [VASE] on the jetty.
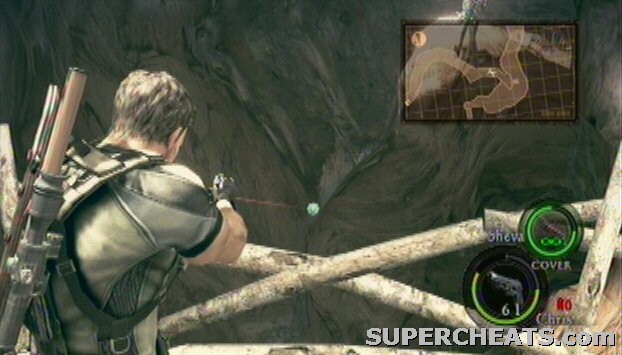
Head down the caves and you'll encounter a new type of enemy called Bui kichwa. They can only take a few handgun bullets, but they're fairly agile and always come in groups of around five.
Move towards the eastern side of the area and loot the contents of the [VASE]. The ledge up ahead contains a [TOPAZ (TRILLIANT)]. Head back to the ladder you passed just now and climb up. The bridge contains two vases, and if you to the right you can spot a [BSAA EMBLEM] on the lower right of the ravine.
 BSAA Emblem |
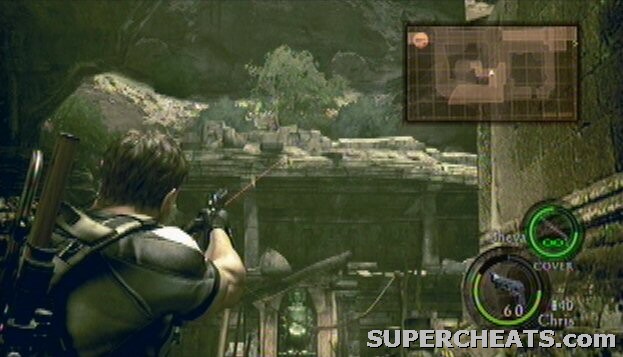
The shiny torch up ahead contains an [EMERALD (PEAR)]. As you walk down the tunnel, more Bui kichwa bug you (get it?). There's another shiny torch which contains a [SAPPHIRE (SQUARE)]. At the end of the tunnel, break the two animal skulls on the ground, and slash the torch to get a [SAPPHIRE (PEAR)], [TOPAZ (PEAR)] and a [RUBY (PEAR)]. Go through the door.
You'll now be in an ancient village. First thing you should do is grab out a rifle and aim at the structure that is holding the up the lens. It may require several shots to shoot the [BSAA EMBLEM] about halfway down the structure. With that out of the way, drop down the ledge and loot the two [VASES]. Shoot the shiny sparkly from the doorway that turns out to be a [TOPAZ (SQUARE)] and drop down.
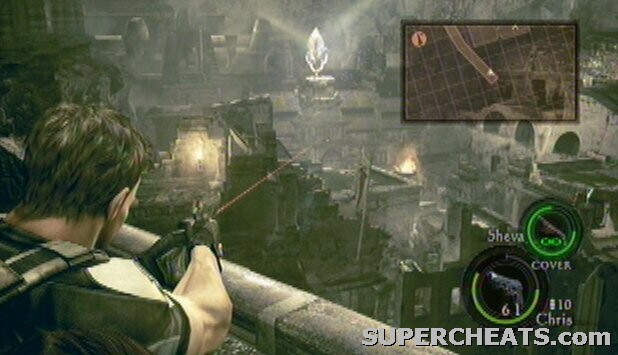 BSAA Emblem |
Break the vase and move into the room with the hanging corpses. With the help of your partner, open the sarcophagus and grab the [GOLD (LARGE) x7]. The torch in the next room contains an [EMERALD (PEAR)], and the room after that contains two [VASES]. Cross the bridge and you'll get temporarily split up. Depending on who crossed the bridge first will find themselves already at the other side, while the other needs to take the lower route.
=-=-=- UPPER GAMEPLAY: -=-=-=-=-=-=-=-=-=-=-=-=-=-=-=-=-=-=-=-=-=-=-=-=-=-=-=-=-
Break the two [VASES] and provide cover for your partner who is located directly below you. As your partner proceeds, head east yourself so you can be of better help.
=-=-=- LOWER GAMEPLAY: -=-=-=-=-=-=-=-=-=-=-=-=-=-=-=-=-=-=-=-=-=-=-=-=-=-=-=-=-
You'll be the one facing the Majini's. Hopefully your partner will cover you well from above. Grab the [GREEN HERB] and the [TOPAZ (PEAR)] (from the torch) as you make your way up.
=-=-=-=-=-=-=-=-=-=-=-=-=-=-=-=-=-=-=-=-=-=-=-=-=-=-=-=-=-=-=-=-=-=-=-=-=-=-=-=-
When reunited, head inside the tomb and open the sarcophagus to find a [SAPPHIRE (SQUARE)], [SAPPHIRE (PEAR)], and [GOLD (LARGE) x6]. The other tomb contains a [SAPPHIRE (PEAR)] from the torch and the corpse in the sarcophagus is holding a [RUBY (PEAR)]. There's also a [VASE] here, and you can grab a [GREEN HERB] from the open sarcophagus.
Head towards the final sarcophagus by going over the bridge and prepare to make a landing. Several Bui kichwa and Majini will enter the tomb. One of them has torches, so you'll want to kill him first. The chest on the west contains a [EMERALD (TRILLIANT)], the chest to the east contains a [SAPHHIRE (TRILLIANT), and the chest on the north holds a [RUBY (TRILLIANT)]. Exit south.
There will be several Majini's down in the room to the south. You can shoot them from a distance. When you've dealt with them, start looting the vases and giant burning boulders will start rolling all over the floor. To get out of this death trap, turn the large crank in the center of the area to open up a doorway. Have one of you make a very fast run for it - as it'll be closed again in only a matter of seconds. When one of you has made it, the mechanism that kept the boulders rolling will stop, and the doorway stays open.
Quickly collect any items from the broken vases and continue through the corridor up ahead. An interactive cutscene follows in which you'll have to make a run for the end. You need to jump over several gaps (for which the buttons can sometimes alternate) and at the last gap a special grab command needs to be performed.
A gigantic labyrinth lies ahead. This big video shows you exactly where to go, what to do, and how to defeat the foes that lurk in the corners of darkness.
Jump down and have you and your partner pull a chain to activate a large stairwell. You'll now be in a very large room with several statues - you could even go as far as calling this a puzzle. There's a [VASE] to your left as you enter the area.
Go downstairs, turn west at the center of the room and open the suitcase on the SW dead-end; It holds a [GRENADE LAUNCHER]. Head north and have one of you pull the chain. The other needs to go back to the center of the room, head north, then go west to the other chain of this turquoise statue. This will uplift a set of chairs to the eastern statue. A [SAPPHIRE (SQUARE)] is also revealed.
From the center of the room, proceed to the jade statue on the east side of the area. Pull the chains and a combination of stairs will be altered. This time, an [EMERALD (SQUARE)] is revealed. The southern ledge can be leapt over, and the chest contains an [IDOL (GOLD)].
Go back to the center again and a group of Majini's will spawn when you take a few more steps. One of them has torches again, two have shields. Deal with them, then jump over to a platform (a torch marks the way). Go to the eastern side of the area where you can shoot a shiny [TOPAZ (SQUARE)] from the ceiling (nearby a hole), and the upper path houses two [VASES]. From here, aim at the ruins above the jade statue and you should be able to spot another [BSAA EMBLEM].
 BSAA Emblem |
Head to the center of the room by hugging the outer wall, and go to the gold colored statue. A [TOPAZ (SQUARE)] will be revealed. Go towards the purple statue in the northeast corner (or grab [FLASH ROUNDS] for the Grenade Launcher in a chest on the path to the right first). One person can already pull the chain, but the other one needs to go back downstairs to pull the chain below.
Majini's and Bui kichwa will appear before you can effectively pull both chains, so take care of them first. When you're done with them, pull the chains and the southern stairs will lower. Grab the [RUBY (PEAR)] from the ground level, and a [SAPPHIRE (PEAR)] from the upper level (notice how blue and red makes purple, the color of the statue - just like with the other statues, the stones you got from there were the same color as the statue too).
On the lower ground, head to the SE corner of the area and loot three [VASES]. Continue your way to the final statue, a red one, which is in the SW corner of the room. A [RUBY (OVAL)] is revealed, and the stairwells are finally raised towards the final destination of the area.
BOSS FIGHT 5: POPOKARIMU (2ND)
You'll remember this creature, and the same strategy still applies. The only thing that has changed are the surroundings. If you have any grenades or proximity bombs, now is the time to use them, but you can also resort to the grenade launcher with explosive rounds to flip the boss over to its side.
As usual, target its weak flesh at the bottom of his tail when on flipped over and give it everything you got. The fight can be over surprisingly fast. Grab the [SOUL GEM] after defeating Popokarimu: This gem is worth 10000 gold!
If you r running out of ammo and the boss cut scene ends just run away to your destination and call sheva. then run to the gate and there a cut scene starts and just press the keys whichever indicated.
Just after the first chest with the Topaz Brilliant, there is a Sapphire Pear on the ceiling above that ledge. Shoot it before you jump down.
This boss is easy, so not worth running for. When the cutscene is completed . pass this boss on the right side, place a proxymine next to the pillar (behind the boss).
Then wait there. The boss activates the mine, lays on the ground, and just 4 rounds of a magnum with 2000 damage in his stomage is enough to take him out and get the gem that is worth 10.000....
ITS SAYS TO EXIT SOUTH OUT OF THE TOMBS AND THE RUBY TRILLIANT IS 2 THE NORTH BUT IT IS VICE VERSA
In the FLAMING BOULDER ROOM there is an EMBLEM above the door that the mechanism opens. Best shot before jumping down -The007Griz