Find the Red Minions
Overlord 2 Walkthrough and Guide
Overlord 2 Guide - Walkthrough
Find the Red Minions
Task: Find the Red Minions
You can't get through the fire barriers without Red Minions, so you must find the Red Hive and deliver it to the Netherworld before you can enter Nordberg Town. The Reds are somewhere within the Nordberg Sanctuary Cave, so backtrack there.
Upon entering the Sanctuary Cave, examine the Netherworld Shard, which is right across from the Brown Minion Gate. Send at least 10 of your Minions to the gate, and then press the X/Square button to take direct control of the Minion atop the Possession Stone. While possessing a Minion, you can walk across narrow bridges or through narrow passageways that you cannot as the Overlord. The possessed Minion is rather weak, and the possession range is limited, so you'll have to be more cautious than usual. If you die as a Minion, you'll be taken back to the Possession Stone; you can possess another Minion here, and then retrace your steps.
 Use the Possession Stone to possess one of your Minions, allowing you to sneak past the Dryad. |
Head south from the Netherworld Shard and start across the tree bridge. The way is blocked, but there is a narrow attachment that Minions can cross. Cross the bridge and follow the path beyond it. Slash the plants to clear the way to the Dryad. The Dryad is quite powerful, so avoid engaging her yourself. Instead, lock-on and hold down RT/R2 to command all of your Minions to attack. When the Dryad falls, destroy the plant that opens up to remove the vines blocking the way into the Sanctuary.
When the way is clear, hold the X/Square button for three seconds to end the possession. Then, as the Overlord, cross the bridge to enter the Sanctuary. Start down the path beyond the bridge and you will soon reach a Waypoint Gate. A few paces from the Waypoint Gate, you'll encounter another Dryad. Send your Minions in and hack away at the Dryad yourself. The vines can't be removed just yet, as there is a second Dryad in the area that can't be reached. When the first Dryad has been taken care of, look for a mudslide along the north side of the area and slide down to the area below.
There are plenty of Gnomes down here, and each will yield a Lifeforce Orb when killed, so be sure to send your Minions after them.
Though the water in this area is shallow enough for the Overlord to trudge through, your Brown Minions will immediately drown, so take care when sweeping them around bodies of water. Brown, Red, and Green Minions will avoid water if left to their own devices, but will go to their deaths if you sweep them through. Walk through the first pond of water and the Browns will follow you across using the narrow log bridge. A Brown Minion Gate will appear on the other side; your Brown Minions can't follow you through the second pond, so you may as well send them back to the Netherworld.
There's a Dark Crystal tucked away nearby; once you're through the water and to the other side, turn into the area to the left. The Dark Crystal container is in the corner here, beyond the trapped man.
 Collect this Dark Crystal before moving on. |
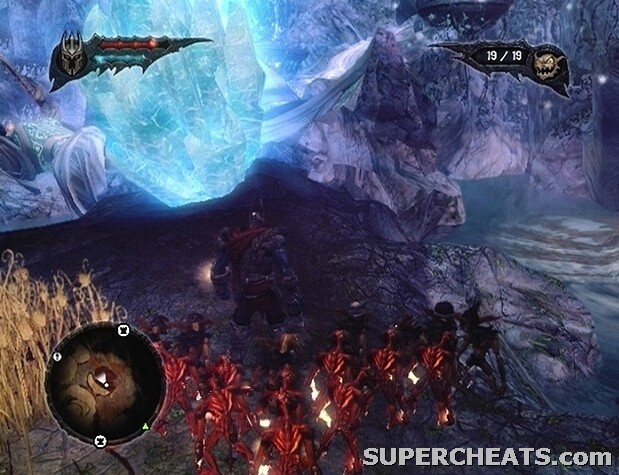
When you have the Dark Crystal, continue heading west to find a batch of Red Minions. Follow the Minions up the hill to find more. Ten of the Red Minions will automatically begin to follow you; use them to destroy the thorny barricade at the bottom of the slope.
Task: Find the Red Hive
As soon as you're through the first barricade, turn left and order your Reds to burn down the identical barricade there. You'll find a considerable amount of treasure in the area beyond the barrier, as well as some breakable objects. There are a couple snapper plants here, but your Reds can make short work of them.
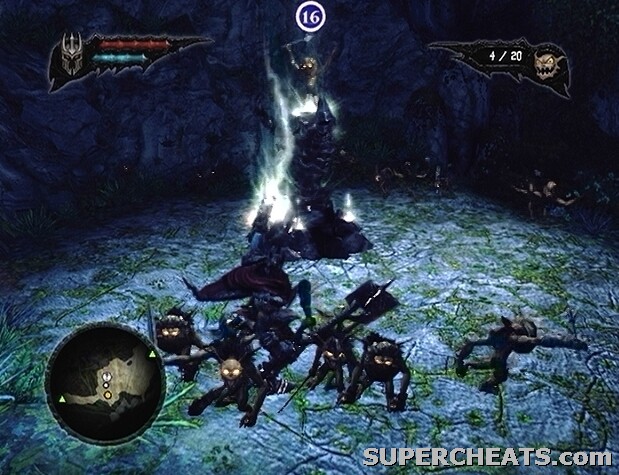
Once you have collected all of the treasure, return to the previous area and command your Reds to burn down the third thorny barrier. Send your Minions after the Gnomes up ahead and collect the Lifeforce Orbs that they drop. Continue down the path to spot the Red Hive in the distance. There are fairies in the next area; though fairies are not hostile, they can be a problem if one gets too close to your Minions, as any Minion within a certain range will cease fighting to gawk at her. Because of this, you'll likely be forced to kill the creature yourself to return your love-struck Minions to their normal, pliable state.
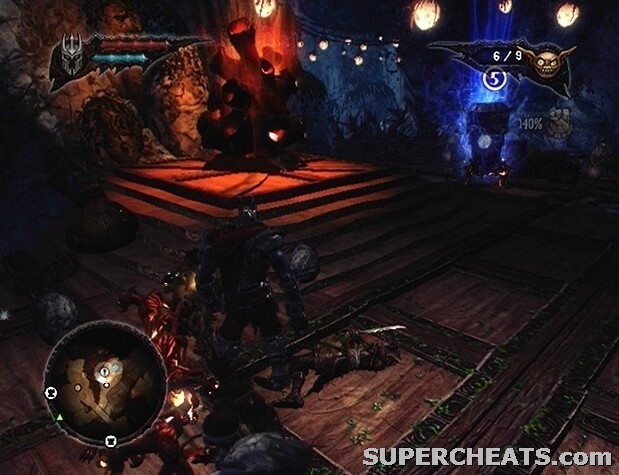
With the area clear, step onto the lift and slide down the mudslide to reach the second Dryad. At the bottom of the slide, press the Y/Triangle button to put your Reds on Guard. While on Guard, Reds will automatically throw fireballs at enemies within range. Provided the Dryad is close by, the Reds on the Guard Flag should automatically begin attacking her.
When the first Dryad has been weakened, usher your Reds over to the wooden platform near the vine barrier and place a Guard Flag there. To call your Minions away from the Guard Flag, hold the B/Circle button until you hear a second horn call (about two seconds). The Reds should be able to down the second Dryad quickly enough. With both Dryads in a weakened state, immediately begin attacking the open flower to kill the both of them. If you aren't quick enough, the first Dryad may completely heal; if this is the case, just set your Reds to attacking her and stand by the closed pod so you can quickly attack it when it opens.
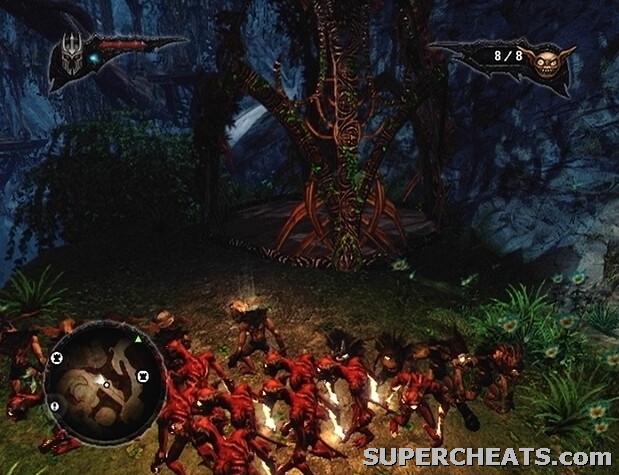
 Red Minions can make short work of Dryads. |
Once the way is clear, cross the bridge to the Brown Minion Gate. Lock onto the Minion Gate and call forth as many Brown Minions as you can before proceeding. Red Minions are not as hardy as Browns, and as such you'll want to keep them out of melee. Reds excel as ranged units, so it's a good idea to keep your Browns selected for sweeping. To select all Minions of a certain colour, hold down the RB/R1 and press the corresponding face button. Simply tap the RB/R1 button to select all of your Minions.
Engage the two Elves by the lift at the south end of this area. Remember to keep your Reds out of close-range; often just setting all of your Reds on a Guard Flag is enough. When the Elves have been taken care of, step onto the lift to reach the upper level of the Sanctuary. Engage the Elves and then start down the walkway. There are several enclosures that contain a number of breakable objects and treasure chest, so consider taking the time to clear these areas as you move through.
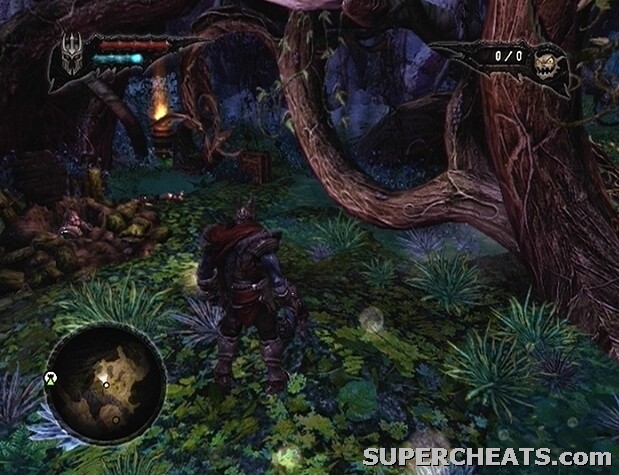
A Harp can be found beyond the walkway overlooking the statue of the Fay. This object is needed to unlock the Treasure Hunter achievement/trophy, which is worth 50 gamerpoints (X360), or a Gold trophy (PS3). It can be carried by your Minions to a Netherworld Gate and teleported back to the Netherworld. There's a Waypoint Gate right by the Harp, so be sure to pick it up.
Continue down the path beyond the Waypoint Gate to find a Possession Stone. Use the stone to take direct control of one of your Minions. As a Minion, head through the low branch across from the Possession Stone and slide down the mudslide there. Step onto the lift in this area to call it back up to the walkway. Then, hold down the X/Square button for three seconds to end the possession.
 Possess a Minion and use him to call the lift back up to the walkway. |
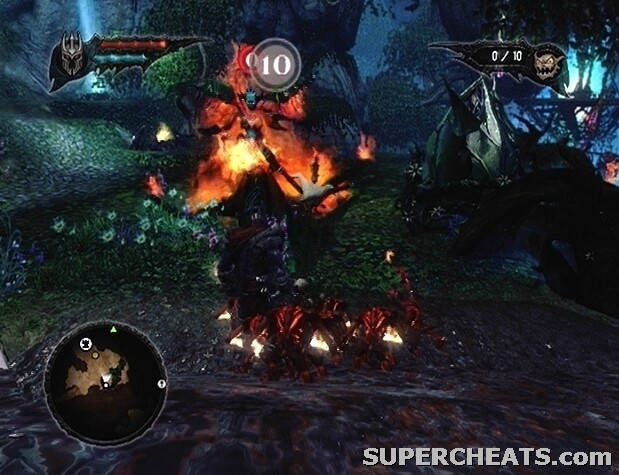
As the Overlord, return to the walkway and take the lift that you just raised back down to the area below. Walk down to the tall grass and set your Red Minions on a Guard Flag. There are three Dryads at the other end of this area; together, they can quickly cut down your Brown Minions, so keep them off the front lines. The tall grass can be set aflame by the Red Minions' fire, so keep your Minions back to avoid losing them.
With all three Dryads weakened, call your Reds back and make your way to the vine barrier blocking the way; lock onto the out-of-reach, open flower, and hold down the RT/R2 button to command your Reds to start throwing fireballs at it. With the way clear, command your Reds to burn down the thorny barrier around the statue of Fay. Then, with all of your Minions selected, sweep them to the base of the statue to have them start chipping away at it. When statue of Queen Fay has been destroyed, smash the large, blue crystal that the statue was holding to reveal a Mana Upgrade.
 Collect this Mana Upgrade before moving on. |
Command at least four of your Minions to pick up the Mana Upgrade and then walk across the overturned statue to reach the other side of the stream. The Red Hive is through here, and is guarded by several Elves. Sweep your Browns in to engage the Elves, and hack away at them yourself as well.
When the platform is clear, command any available Minions to pick up the Red Hive here. Then, command your available Red Minions to burn down the thorny barrier in the southwest corner of the platform. There's a Waypoint Gate beyond the barrier, so allow your Minions to carry the Red Hive and Mana Upgrade over to it before teleporting back to the Netherworld Tower.
 Return the Red Hive to the Netherworld. |
No comments yet. Tell us what you think to be the first.