Getting Started
Monster Hunter Tri Walkthrough and Guide
Offline Mode Walkthrough, Getting Started
After creating your hunter and watching the opening video sequence you will find yourself in the idyllic Moga Village. Everything is fine and dandy in this little fishing village, save for the frequent earthquakes and the close proximity of the Lagiacrus, a massive sea monster. You'll learn about all of this and more during your chat with the Village Chief, but don't worry about any of that now; you've got quite a ways to go before even thinking about saving the day.
Buying some armour would be a good start. After all, you won't get very far without pants. The Village Chief will give you 1500z after his talk. Head up the steps to the right of the Village Chief and speak to the Outfitter about purchasing some armour. You have enough zenni for a full set of Leather armour, or you can spring for the slightly more impressive Chainmail, though you won't be able to purchase the full set just yet. Since the early quests are appropriately easy (and because you'll be getting some more free cash soon), it would be wise to buy three pieces of Chainmail and save up for the other two pieces. Better start with some pants.
 Use the money the Village Chief gives you to purchase armour from the Outfitter. |
Your hunter is equipped with the Hunter's Knife, which is a Sword & Shield type weapon. There is an Iron Sword Great Sword in the Equipment Box in your room (through the open curtains just to the right of the Village Chief). If you're new to the Monster Hunter series, sticking to the Sword & Shield is your best bet. The Sword & Shield weapon type is perfect for the beginner: it's quick and you can roll, block and use items while your weapon is unsheathed. The Sword & Shield, however, is lacking in damage output compared to the other weapon types -- even in the later weapon lines. Stick to it, though; once you feel you've mastered the Sword & Shield, you can graduate to something a bit heftier.
Once you're all set with a weapon and armour, head up the steps at the east end of the village and speak to the Carefree Lad. The kid hands you a Whetstone, which is used to sharpen dull weapons. Cross the bridge and exit to Moga Woods once you're prepared.
Read through the Village Chief's instructions and then make your way to Area 2. To get to Area 2, simply exit via the route at the north end of Area 1 (check the map on the right side of the screen). The first creatures to taste your steel are some poor, (mostly) defenceless herbivores. You must kill the Aptonoth in Area 2 and then carve their corpses for Raw Meat. Attack using the face buttons or Right Stick (depending on your control settings) and bring down at least one Aptonoth. Each Aptonoth is good for two carves. To carve a dead monster, stand on or next to its corpse and press the A button.
 Hunt and carve Aptonoth for Raw Meat. |
When you have at least one piece of Raw Meat, exit Area 2 via the path at the west end to reach the Base Camp. Junior, the Chief's Son, is here. Speak to Junior once and then again to give him one piece of Raw Meat. Once you've done that, return to Area 1 and cross the bridge at the south end of the area back to Moga Village.
Back at the village, speak to the Chief's Son and he will give you a BBQ Spit. With this, you can cook Raw Meat and consume the cooked meat to increase the length of your character's stamina bar. When cooking a piece of meat, you can end up with a Well-done Steak, Rare Steak, or Burnt Steak. A Well-done Steak will give your character the most stamina when consumed -- enough to extend the bar to its maximum length when consumed at default stamina. A Rare Steak will increase your character's stamina by half of what a Well-done Steak does, and a Burnt Steak will decrease your character's stamina (so don't eat those).
Cooking meat is simple. First, get at least one piece of Raw Meat in your inventory and select the BBQ Spit. Then, press the A button to start cooking. Keep an eye on the colour of the meat while it cooks. There are four different colours: the default (Raw Meat), light brown (Rare Steak), golden brown (Well-Done Steak), and black (Burnt Steak). After the short tune, the meat will be light brown and will turn golden brown for a split second before turning black. To cook a Well-done Steak, you must press the A button again while the steak is golden brown to take it off the spit. The meat will turn golden brown about two seconds after the tune. If you're too quick, you'll get a Rare Steak, and if you're too slow you'll get a Burnt Steak. It may take a few tries to get the timing down, but with a little practice you'll be able to cook Well-Done Steaks consistently and with ease. Check out “The Basics” section for a video demonstration.
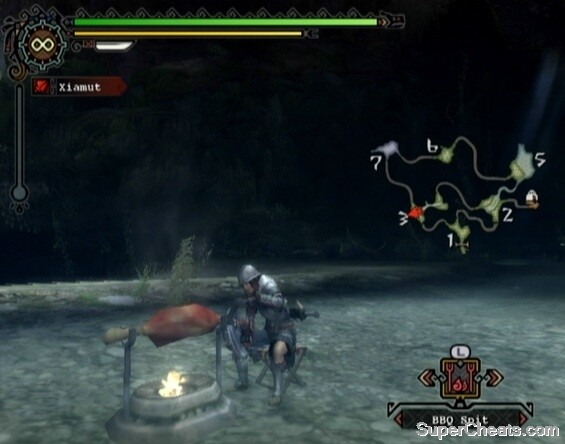 Take the Raw Meat off the BBQ when the meat turns golden brown to produce a Well-done Steak. |
Fix Up the Camp!
You can fulfill Villager Requests from the Stockpile menu that appears when you speak to Junior in Moga Village. These are not part of the game's main quest, but completing these requests is required to upgrade Moga Farm and obtain certain items. Before you can embark on an actual quest, you must complete the “Fix Up the Camp!” Villager Request. Before setting out, talk to the Village Chief at the west end of the village and he will give you 1000z.
Speak to the Wyverian Artisan at the bridge to Moga Woods to learn about weapon craft. To craft a weapon or a piece of armour, you'll need materials. The required materials for a piece of equipment is listed in the bottom-left box on the forge equipment screen. The box in the top-right lists the stats of the weapon or piece of armour. Refer to “The Basics” section for a more in-depth look at equipment forging.
After speaking to the Artisan, cross the bridge and exit to Moga Woods. In Area 1, search the gather spot by the rocks in the northwest corner of the area to find Whetstones. Continue gathering Whetstones here until the gather spot disappears. Herbs can be found at the gather spot under the naked tree at the southeast end of the area. Continue gathering Herbs here until the gather spot disappears.
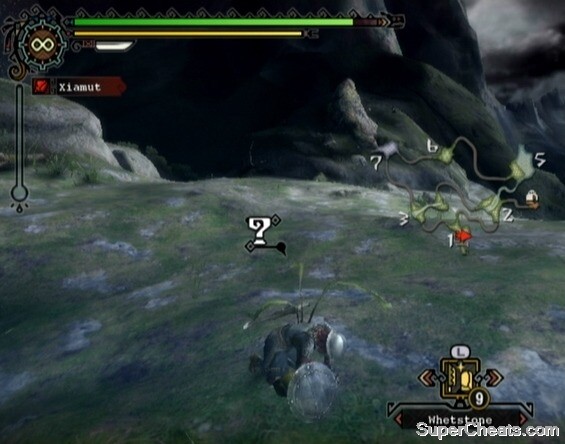 When a question mark appears above your hunter's head, press the A button to gather an item. |
Consume a Herb after taking damage and your character will regain a small amount of health. You can combine a Herb with a Blue Mushroom to make a Potion, which replenishes a bit more health. To combine two items, press the Select button to bring up the Hunter menu and select the second option on the list, Combine. Select the first item and press the A button to add it to the recipe, then select the second item and hit the A button again to combine them. If you don't have any Blue Mushrooms in your inventory now, you can find some by searching the gather spots in Area 2 (north end of the area) and Area 3 (centre and west end of the area). Gather spots that yield Blue Mushrooms and other types of mushrooms look like mushrooms.
There are many more item combinations. Refer to the “Item Combination List” section of this guide for a list of every single combination.
When you enter Area 2, Junior will tell you how to register monsters in your Monsters List. Registering a monster requires the Wii Remote. Even if you aren't controlling your character with the Wii Remote and Nunchuck combo, your Classic Controller or Classic Controller Pro is still tethered to a Wii Remote, so you can use it to add monsters to your Monster List in the way the Junior describes. First, hit the Select button to bring up the Hunter menu. Then, enter the “Hunter's Notes” section and press and hold the B A buttons on the Wii Remote to bring up a pointer. Move this pointer onto a monster, press and hold the A button and then drag the monster name with your Wii Remote to the “Register” icon in the bottom-right corner of the screen.
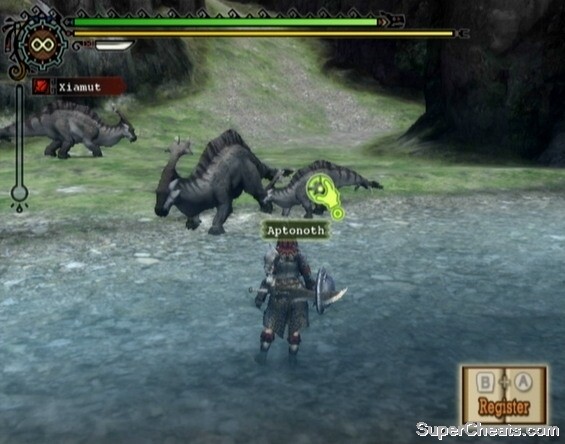 Trigger the Pointing option while viewing the Hunter's Notes section of the Select menu and use the Wii Remote to register new species. |
Once you have that down, make your way to Area 6 ready for a fight. Unlike the peaceful Aptonoth, the Jaggi in this area are carnivores and will attack on sight. These guys are small fries; soon enough, you'll be able to kill them with a single blow. In the interim, you must kill enough of Jaggi to earn 30 Resource Points.
Killing one Jaggi yields 5 Resource Points, so you must kill six to earn 30 Resource Points total. There are four Jaggi in Area 6 to start, but kill one and another will spawn. Look to the bottom-left corner of the screen to see how many Resource Points you have earned so far. Jaggi don't hit hard, but consume a Herb or Potion if you're really getting pushed around and are low on health.
After killing at least six Jaggi and earning 30 Resource Points, make your way back to Area 1 and cross the bridge to Moga Village. Report back to the Chief's Son once in the village. In the Stockpile menu, enter “Hunt Report” and press the A button once and then again to convert your kills into Resources. As well as the Resource Points, you will receive a small reward. Send the commodities to your Item Box, then enter the “Villager's Request” section and turn in the 30 Resource Points to complete the request.
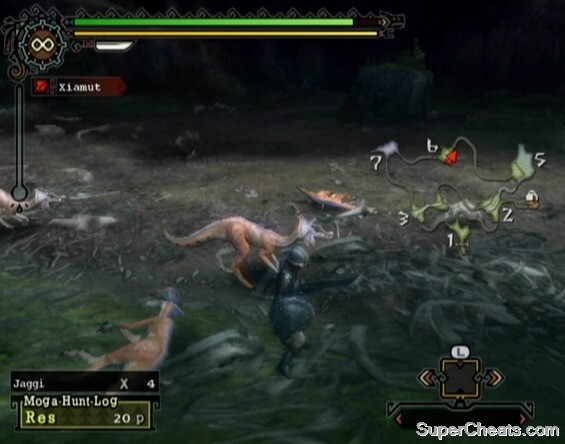 Kill the Jaggi in Area 6 to rack up Resource Points. |
More Monster Hunter Tri Stuff
This is a really stupid question I know, but I'm totally new to the WiiU and to this game. My stamina keeps getting low and I have her a and meat and all that, but I can't figure out how to actually make my character EAT or use things. Right now the only way I can regain enough health and stamina is to go to the village and go home and "save". Im so frustrated!
I'm also trying to collect Iron Ore and I have an Iron pickaxe and I found where to mine it, but I can't get the character to switch from her weapon to the pickaxe to do it!
Can anyone help? Please?
Heyy guys, so I converted my resource points, but I have a problem. Whenever I hover over the "Fix Up Camp" villager request, it says "duplicate" and it won't let me drag it to the complete section. Does anybody know how to fix this? It is really annoying and I can't progress in the game until it's completed.
I have no idea how to make money at the start of the game. I only seem to be able to convert raw materials into village build-up points (or whatever they are called) but I have no Idea how to get money. Damn the menus are so friggin complicated ;).
So when anybody knows how to sell things, please post, it will be appreciated.
Why is it when returning to the village that some items I have collected are automatically taken from me and turned into resource points? Why can I not keep these items? Things like monster guts, throwing knives, abalone pieces, red corral...
What sword should you buy first
To get whetstones you must look for small rocks around and when the question mark pops up over your head press A
Thank you for helping me!
where do u get whetstones after the kid gives u them
You go all to the left on the dock
When on a quest how do you get out of the village, I forgotten!
u go to the chiefs son talk to him. click on hunt report and press a to convert it into resource points
i dont know how to convert my resource points how do i do that.