Denizen of the Molten Deep
Monster Hunter Tri Walkthrough and Guide
Denizen of the Molten Deep
Hunting Quest: Hunt an Agnaktor
Unlock: Complete “A Bard's Tale,” “The Wrath of Rathalos” and the “One Chance” Villager Request.
Reward: 6000z
Contract: 600z
Time: 50 min.
Area: Volcano
Subquest A: Wound Agnaktor's chest
Reward: 1000z
Subquest B: Sever Agnaktor's tail
Reward: 1000z
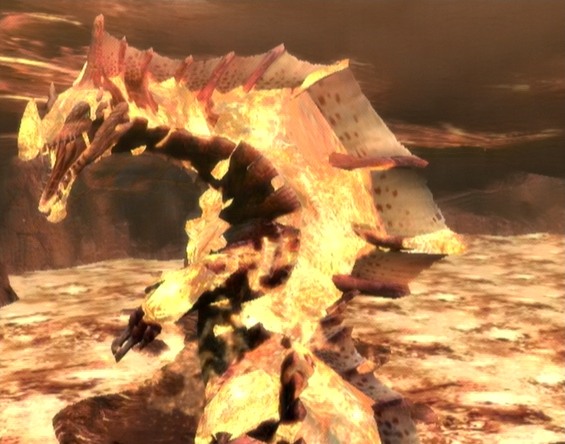
Agnaktor is the adult version of the Uroktor, which are the small
leviathan monsters you've surely encountered on previous treks through
the Volcano zone. Like Uroktor, Agnaktor can burrow into the ground and
emerge at will. As the adult, Agnaktor is much larger and more powerful
than the Uroktor and features a fleshed out move set. Though Agnaktor
may be a tough fight, the skills you've gained hunting the monsters
before it are more than you need to take down this beast.
Bring either a Lance or a Great Sword to this fight. A Great Sword might
be the better choice because you can sheathe it more quickly, allowing
you to better dodge Agnaktor's attacks or catch it with a Sonic Bomb
when it burrows underground. If you're more comfortable wielding a
Lance, go with a Lance. If you end up having a difficult time with
Agnaktor the first time around, go with the other weapon type on your
next attempt to determine which you're more competent with.
 Agnaktor is tough, but the skills you've gained hunting the monsters before it are more than you need to take down this beast. |
As Agnaktor's body is covered in molten lava, it's unsurprising that
this monster is weakest to the Water element. As such, you'll want to
equip your hunter with a weapon that deals Water damage. If you've been
playing exclusively offline, the two best such weapons available to you
at this point are the Spiral Lance (322 raw power and 240 water
elemental damage) and the Cataclysm Sword (624 raw power and 320 water
elemental damage).
Follow the Ludroth Bone Sword path to get to the Cataclysm Sword. You
may need to hunt Royal Ludroth and Gobul again to gather the required
materials. You'll also need three Lagiacrus Tails to upgrade from Spiral
Lance to Spiral Lance , so you may have to hunt Lagiacrus a few times
before you're ready to go. A Lagiacrus Tail can only be obtained by
severing and then carving Lagiacrus's tail. You have a pretty good
chance of obtaining this item when carving Lagiacrus's tail, so
acquiring three shouldn't take too long.
Though not required, it is highly recommended that you also craft a full
set of Rathalos armour before taking on Agnaktor. Most of Agnaktor's
attacks also deal Fire damage, so the 15 Fire resistance a full set of
Rathalos armour provides could spare you an involuntary trip back to
camp and a diminished reward. You'll have to hunt Rathalos a few times
and do some mining to gather the materials required to craft the armour,
but this set will certainly serve you well for the remainder of the
offline mode. Note that the Rathalos Plate needed to craft Rathalos
Vambraces is a rare carve (about a 3% chance when carving Rathalos's
tail and a 2% chance of receiving one on the reward screen), so you
could potentially have to hunt Rathalos quite a few times before
acquiring all the items you need.
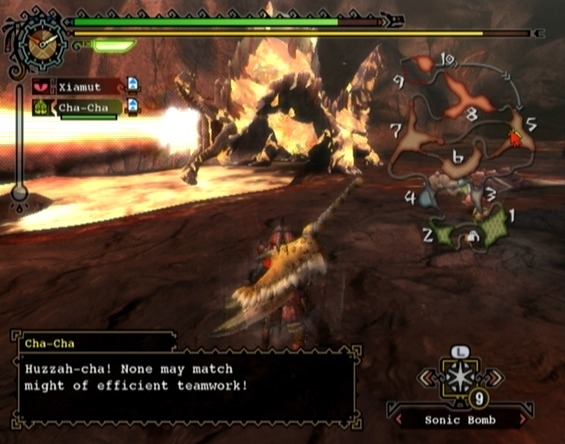
One item that will help you greatly when facing Agnaktor is the Sonic
Bomb. You can throw a Sonic Bomb at Agnaktor just after it burrows
underground to trap it for a short period of time. In this effect, Sonic
Bombs act just like Pitfall Traps, but don't seem to diminish in
effectiveness the more they're used. As such, you'll want to forego
traps this hunt and bring a full supply of Sonic Bombs with you. The
Supply Box for this quest contains two Sonic Bombs and you can hold 10
total in your inventory, so bring eight. Do note that Sonic Bombs won't
have an effect while Agnaktor is in rage mode.
You can create a Sonic Bomb by combining Gunpowder with a Screamer.
Combine a Fire Herb with a Nitroshroom to get Gunpowder. Screamers are
common on the reward screen after a Qurupeco or Great Jaggi hunt.
 Your strikes will bounce when the lava covering Agnaktor's body is hardened. |
As well as eight Sonic Bombs, bring the usual 10 Mega Potions, a decent
supply of Whetstones and some extra Cool Drinks. Once in the quest,
remove the Map, Rations, First-aid Meds, Cool Drinks, Paintballs (if you
don't have Cha-Cha equipped with his Fluffy Mask) and Sonic Bombs from
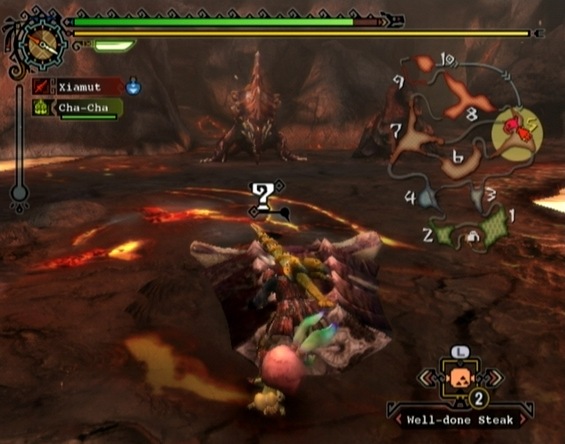
the Supply Box before setting out. Agnaktor is in Area 7 to start, so
make your way there after leaving camp.
Areas 7, 6, 5, 8 and 10 are especially hot. An overheated hunter will
gradually lose health; because you'll be fighting Agnaktor in the
aforementioned areas, you'll need to use a Cool Drink to counteract this
negative effect. Be sure to use another when the effect of your first
drink wears off.
The Agnaktor's body is covered in molten lava. If it remains out of the
lava or above ground for an extended period of time, the lava covering
its body will harden. Any attacks on this hardened lava will bounce and
deal a greatly diminished amount of damage. Fortunately, the Agnaktor
likely won't keep this armour for long, as it will frequently dive into
the lava and burrow into the ground. As well, the Agnaktor's magma beam
attack will melt the hardened lava on its chest, which is its weakest
point. Don't waste any time attacking Agnaktor when the lava covering
its body has hardened; just sprint away from it until it burrows
underground or moves into the lava.
Focus most of your attacks on Agnaktor's chest, as targeting this area
will deal the most damage. Attack Agnaktor's chest enough and you'll
wound it, which is required to complete Subquest A. You can also break
all four of Agnaktor's claws, its beak, the fin on its back as well as
sever its tail. Breaking all four of Agnaktor's claws will give you a
chance of receiving Agnaktor Claws on the reward screen at the end of
the quest and breaking its beak will give you a chance of receiving an
Agnaktor Beak. Severing and then carving Agnaktor's tail is the only way
to obtain the Agnaktor Tail item and is required to complete Subquest
B. As well, breaking the armour on any part of Agnaktor's body will
prevent your attacks from bouncing when targeting that area.
You may have noticed some similarities between Agnaktor and Lagiacrus.
As well as being a leviathan like Lagiacrus, Agnaktor shares several of
Lagiacrus's on-land attacks. One such attack is its tail whip: Agnaktor
performs a wide bite to one side, wrapping its tail around its body and
then whipping its tail back behind it soon after. If you're standing on
the side opposite the side its tail is wrapped around, roll toward
Agnaktor's head to avoid being whipped by its tail. Cutting Agnaktor's
tail will reduce the effectiveness of this attack, making it much easier
to dodge. If you're close enough and you manage to dodge the attack,
you can get a few hits in before Agnaktor makes another move.
 Sever Agnaktor's tail to complete Subquest B. |
Another move Agnaktor shares with Lagiacrus is a slide forward on its
stomach. When Agnaktor takes a step back and momentarily hunches over on
its hind legs, it will then slide forward on its stomach. You most
won't take any damage from this attack unless you're directly in front
of Agnaktor or near its front legs. Dodge or dash to the side to get out
of the way when you see this attack coming. Agnaktor's bite attack is
similarly easy to avoid because it simply lunges forward.
Like most other boss monsters, Agnaktor also has a charge move that it
uses to cover ground quickly, so be careful when choosing a spot to use
healing item or sharpen your weapon. Agnaktor also has a body slam,
where it rises onto its hind legs and then falls forward onto its
stomach. Roll or dash to the side to avoid this attack. Agnaktor's head
can also hit you when it falls forward, so evading to the side is your
best bet.
When the lava covering Agnaktor's body isn't hardened, all its attacks
will inflict the Light or Severe Fireblight status ailment when it hits
your hunter. A hunter suffering from Fireblight will gradually lose
health. You can cure Fireblight by rolling three times or rolling once
in water. As Agnaktor never ventures into Area 4 -- the only area in the
Volcano region with water -- you'll have to roll on the ground a few
times to put out the flames.
Agnaktor's hip check move can be difficult to evade, so it's best to
block it. When the Agnaktor takes a step back and then slowly positions
itself so its side is facing toward your hunter, use your shield or
weapon to defend against the incoming attack. Don't underestimate the
range of this attack, as it is considerable.
It's important to avoid positioning your hunter directly in front of
Agnaktor when attacking. Aside from Agnaktor's bite attack, you also
have to watch out for its peck attack. Here, Agnaktor hammers its beak
on the ground in front of it several times. The resulting tremors will
cause your hunter to stagger if he or she is too close, so try to get
some distance when you see Agnaktor readying this attack.
 Agnaktor's above ground magma beam is powerful but easy to avoid. |
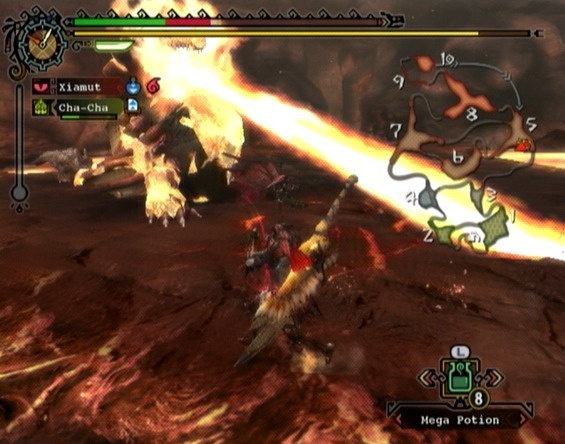
One attack Agnaktor frequently uses is its magma beam. Here, the
Agnaktor lifts its head while clacking its beak and then fires a large
beam of energy directly in front of it. This attack can be easily
avoided by simply rolling or dashing to the side when you spot the
Agnaktor lifting its head or hear it clacking its beak. This attack
actually provides a good opportunity to get a few hits in on Agnaktor
because the beam comes out directly in front of it, leaving its head and
chest vulnerable. Your hunter will take a large amount of damage and
suffer from Fireblight if you're hit by the beam, so remain vigilant.
Agnaktor can also burrow underground and re-emerge to attack. A large,
orange spot will appear on the ground where Agnaktor is about to emerge
-- usually behind your hunter. The lava on Agnaktor's body will soften
whenever it goes underground.
You can trap Agnaktor with a Sonic Bomb if you throw it right after
Agnaktor burrows into the ground. If successful, Agnaktor will partially
re-emerge and be at your mercy for a short period of time. This is a
good opportunity to attack its face and chest. It's good to keep your
Sonic Bombs selected whenever you're not using a healing item or a
Whetstone so you'll be ready to quickly throw one while Agnaktor is
burrowing. If you're using a Lance it can be difficult to sheathe your
weapon and then throw a Sonic Bomb in time. Great Swords are quick to
sheathe, so making this tactic work is considerably easier with one.
The Agnaktor will drop a glittering spot once you've trapped it; gather
at this spot for chance of finding a Wyvern Tear or other item.
Using a Sonic Bomb to trap Agnaktor
When Agnaktor leaps into the air and lands to get back above ground, the
resulting tremor will cause your hunter to stagger if he or she is
standing too close. This stagger will leave your hunter vulnerable to
attack, so it's best to keep away from Agnaktor's emergence spot until
you're sure which attack it's going to use.
There are several attacks Agnaktor can use once burrowed underground.
One is a sequence of dives aimed squarely at your hunter. During this
attack, the Agnaktor will leap into the air toward you and dive back
into the ground several times. If you're using a Lance, it's best to
block these dives with your shield. After blocking the initial dive,
immediately turn around to block the next one. Repeat this until the
attack is over. If you're able to sheathe your weapon before the
sequence of dives starts, you can run from side to side to dodge the
Agnaktor's dives. This tactic is more effective if you're able to
manually control the camera while sprinting so you're able to know where
Agnaktor will next emerge.
Much like its slide forward on land, Agnaktor can swim forward while
partially underground and strike your hunter with its fin. Just dodge or
dash to the side when you see Agnaktor partially underground to avoid
taking damage.
Perhaps the most important attack to watch out for while Agnaktor is
burrowed is its magma beam. When underground, the Agnaktor can prop
itself above ground with its arms before firing a magma beam in a circle
around it. As when firing its magma beam when above ground, Agnaktor
will clack its beak several times before the beam comes out. Agnaktor
will first shoot the beam in front of it and then twist its head in an
arc from left to right.
 To evade Agnaktor's burrowed magma beam attack, move in and attack if you're close to Agnaktor or get ready to dive over the beam if you're far out. |
How you evade Agnaktor's burrowed magma beam depends on how far the
Agnaktor is from you when it emerges and props itself up. If it's close
to you, sprint right up to it and use this as an opportunity to attack
its chest. As the Agnaktor tends to emerge far from your hunter when
using this attack, you'll likely have to dive to avoid getting hit by
the beam when Agnaktor twists its head around. A dive can only be
performed while your hunter is panic running. To panic run, sprint away
from the monster so your hunter's back is to it. To dive, just press the
B button to evade while panic running. Your hunter is invulnerable
while diving, so dive over the magma beam just as it crosses your path
to avoid taking massive damage. If your hunter is not panic running, he
or she will roll rather than dive, so be careful.
Agnaktor will keep to Areas 7, 6 and 5 for most of the fight but will
limp into Area 8 when close to death and swim to Area 10 to rest shortly
after. If you have pickaxes in your inventory, it may be worth taking
the time to mine the spots in Area 8 when Agnaktor leaves as well as the
mining spots in Area 9 on your way to Area 10. If Agnaktor is asleep in
Area 10 when you enter, consider mining the spots in Area 10 before
waking the beast and finishing the job.
Continue battling Agnaktor until it falls to complete the quest.
More Monster Hunter Tri Stuff
i used inceadeus switch axe and all qurpeco armour
To get the rathalos plate you can also find it as a shiny drop if you damage both rathalos wings, get ultra lucky cat from a meal and damage its head.