Recruit The Krogan
Mass Effect 2 Walkthrough and Guide
Recruit The Krogan
Next and final stop from this dossier is a scrapyard-planet (with the second-highest murder per capita level in the galaxy), where ships go to be recycled. There is something shady going on there, however, involving the Krogan (called Okeer) that we want to sign up. Using the Mass Relay, travel to the Eagle Nebula and land on the planet of Korlus.
Team Selection: As usual, it's useful to have someone adept at the biotic arts (maybe a good time to give Jack a try), a soldier, and someone with the Overload ability.
Infiltrate Blue Suns Compound
The Blue Suns are in control of this region, and will be hostile to you advance.
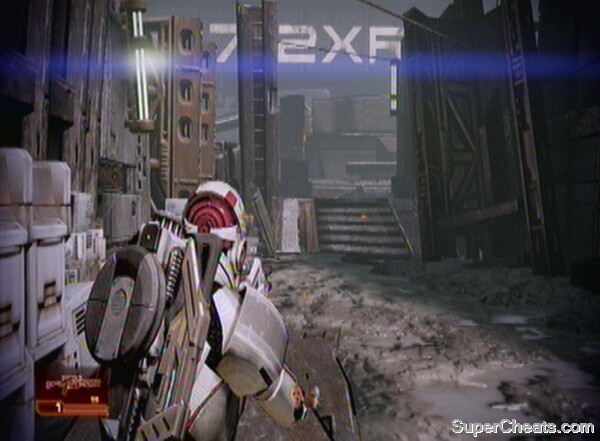 Korlus is a desolate place. |
Round the corner and move over the ramp. It is here that you will find your first hostiles: a group of Blue Suns Mercenaries. Try to pick them off with a sniper rifle from distance, if your character has one. Continue over the next ramp and you'll find an injured mercenary. Something obviously attacked him. Offer him some Medi-gel to get in his good books. Ask plenty of questions and you will learn that someone called Jedore has decided to create a Krogan army, the construction of which is Okeer's job. Unfortunately it hasn't gone to plan and the indoctrination given to the freshly-created Krogan has turned them insane – making them fodder for the mercenaries (though still causing plenty of problems).
When the merc's base radios him, choose the Paragon or Renegade statement after enquiring about the 'Krogan pack'. You can ask further questions about the layout and defences of the labs once the danger of incoming mercs has abated, before moving out.
Find Okeer
Move around the corner and get into cover by the crates. Pick off the Blue Suns troops up high using a long-distance weapon or incendiary ammo. More will appear on the bridge and on a landing up ahead as you drop down into the trench below. Take the Medi-gel as you move through. Move up the ramp and get into cover once again.
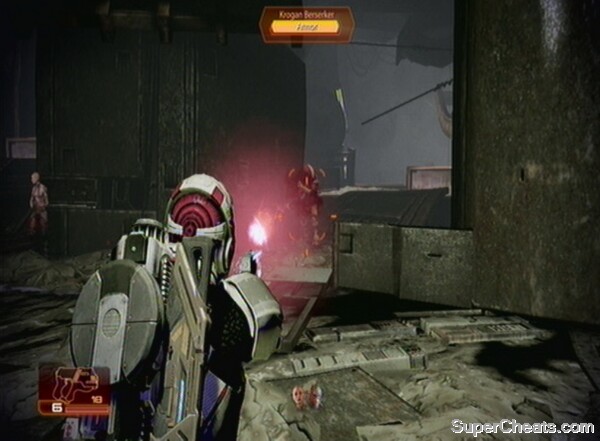
 Be careful of their powerful attacks. |
Pick the Blue Suns mercs off as before, stopping to remain in cover to allow your shields to recover every now and then. Continue through the wasteland until you come upon a team of Krogan attacking the mercenaries. Help them out from behind cover and talk to the lead Krogan when clear
Luckily the lab-bred Krogan recognises that you mean him no harm and will assist with your enquiries. After explaining what he knows of his origins, you can ask him to show you the way to the labs.
On the route ahead you will quickly find a Blue Suns Corpse, which you can access for some credits. It appears the Krogan have escaped and are attacking their oppressors as you head down a steep slope. Attack the enemies that come your way as you near the bottom. Here you will find the loose Krogan, and they pack a punch.
 Don't let the Krogan get too close. |
Use Pull once their armour is down to keep them at a safe distance, and concentrate on attacking early and from range. Head round to the right, trying to pick off one Krogan at a time. Proceed across the ramps, continuing to keep the Krogan at bay. There are a lot of them, at least a dozen – fortunately they all arrive one at a time.
Once you clear the ramp you can collect some Refined Platinum. Climb the steps and hack the door ahead. Take the next flight of stairs and take the Sniper Rifle Damage Upgrade, Power Cells and make use of the Medical Station in the next room. Eliminate the guard directly behind the door and get into cover on the balcony. Destroy the cover of the Blue Suns Mercenaries on the other side of this abyss and take them out when unprotected.
Continue along the balcony until you come to another room full of mercs. Shoot as many as possible through the doorway before getting into cover inside. Use a sniper rifle to deal damage from range, and Incendiary Ammo to hurt the fleshy enemies, if available. Move through the room, hacking the PDA on the floor by the exit door. Another flight of steps beckons. Head left at the top and get into cover by the Med Kit – the area is swarming with Blue Suns Mercs. Push up to get a better angle on some of the shielded enemies and use Overload on them if possible. Get the Med Kit when the area is clear and go round the next corner.
 Keep going through this circuitous level. |
There should only be a couple of enemies in sight. Take them out and move on, rifling through the Blue Suns Corpse around the next corner. Get into cover again and deal with the onrushing mercs. Use a sniper rifle on the most distant enemies if you are carrying one. In the next room you will find Power Cells and a Wall Safe. Proceed but ignore the door and move round the corner for a hackable PDA. Return to the door and go through. Up the stairs you'll find yourself in another rampy area. Deal with the enemies you can see from behind cover on the lower floor and then push up the ramp to the next piece of cover.
Follow the path down and more Blue Suns are blocking the route ahead. Again, long range weaponry is ideal. The radio chatter suggests the mercs are getting overrun, and as you move on into a new area with stairs leading up to some desperate mercenaries, you can see proof that their chatter has foundation. You can ignore the stairs and go underneath the upper section, but the height advantage is worth making use of. Take out the Blue Suns Heavies from this vantage point and watch out for their powerful shots. Take cover immediately as you reach the bottom as you have more Heavies to deal with. Ensure their shields are down and let rip with the Incendiary Ammo and Biotic powers. Go through the door at the end of this lengthy section.
Depending on your Mass Effect 1 character, you may now meet a slightly shady scientist. Either way, she has little to add (except Paragon/Renegade points), so ask your questions before hacking the Security Terminal and using the Medical Station. The next room contains Okeer.
 The morally confused Okeer. |
The conversation ahead reveals that Okeer has been attempting to make the perfect Krogan soldier. His failed attempts join Jedore's ranks. It is all about purifying the troubled Krogan race. Okeer is willing to join you, but his super-soldier will remain his property. Unfortunately, Jedore is giving in and shutting down the whole operation. This will kill Okeer's prototype and so Jedore must be stopped.
Defeat Jedore
Bypass the Lab Terminal in this room to unlock the Krogan Vitality Upgrade. Open the door and follow the steps downwards. The next room is very tough, largely due to the presence of a Mech Suit and Krogan Berserkers. As you are focusing on the Mech Suit the Krogan will flank you, so set your team up to keep you covered while you take on the main enemies. You can use Overload on Jedore and the Mech, and then whittle down their armour. Have Push reserved for the Berserkers, just in case they get through to you (and be ready to switch to a shotgun of your own!).
TIP: Now is a good time to break out the heavy weaponry. The grenade launcher can kill the Berserkers comfortably in a couple of shots.
Destroy Jedore and her cronies.
Get Back to Okeer
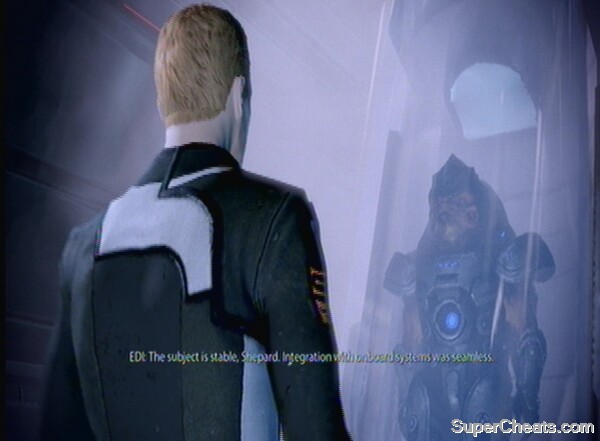
Rush back the way you just came to find Okeer on the floor. He doesn’t appear to have known anything, but a recording he has left makes further remarks on the perfection of his prototype Krogan. You can have a discussion with your team about the viability and ethics of taking the Krogan back to the Normandy to join your squad, but eventually the decision will be made to take him along. Despite the risks, he could prove invaluable against the Collectors.
Normandy
Suffice it to say, not everyone agrees with your decision to bring the Krogan back on board. Miranda in particular is very worried about the consequences of opening the tube. You should know that the Illusive Man wants to speak to you, but this will trigger your next mission – so do anything you want to catch up on now, especially releasing the Krogan.
Release the Krogan
Feel free to speak to Yeoman Kelly Chambers and get the opinion of other crew members, but eventually make your way down to the port cargo hold on Deck 4.
 You now have a decision to make about the Krogan. |
There is little reason not to release him, as he provides a valuable, strong and effective grunt (as his name suggests) in your squad. The only real motivation for doing otherwise is if you are on another playthrough and want to try something different. Cerberus protocol demands that you don't trust alien technology, but who cares what they think, this guy is a very cool character.
Once he is out of the tank and gives Shepard a warm welcome, you have to aim to diffuse the situation and convince the Krogan to join your team. You need to try and show yourself as a strong and brave leader, but don't start a fight! When you have the option, use the Paragon or Renegade options to convince the Krogan.
Party Member Acquired: Grunt
With Grunt on board, you can ask about his past, where he hopes to be in the future, and all the usual team-building stuff. Once you're happy with this, pay a visit to Kelly to see what she thinks about your new addition, and then head to the briefing room to meet the Illusive Man and see what's next for your intrepid crew (note that this will trigger the next mission, so do whatever you need to on the Normandy and elsewhere before visiting the briefing room).
No comments yet. Tell us what you think to be the first.