The Truth and Reconciliation
Halo: Combat Evolved Anniversary Walkthrough and Guide
by CMBF ![]()
The Truth and Reconciliation
--== Enemy Units ==--
(1) Grunts -- A mixture of both types / dangerous in packs
(2) Jackals -- Try not to let them get close enough to melee you
(3) Elites -- Both types are present, the Red seem more dangerous as they melee
(4) Hunters -- Very accurate shooters / Kill On Sight (Groups of Two)
--== ==--
Level Notes: Truth and Reconciliation has three Achievements directly associated with it - the standard Achievement for completing the level regardless of difficulty level selected, and a pair of optional Achievements that are based upon specific actions/results and not difficulty.
-- Truth and Reconciliation (25 GS)
You get this for completing the level.
-- Close Quarters Combat (25 GS) Complete the level "Truth and Reconciliation" with at least four rounds left in your Sniper Rifle.
That may sound easier than it actually is -- but one way to make sure that you do end up unlocking this is to replay the level with your second gamepad active and use that character to do most of the sniping, which pretty much guarantees you unlock this one.
-- All According to Plan (10 GS) Kill all of the enemies in the first encounter of "Truth and Reconciliation" without being detected.
To accomplish this what you need to do is stick to the cliff wall on the right of the first area and snipe your targets without giving away your position. Foot-units get priority over the ones on the mounted guns, but bear in mind that if you are detected or you stray too far from the right side the Marines that are with you will attack, and if that happens you cannot unlock this Achievement. So don't let that happen!
Basic Walkthrough
Your goals here are simple:
-- Eliminate the Covenant Troops in the first area without being discovered
-- Rescue Captain Keyes from the Covenant Cruiser
The level begins with you being inserted near the enemy base with a squad of Marines -- while they will be very useful to you later, right now you need them to stay put! Using your Sniper Rifle start clearing out the enemy here -- you will know you got them all when you unlock the Achievement for that.
-- All According to Plan Achievement --
If you are going for this Achievement -- which is for taking the first group of Covenant out without being spotted using your Sniper Rifle, there are several basic strategies that you should be following:
(1) Be Patient. I once heard the professional sniper described as a man who enjoys the fascinating detail of watching paint dry -- what that translates to is that patience is a virtue for the sniper. Math is also a help, since you can use that to keep track of your kills (that was humor).
(2) Move in small and carefully planned steps. Motion is how you end up spotting the enemy and, I suspect but cannot prove this, how the enemy spots you in the game. In other words the game decides you moved too fast, too far, or too much in the open, and the enemy "spots" you and starts shooting. If they shoot at you that blows any chance of you unlocking this since it means you were spotted, and this is awarded for NOT being spotted. So use economy in motion, elevate your situational awareness to the max, and take the enemy out ideally when no OTHER enemy is around to see them get killed.
(3) Keep track of your kills. Basically you will be taking down 2 Jackals, 2 Elites, and a bunch of grunts -- the grunts will be your biggest problem because unless you are in a good position they can be hard to spot -- and the best position is unfortunately one in which you are easy to spot from below -- so you have to eliminate as many of them as you can BEFORE you move into the opening of the ledge to reduce the chance of being spotted.
(4) The fixed guns have sensors on them. Maybe. Well, we cannot say that for certain but what we can say is that a grunt manning one of the guns is twice as likely to spot you than one on foot -- so we should assume that they do have heat sensors on them or at the very least increase the grunt awareness level but it all amounts to the same thing.
The easy solution to this threat is to make damn sure you clear out the fixed gun operators because they will ruin your day brother. When a grunt becomes alarmed -- as in sees another Covenant die -- four times out of five they will head for and man the nearest fixed gun, so watch for that and kill them when they do.
(5) Once you have the enemy down to the last two or three is when you will make a dumb mistake. Murphy is waiting for you mates, so don't amuse him. Treat the last three with the same level of care you gave to the first three, even though it will take 20 times longer to kill the last three than it did the first three, in the end your reward is a bitching Achievement and the personal knowledge that you accomplished something!
Once you take out the last Grunt -- and it will be a Grunt, it is always a Grunt -- the Achievement will unlock, and you will immediately hear the music start up and the Marines start to chatter -- which is a good thing because it means you accomplished this goal and you can now be a bit more up-front about engaging the enemy.
Taking out the Hunters
 The Ascension to Reconciliation |
-- Back on the Mission --
After you have eliminated the first group of Covenant (and hopefully obtained that Achievement) you will want to carefully make your way along the path ahead, which follows the edge of the cliff on the other side of the Covenant encampment past the fixed gun emplacements. As you approach the threshold of this path Cortana will tell you to stop, and warn you that her sensors are picking up movement ahead...
That is spot-on! Ahead of you is a mixed pair of enemy squads, and they know you are coming so progress carefully and use what cover is available as you work your way along the path. Ahead and slightly above you is a gap with mixture of Jackals, Grunts, and Elites and one of the Advanced Elites (Type 3? Whatever, you will know when you run into one because they are a lot tougher than the two types you have faced before) -- you will want to make good use of your Sniper Rifle here to thin them out, which will make crossing the gap a lot easier -- but save for a concentration of needlers your greatest threat is the mounted fun on the far ridge so take its operator out quickly to save yourself some grief.
Personally I found that the best way to take the Type 3 Elite out who is around the corner to the right was to switch to sticky grenades, quickly dodge around the corner and plant one on him then just as quickly back up -- the grenade going off takes out his shields, and all that you need to do then is hit him with a short burst from your rifle and he is toast.
As you work your way along the path you will run into a small cluster of Grunts -- this was really not funny at the time but after the fact it is funny -- but when we got to this section there was one Grunt who ran back and forth BETWEEN my two groups of Marines, causing them to shoot at it and hit each other because they were directly across from each other. That was when I learned that friendly fire was actually in effect in the game, as a few of the Marines killed each other trying to kill the Grunt. *Facepalm*
Further ahead on the trail is another mounted gun and it is manned -- but if you stop just past the large clump of brush and switch to your Sniper Rifle you will find that you can *just* target the top of the Grunts head that is manning the fixed gun, and kill him. You actually have to aim a smidgeon above his head to do it, but that way you do not have to walk around the boulder and into his range to take him out!
Ahead of you is a pair of Type 3 Elites as well as the other types scattered around -- we already discussed a way to kill them but just so you know if you are going to try to kill them with guns instead of softening them up with a grenade first you need to try to target their heads to damage them quicker...
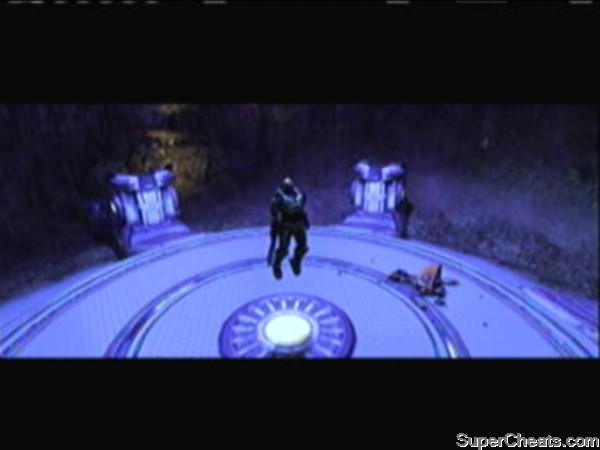
To the left of the other side of the land bridge you will spot a blue glowing object on the ground that you can pick up -- this is an Active Camouflage Unit (ACU) -- a device that makes you blend into the background and hard to see -- but it does not make you invulnerable (you can still be shot). It will let you slip in behind the next group of enemy through the narrow cut in the canyon, so you may want to do that in order to quickly take out the turret there but there is still the matter of some Jackals, Grunts, Elites, and some Type 3's...
Personally I find that softening up the Type 3's by tossing a grenade between them and THEN taking out the turret from behind is a more effective strategy but your mileage may vary here... So do it however you like. Bear in mind though that if you get killed when you re-spawn at the last checkpoint you have to find your body to recover your Sniper Rifle from it.
I am uncertain that this interferes with the optional Achievement since I did not get killed but it might? It is a good idea not to get killed anyway, I am just saying... You will know it when you arrive at the lift to the ship -- it is huge, it is pink, it is obvious!
At this point the Marines are no longer hanging back but are actively with you assuming that any of them are still alive -- speaking of which while it is a nice idea to try to keep them alive if you can, remember that they are there to help you, not you to help them! If a few have to die to get the mission accomplished than hey, that is what has to happen...
As you approach the launch pad for the cargo lift you will notice that it is protected by several SHADE Guns (fixed turrets). Of course it is! That is just the sort of facility you would use turrets to defend after all -- so you will want to make sure that you clear them as you approach and then look for a spot you can easily defend because before you can use the lift you are going to need to defeat a few mixed waves that will include pairs of Jackals, Elites, and lots of Grunts. The trick is to not let the Grunts man any of the SHADE guns that can hit you and to have some bolt hole near enough so that you can duck into it to let your shield recharge if you need to.
Chances are good that you will run out of ammo for your MG before the battle against the waves is over - I recommend holding on to the Sniper Rifle and swapping your empty MG for one of the Plasma Rifles from an Elite... When you get to the end of the waves of attackers you should feel good about yourself -- assuming you did not die that is and if you did not, well then good job! -- and the good feeling will last... For about 20 seconds before the ominous music kicks in and you see a double flash from the launch pad...
If you have been gaming for long you probably know that games like Halo usually have a boss mob you have to face every few levels -- and we have not seen one of those yet have we? Well, not we get to see two of them! Maybe they are not really boss mobs -- but this new mob you are about to meet is called a Hunter -- and they are very hard to kill since they are only vulnerable from behind.
Seriously, you want to let them rush you assuming they do not just kill you outright with that canon they are armed with. Stick to cover because you cannot take more than two shots from their gun before you die -- and you are going to die (probably many times) before you figure out how to deal with these things. That sucks but call it a learning experience, right? I would be totally lying to you if I said that I took them down no hoo-hoo... The truth is I got my ass handed to me the first few times I fought these!
What I found was the easy way to deal with the pair was to man one of the SHADE turrets and, as soon as they spawned open up on them. Generally I was able to kill one of them dead before the second one blew me -- and the turret -- to hell. So yeah, that only works once, but the remaining Hunter was a lot easier to handle all by his lonesome, so you should find it easier that way.
After you kill the second Hunter Cortana contacts the rescue ship and has a conversation with the pilot, which is your clue that you have accomplished your goal and cleared out all of the ground forces here, which means this part of the level is finito!
More for this game on SuperCheats.com
Can I buy the complete walk tru book any where?