ONI Alpha Site
Halo 3: ODST Walkthrough and Guide
Halo 3: ODST Guide - Walkthrough
ONI Alpha Site
Mombasa Streets
Character: The Rookie
Note that you can tackle the Kizingo Boulevard, ONI Alpha Site, NMPD HQ, and Kikowani Station missions in any order you wish. To set a different Beacon on your compass, first press the Back button to access your VISR NAV and then use the up and down buttons on the D-pad to switch between the available Beacons. Press the A button to set the selected Beacon to the compass.
Objective: Search ONI Alpha Site for ODST squadmate
Activate VISR and look for the clue on the ground by the bombed out bridge. Inspect the REMOTE DETONATOR to start the mission.
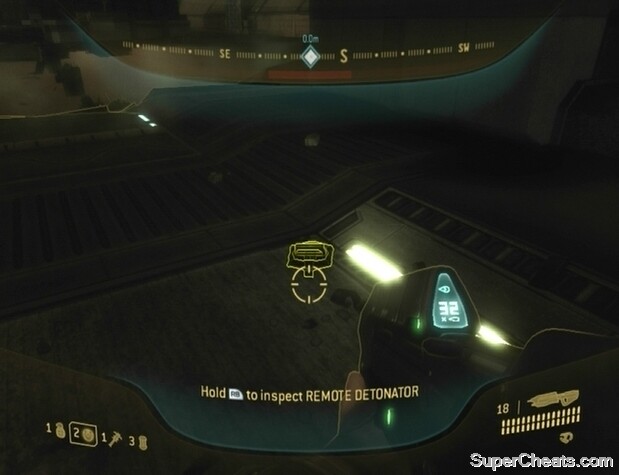 Look for the clue in the ONI Alpha Site area and inspect it to start the mission. |
Oni Alpha Site
Character: Dutch
Achievements: ONI Alpha Site, Laser Blaster (get 10 Spartan Laser kills).
Objective: Arm all charges on bridge
Though you should be busy setting charges, you can unlock the Laser Blaster Xbox 360 achievement right at the start of the level.
Achievement Tip -- Laser Blaster: Start by taking out the Wraith at the northwest end of the bridge to score three Spartan Laser kills. Click the Right Stick to zoom in if necessary. Then, turn around and keep an eye out for Banshees coming from the south. Use the Spartan Laser to blast each Banshee as they fly overhead. One Banshee is worth two kills. Finally, face northwest again and hug the railing along the west side of the bridge. You should be able to spot another Wraith across the way; hit it with your Spartan Laser to unlock the achievement.
Unlocking the Laser Blaster achievement.
Travel southeast down the bridge and activate the three charges as you pass each one. When all three charges have been armed, join your allies behind the barrier at the southeast end of the bridge and fire at the approaching Covenant.
Objective: Use Detonator in watchtower
Wait until you receive order to detonate the charges. Then, climb up the watchtower northeast of the barricade and power up the terminal to set off the charges and blow up the bridge. Swap your Spartan Laser for the Sniper Rifle in the tower.
Objective: Fall back, defend inner courtyard
Continue southeast to the inner courtyard. There are some Brutes, Grunts, and a pair of Hunters in the middle of the area. Try using your Sniper Rifle to pick of the Brutes with headshots. Keep an eye on the Hunters as well; if you spot one with its back turned, shoot its weak spot with your Sniper Rifle to inflict a large amount of damage. A couple shots should do it.
Once the first batch of enemies has been taken care of, join your allies at the other end of the courtyard. Two Phantoms will soon appear to drop off some troops. You can find a mounted Machine Gun on the jutting platforms on either side further up the steps. Use the Machine Gun to cut down some of the enemies below. While the Machine Gun does have infinite ammo while mounted, you remain very vulnerable while gunning, so consider detaching the weapon if you’re taking heavy fire.
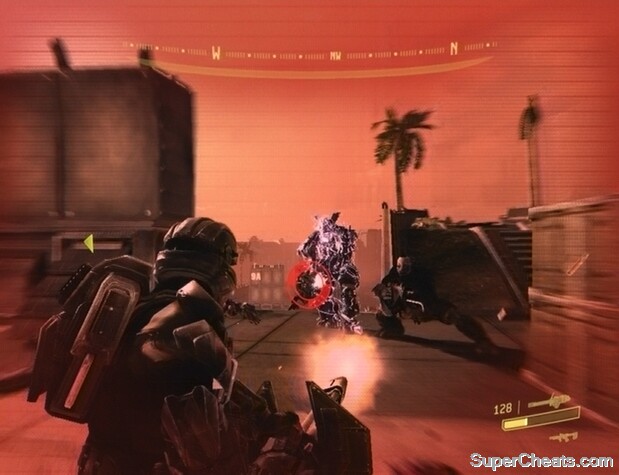 Use a detached Machine Gun to mow down enemies as they appear. |
There is a Wraith among the enemies dropped by the Phantoms, but it won’t be able to do much damage where it is so just leave it alone. When you receive order to fallback, detach the Machine Gun if applicable and then climb up the steps to the top of the ridge. Walk along the ridge and gun down the Brutes and Grunts as they climb up the stairs. Be wary of fire from the Wraith and continue to mow down Covenant until another pair of Phantoms appear.
Fallback when you receive order and enter the ONI building.
Objective: Retreat, defend ONI building interior
Hop on the turret behind the sandbags in the lobby and face the north entrance. When the Covenant cuts through, fire at the suicidal Grunts as they come down the stairs. More suicidal Grunts will then come from the west entrance followed by some Brutes, Jackals, and more Grunts. Mow the enemies down with the mounted Machine Gun but detach it if you’re taking heavy fire.
After the first wave, more enemies will pour in from the south and east entrances. If you haven’t detached the turret yet, do so now. Fire at the enemies that come through the south and east entrances using the detached Machine Gun turret or your Silenced SMG. Crouch in front of the sandbags to recharge your Stamina if necessary. There is a health pack on the ground by the pillars in front of the east exit, but only go for it if you’ve cleared that part of enemies.
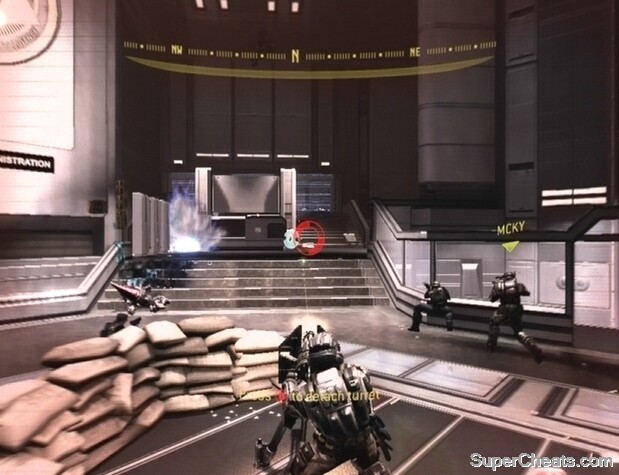 Defend the ONI building interior. |
Objective: Take the elevator to roof for evac
Once the last enemy has fallen, follow Mickey and any remaining allies onto the elevator. Stand in front of the terminal and hold the RB button when prompted to start the elevator. A swarm of Drones will appear partway up; move around to avoid their fire and use your Silenced SMG to clear away as many as you can.
At the top, follow your allies outside. On the roof you face Jackals, Grunts, and several variants of Brute. Pick off as many enemies as you can from inside. Try to get your hands on a Plasma Pistol if you can; one or more of the Grunts you encounter should be carrying one. Hit Brutes with charged Plasma Pistol shots to remove their armor, then switch to your secondary weapon and quickly finish them off.
Keep this up until the Pelican reaches the rooftop, at which point approach it and hold the RB button to board.
More for Halo 3: ODST on Super Cheats
Yay
Excellent!!!!!