Agency Tower
Crackdown 2 Walkthrough and Guide
Agency Tower
Once you've infiltrated the Refinery and opened all five valves, you then must head to Agency Tower to detonate the final Beacon. You'll have to defend the three cores charging the Beacon from an onslaught of advanced Freaks, so ensure you're well-prepared before setting out.
As you've made it this far, presumably your Agent's Agility, Firearms, Explosives and Strength skills are all at least level four. It is recommended that you equip your Agent with a Mach HMG-120, either a Homing Launcher or Flocket Launcher (the Homing Launcher is a bit more powerful than the Flocket Launcher), and Cluster Grenades.
 The final phase of Project Sunburst will take place at the Agency Tower. |
You'll have unlocked the Flocket Launcher when you levelled your Agent's Explosives skill to level three, but the Mach HMG-120, Homing Launcher and Cluster Grenades are Cell weapons, so you'll have to deliver those to the marker at an Agency Landing Zone before you can select those weapons when redeploying your Agent.
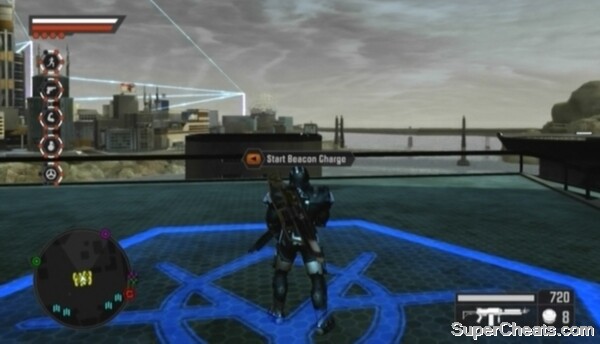
When you're ready to get started, make your way to Agency Tower and follow the white trail that appears up to the Beacon Charge marker. Stand on the marker and press the Back button to begin charging the Beacon.
You will soon receive word that hostiles have been detected inside the energy field. The enemies you'll face here are former-agents-turned-freaks. These guys are powerful and there are a lot of them, so be ready for a tough fight.
There are three power cores charging the Beacon. You must defend each core in order, moving on to the next only when the previous core is fully charged. The blue meter in the top-right corner of the screen indicates the charging progress of the current core, while the red meter below it indicates the core's condition. You'll fail the mission if the Freaks manage to destroy any of the cores.
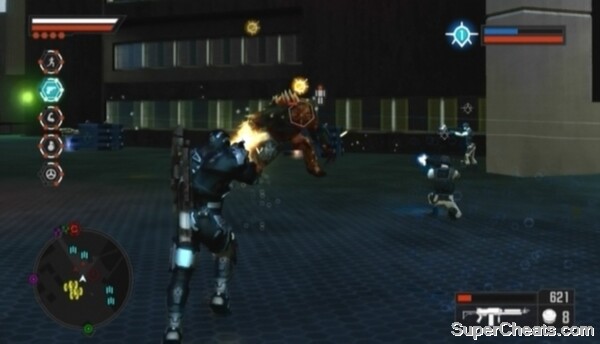 Defend each power core from the onslaught of lethal Freaks. |
At each core, the Freaks will start by attacking the core at its base, moving higher and higher up the core structure as the battle progresses. Start on the lowest platform and continue killing the Freaks that appear there until the Freaks start climbing higher up, at which point use the ramps on either side of the platform to ascend to their level. The narrator will inform you of the Freaks' current position on the core structure, instructing you to move up to the mid- or top-level platforms to clear them out.
As when defending any Beacon, while defending Agency Tower you will encounter attacking Freaks who are marked on your tracker and HUD and will only attack the objective, as well as unmarked Freaks who serve no other purpose than to make defending the objective as difficult as possible.
For the most part, you'll want to take down unmarked Freaks with your Mach HMG-120, as these guys will come at you head on and you don't want to risk your Agent taking damage because he's too close to a rocket blast. Try your best to preserve rocket ammo, as you'll need plenty to defend the final core. Use your Homing Launcher to take down groups of two or more marked Freaks while using your Mach HMG-120 to gun down any that are close enough. There is an explosive pack attached to the vents marked Freaks perch on, so target these explosives with your Mach HMG-120 when a Freak is there to blow them away.
When the first power core is fully charged, move on to the next one by continuing up the ramps until you spot a numbered arrow on the ground pointing to the next core. Follow the arrows to the second core and prepare for another wave of Freaks. There are weapon crates near the start you can go to if you're low on ammo, though it's best to stick with a Mach HMG-120 and Homing Launcher if you've been frugal with your weapons.
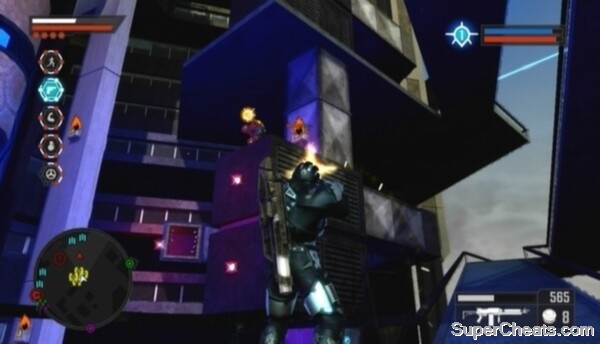 Target the explosive object attached to a vent when an attacking Freak is perched there. |
At each power core you will face an increasingly large wave of Freaks. Defending power cores one and two is not difficult with the right weapons, but things can quickly get out of hand at power core three. There seem to be many more unmarked Freaks at the final core, and they can make it difficult to take out the Freaks attacking the core before things get out of control.
To maintain control at the third core, gun down approaching unmarked Freaks with your Mach HMG-120 (aim for their heads) and then switch to your Homing Launcher and blast any attacking Freaks on the platforms above or below you. You won't have time to run up and down the ramps to reach attacking Freaks, so just clear them out with your Homing Launcher as best you can from however far up the core structure you are. Move to the top-level platform once Freaks start appearing there and use your Homing Launcher to keep thing under control.
Defend the final core until it's fully charged to complete the final phase of Project Sunburst, ridding Pacific City of Freaks and winning you the game! Be sure to sit through the credits for an additional cutscene that hints at a sequel (or perhaps some downloadable content).
Defending the three Power Cores at Agency Tower
More Crackdown 2 stuff on SuperCheats
what can you do after you've done this?
1