Pauper's Drop
BioShock 2 Walkthrough and Guide
Pauper's Drop
A note about the Research Master achievement/trophy: Research Master is unlocked by maxing out research on all nine subjects. As such, if you're after this achievement/trophy, you must research the Thuggish Splicer to level four in Pauper's Drop, as they do not appear beyond this level.
Goal: Go to the Sinclair Deluxe Hotel
Step out of the train and proceed to the highlighted Door Control panel through the doorway straight ahead. Complete two stages of hacking to unlock the secured door. Through the door, pick up the Machine Gun next to the Rosie corpse to gain some ammo and then continue on into the next area. There are three Splicers through the door at the end of the L-shaped corridor. Waste them using your Machine Gun and Anti-Personnel Rounds, or headshot them with your Rivet Gun.
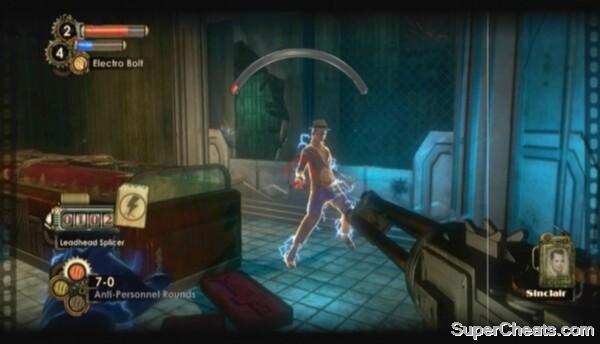
You'll encounter a Brute Splicer upon entering The Fishbowl. You won't be facing him just yet, so move further into the area. There's some stuff to do here before entering Sinclair Deluxe. Just beyond the door to the hotel you'll encounter a Leadhead Splicer with a hacked Security Drone. Hit the drone with a Hack Dart and hack it to your side.
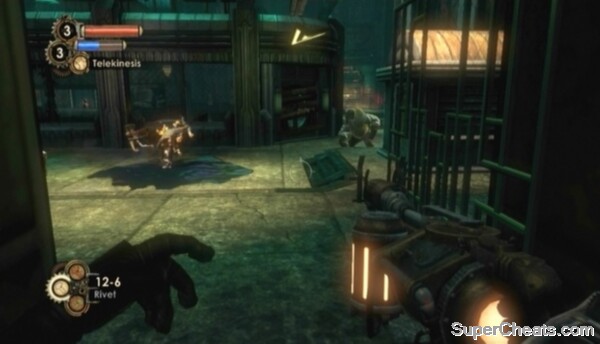 Brute Splicers can pick up and throw objects with considerable force. |
There's a Turret on top of the Diner, so climb up there and either hack the Turret or destroy it by setting fire to the oil it's sitting in. Avoid doing so, though, as you'll want to keep the explosive container here intact. Look for a Security Camera attached to the side of the Diner across from Marlene's Flower Emporium in the southwest corner of The Fishbowl. Having a hacked Security Camera on your side will definitely come in handy, especially if you're considering taking down the Big Daddy in this area.
Enter Marlene's Flower Emporium and collect the Audio Diary (Ryan vs. Lamb: Religious Rights) on top of the drawers inside. There's another Audio Diary (Better Times with Lamb) on top of the flower shop, as well as the Hacker's Delight Gene Tonic. To reach these items, climb the wooden steps along the east side of the Diner and cross the bridge at the southwest end to get on top of the flower shop.
After collecting diaries and Tonic, enter the Diner through the doorway next to the wooden stairs in the southeast corner. Inside the Diner, look for a Shotgun by the bloody Corpse at the back. Take note of the code scribbled on the paper here: Clinic 0047. Make sure you're ready for a fight before picking up the Shotgun, as a group of Splicers will break into the Diner as soon as you do. All the better to test out your new weapon.
Armed with the Shotgun, now is the time to consider taking down the Rosie in the area to get at his Little Sister. Make sure he has a Little Sister with him before attacking!
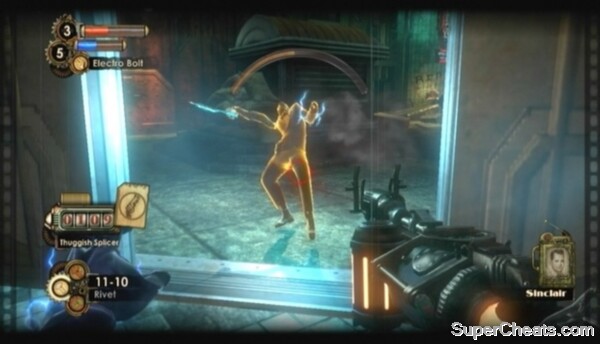
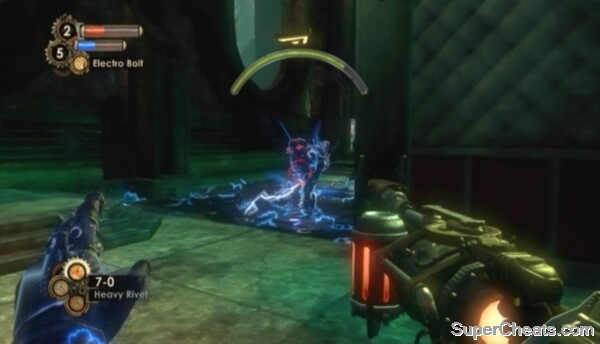 Lure the Rosie into the pool of water on the west side of the Diner and hit him with an Electro Bolt. |
There is a pool of water on the west side of the Diner. Wait around here until Rosie and the Little Sister are on the north side of the Diner. Get Rosie's attention by hitting him with a Rivet or your Shotgun, and then run to the opposite side of the pool of water. Get behind cover and ready Electro Bolt. Wait until the Big Daddy is in the water, then hit him with Electro Bolt and start firing Rivets. He will remain stunned for only a moment, so be ready to fallback or to quickly stun him with another Electro Bolt.
When the Rosie is past the pool of water, get on top of the Diner using the ramp along the east side. If you hacked the Security Camera here, it will go off when the Big Daddy comes after you, sending two Security Drones to attack. Use Telekinesis to pick up the red, explosive container by the hacked Turret on top of the Diner (provided it's still intact). Look below for the Big Daddy and propel the explosive container at him, and then continuously hit him with gunfire until he starts firing at you. There's an explosive barrel by the oil spill at the northeast corner of the Diner, which you can pick up with Telekinesis and use to further damage the Big Daddy.
Rosie is a fierce long-ranged fighter, so try getting close to him with your Shotgun or Drill once he's really low on health. It's best to run at him while he's occupied with a Security Drone or Splicer. If you're quick enough, you can easily drain the remainder of his health up close. If you can't get close, use your Machine Gun against Rosie, ducking in and out of cover to avoid taking fire.
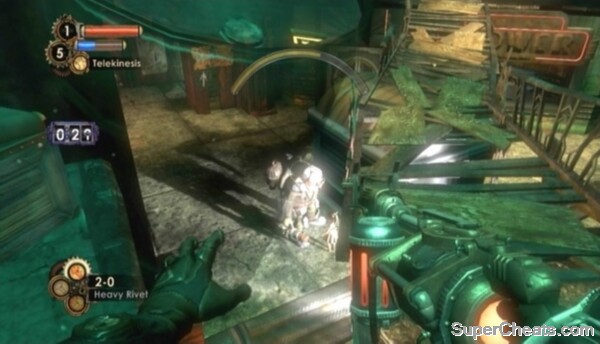 Propel explosive barrels at Rosie with Telekinesis. |
When the Big Daddy is dead, pick up the Little Sister and press the X/Square button to have her point you to the first gathering spot. You can gather ADAM from two glowing corpses with this adopted Little Sister. Each gathering spot yields 60 ADAM.
Gathering ADAM is optional, so you can just bring the Little Sister to the nearest Vent and Rescue or Harvest her if you aren't interested in earning the extra ADAM.
Killing the Rosie in The Fishbowl
When you're ready to move on, enter Sinclair Deluxe through the door at the east end of The Fishbowl. Look for an Audio Diary (Wrong Side of the Tracks) in the reception office to your left upon entering. Proceed through the automatic double-door up ahead and turn through the doorway to your left to enter the office.
Goal: Search the Pawn Shop Downtown for the Research Camera
Return to The Fishbowl and exit through the passageway at the south end of the area to reach Downtown. Keep an eye out for a red, explosive barrel by an oil spill as you make your way there. Pick up the explosive barrel with Telekinesis and look for a Brute Splicer on top of the Pawn Shop (the building just beyond the Health Station). Propel the explosive barrel at the Brute Splicer to knock off some of his health. Be ready with Telekinesis and your Machine Gun with Anti-Personnel Rounds.
If the Brute picks up a slab of concrete and hurls it at you, use Telekinesis to grab it just before it hits you and propel it back at him. Hack the nearby Health Station if you have a chance, as the Brute will likely use it when he is low on health. Finish him off with your Shotgun or Machine Gun coupled with Anti-Personnel Rounds.
Killing the Brute Splicer Downtown
There are a couple of audio logs to collect in this area. Look for the first Audio Diary (The End of the Line) on the Prentice Mill memorial in the northeast corner of the area. There is a second Audio Diary (Clinic Code at the Fishbowl) by the locked door to Fontaine Clinics at the south end of the area.
Goal: Use the Code 0047 to Enter the Clinic
The code to open the door to Fontaine Clinics is scrawled in blood on a newspaper at the back of The Fishbowl. Enter 0047 into the keypad to open the door. Head for the stairs beyond the reception desk and be ready for a Splicer with an explosive. Dodge the projectile and fill him with Rivets.
Around the corner at the top of the stairs is a Security Camera and a Health Station. Use a Hack Dart and hack the camera to your side. Proceed through the opening in the wall next to the Health Station and cross the walkway to another opening. Use the Power to the People weapon upgrade station here to upgrade one of your weapons before heading up the stairs.
 Upgrade one of your weapons using the Power to the People station in The Hamilton. |
At the top of the stairs, enter R. Flanagan's office through the door up ahead. Look for an Audio Diary (Camera in Hock) on the desk and the Shorten Alarms Gene Tonic on top of the filing cabinet in the corner.
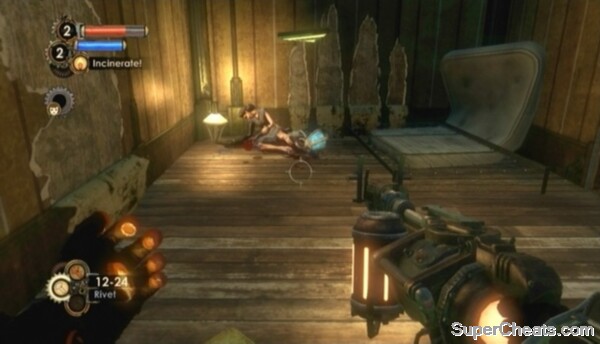
When you have the Tonic and diary, return to the hallway and exit through the opening in the wall at the other end. Gun down the Splicers standing around the Thuggish Splicer on the covered table (she's alive, by the way). Look for an Audio Diary (Arrangements) by the bunch of candles next to the Vent.
There is a Security Camera on the wall further ahead, so be ready with your Hack Tool. Proceed through the automatic door and you'll be on top of the Pawn Shop. There's an audio log to collect nearby, so don't drop through the hole just yet. Cross the wooden bridge at the other end of the roof (the north end). Through the door here, blast the Splicer and turn right to spot the Audio Diary (Therapy with Gene 1) on the cabinet there.
After collecting the diary, drop down the hole on the Pawn Shop roof and pick up the Research Camera on the table.
 With the Research Camera equipped, start recording when an enemy is in the shot. Use a variety of attacks to rack up score. |
Goal: Research Splicers with the Research Camera
Using the Research Camera is simple. With the Research Camera equipped and an enemy in your sights, hit the RT/R2 button to start recording. While recording, damage the enemy in as many different ways as possible to rack up score. Achieve a certain score to unlock a Research Bonus and discover the enemy's weakness.
To complete this goal you must research any Splicer with the Research Camera. There's a Thuggish Splicer and a Leadhead Splicer through the front door. When you're ready, start recording while the Thuggish Splicer outside is in the shot. When the door opens, hit him with an Electro Bolt and then shoot him in a non-vital area, such as using the Rivet Gun to hit him in the leg. Then, switch to another weapon and finish him off. Doing this will be enough to attain the first research level.
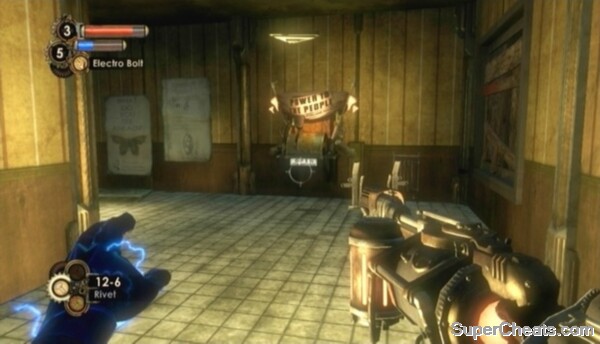
If you're after the Research Master achievement or trophy, which is unlocked by maxing out research on all nine subjects, you must research the Thuggish Splicer to level four in Pauper's Drop, as they do not appear beyond this level.
 Max out research on the Thuggish Splicer while you still have the chance, as this enemy does not appear in any of the levels beyond Pauper's Drop. |
Goal: Research Brute Splicers
Now that you have the camera, you must use it to research a Brute Splicer to learn a new move, which will allow you to remove the rubble blocking the way in the hotel. There's a Brute Splicer in Skid Row, which can be accessed via the automatic door in the northeast corner of the Town Square area (i.e., where you are right now).
You'll encounter another Rosie in Skid Row. If he's fighting Splicers, sit back and allow them to whittle down his health. They likely won't last long, though. If the Big Daddy doesn't have a Little Sister with him, he will soon. Wait until he calls a Little Sister from the nearby Vent. You'll want to prepare the environment as well.
There's a Security Camera at the east end of the area, across the pool of water below the Vent. Hit the camera with a Hack Dart and hack it to your side. There's also a Missile Turret through the doorway to the right of the camera. This Turret won't be of much use to you against the Big Daddy, but you may as well get it on your side. If you're out of Hack Darts, you can purchase more from the Vending Machine at the start of the area, or just destroy the Turret using Telekinesis and one of the explosive containers in the area.
When the Big Daddy has a Little Sister with him, start the assault by either using Telekinesis to launch an explosive container at him if he is out of water, or by hitting him with an Electro Bolt while he is in water. The Security Camera will spot him if he is standing near the Vent, so duck behind cover while the Security Drones move in. Hit the Big Daddy with Heavy Rivets from your Rivet Gun or Armor-Piercing Rounds from your Machine Gun and throw explosives at him using Telekinesis. He should fall quickly.
Killing the Rosie in Skid Row
It's best to wait to Rescue or Harvest the second Little Sister until you have the Hypnotize Plasmid and another Big Daddy has spawned in this area, as dealing with the last Little Sister in a level will spawn a Big Sister.
There's an Audio Diary (Blood Lamb) to collect in this area before moving on. Enter the Pharmacy in the middle of the area and head through the doorway behind the counter. In the backroom, climb on top of the boxes, click the Left Stick to duck and crawl through the opening in the wall to enter the bookstore. The diary is on the counter. Hack the sparking Door Control panel to exit.
After collecting the diary, enter the doorway across from the Pharmacy entrance. Look for an Audio Diary (Mole) by some fire and a Rosie corpse about halfway down.
There are two more audio diaries to collect. At the end of the corridor, rather than heading down the steps, turn right and head up the steps there. At the top of the steps, proceed through the doorway straight ahead. Upon entering this room, turn left and look for the Fire Storm Gene Tonic next to the Corpse in the corner. Then, move through the opening and cross the wooden bridge to the top of the Pharmacy. Look for an Audio Diary (Pauper's Drop) on the Storage Crate through the opening across from the hole in the roof. When you have the diary, cross the wooden bridge back to the apartments. The Audio Diary (Sunday Services) is on the ground next to the gather spot.
 Equip the Fire Storm Gene Tonic to emit fire when hit by a melee attack. |
When you have the Fire Storm Tonic and two diaries, make your way to the Limbo Room Entrance area. Enter the Limbo Room through the door at the south end of the area. Eleanor has left you another gift. Pick up the Hypnotize Plasmid in the carriage across from the entrance. Hit a Splicer with Hypnotize and he or she will attack any other Splicers in the area. You can test it out on one of the Splicers on the stage in the next room.
Get up onto the stage and head up the steps at the right end. Proceed through the door straight ahead to find another Power to the People weapon upgrade station. Upgrade one of your weapons and then exit the room. Turn right once through the door and pick up the Audio Diary (Closing the Limbo Room) on the vanity in the room you come to.
Exit back to the Limbo Room Entrance. Look for the Brute Splicer by the windows at the north end of the area. Equip the Research Camera, get the Brute in your sights and start recording. Again, you need to hit this guy with a variety of attacks to attain the first research level. Use Electro Bolt, your Rivet Gun, Shotgun, and so on until you unlock the Drill Dash move. Once you have Drill Dash, finish off the Brute with your Machine Gun and Anti-Personnel Round and Shotgun. To perform Drill Dash, hold RT/R2 and press B/Circle with the Drill equipped.
 Max out the first Brute Splicer research track to gain the Drill Dash ability. |
Goal: Clear the Rubble at the Sinclair Deluxe
With the Drill Dash ability you can clear the Rubble at the hotel back at the start of the level. Now that you have the Hypnotize Plasmid, now's the time to deal with the Little Sister you have with you. A Big Sister will spawn when you do. The best place to face her is in the section of Skid Row with the Pharmacy and bookstore. There's a Vent in this area, and there should be another Rosie now, whom you can get on your side with the Hypnotize Plasmid. If you don't have Hypnotize, set in one of your Plasmid slots using the Gene Bank in the bookstore.
When the Big Sister appears, hit Rosie with the Hypnotize Plasmid, and then sit back and watch as the two duke it out. Use your Machine Gun and Armor-Piercing Rounds to finish off the Big Sister if Rosie falls. Loot the Big Sister for some ADAM, ammo, and cash.
Killing the Big Sister in Pauper's Drop
In the corridor between Sinclair Deluxe and the Downtown area is an oil spill and two explosive barrels. Keep your distance, as a Splicer up ahead will ignite the oil spill and set off the two barrels. Kill the Splicer with your Rivet Gun from afar and then make your way to the other end of the corridor. Careful here, as an explosive barrel will soon roll down the stairs to your left. There's also a Brute Splicer here, so be ready for him.
Up the stairs, proceed through the door, start down the corridor, and turn right to enter Sinclair Deluxe. Move through the door beyond the counter and equip the Drill. Approach the pile of rubble blocking your path, hold RT/R2 and press B/Circle to clear the way with Drill Dash.
Goal: Go to Grace's Apartment
Kill the Splicers in the lobby and then head up the stairs. There is an Audio Diary (A Gift From Lamb) in room 106 along the south side of the second floor walkway. The diary is in the bathroom.
When you have the diary, return to the walkway and head through the doorway at the east end. Kill the Splicer on the table and then start down the hallway up ahead. Enter the apartment through the doorway by the collapsed doors at the end of the hall. Move through this area until you reach a Vent and a Security Camera. The Freezing Drill Gene Tonic is on the covered table across from the Vent.
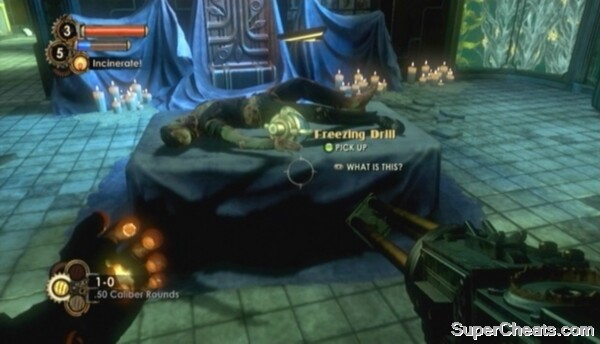 You don't want to miss the Freezing Drill Tonic. |
There's another diary on the second floor, as well as a Power to the People weapon upgrade station, so don't head up the ramp just yet. Continue past the Vent and Gene Bank and turn left when you can. Head up the stairs here and jump across the gap to the Audio Diary (Profit Coming, Profit Going) by the Storage Container.
After collecting the diary, drop back down to the Vent and move past the hole in the wall you entered this area through. There's a Turret around the corner. Hit it with an Electro Bolt or Hack Dart and then make your way to the other end of the corridor. Enter the room here to find the Power to the People weapon upgrade station. Use the station to upgrade one of your weapons, then return to the Vent and head up the ramp across from the covered table to reach the third floor.
There's an Audio Diary (Where Has Harry Gone?) in the apartment across from the Vending Machine. Turn through the doorway to the left and look for the diary on the shelves next to the Turret. Head back into the hall once you have the diary.
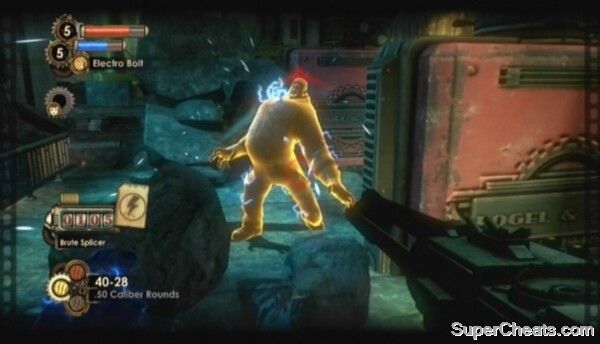
You'll encounter a Brute Splicer beyond the Vending Machine. Shoot an Electro Bolt at the puddle of water while the Brute is standing there and then hit him with Anti-Personnel Rounds from your Machine Gun.
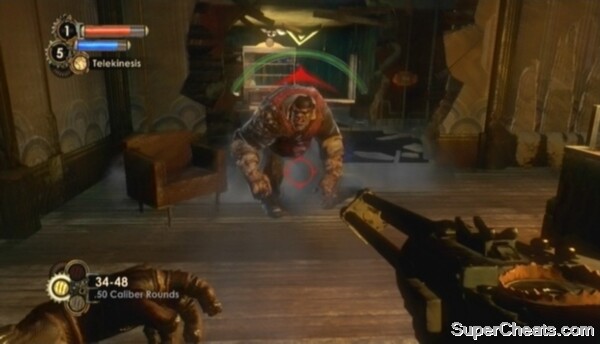 Hit the Brute Splicer with Electro Bolt while he's standing in the puddle. |
Look for an Audio Diary (The Butterfly) on one of the tables in the southeast corner of the apartment across from the puddle of water.
Through the bathroom, climb up the collapsed floor to reach the fourth floor. There's a Security Camera at the other end of the corridor. Hit the Security Camera with a Hack Dart and hack it to your side. There's an Audio Diary (What a Snap) by the Storage Crate at the northwest end of the fourth floor walkway.
Grace's apartment is at the southwest end of the walkway.
Goal: Find Grace's Hiding Place
There's an Audio Diary (Barbarism) under the bed in Eleanor's room in Grace's apartment, and the Keen Observer Gene Tonic on the round table across from it. Continue through the doorway across from Eleanor's room. Look for another Audio Diary (Falling Lamb) on Grace's bed.
Approach the ripped poster between the two closets at the far end of the room and remove it to reveal a Hidden Switch. Activate the switch to reveal a hidden corridor at the back of the closet to the left of the switch.
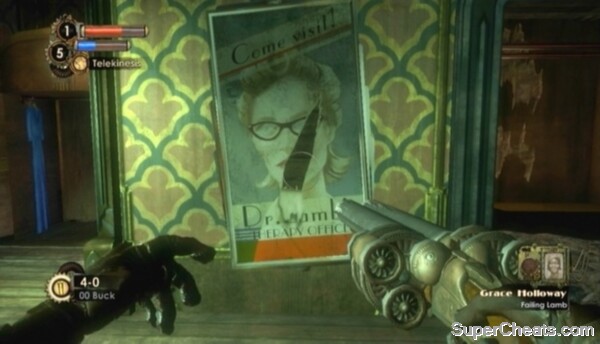 Look behind the ripped poster in Grace's apartment and press the switch behind it to reveal the way to her hiding place. |
Goal: Get the Override Switch from Grace
Make your way to the other end of the corridor and examine the circular window there. When Grace opens the door, step in. The Override Key is on the desk.
You can kill Grace before moving on. Know that by doing so you forfeit the “Savior” achievement or trophy, which is unlocked by rescuing every Little Sister and sparing all characters when given the choice to let them live or die choice. Grace will also help by sending you ammo in the next level if you keep her alive.
Goal: Use the Override Key to End the Lockdown
Exit Grace's apartment and make your way back down to the first floor. A Splicer has set up a Turret in front of the lobby door. Hack the Turret to your side with a Hack Dart and sit back as it guns down the Splicer. Exit Sinclair Deluxe and continue to the entrance to The Fishbowl area. There's a Missile Turret behind some sandbags in front of the automatic door. Hit the Missile Turret with a Hack Dart, but back up while hacking to avoid getting hit.
To get the last Audio Diary (Field Test 1), you need to kill the Brute Splicer in The Fishbowl before leaving the level. When the Brute is dead, loot his corpse to find the diary.
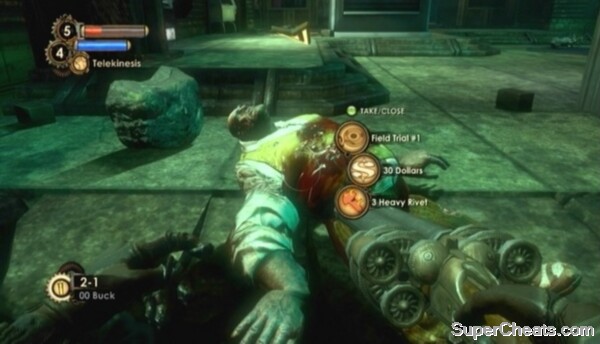 Kill the Brute that spawns in The Fishbowl and search his corpse to find an Audio Diary. |
Goal: Ride the Train out of Pauper's Drop
Follow the arrow at the top of your screen back to the start of the level. Enter the Bulkhead Control room, pull the switch there, then get on the train and activate the highlighted Switch to complete the level.
This is really the first video game I've ever played. So I'm pretty new to all this stuff. Even though I don't need to in order to move on, I wish it didn't tell me I should adopt a little sister and get ADAM. I know I should because I know it's a necessity for power in the game, but I got through every single goal in this level, and then was about to enter the train and it told me I didn't adopt a little sister or harvest any ADAM and that I should for better gameplay later on and that I can't go back, so... now I have to face that after I had an interesting time in Paupers Drop. I'm going to go do it, but.. ugh, really dont want to. Hah.
I killedthe brute splicer wih my frost drill andhe went to pieces, can i still get the diary?