4: Upriver
Battlefield: Bad Company 2 Walkthrough and Guide
Level 4: Upriver
Story:
This level follows on directly from the last. Having cleared the logging camp and road, we have proceeded upriver into a densely wooded section. The hunt for Aguire continues.
Collectibles:
None
Other Collectibles:
T-88 S, AEK-971R, SPAS-12S, MP-443
M-COMS:
2
Walkthrough:
You begin in the jungle, in darkness and during a thunderstorm.
Obtain Sniping Position:
Follow your squad along the jungle path. You will see an enemy in a shack, facing away from you. Sneak up behind him and knife him.
 Take out the enemy who’s occupying your sniping position. |
After this, a cut-scene will roll. We have spotted Aguire, but need to clear a path to get to him.
Other Collectible: You begin this level with the T-88 S sniper rifle.
Stealth is still the order of the day, so some tactical sniping is called for.
Terminate Militia Sentries:
There are a couple of important points to know for this section. First, you have to use the thunder to mask the sound of your rifle shots. This is indicated by a flash of lightning about half a second before the thunderclap – you can fire once you see the lightning. Second, you have a very powerful sniper rifle. Headshots are not necessary to kill in one, so aim for the chest.
Sarge will talk you through your targets.
The first is the ‘guy on the pier’. He is by the water’s edge to the left, next to a blue rowing boat. He is an easy shot. Wait for the lightning, then fire.
TIP: If you miss your shot, you have a split second to take another one while the thunder echoes around. If the soldier runs off, you fail.
The second sentry is to the right, and your squad get right up close to him before giving you the order to fire. You may notice another guard further right – he will turn away as the thunder claps.
The third is this guy to the right, and should be a simple execution.
With the initial area clear, your squad moves up.
A medic comes to the stairs they are on and heads down, looking towards the dead sentries. Take him out on the first thunderclap once he pauses at the bottom of the steps.
Two men will now come from opposite sides of a shack at the top of the stairs. They will stop, standing together in the middle. You may need two shots to take them out (though one stands in front of the other). Luckily, the thunder is now extreme, and you have time for at least two rounds.
With that, all the sentries are down.
Use the thunderclaps to take out the sentries.
Regroup with Unit:
When given the order, follow Sweetwater out of the guard tower and back down to regroup with the rest of your squad.
TIP: Don’t forget to swap out your sniper rifle if you want, using the resupply crate.
M-COM Station #1: The first M-COM of this level is to the left once you reach the top road with your team on. It is in the second to last shack past the parked trucks.
 The M-COM is in this direction, in the second to last building of the row. |
Follow Unit:
Move up the path to trigger a cut-scene. Haggard saves Sweetwater from a tripwire mine. This now becomes your duty. Follow behind your squad until they stop – this indicates a mine in the area. You should be able to see a lighter band going horizontally across the path, and this is a tripwire. You should approach it, look at the wire and then press the button when prompted to disarm it. When your squad stop for the first time, at the top of a small incline, the wire will be about three metres in front, as the hill begins to rise again.
Other Collectible: AEK-971R – this can be found on many enemies throughout the level.
The second is quite a way on. The game will autosave just before it, so keep an eye out for that as a helpful indication. Again, your squad will stop first. The tripwire is at the top of this slope.
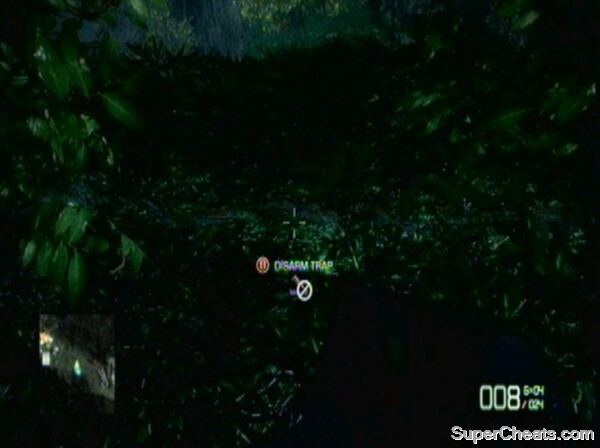 The tripwires can be hard to see, but look for a lighter colour and contrasting texture. |
The final one is not too far. Look for a panel of wooden stakes on your right hand side opposite a rock – the tripwire is just beyond it.
With that done, you can sprint on until you come in sight of a building. You should be able to move up the first street, but once it opens up enemies will engage you. Use the houses at the side as cover and to flank the enemy. Pass through their little camp and skirt alongside the cliff to continue. Eventually a cut-scene will trigger.
Assault Upriver:
You will find yourself overlooking a camp when the cut-scene ends. Sarge has an elaborate plan of action for you, but you can begin by peppering the camp with bullets. Indeed, the first step should be to take out the two guard towers that will otherwise wreak havoc on your position. Use 40mms to decimate their position.
You can then move down into the river as Sarge ordered. Surprisingly, there are enemies in the water, so push your way through carefully. Many will be hiding in bushes – stay on the alert. Once you reach the objective marker you can follow the path into the base itself. Your squad will follow. There shouldn’t be too many enemies left in the base, so clear the area. The objective will complete once this is done.
M-COM Station #2: There is an M-COM station in this camp, in the shack behind the rightmost guard tower.
 The M-COM is in the shack behind this tower. |
With the base dealt with and the M-COM destroyed, move uphill to trigger a cut-scene.
Aguire has been taken into the camp in the valley at the bottom of the hill. We need to rescue him.
Assault Militia Stronghold:
Use the resupply point at the top of the hill to stock up on ammunition and to get a Carl Gustav. Use this to destroy the bridge you see as you come around the corner in sight of the camp. Two guards are standing on it, and it is quite a humorous death to cause.
Use the stone wall next to the bridge to assault the shack across the river. You can then push on up the hill. Your squad is quite useful here, though the next section will be quite the opposite. Proceed through the house, clearing it and the path ahead of enemies. Sarge will order you to flank a machine gun next. This is not an easy task, as they really pack a punch and are covered by infantry on all sides. If you still have your Gustav, you can hit it from the front if you are quick and accurate. Otherwise, move past the first entrance to the level above, where Sarge will be waiting for you, and use the shack on the left for cover. Prime a 40mm to quickly take out the turret, before dealing with the infantry.
 You can attack the turret from the front, but there’s more risk involved. |
Head to the next objective marker once the initial area is clear. The next section of this level is very close quarters, much like the end of the Heart of Darkness. Pick up a shotgun if possible (there is a SPAS at one of the gun icons nearby) to make this a little easier.
Other Collectible: Pick up the SPAS-12S to unlock it.
TIP: Despite spraying their fire, you still need to have the crosshair over a target to hit them with a shotgun.
Use 40mms to rip through the wooden houses. With a path through cleared, you can move up into a courtyard area. Take out any enemies in sight, then move through the houses with your shotgun out. The final house you come to fronts onto a main road. At this point, everyone’s favourite vehicle, the Vodnik, rolls into shot. You can use 40mms on it or pick up the RPG which should be at the front of the house.
 Use your 40mm grenades on the Vodnik if you want to be quick. |
Neutralise Enemy Militia Elements:
Follow the road that the Vodnik was on to move forwards. Pass the fountain and use the walls and obstacles for cover against the masses of infantry in the area. Take out the machine gunner at the next row of walls and continue. As you go up the steps to the next section, be sure to pick up the Gustav by the ammo stash, as it will be needed in the battle to come.
An enemy tank will come into the courtyard. Get a shot on it, then retreat, as it will throw everything at you in self-defence. Two shots should take it out.
Liberate NSA Operative Aguire:
Go through the courtyard and past the tank wreckage to come out on Aguire, being held hostage by a Bolivian. You are automatically switched to your pistol, and must make the shot, killing the Bolivian but missing Aguire. The best tactic is to fire at the very top of the two bodies, as this will be the enemy’s head.
Deal with the tank then take out Aguire.
TIP: The game saved after you destroyed the tank, so if you miss it is not particularly consequential.
With Aguire freed, the level ends.
Other Collectible: The MP-443 is given to you during the hostage situation.
thx!