Laguna Alta (Map Pack 1)
Battlefield: Bad Company 2 Walkthrough and Guide
Laguna Alta (Map Pack 1)
Overview:
The layout of this map is quite complex, with the Alpha base down in the valley, in the form of the village; the Bravo base is higher up, on the side of the hill overlooking Alpha; Charlie is even further up, and is an industrial mill area. The spawns are not equal, with US Deployment nearest Charlie, but RU Deployment close to Alpha, which is a crucial base to hold due to its large area and central position. There are a few tanks on this map, and many quad bikes, and the tanks can swing the balance of the game, particularly concerning the Alpha base, which has many points of entry for vehicles.
 Every base on this map is important. |
Class Recommendations:
1) Recon: Because both Bravo and Charlie are up high, playing as a recon and using a sniper rifle can really help your team. If you are playing from US Deployment, snipers can quickly take Charlie and then have a position overlooking the Russian Alpha base. Between Bravo and Charlie there is also a straight road, allowing snipers to defend Charlie from the mill's roof, and for snipers to attack it from Bravo using the cover provided by the logs at the side of the road. Mortar strikes are also very useful for targeting the barn at Alpha, or the enclosed base at Bravo.
2) Engineer: The engineers are valuable here for blowing up the bridge by Alpha, and for preventing the tanks from gaining a foothold on the map. Not only that, the buildings at Alpha can be destroyed, making this explosive class a good idea if the fighting is concentrated around this base, as it frequently is.
3) Assault: Due to the wide-open nature of the valley, and the long distances over which much of the fighting happens, the Assault class is good due to the improved range of its rifles. In addition, the fighting in each base can be quite close quarters, making the diversity that the Assault Rifles afford priceless in many situations on Valparaiso.
4) Medic: The LMGs can really rip through the barn at Alpha, and indeed many of Alpha's buildings. As with Atacama Desert, however, there are quite long distances between the bases, making it difficult for a medic to effectively keep much of his team alive. Despite this, a medic who holds position defending Alpha, for example, would be a valuable addition to a team.
Deployments:
US Deployment:
At US Deployment there are three quad bikes and a M3A3 Bradley. The spawn is within easy reach of Charlie base, though it requires a trip up a steep hillside. Using the quad bikes, Bravo can sometimes also be captured before the Russians reach it.
RU Deployment:
In terms of physical characteristics, RU Deployment is almost identical to the US base. The main difference is that instead of an American Bradley tank the Russians have their BMD-3 Bakhcha. It is also considerably closer to Alpha, and Russian players should also be able to reach Bravo first, if they set out to target it specifically.
Bases:
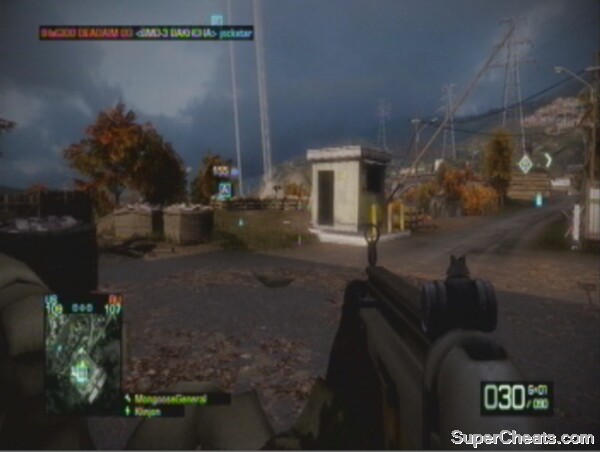
Alpha Base (Farm):
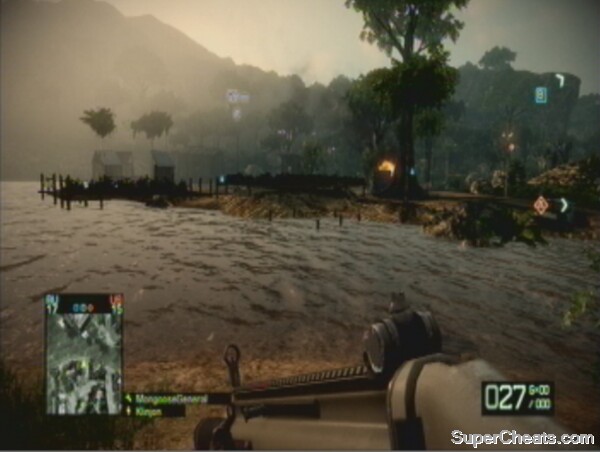
Alpha can be attacked principally in three directions. These are across the wooden bridge (or, once the bridge is destroyed, from the river), from RU Deployment, and from US Deployment. It is thus a centre-point of this map, and while RU Deployment has easier access to it, it is always hotly contested. The barn building by the flag can be destroyed and often harbours hidden attackers. The upper floor of this building supports a mounted machine gun, which can terrorise players at Bravo base as well as in the river. The plethora of buildings dotted around this base are great hiding places for attackers and defenders guarding the flag, though you have to be in the barn area to actually convert the base. You should beware of quad bikes coming from RU Deployment, often loaded with C4 – shoot off the rider if possible, then get out of the way of the quad bikes!
 Destroy the bridge at Alpha to hinder enemy movements. |
Bravo Base (Train Depot):
The Train Depot features a raised platform with a building and mounted machine gun turret guarding the area below, which houses the flag. There is much rubble to hide behind, as well as cargo containers that are a favourite camp spot for particular players. Bravo is the primary base used to attack Charlie, but is also useful for assaulting Alpha due to its position overlooking the barn. As such, it is an important point to hold. It can be attacked from the road below leading to Alpha via a circuitous route, or directly from Charlie. There is also a small hill which players use to conceal their actions until the last minute. The mounted turret has a perfect position watching this area, however, so an organised defensive force should be able to hold the base against most enemies. If attacking, beware of anti-tank mines around the flag, and throw grenades into the cargo containers and into the upper area to flush out any camping defenders.
Charlie Base (Lumber Mill):
This base is centred on the tall Lumber Mill. Built of concrete so as to withstand explosive attacks, it has two main storeys and then a flat roof area where snipers (and UAV-hogs) love to congregate. The second storey has a window overlooking the road from Bravo, and is also a good place for long-range kills. There are many points of cover outside the building, including log piles and small buildings. If the base comes under an irresistible attack, it is a good idea to retreat outside and wait for some of the attackers to disperse before retaking the building from the flank. The base can be attacked from the river below, or along the road towards Bravo. There is a mounted turret overlooking the road and valley, which can be used to suppress enemy attackers and rack up the kills. Next to this is a small guard outpost, and this should be manned to prevent enemies storming through the main entrance. Beware of the paths coming up from the river, however, as this is a very effective means of flanking the base (particularly as there is a rear door leading into the mill). The UAV is also located in Charlie Base, on top of the mill building.
 The main entrance to Charlie is protected by a gun emplacement. |
No comments yet. Tell us what you think to be the first.