2: Cold War
Battlefield: Bad Company 2 Walkthrough and Guide
Level 2: Cold War
Story:
We’re in the present day now, and assisting a US counter-intelligence operation. It is a wintry mission, set in North Russia, as the playful name of the level suggests. Bad Company don’t know the nature of the mission exactly, as will become clear during the walkthrough below.
Collectibles:
None
Other Collectibles:
AN 94-R, TOZ-194
M-COMs:
None
Walkthrough:
Having traversed the minefield, you are given control of Preston Marlowe as will become standard for the rest of the game.
Follow Unit:
Once you gain control of your character, follow your three squadmates along the snowy path. Wait at the edge of the upper path rather than dropping down, where your squad stops. Soon, the enemy patrol spotted during the cut-scene will come into view. Wait for Sarge’s countdown before firing on the enemy.
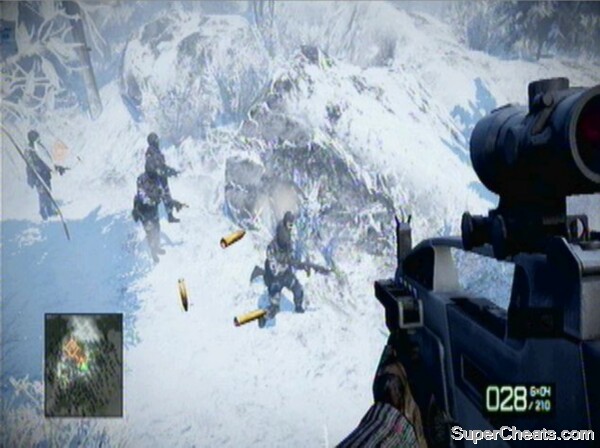 Get the drop on this patrol with the help of your squad |
TIP: Pick up a second weapon to help in the mission ahead. A shotgun will not really be required, though some building-clearing will take place.
Other Collectibles: Find the TOZ and AN 94-R off the group you ambush.
Once you reach the boat stuck in the ice, a cut-scene plays, and the nature of your mission becomes a little clearer. The agent we were supposed to be assisting has been captured by a very formidable man, but HQ cannot give authorisation to take him out. As he leaves in the helicopter, we are given orders to fight through the town and secure the vehicle our agent was working towards.
Follow unit:
The town has a main road that is very tightly packed, but plenty of buildings to fight through if you would rather stay off the street. Indeed, this is the easiest way to proceed. Your squad moves up along the road, so head to the house on the left and begin to work through each one as you come to it.
The first house should be clear. Use the upstairs to gain a vantage point on the street below.
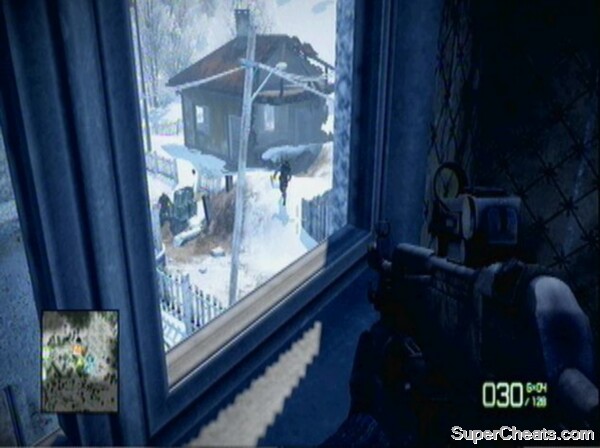 You can use the upper floors of this village’s houses to get overwatch positions on your squad |
There is a Vodnik in the street too, so pick off the gunner or launch a couple of 40mm grenades at it from underneath the barrel of your assault rifle. With the vehicle taken out, you can move downstairs and slink between the buildings to mop up the rest of the soldiers. The road turns uphill to the left, where you should continue our building-clearing tactic. Watch for RPG soldiers in the windows of some of the buildings.
Soon you’ll come upon a bus filled with Russians. Again, however, you can flank this using the buildings to the right. In fact, you have to use the building directly adjacent to the bus to get round the obstacle. There is an ammunition crate inside, which you should use to stock up.
Secure Courtyard:
Once inside the building, waves of infantry will begin to attack. Get upstairs in the house and use the height to take out the enemies in the open courtyard area.
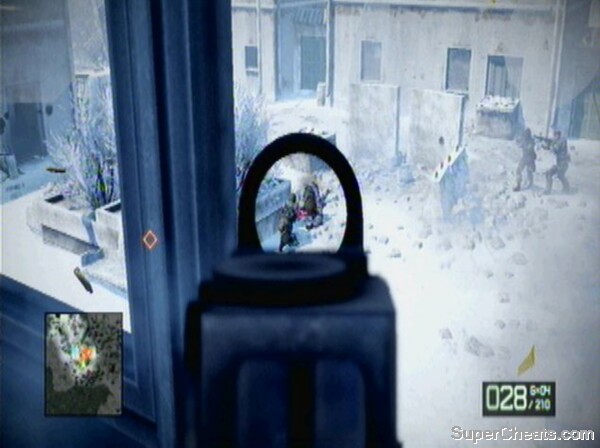 Use the height advantage to flank the Russians |
When you can see no more enemies, move downstairs and sweep the area to clear out any stragglers.
Hold Out Until Air Support Comes Online:
An enemy tank appears at the edge of the village once the courtyard is clear. We need to hold position until air support is ready. Pick a spot to hunker down, but remember that enemy infantry will continue to move forward, so you need a line of fire out into the courtyard. There should be a house blocking the view to the tank, and you can use this (do not cover in the house itself, but use it as a long-distance shield) to assist.
TIP: It is best to be downstairs here, as you can move between cover as the tank destroys the positions around you.
Before long, the air support will be available and you can call it in by equipping your binoculars with Back/Select. Get the tank in sight and press fire to call in an air strike. Retreat to cover until the ordinance has been dropped.
Call in the air support against the enemy tank.
Locate Russian High Value Vehicle:
Once you get to the end of the tank’s road, another house with enemies upstairs will present itself to you. 40mm anyone not directly in view, before proceeding up the road. A quad bike and infantry will move forwards. Stay crouched to use the wall to the right as cover from other enemies while you take out these targets. You should then turn your attention to the right, and climb up into the buildings previously occupied by the enemy.
TIP: Before going down the street where the quad bike emerges, bear in mind that you can backtrack and take the path to the right instead. This is a slightly easier route, but takes longer.
The street beyond is filled with enemies. Take out as many as you can, using each building for cover. To the left (or ahead, depending on which route you took; see the tip above), is a KORD anti-personnel turret. Use explosives or flank around the back of it to take it out.
TIP: You can flank right round this entire area, using the snowy slopes on the right hand side to reach the target vehicle.
Near the target vehicle is another gun emplacement, this time without a shield. Kill the gunner and anyone in the street up to the truck, before embarking to begin the chase at the climax of this level.
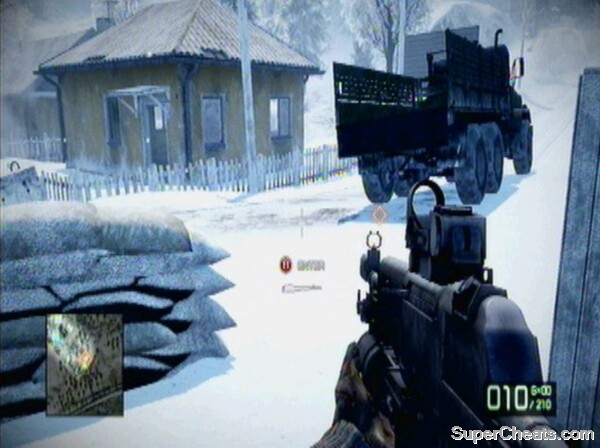 Enter the truck as ordered by HQ |
Reach Exfil Point:
On the back of the truck you will need to despatch some infantry chasing after your vehicle. With that done, switch to 40mm grenade launcher mode on your assault rifle. This is necessary to destroy the vehicles that now begin to chase your truck. The first quad bike comes just after you pass the first corner.
TIP: You have unlimited ammo, so let rip!
Pummel the ground in front of it to attempt to dislodge the driver and passenger, or destroy the bike altogether. Another will soon join it, before an intersection is reached. After a few more quad bikes, a Vodnik joins the chase
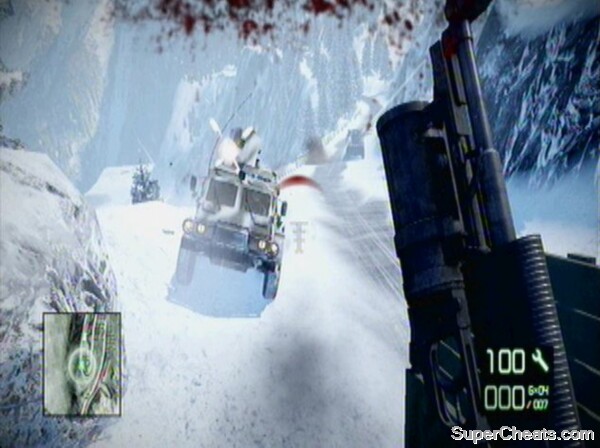 The Vodniks generally take two grenade shots to destroy them, though the first may in fact take out the driver and render the vehicle inoperable |
TIP: Drop grenades behind the truck to catch any lingering vehicles.
Eventually Haggard will drive off-road, pursued by more Vodniks. He crashes having rejoined the main road, where two more Vodniks get into mischief. If you thought that was hectic, a helicopter then descends onto your position. You can take an early pot-shot against it, but the only real chance to get a hit on the aircraft comes at the end of the tunnel section.
Having left the tunnel, the helicopter comes in behind your truck. You need to be quick to take it out before it launches a missile at you – you have only a few seconds.
TIP: Be ready, facing out of the back of the truck with a 40mm grenade primed as you leave the tunnel to ensure you can take the shot quickly enough.
With the helicopter down, the mission ends.
No comments yet. Tell us what you think to be the first.