Arica Harbor (Map Pack 2)
Battlefield: Bad Company 2 Walkthrough and Guide
Arica Harbor (Map Pack 2)
Overview:
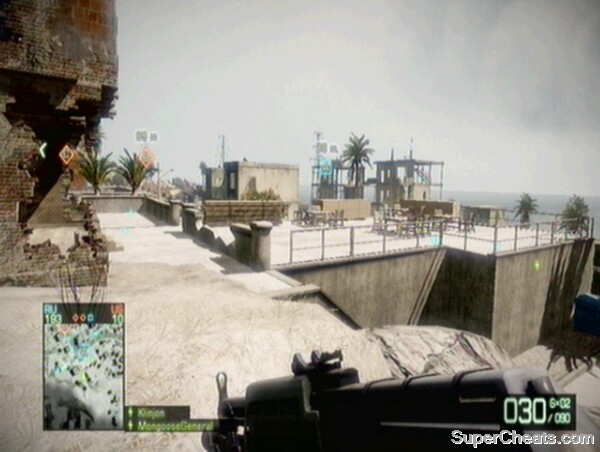
Arica Harbor is a converted Rush map, based on a small desert town. Unlike the Rush level, the bridge section is omitted, and all the fighting takes place around the main road in the town. Surprisingly, considering the plethora of vehicles on the Rush mode, there are no quad bikes, jeeps or tanks available for this map in Conquest, with players having to rely on the UAV for their vehicular kicks. There are many opportunities for every class due to the hill on which the Americans spawn and tall buildings helping snipers, and close quarters combat through all the houses in the town.
 Any Rush players will instantly recognise this map. |
Class Recommendations:
1) Assault: As the assault rifles can function well even at long-range, they are the best choice for Arica Harbor. The diversity they offer means you can adapt your play style depending on how the match is going. The 40mm grenade attachment is great for destroying the walls in the bustling town centre area.
2) Recon: The tall building near the US deployment is a haven for snipers, and there are other high structures in the town. Mortar strikes are good for bombarding the flags, which have to be captured at short range.
3) Medic: There is not much call for medics on this map, but slightly more than there is for engineers. Their LMGs are good at long ranges, and because of the masses of people congregated around the flags in tight spaces, not having to reload frequently is a distinct advantage.
4) Engineer: As there are no vehicles on this map, engineers do not have much of a role in a successful team. Some players do prefer the SMG, and there is no reason to prefer the assault class if that is the case (especially as players' life expectancy on this map will be short so few ammo boxes will be needed). Of course, the engineers' RPGs can match 40mm grenades for building destruction too.
Deployments:
RU Deployment:
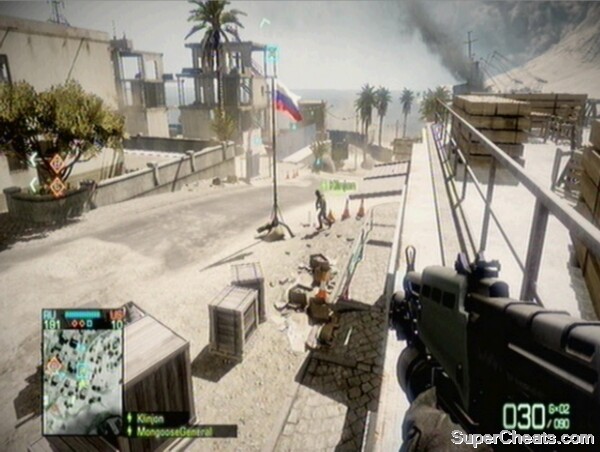
The Russian base is near the Bridge on this map, where the third set of M-COM stations on the Rush iteration are. While it lacks the height of the US spawn, it offers better flanking routes on the flags. From the Russian deployment, players can go off to the right, through a variety of tall buildings and up to street level to access Bravo and Charlie. Alpha, meanwhile, can be flanked on the left, using the red building next to the flag for cover. There is also a hole underneath the higher terrace by Alpha, much like the hole for the Bravo M-COM station of the second base in Rush (this can also be exploited in Conquest to guard Bravo).
US Deployment:
With no vehicles, there is not much distinctive about either deployment position. The Russian base in on the hill, near the military checkpoint of the Rush gametype. The tall building on the hill can be used by snipers to get an overwatch position on Charlie, as can the mountainous section at the edge of the map. It is also a good spawn point to flank each flag on the side near the mountains. It is closest to Charlie, and the US team should hold this base for the majority of the time.
Bases:
Alpha (Town Near Bridge):
The Alpha flag is nearest to the Russian deployment. It is up a slope from their spawn, and is surrounded on two sides by a higher terrace, complete with a distinctive red building overlooking both the Russian spawn and the main road that supports each of the three flags. There is a section underneath the terrace that can be used to hide in while protecting or capturing Alpha. This garage area can be targeted with explosives to force out anyone camping within.
 The buildings around Alpha are good as a vantage point over the other flags. |
Bravo Base (Town Center):
Bravo is right in the middle of this map, and, as the name suggests, is nestled between many of the town's buildings. It is overlooked on all sides, but the wall of the terrace above can be used for cover from one half of the map. The buildings on the other side, however, afford anyone defending the flag a variety of cover. People attempting to capture the flag can also be attacked down the street, and there is little cover at Bravo itself. Planting C4 all around the road near Bravo is a good idea for anyone defending.
 The garages alongside the road are crucial to holding Alpha and Bravo. |
Charlie Base (Town Outskirts):
Charlie is close to the US deployment. As such, it is at the bottom of a large hill, overlooked by a tall building, still under construction, and anyone trying to attack it becomes easy prey for snipers. On the opposite side there is also a house, with a wall outside which can be used to provide a semblance of cover against the snipers.
 Charlie is in an exposed position, vulnerable in particular to sniper fire. |
No comments yet. Tell us what you think to be the first.