Fixer Contracts
Thank you for printing this page from www.SuperCheats.com.
Remember to come back to check for updates to this guide and much more content for Watch Dogs
Follow this guide to hear about updates
Last Updated:
This side mission is divided to several types. Some of these will only become available as you finish other activities and Fixer Contracts.
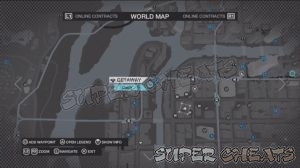
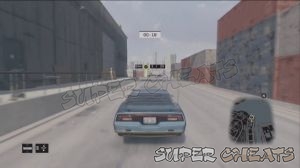
Getaway
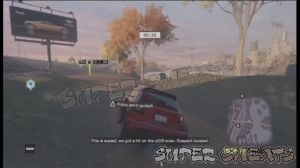
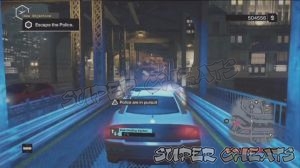
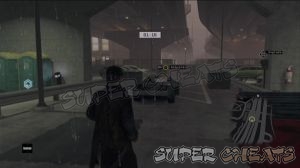
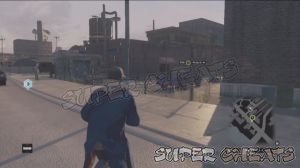
You have to drive the requested vehicle and lose your pursuers - either the police or members of The Club. Your pursuers will be infinite and the only way to lose them is by breaking their line of sight or stopping them using environmental hazards like steam pipes and blockers. CPD will be using choppers to maintain their line of sight so the only way to deal with them is by Driving underneath structures like city train tracks and underground access roads.
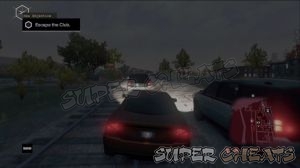
After losing them, you have to deliver the vehicle to the drop zone undetected. The police will use ctOS scans in immediate areas while the Club members will search around the block using their numbers and vehicles. If you get detected when trying to deliver the vehicle to the drop off point, the process starts all over again. However, this will put you to a disadvantage since your vehicle will probably be very damaged at this point.
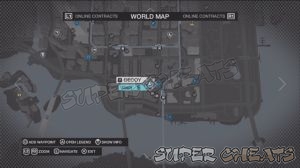
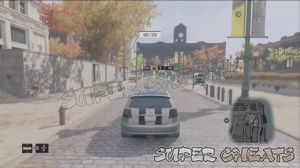
Decoy
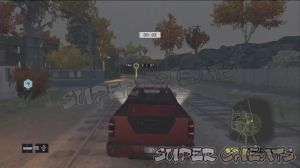
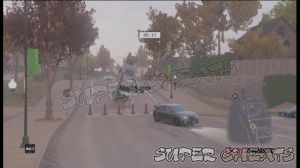
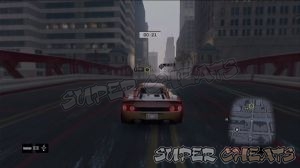
In this mission, you have to use the provided vehicle to race through the ctOS monitoring points (or checkpoints) before time runs out and to attract Police attention. The police will launch ctOS scans and will pursue you while doing this activity. If you're Driving a fast car and you're driving excellently, it is possible to avoid these ctOS scans until the police gives up. When that happens, you just need to compete with the time. If ever you get caught in a ctOS scan, the police will instantly launch a pursuit and will attempt to take you time while you're in the middle of racing through the checkpoints. Keep evading or fighting your way through the checkpoints until you reach the last one to complete the mission. Take note that the police will still be on your tail even after reaching the last checkpoint.
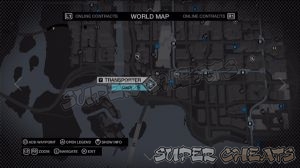
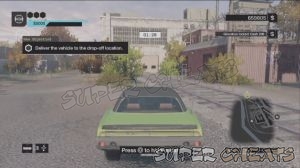
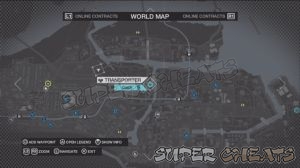
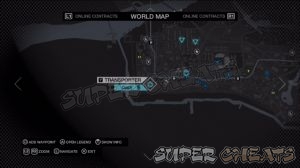
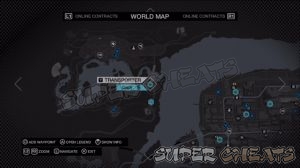
Transporter
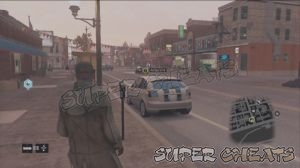
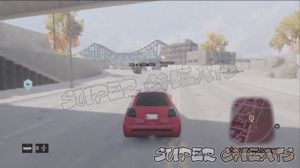
These contracts will require you to deliver specific vehicles to the marked drop-off points. The reward you'll receive will depend on the vehicle's condition upon delivery. You can use any path of your choice to reach your destination; however, it is recommended to drive through shortcuts whenever possible since some missions will only give you a few seconds allowance between each drop off point.

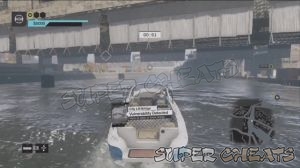
Interception
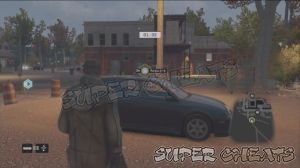
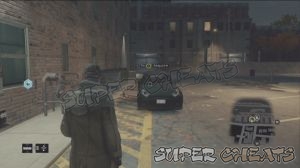
This side mission will require you to pursue the targeted driver and hack his data. You need to keep up and stay in range so you can remotely download the stolen data. One alternate way is to force the target off the road and kill him so you can just hack his phone. This will allow you to recover the data instantly. Other targets will have armed reinforcements so you also have to deal with them as well.

Parker Square
Hot Property (Transporter)
- Gold: +00:30s, $3000
- Silver: +00:20s, $2000
- Bronze +00:00s, $1000
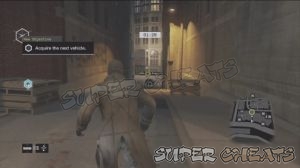
After acquiring the first vehicle, drive it as fast as you can to the first drop-off point. You have to utilize your Hacking skills to manipulate the traffic lights and you also have to use the back alleys as shortcuts to get to your destination faster. After reaching the first drop off point, you'll have to drive another vehicle to another drop off point in the next neighborhood.
Parker Square Rally (Decoy)
- Gold: +00:30s, $3000
- Silver: +00:20s, $2000
- Bronze +00:00s, $1000
Head to the target vehicle to start the mission. You have to pass through several checkpoints before the timer runs out and to get the police's attention. Once the police are in pursuit, you have to continue passing through the remaining checkpoints until you successfully complete the mission. Take note that you still have to escape the police after the mission.
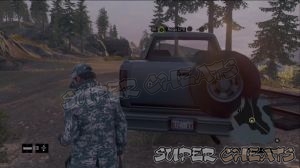
Railroaded (Decoy)
- Gold: +01:00s, $10000
- Silver: +00:40s, $9000
- Bronze +00:00s, $8000
You'll be Driving a very sturdy pick-up truck so don't mind going through traffic, obstacles and even police cars , especially if you have upgraded your driving skills. Don't bother wasting your Jam Coms to delay the ctOS scans; your vehicle isn't fast or “grippy” enough to make fast escapes. Let the police pursue you then just take them down when they're in range.


Road Soldier (Interception)
- Gold: +02:30s, $10000
- Silver: +03:30s, $9000
- Bronze +00:00s, $8000
You'll have a muscle car ready to use and enemies at your tail at the start of the mission. You have to knock off the target's vehicle and force him to disembark from his car. Be careful during the off-road part of the chase. Muscle cars aren't that good in handling, especially in off-road courses so it's easy to get forced out of the path or even oversteer towards the water. Keep following the target and ram him whenever you have the chance. Once done, finish him off with your weapons and take out his reinforcements as well.


Straight and Narrow (Transporter)
- Gold: +00:30s, $3000
- Silver: +00:10s, $2000
- Bronze +00:00s, $1000
After acquiring the first vehicle, drive it as fast as you can to the first drop-off point. You have no choice but to drive fast in the expressway until you reach the first drop off point. The second vehicle should be easier, as long as you have purchased the skill to unlock gates and garages. From where you started, the path should be straight ahead. You just need to unlock all the gates along the way. Be careful still since this is a main road and you'll have to maneuver around several vehicles before reaching your second drop off point.
The Hunter (Interception)
- Gold: +01:30s, $3000
- Silver: +02:30s, $2000
- Bronze --:--, $1000
For this mission, you have to drive the vehicle of your choice. Bring something fast and sturdy, like muscle cars since you'll need to disable the target's vehicle. After taking down the vehicle, the driver will escape on foot. Pursue him and take him down to complete the mission.

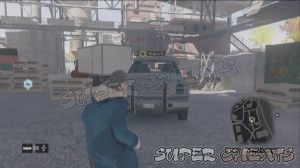
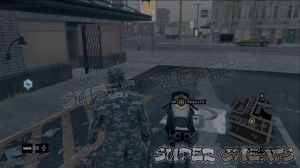
Under Construction (Getaway)
- Gold: +03:00s, $3000
- Silver: +05:00s, $2000
- Bronze --:--, $1000
Before starting this mission, it will help you a lot if you'll unlock the Jam Coms skill and craft some of it. After acquiring the vehicle, you have to escape the police. Once you've escaped the police, you have to deliver the vehicle to the drop off point to the south undetected. You'll still need to evade the ctOS area scans so use your Jam Coms when necessary until you reach the drop off point. Take note that if you get scanned again, the current drop off point will change and you'll have to repeat the process of losing the police and trying it again.
.webp "Guide Image")
The Loop
Buffering (Interception)
- Gold: +05:40s, $6000
- Silver: +07:00s, $5000
- Bronze --:--, $4000
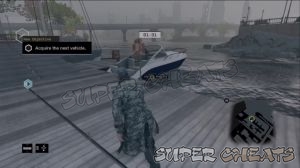
For the first part of this mission, you have to chase the target on speedboat. You don’t have any way of forcing him so just keep close until you completely retrieve the data. Next, you have to head to the next location on land.


Find a fast, stable vehicle and head to the next target. Armed enemies will pursue you on your way to the next location so do your best to evade or neutralize them. Once you found the target, do your best to locate force him off the road or block his vehicle. From there, you can simply kill the target to instantly download the complete data.

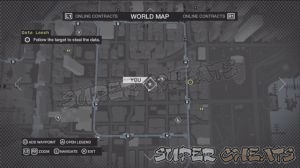
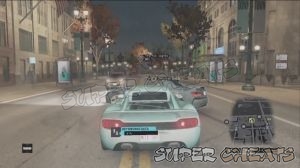
Data Leech (Interception)
- Gold: +01:30s, $6000
- Silver: +03:00s, $5000
- Bronze --:--, $4000
Find the target and retrieve the stolen data. You can recover the data immediately by blocking off the target and killing him. This is easier done using a shotgun or grenade launcher. Enemy reinforcements will appear shortly after you start the chase so be prepared to deal with them as well.
Deadly Loop (Interception)
- Gold: +02:40s, $3000
- Silver: +04:00s, $2000
- Bronze --:--, $1000
You have to eliminate two targets indicated in the map. Since there’s two of them, you have to keep tailing them and ram their vehicles, until you get the opportunities to neutralize them using environmental objects. Depending on the aftermath of the chase, you may also want to keep a Jam Coms handy in case a civilian reports to 911.

Distraction (Decoy)
- Gold: +00:30s, $6000
- Silver: +00:20s, $5000
- Bronze --:--, $4000
You have to pass through the checkpoints as fast as you can. Take note that some of the checkpoints are haphazardly placed which may require you to make sharp and U-turns. After passing through the last checkpoint, you have to lose the heat as well before you can continue with your other activities.
Double Vision (Interception)
- Gold: +03:30s, $10000
- Silver: +06:00s, $9000
- Bronze --:--, $8000
Chase the first target and take him down. You can kill him and just retrieve his phone to get back the data. Next, head all the way back to The Wards and find the second target. This time, more enemies will be on you tail. Force the target off the road by using whatever environmental objects at your disposal. After killing the target, you can escape or just finish off the remaining enemies.


Gateway Timeout (Interception)
- Gold: +01:30s, $3000
- Silver: +02:30s, $2000
- Bronze --:--, $1000
For this interception mission, you have to keep following the target until you download the complete data. The remote download range is limited so you have to keep close to him. The mission will be complete as long as you download the data completely. Take note that if prolonged your chase, enemy reinforcements may come in and interfere with you.

Ghost Trail (Decoy)
- Gold: +00:30s, $6000
- Silver: +00:20s, $5000
- Bronze --:--, $4000
You have to pass through the checkpoints as fast as you can. After passing through the last checkpoint, you have to lose the heat as well before you can continue with your other activities.

Misguided (Decoy)
- Gold: +00:35s, $6000
- Silver: +00:20s, $5000
- Bronze --:--, $4000
You have to pass through the checkpoints as fast as you can. After passing through the last checkpoint, you have to lose the heat as well before you can continue with your other activities.
Number Crunch (Interception)
- Gold: +02:00s, $3000
- Silver: +03:00s, $2000
- Bronze --:--, $1000
Find the target vehicle and keep close. If you can force him to total his vehicle, you can run over the target and hack his phone to instantly recover the data. Take note that enemy reinforcements will arrive while you’re chasing him. You have the option to escape or engage and kill the enemies.

Playing it Safe (Getaway)
- Gold: +03:00s, $3000
- Silver: +05:00s, $2000
- Bronze --:--, $1000
Head to the drop off point without being seen. After getting the car, drive away from the search helicopter and other patrol cars. As long as you get off their trail at the start of the mission, your coast will be clear until you reach the drop off point.

Rogue Data: (Interception)
- Gold: +01:30s, $3000
- Silver: +02:30s, $2000
- Bronze --:--, $1000
The target is riding a fast sportscar so once the mission starts, there should be a sportscar nearby that you can use. Keep trailing the target until you download the data. Enemies will pursue you minutes after and will try to force you off the road. You must kill the target so if you get the chance to block off his vehicle, quickly leave the car and blow him up. Otherwise, you’ll be forced to continue pursuing him even after retrieving the data until you can kill him.


Tracked (Getaway)
- Gold: +03:00s, $6000
- Silver: +05:00s, $5000
- Bronze --:--, $4000
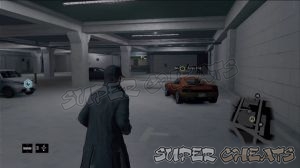
You have to acquire a police car for this particular mission. You have to keep evading the police until the tracking device is completely deactivated. You'll also start with LV3 heat so expect police choppers to spot you as well. After successfully deactivating the tracker, do your best to lose the police as quickly as possible. After losing the police, you have to reach the drop off point undetected. Keep your Jam Coms ready since you'll need them. Fortunately, the drop off zone seems to be fixed so you just need to lose the cops if ever they detect you again and attempt to head to the same location again. The drop off point is inside an underground parking garage.
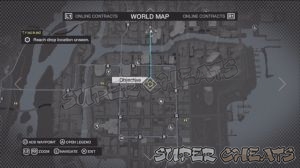
Urban Exploration (Transporter)
- Gold: +00:25s, $6000
- Silver: +00:15s, $5000
- Bronze --:--, $4000
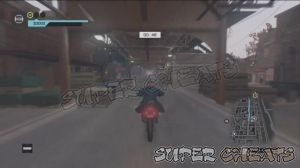
The first vehicle you need to deliver is a chopper. Just go straight ahead the back alleys from your starting point and you should be able to reach your drop off point quickly. Just be careful of the passing traffic since you’ll get thrown off the bike if you crash into another vehicle.
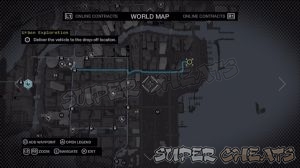
After dropping off the bike, you have to go downstairs and acquire the second sportscar. Deliver it to the second drop off point then acquire the last car. The last car delivery can be tricky since there’s a lot of traffic in the area. Try to take the off road path leading to the last drop off point to save up a few seconds of your time.
Muscle Memory(Transporter)
- Gold: +00:20s, $3000
- Silver: +00:10s, $2000
- Bronze --:--, $1000
There are three vehicles to be delivered and they’re all muscle cars. For the first two cars, you have to follow the main roads since you have to cross bridges.
For the last car, you have to remotely open the garage doors leading to the underground access. There is a shortcut straight ahead that will require you to open parking doors and go through narrow paths. As tempting as it is, it seems to be faster sticking to the main road since you can use your speed to cut the time.
Brandon Docks
Bandwidth Exceeded
- Gold: +03:15s, $10000
- Silver: +06:00s, $9000
- Bronze --:--, $8000

You have to tail and download the data from two different targets but you’ll only need to follow one at a time. Do your best to trap and neutralize the first target. You don’t have to wait for the data to be completely downloaded; as long as you kill the target, you can hack his device and recover the data instantaneously. The first target has a lot of reinforcements so if you want to make your life easier, might as well stay put and eliminate all of them. Head to the second target and do the same to retrieve the data.
Bootlegged (Decoy)
- Gold: +00:25s, $10000
- Silver: +00:15s, $9000
- Bronze --:--, $8000
The car you’ll be Driving has good speed and acceleration but very sloppy handling and questionable durability. You have to be careful not to drive too fast especially around corners and tight areas since it won’t end well for you. You’ll only have a very limited amount of time so any mistakes you make can greatly affect your chances in finishing the mission on time.
Delivery Man (Transporter)
- Gold: +00:30s, $6000
- Silver: +00:20s, $5000
- Bronze --:--, $4000
The first vehicle is a muscle car. You can go straight ahead since there’s a shortcut that will lead you directly to the first drop off point. After reaching it, you need to deliver a speedboat. Remember to ease up your controls, especially when turning. Halfway in the path, you’ll have to hack and raise a bridge in order to get through. Finally, you have to deliver a small car to the final drop off point. Just stick to the straight main street to reach the alley where the last drop off point is located.

Derailed (Interception)
- Gold: +02:00s, $6000
- Silver: +03:30s, $5000
- Bronze --:--, $4000
Pursue your target and force him off the road. Finish him off once he leaves his vehicle.


In the Spotlight (Getaway)
- Gold: +03:00s, $6000
- Silver: +05:00s, $5000
- Bronze --:--, $4000
You’ll start with LV3 heat level so you have to draw most of the police pursuers near you then neutralize them. The best way to lose them is by crossing bridges. If the police chopper is after you, keep Driving until you lose it. After escaping the police, drive to the drop off point and park the vehicle inside the designated garage without catching the police’s attention.


Industry Standards (Transporter)
- Gold: +00:35s, $6000
- Silver: +00:20s, $5000
- Bronze --:--, $4000
The paths leading to the delivery points are easy to follow so no special things to note on this contract.

Muscle Out (Interception)
- Gold: +03:00s, $6000
- Silver: +04:30s, $5000
- Bronze --:--, $4000

Pursue your target and force him off the road. There is at least one escort vehicle that will attempt to thwart your chase. Finish off the target once he leaves his vehicle or just blow him up with a grenade launcher or shotgun blasts when his vehicle is stuck.
Pickup and Run (Getaway)
- Gold: +03:00s, $6000
- Silver: +05:00s, $5000
- Bronze --:--, $4000
The Club will be in pursuit of you. You have to lose them so you can deliver the pickup truck to the drop off point. Your truck isn’t fast but it packs a punch. Don’t hesitate to ram the pursuers’ vehicles to take them down. Unfortunately, there’s no end to enemy reinforcements so make sure to take your pursuers in the districts that you have ctOS network access so you can utilize them as needed. The best way to deal is by crossing bridges and raising them to stop their tracks.

After losing them, head to the drop off point unseen. Your pursuers will patrol the area near the drop off point so avoid taking the main roads and remember to turn off your engine and hide your vehicle in alleys to avoid detection. As much as possible, don’t move your vehicle when they’re nearby since they will go to your location and disembark from their vehicles to search for you on foot.

Pier Pressure (Transporter)
- Gold: +00:30s, $6000
- Silver: +00:20s, $5000
- Bronze --:--, $4000
The first drop off point is located in the next district but you can follow the main road to reach it. Next, hop on the boat and head to the next drop off point. This is an easy delivery so you should be able to reach it without any problems. The last vehicle to deliver is a bike. From your starting point, continue straight ahead until you reach a garage door. Open it to pass through and it should be a straight path until the last delivery point.


Raid (Decoy)
- Gold: +00:35s, $6000
- Silver: +00:25s, $5000
- Bronze --:--, $4000
You have to use the ramp straight ahead and you have to make sure you don’t use too much or too little power; otherwise you won’t make it without crashing your vehicle. You only have limited time so can’t afford making any detours.


Ridge Racer (Decoy)
- Gold: +01:00s, $10000
- Silver: +00:40s, $9000
- Bronze --:--, $8000
The checkpoints are placed in tight corners which will require sharp turns, as well as raised bridges that may wreck your vehicle if you launch yourself too far in the air. Fortunately, the provided vehicle has good grip and speed, making it ideal for this decoy course.


The Wards
Connection Interrupted (Interception)
- Gold: +03:30s, $10000
- Silver: +05:30s, $9000
- Bronze --:--, $8000
There are two targets you need to pursue and download the data from. The quickest way to recovery the data is by forcing them off their vehicle and killing them. The first target will call in reinforcements so you have to deal with them as well before heading to the second target. The second target is alone so taking him down will be much easier.


Grand Triathlon (Transporter)
- Gold: +00:20s, $10000
- Silver: +00:10s, $9000
- Bronze --:--, $8000
First, ride the bike to the first drop off point. You can set the waypoint and just follow the main road until you reach the marina. Next, ride the speedboat and deliver it to the next drop off point. Once you reached the last car, deliver it to the parking lot as fast as you can, in the best condition you can manage to complete the mission.
Hard Shoulder (Interception)
- Gold: +01:40s, $6000
- Silver: +03:00s, $5000
- Bronze --:--, $4000
You have to pursue the target while dealing with enemy vehicles as well. After cornering him, kill the target to complete the mission. You have to deal with his reinforcements as well or escape them.


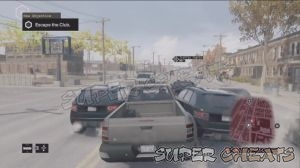
Members Only (Getaway)
- Gold: +03:30s, $3000
- Silver: +05:00s, $2000
- Bronze --:--, $1000
First, you have to escape the pursuers by all means necessary. Don't bother attacking them since they'll just respawn infinitely. Once you lost them, head to the delivery point without being detected.

Mad Mile
Deception (Decoy)
- Gold: +00:40s, $6000
- Silver: +00:30s, $5000
- Bronze --:--, $4000
You only have a very limited time but you can build it up easily by avoiding accidents and crossing the checkpoints quickly. You'll be using a high-powered bike and the checkpoints will lead you through tight alleys and corners. Don't hesitate to the use focus to slow time down when needed and remember to ease up the throttle especially when jumping over ramps. You may injure or kill civilians along the way but don't let that deter you.


Escape Artist (Getaway)
- Gold: +03:00s, $10000
- Silver: +05:00s, $9000
- Bronze --:--, $8000
The bike is located on the second floor of the parking building. As soon as you ride the bike, go to the parking building's top floor and go through the barricade ahead. This will lead you to a ramp that will make you land on the train tracks. Keep racing through the train tracks and don't jump out. The police won't be able to catch up to you and you'll be able to escape easily. Once the drop off point is revealed, active your GPS there and keep following the tracks. Jump only out of the tracks when you reach the highway connecting Parker Square and The Loop. This is where the train tracks and highway will branch off.


Lap of Luxury (Transporter)
- Gold: +00:25s, $10000
- Silver: +00:15s, $9000
- Bronze --:--, $8000
You need to drive three luxury cars to their respective drop off points. The drop off points are located conveniently along major roads. There are no effective shortcuts (except for the second car where you can drive through the park) so you just need to concentrate on racing through traffic and avoiding them. Activating our GPS on the drop off points is very helpful since you just need to follow them to your destination.

Showroom Condition (Getaway)
- Gold: +03:00s, $6000
- Silver: +05:00s, $5000
- Bronze --:--, $4000
Find the car and escape from the showroom. The police will be on your tail as soon as you enter the car so do your best to lose them fast. The best way to do this is by Driving fast and crossing a bridge as you raise it. Once you lost the police, the drop off point will be revealed. Activate a waypoint there then have your Jam Coms ready to delay any ctOS scans that you'll encounter. Drive fast to avoid the scanners and once the police gives up, you're free to reach the drop off point without worries except the time.


Wild Ride (Decoy)
- Gold: +00:30s, $6000
- Silver: +00:20s, $5000
- Bronze --:--, $4000
If you clear the checkpoints fast enough, you'll always stay ahead of the ctOS scanned areas. Continue staying away from the scanned areas the police will eventually give up, which will leave you just racing against the clock.


Pawnee
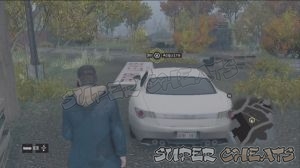
Deliverance (Getaway)
- Gold: +03:00s, $10000
- Silver: +05:00s, $9000
- Bronze --:--, $8000
Since you're Driving a bike and your pursuers are on vehicles, it will be quite easy to lose them. Just keep going through the off road areas until they lose sight of you. After losing them, you need to deliver the bike to the drop off point without getting detected.


Scenic Retreat (Getaway)
- Gold: +03:00s, $10000
- Silver: +05:00s, $9000
- Bronze --:--, $8000
Pick up the car from the Blume premises. Shortly after, several police patrol cars and chopper will be on your tail. You have to lose them first before the drop off point is revealed. You have to bring your car to the nearest city district where you have more take down opportunities. Once the drop off point is revealed, carefully head there by using the back alleys. Remember to keep an eye to your minimap as well to know the police vehicle locations.

The Badlands (Transporter)
- Gold: +01:30s, $10000
- Silver: +00:30s, $9000
- Bronze --:--, $8000
The first part can be tricky since you have to find an off road path leading to the main road. Just go uphill and you'll find the path leading back to the main road. Follow the road that leads to the lumber mill and drop off the first vehicle.
Next, ride the bike and use the ramp nearby. Follow the trail that leads to another ramp which will launch you over the river. From there, you can take off road shortcuts and paths leading to the Blume headquarters where the second drop off point is located. You have to use your Focus to control your landing, especially if you're using the ramps. The time is quite limited in this one, giving you only with a few seconds allowance.

The last one is easy. It may seem a long roundabout path taking the highway but there's a shortcut. First, find the broken rail road beside the bridge construction. Jump from there, then go up the hill to the left which will take you to the highway below. This gives you plenty of time to reach your goal.

Trials and Tribulations (Decoy)
- Gold: +00:40s, $10000
- Silver: +00:25s, $9000
- Bronze --:--, $8000
You'll have to use an offroad bike to race through 32 checkpoints. Make sure you have Jam Coms ready and use it only when the ctOS area scan is almost filled up. That way, you can delay the scan as much as possible and keep the police out of your tail. After several checkpoints and scans, the police will give up, giving you a safe last leg through the last checkpoints.


Anything missing from this guide?
ASK A QUESTION for Watch Dogs
Comments for Fixer Contracts
Add a comment
Please log in above or sign up for free to post commentsNo comments yet. Tell us what you think to be the first.
Table of ContentsClose
- Basics
- Skill Tree
- Act I
- Act II
- Act III
- Act IV
- Act V
- Activites: Parker Square
- Activites: The Loop
- Activities: Brandon Docks
- Activities: The Wards
- Activities: Mad Mile
- Activities: Pawnee
- Collectibles
- Investigations
- Sidequests
- Trophies / Achievements
Guide Updates
Get notified of updates to this guide
Many of our guides get updated with additional information. To get an email when this guide is updated click below.
 Join us on Discord
Click to close