- Games
- Guides
- Complete Guide to Monopoly GO!Palworld Walkthough GuideThe Walking Dead: Survivors Beginners ..Ravenlock Walkthrough
- Warzone 2 GuidesHogwarts Legacy Walkthrough and GuideFar Cry Primal Walkthrough and GuideVirtual Villagers Origins 2 Puzzles an..
- Fire Emblem Engage Walkthrough GuideLego Star Wars: The Skywalker Saga GuideSurvivor.io Walkthrough and GuideChained Echoes Guide
- Latest
- More
- General ForumsChat and have fun Video Game ForumsFind friend, get help Achievements & Trophies'chieve lists and hints to help
- Pokémon HubFind it all PokédexAll the stats ModsMods and and-ons
- Action Replay CodesAR Codes and cheats GameShark CodesGS Codes and cheats CodeBreaker CodesCB Codes and cheats
Submit Your Stuff· Send in your cheats, hints and codes
· Need help? Ask a question here Help a gamer Can you provide the answers for fellow gamers questions- Forums
- Pokemon
Log into your account here:
Not registered? Sign Up for free
Registration allows you to keep track of all your content and comments, save bookmarks, and post in all our forums.
-
PlayStation 5
PlayStation 4
PlayStation 3
PlayStation 2
PlayStation
PS Vita
PSP
-
Xbox Series X
Xbox One
Xbox 360
Xbox
-
Switch
Wii
Wii U
3 DS
Nintendo DS
Nintendo 64
Gameboy Adv.
Gameboy
GameCube
SNES
NES
-
Roblox
iPhone
Android
PC
FaceBook
Mac
Dreamcast
Arcade
- General Forums
- Video Game Forums
- Teams Forums
- Pokémon Hub
- Pokédex
- Technical FAQ's
- Achievements & Trophies
- Hall of Fame
- Enter a game name to find below:
-
- Or click here to search for specific content.
- All Our Full Guides More Game Walkthroughs Cheats, Hints and Codes Questions and Answers Recent Guide Updates
- Complete Guide to Monopoly GO!Palworld Walkthough GuideThe Walking Dead: Survivors Beginners ..Ravenlock Walkthrough
- Warzone 2 GuidesHogwarts Legacy Walkthrough and GuideFar Cry Primal Walkthrough and GuideVirtual Villagers Origins 2 Puzzles an..
- Fire Emblem Engage Walkthrough GuideLego Star Wars: The Skywalker Saga GuideSurvivor.io Walkthrough and GuideChained Echoes Guide
Thank you for printing this page from www.SuperCheats.com.
Remember to come back to check for updates to this how to and much more content for Vita.
How to Copy Images To and From your PS Vita to your PC
Published by SuperCheats Staff on Sep 3rd 2013
Photos you've taken can be transferred to your PC from your PS Vita for further editing or post-processing. You can also transfer photos or images from your PC to your PS Vita to customize the background image of your Home Screen.*Please make sure that you have installed the “Content Manager Assistant” Application and have it running on your PC. You can download the Content Manager Assistant for the PC and Mac OS
How to copy Images from your PS Vita to your PC
1. On your PS Vita Home Screen press “Content Manager”. Press “Start”.
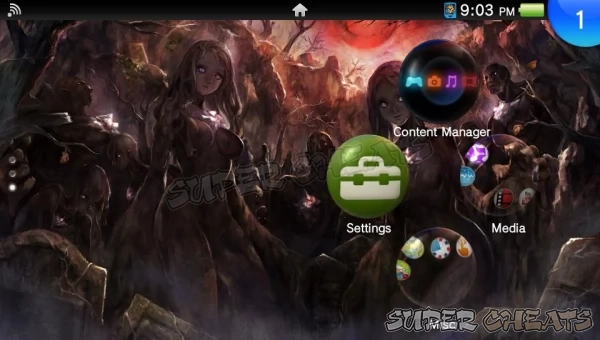
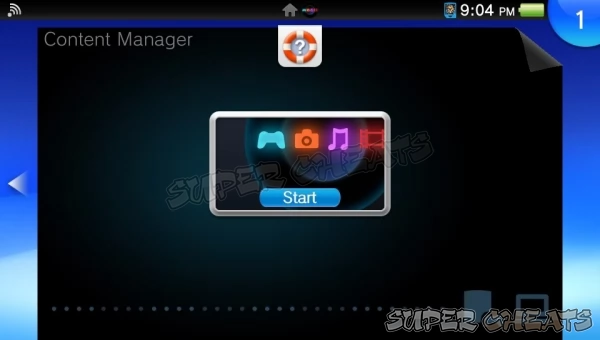
2. Under the “Copy Content” select “PS Vita System -> PC”. Press “Photo”
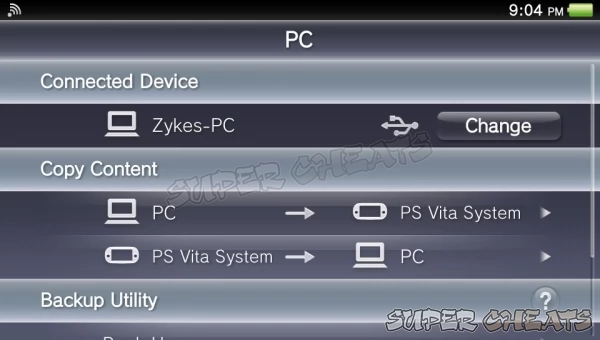
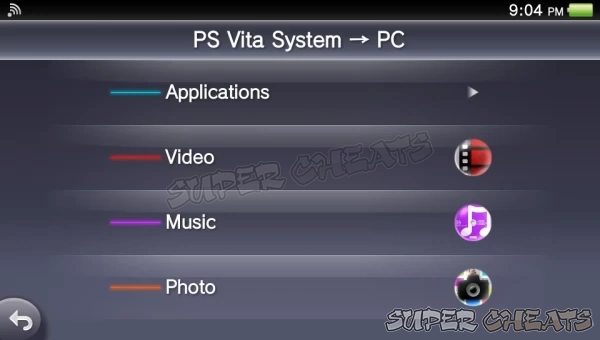
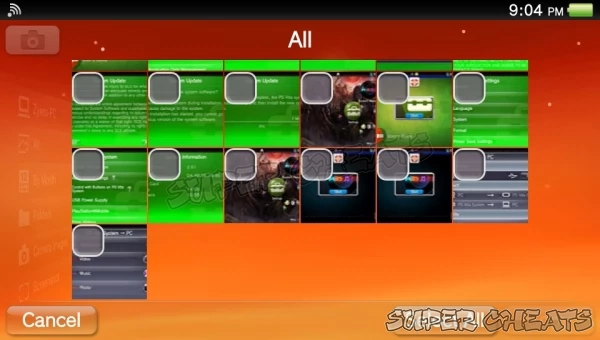
3. Select the images you want to copy by tapping the check-box on the image or you can also press “Select All” to select all the images store on your PS Vita.
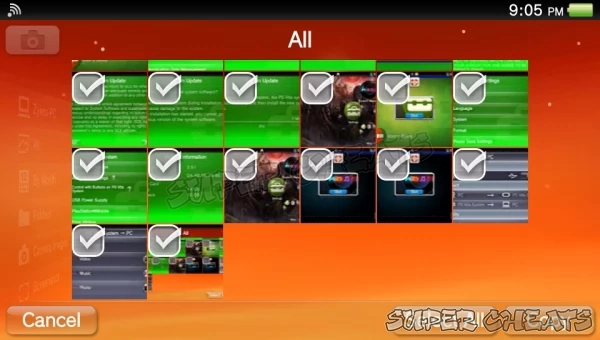
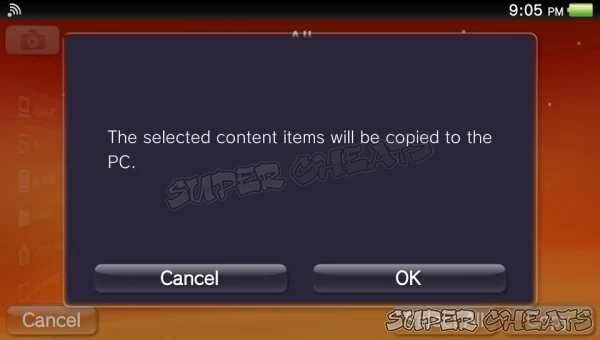
4. After selecting the images you want to copy press “Copy”. A confirmation message will pop-up, press “OK” to start copying the images to your PC.
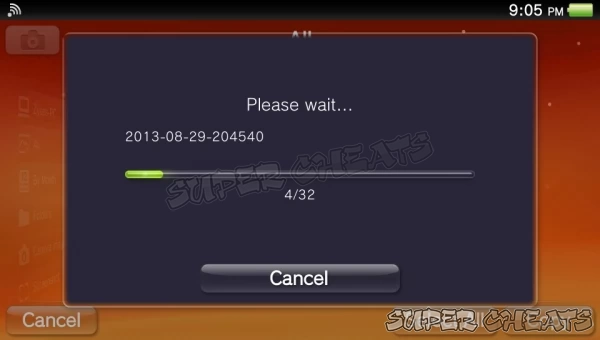
5. Wait for the files to be finished copying to your PC. You can check the files by going to the path you specified on the “Content Manager Assistant”.
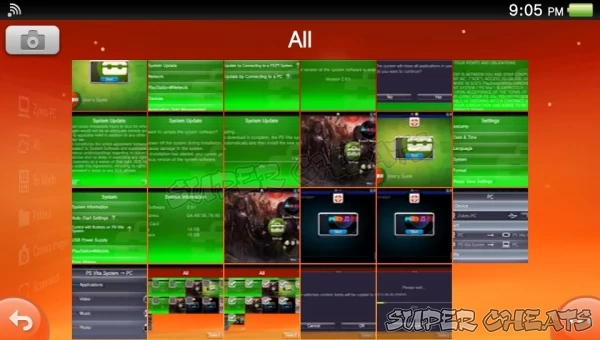
How to copy Images to your PS Vita from your PC
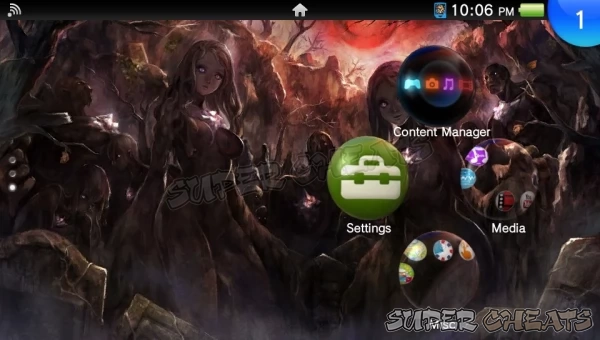
1. On your PS Vita Home Screen press “Content Manager”. Press “Start”.
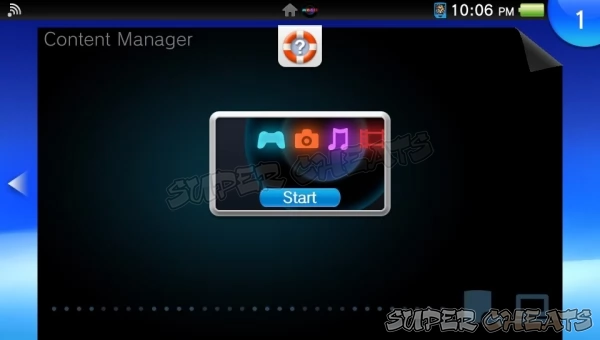
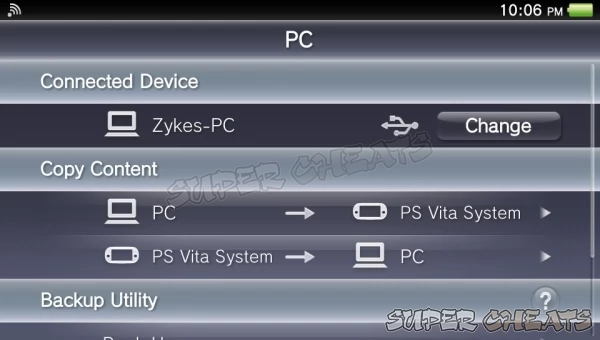
2. Under the “Copy Content” select “PC -> PS Vita System”. Press “Photo”
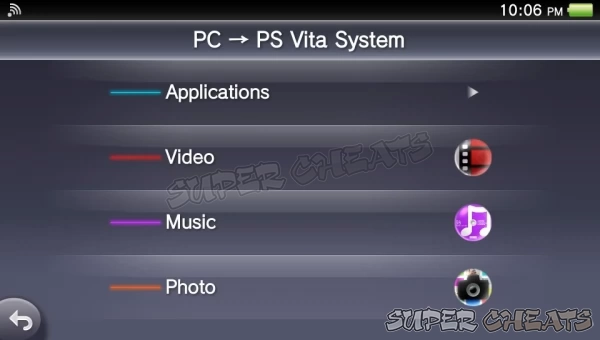
3. Select the images you want to copy by tapping the check-box on the image or you can also press “Select All” to select all the images store on your PS Vita.
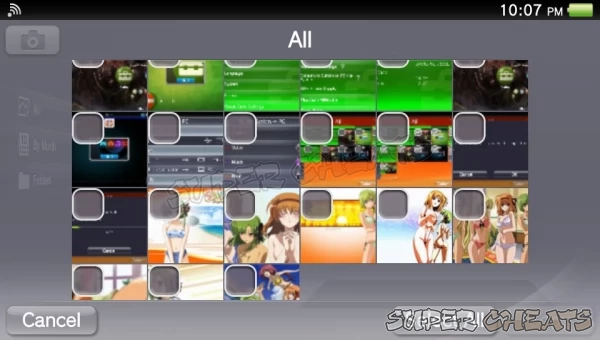
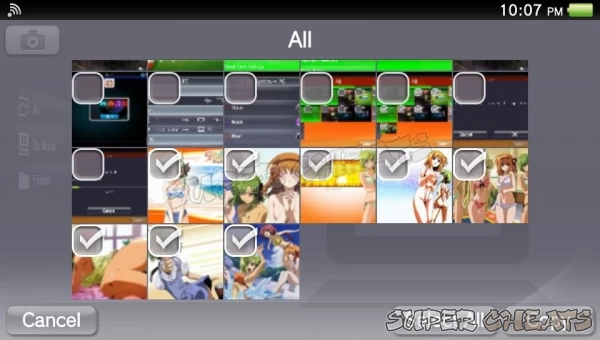
4. After selecting the images you want to copy press “Copy”. A confirmation message will pop-up, press “OK” to start copying the images to your PS Vita.
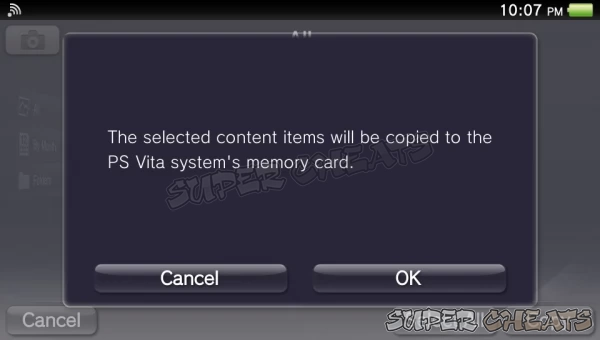
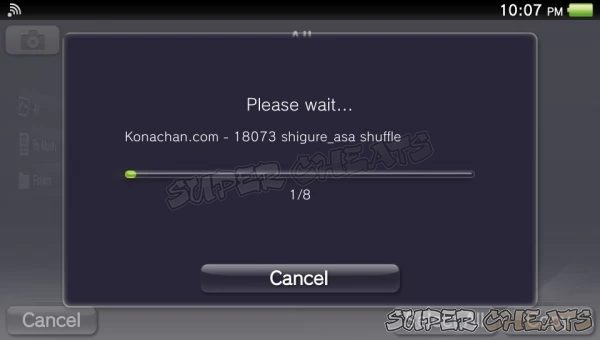
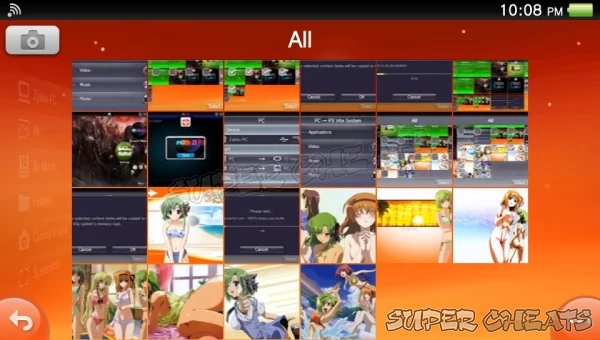
5. Wait for the files to be finished copying to your PS Vita. You can check the images by going to “Photo”
Reference:
Playstation Knowledge Center
Comments for "How to Copy Images To and From your PS Vita to your PC"
Table of Contents
Ask a question
Do you have a question about Vita?
Click here to post it.
Click here to post it.
Latest Help Articles
The following file types are supported by the PS Vita:MusicMP3 (MPEG-1/2 Audio Layer 3)MP4 (MPEG-4 AAC)WAVE (Linear PC..
It is important to have a backup of your PS Vita’s Data. You may never know when your data may become corrupted or i..
Photos you've taken can be transferred to your PC from your PS Vita for further editing or post-processing. You can al..

