Part 10: The Land Effort (Levels 15-20)
Now that you have reached the point where you are adding the Church, you are close to the point where a lot of other Buildings are going to be available in the game. As a direct result of this our need for open and available land has increased -- in fact that neeed will grow quite pressing shortly -- unless we take steps to remedy it quickly.
One reaction commonly observed in the towns of other players is to bunch together existing Buildings in the town in order to more efficiently make use of hte land area presently unlocked, but this approach typically results in creating a less attractive game environment that tends to reinforce the idea that this is a game and that esthetics do not really matter.
That is a shame because perhaps its greatest strength and one of the points that contributes to the game and its over-all popularity is the sense that it is a continuation of the imaginary world that is experienced by players as the audience of the TV Show, and as such, emphasizes that the player -- by playing the game as creator of a personalized Springfield emerging phoenix-like from the ashes -- gives the game and Game Play a much more personal connection.
As most players prefer not to choose a plan that breaks the suspension of disbelief that is necessary for this sort of game environment (and which Tapped Out succeeds at exceedingly well) the only other option is a uniform Expansion approach in the game that essentially creates a larger town with legitimately more land available for Game Play.
That is the approach that we endorse in this Guide, and that is the choice we hope you will also make.
Donut Warning Setting
As this approach will, necessarily, require you to spend at least some Donuts in the process, now is a good time to remind you that there is a new setting you can employ in the game to prevent yourself from the accidental spending of Donuts.
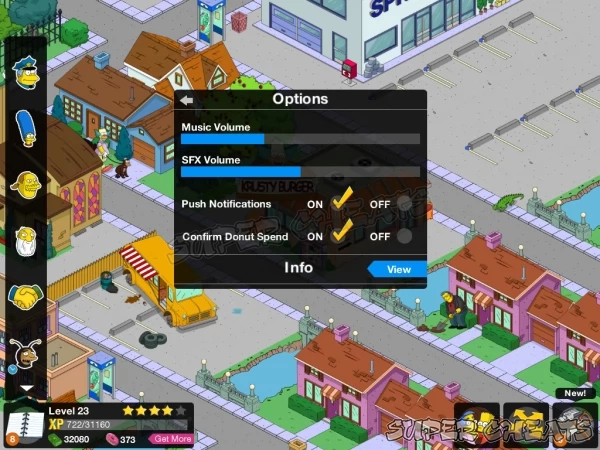
Turn on Donut Warning Option
Hint: If you have not already done so, open the in-game store menu and look at the top right corner, where you will spot an "i" icon that you can tap to get to the Game Options Menu. Once there, the last tick box in that pop-up is the "Confirm Donut Spend" Option. You want to enable that (tap the "On" tick) so that you cannot accidentally spend Donuts if you end up tapping the wrong area of the screen!
They added this later in the game's development and it is really a good idea to make sure that it is ticked "On" for obvious reasons!
- = - = - = - = - * - = - = - = - = - = - @@ - = - = - = - = - = - * - = - = - = - = -
A Temporary Pause to Build Your Money Bank
Considering that the game is built around the idea of constantly moving forward and constantly making progress, what we are about to suggest to you may seem like it is the opposite of what you should be doing in terms of Strategy, but we have found that contrary to that gut feeling, this is actually one of the smartest things you can do at this point in the game!
Having a fat balance in your in-game bank means not having to scramble around every time that you need to buy something or pay for a Building -- and as the latter is something that you will be doing on an increasing basis from here forward, this has suddenly become a serious issue.
Game Play is a lot smoother when you have a warchest of funds to use -- and the temptation to trade Donuts for Cash is not as great -- and believe us when we say that trading Donuts for cash is possible the worse decision you can make in Tapped Out! The exchange rate is horrific when you compare what you get in terms of cash to what those Donuts could do for you in terms of time saved and Items purchased.
There really is no question about this -- trading Donuts for Cash is a very bad idea. You need to trade time for cash.
Stop Questing for a While
The easiest method to accomplish that is to simply stop moving forward in the quest system. Literally stop swimming and start treading water while you build up Money from harvesting houses and Buildings as well as doing timed jobs and tasks.
As you build your bank, you may be depleting it quickly by purchasing new land - but that is OK! That is part of what we mean to do at this stage and it simply means that the treading water phase of Game Play will last longer than it might otherwise have lasted.
Your objective is to trade time for Money, use the money to expand the game world, and save money to have a warchest of funds at your disposal (of course) all the while trading time for Cash.
You really should keep doing that for as along as you feel you can - one way to make this sting less is to alter your Game Play habits so that it is less of an issue! What you can do is pick 24-hour tasks/jobs and then if it helps, only log in once per day to collect those Tasks/Jobs and recycle the assignments, while collecting taxes and business revenue at the same time.
That way you limit the amount of time you spend in the game and so reduce the temptation to say "Chuck it!" and start playing again without having built up the bank you need to play smoothly!
If you still need a game to fill-in the time you would ordinarily spend gaming, well, we find The Sims: Free Play to be a great game and as it uses a similar system to Tapped Out, you would easily be able to use it as a substitute for your Simpson's family while you work through this period of play pause.
Once you have obtained a large amount (say about a fifth of your overall town) as open and unoccupied grass land, keep going until you build up a warchest that is somewhere between $150,000 and $300,000 at a minimum -- but we suggest half-a-million for reasons that may not be obvious at first.
The $100K Minimum Balance
One thing you should factor in at this point since you are Building your warchest is the idea that you will always have $100K in your bank at any time. It is easiest to consider that $100K as if it does not exist, so that when your bank balance reads $100K you consider it to read $0. Why?
It turns out that the game treats that $100K as a magic number -- and having that impacts the results of the Mystery Box, Homer Buddha, and other Prizes, increasing your chances of getting Donuts over Cash as your prize. ANYTHING you can do to increase the odds of a Donuts pay-out is a good thing.
Another reason half-a-million is a better target figure is that some of these Buildings are very expensive. If you go for the extra now, it may mean not having to tread water later, again, to build your bank back up! Bear in mind that it is not just the cost of placing a LOT of buildings as well land Expansion you will be dealing with, but also the incredibly expensive and time-consuming process of Building the Squidport Boardwalk.
With that in mind you will find that your best approach -- and coincidentally an approach that also sees you obtaining a bunch of levels relatively easily -- is to tread water at the start to get the funds you will need for the Buildings and land Expansion, then progress through the quests until you reach and complete the FIRST Squidport Boardwalk Expansion (where it asks you to have placed a total of 8 Boardwalk pieces) and then pick that point for your second Money collecting halt.
The reason it is a good idea is really twofold -- the first being that obviously you will need the Money, but the second is that the process of Building the Boardwalk pieces that you will need to place will quickly hit the price of $5000 per piece with a 24h timer... All too shortly after that it jumps to $7,500 and a 1d12h timer, so you can probably see how bad it will be before it gets better!
And that is just to start out mind you - by the time you get to the next section of the Guide and place the 35 pieces of Boardwalk you will need to place we are talking over a month of build time and almost $200K in build costs. Yeah, you need Money. Lots of money.
That being the case -- and bearing in mind that at least for the Boardwalk pieces spending Donuts to speed that process up is simply in NO way cost effective -- you will find that you can get a fair number of long tasks and jobs in during the time you spend making the Boardwalk pieces.
What we ended up doing was focusing on getting all of the Springfield quests to that point and then doing 24h tasks/jobs since it means only having to address The Characters one time per day, and also logging into the game every 3 hours or so to collect taxes and etc.
Also do not forget to hit the farm! Growing the Moonshine Crop (24h) works in well here.
While all that was going on we also made sure to progress the quests in the Krustyland Expansion area too -- do not forget to do that even if you are just visiting there each login to collect the Tickets from whatever you have placed there so far, since eventually you are going to need a LOT of Tickets!
If you end up needing to spend a lot of time (more than a week) in Building up funds and building the Boardwalk pieces, you may want to go ahead and spend some of the Tickets you have been acquiring on purchasing additional land in Krustyland, because just like in Springfield you are going to need it anyway, and it does not hurt to have it ready and waiting... Just saying.
Seriously one of the reasons you are reading this Guide is to learn the strategies that will make Game Play faster and better - well this is one of the key strategies.
You will build Money far faster by just accumulating it than you will constantly using it up, all the while committing your troops to different quests as a reaction to that need. This really is one of those times when slow-and-steady really does win the race...
In the process of doing this you will pick up several levels - as many as four or five easily if you go for this in a serious way.
Once you have a sufficient amount of free land and Money available you can resume the quest-lines, starting with the Church series if you have not already started it.
- = - = - = - = - * - = - = - = - = - = - @@ - = - = - = - = - = - * - = - = - = - = -
Quest Line Organization
The quest lines below are organized by their quest name, with each of the quest segments being in order of number.
That does NOT represent the order that they appear in the game -- that is to say you will end up doing a few of one and then that will trigger a few of another, but then you will return to the previous quest line after that.
The chances of you gettinmg the quests in the same order that we did are pretty slim, and how you prioritize the different Buildings in the game will have significant impact on this as well...
This happens often in the process of working your way through the levels that are covered here, and we wanted to be sure that was clear to you.
- = - = - = - = - * - = - = - = - = - SPRINGFIELD - = - = - = - = - * - = - = - = - = -
Springfield Quests Phase I
From here on each of the Guide sections will be organized and divided by the Game Play zone that they apply to , so for example the quests in this part of the section are all based in Springfield, and so are organized as the Springfield Quest.
The second half of this section will focus upon the Krustyland Quests -- we feel that dividing them up this way offers a more efficient method for using the Guide -- and because you will very likely be bouncing back and forth between guide sections due to the different order in which the quests appear in your game (as opposed to our own) this will be much more convenient.
As you progress bear in mind that tasks and quests from here on are generally divided into three distinct types: The Story Line Quests/Tasks. Character Development Quests/Tasks. and Gap-Quests.
For the most part the Gap-Quests are one-offs, and do not usually include multiple parts, though they often include multiple requirements in each.
The Story Line Quests usually are multiple part, and often each part has multiple requirements.
The Character Development type of quests are more like the gap-quests than they are The Story Line Quests, but they also tend to be more entertaining and worth paying closer attention to.
- = - = - = - = - * - = - = - = - = - = - @@ - = - = - = - = - = - * - = - = - = - = -
Passion of the Flanders
This is a very significant quest series since it is the bottleneck for a LARGE number of other quest lines that simply cannot happen until this one is completed!
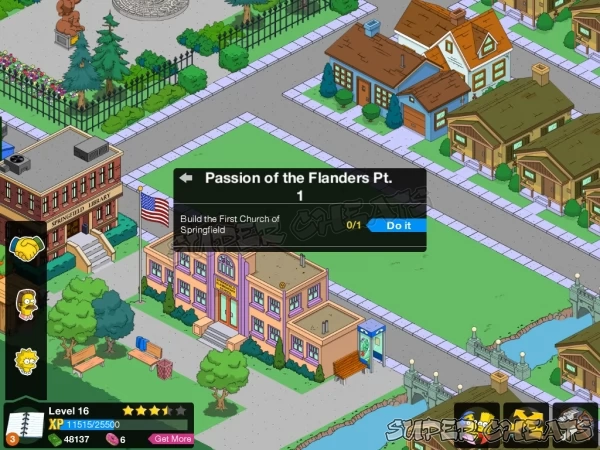
The first part of this series -- Part 1 of the quests -- requires that the player buy and build the Church that Flanders AND The Simpsons belong to (both in the show and in the game).
The Passion of Flanders Pt.. 1 -- Build the First Church of Springfield (Reward = $100 / 10 XP). The First Church of Springfield cannot bu built until at least Level 14, and it costs $32,500 and 24h to buy and build.
The base action for the Church is a 12h Action called "Collection Plate" that generates $200 and 20 XP.
Of more significance though is the large number of Characters who are impacted by the presence of this Building in your Springfield:
- Agnes Skinner -- Unlocks the Task: Hustle at Bingo (4h $175 / 45 XP)
- Barney Gumble -- Unlocks the Task: Attend AA Meeting (1h $70 / 17 XP)
- Clancy Wiggum -- Unlocks the Task: Attend Church (12h $420 / 100 XP)
- Homer Simpson -- Unlocks the Task: Attend Church (12h $350 / 100 XP)
- Marge Simpson -- Unlocks the Task: Attend Church (12h $350 / 100 XP)
- Lisa Simpson -- Unlocks the Task: Attend Sunday School (12h $420 / 100 XP)
- Bart Simpson -- Unlocks the Task: Attend Sunday School (12h $350 / 100 XP)
- Milhouse Van Houten -- Unlocks the Task: Attend Sunday School (12h $350 / 100 XP)
- Ned Flanders -- Unlocks the Task: Attend Church (12h $350 / 100 XP)
- Rod Flanders -- Unlocks the Task: Attend Sunday School (12h $420 / 100 XP)
- Todd Flanders -- Unlocks the Task: Attend Sunday School (12h $420 / 100 XP)
- Reverend Lovejoy -- Unlocks the Task: Give a Sermon (12h $350 / 100 XP)
- Reverend Lovejoy -- Unlocks the Task: Counsel Couples (24h $600 / 150 XP)
- Sea Captain -- Unlocks the Task: Pray to Poseidon (12h $420 / 100 XP)
- Waylon Smithers -- Unlocks the Task: Attend AA Meeting (1h $75 / 20 XP)*
* This is a one-time task only.
The Passion of Flanders Pt. 2 -- Make Ned Flanders and Homer Simpson attend church; Have Rev. Lovejoy give a Sermon.
The total time required for this is around 12h. (Reward = $1260 / 310 XP).
Once that is complete Ned Flanders will emerge and complain that children are not attending to their spiritual obligations as they should!
In this instance he is speaking specifically of Bart, Lisa, and Milhouse -- who you have available to you.
Tapping Flanders on the task bar will open the quest task menu, from which you can send them to Church for that 12h task.
The Passion of Flanders Pt. 3 -- Make Milhouse, Bart, and Lisa Simpson attend Church - this is a 12h task.
Completing Part 3 pays off in a reward of $100 and 10 XP.
- = - = - = - = - * - = - = - = - = - = - @@ - = - = - = - = - = - * - = - = - = - = -
The New Evergreen Terrace
The next of the ongoing quest should be Part 8 in the Evergreen Terrace line, which also happens to be the final quest in that quest line, and this time you are prompted via Lisa to build an Orange House. That is presuming you get Part 8 - it is slightly possible that you are actually at Part 7 instead, as the quests appear in a different order in-and-out for every player depending upon which other quests that they have completed.
That being the case, and on the off-chance that you have not completed Part 7 yet, we are including BOTH of those Parts here for your Reference and convenience.
The New Evergreen Terrace Pt. 7 -- Buy, Place, and Build the White House.
To accomplish that you will need $7,700 Cash and it will require a 24h build time. The White House pays a tax of $200 and 20 XP.
Once you complete this task you will receive the traditional $100 and 10 XP for your troubles.
The New Evergreen Terrace Pt. 8 -- Buy, Place, and Build the Orange House.
To accomplish that you will need $24,500 Cash and it will require a 24h build time.
Once you complete this task you will receive the traditional $100 and 10 XP for your troubles, and you will have fully completed this quest line -- which we remind you was one of the original quest lines you flagged at the very start of the game!
Congratulations mates! Good on ya!
- = - = - = - = - * - = - = - = - = - = - @@ - = - = - = - = - = - * - = - = - = - = -

Is There an Al Coholic Here
Finally you will trigger the opening quest in the Moe's Tavern line, which in addition to adding that new Building to the game -- which will cost you $32,000 and require a 24h build time -- will also add The Characters of Moe and Marge (Homer's wife) to the game.
Is There an Al Coholic Here Pt. 2 starts as a Quest Icon over Homer's head. Tapping that reveals the task to send Homer to drink at Moe's which is an 8h task.
- = - = - = - = - * - = - = - = - = - = - @@ - = - = - = - = - = - * - = - = - = - = -
An Apu's Work is Never Done
Apu gets a new Quest Marker and tapping him initiates the new quest An Apu's Work is Never Done, revealing that the Kwik-E-Mart corporate types have implemented a new 24-hour shift for their workers. Apu views this development with relief, since it is an improvement over the 48-hour shift he is used to.
Tapping the Quest Icon prompts you to send Apu to work for a 24-hour shift.
- = - = - = - = - * - = - = - = - = - = - @@ - = - = - = - = - = - * - = - = - = - = -
Squidport Phase I
After Moe's Tavern is restored to your Springfield and you have completed the first two quests in that line Homer will flag the Squidport series of quests -- starting with his declaration that he craves dough -- as in the fried dough that you could only get in Squidport! The problem is, of course, that Squidport no longer exists...
After that conversation with Lisa completes, the Squidport Quest Line is fully flagged.
Squidport Pt. 1 -- to complete the first part of the Squidport quest line you will need to have expanded your land area to include the beach along the water line (the Beach Expansion) AND the water itself (the Water Expansion).
That is why at the beginning of this section in the Guide we recommended that you cease working on quests and tread water to build a large bank for your warchest -- because this stage in the game requires a lot of land purchases, and for that you need Money.
Assuming you have done that, go ahead and purchase the land Expansion blocks along the beach and just off the beach to complete this part of the Quest. If you have NOT done it, do it. Seriously - cease working on Quests and spend a week or three just collecting taxes and doing repeatable tasks with your entire army of Characters. That is the best way to empower yourself to complete the next few sections in the Guide and phases of the game.
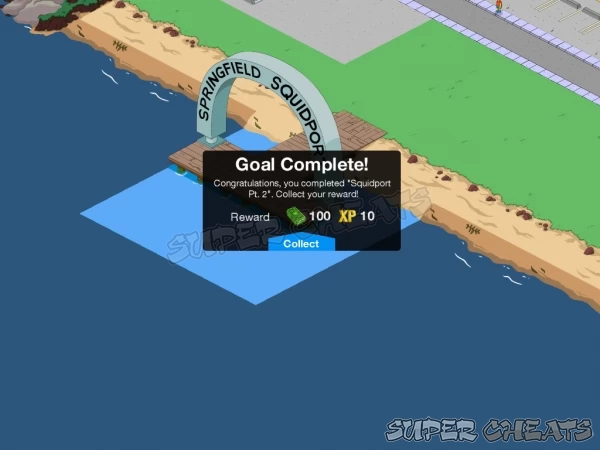
Squidport Pt. 2 -- Technically you only need to unlock one beachfront and one waterfront Expansion slot in order to complete Pt. 1 and unlock Pt. 2, but you should focus upon unlocking the entire beach and water fronts as you work on this simply because you will benefit from that effort later.
With Pt. 2 unlocked, your next goal is to place the Squidport Entrance -- which we seriously recommend should be placed at the end of one of the main streets towards the center of the beach area for both appearance and ease in later Expansion.
The Squidport Entrance costs $4,500 to place, and includes a variable jobs scheme. Placing the Entrance pays off in XP and four pieces of Boardwalk Sections (the Resource for this quest line)and the traditional $100 and 10 XP.
Squidport Pt. 3 -- Place Boardwalk Sections. You will recall that you just received four Boardwalk Sections as part of your reward from the previous quest - now it is time to place those, and extend Squidport into the sea by Building the wharf it consists of.
Once you place all four of the Boardwalk Sections you will complete this part with a reward of $100 and 10 XP.
Note: To obtain additional Boardwalk Sections in order to expand the size of your Squidport you tap on the Squidport Entrance, which will pop-up the Create Boardwalk task. Simply pay the fee (the amount climbs with the number of times you complete the task) in Cash and the task begins. Once its timer runs out, you will receive 1 Boardwalk Section, which you can place or keep for later.
After you complete the task and obtain the Boardwalk Section, you can then initiate the task again, paying the fee and waiting out the timer.
Squidport Pt. 4 -- Make Homer Swear at the Ocean. Simple enough (as long as Homer is available that is). Just tap him or the quest prompt and have him complete the 12h Swear at the Ocean Task ($420 and 100 XP).
Once the timer counts off the 12h of the task you complete Part 4 and receive the traditional $100 and 10 XP reward.
Squidport Pt. 5 -- With the completion of the Old Man and the Sea task you will now be prompted to build the Itchy and Scratchy Store on the Boardwalk - that being the first store that will be added to the new Squidport. The cost to place the store is $32,000 and completing the placement and Building rewards you with the traditional $100 and 10 XP.
Squidport Pt. 6 -- Your task here is to build a Boardwalk Section at the Squidport Entrance." You do this by tapping the Entrance Sign and then spending the Cash to build a new section of Boardwalk. When the timer runs out you collect the Boardwalk Section and you complete the quest.
Your reward is $100 and 10 XP. -- and a new section of Boardwalk of course!
Squidport Pt. 7 -- This is a multi-part quest stage in which in addition to having built and placed sufficient Boardwalk Sections to have at least 8 of them in place, you also need to build Malaria Zone, which is the next Building being added to your new Squidport. This structure costs $47,500 to build so hopefully you built up a good supply of funds...
This is a 24h build task, and when the Building is complete you receive a reward of $100 and 10XP, and move the quest line forward.
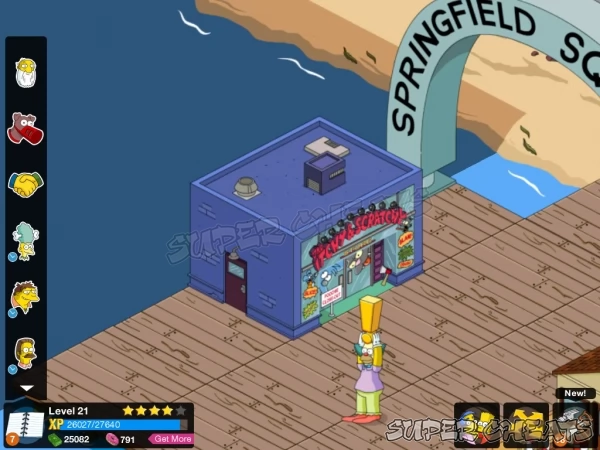
Squidport Pt. 8 -- For this stage in the series all that is required is for you to purchase and place a Boardwalk Lamppost and three (3) Boardwalk Trees, then place five (5) Boardwalk Fences. Oh and have Ned Flanders declare himself to be heterosexual, Yar!
The reward is the traditional $100 and 10 XP, and you move the quests along.
The next quest to move the series along is another gap quest. Once you complete the 2-part gap quest with Bart you have another gap quest with the Sea Captain.
Squidport Pt. 9 -- This one works out to be something of a whopper of a quest in more ways than one... It is a multi-part quest that first has you build to at least twelve (12) Boardwalk Sections, then build the Just Rainsticks shop -- which takes 12 hours and will set you back $52,000 in Cash.
One of the problems with this stage in the process of Building the Boardwalk is that even though it says all you need is 12 sections in place to meet the first requirement of the quest, in reality you will need more than 12 simply due to the way that the Boardwalk is build and how space unfolds that you can actually use. There will be what we call negative (unusable) space that has to be factored in as part of this process.
Getting the initial 12 Boardwalk pieces will come relatively fast since we are still at the early stages of the build process, and the cost and build timer have yet to hit the point where they become painful. Actually that will happen during this segment of the quest... Sigh.
So the first 12 sections you place will likely be the section of the Boardwalk that juts out into the water, more or less establishing the length from shore to sea. Unfortunately that will only allow you the room you needed to place the Malaria Zone, the itchy & Scratchy Store, and the trees and lamp post. You will very likely end up using the fence sections on the beachside edge of the Boardwalk as it begins to extend up the beach.
So to sum this up - even though this part of the quest only requires you to have built 12 pieces and placed them, in reality to make this work out gracefully you will actually have built and placed sixteen (16) pieces!
That is OK though because you had to build them anyway -- remember that before this is done we will have built and placed over 35 sections!
Building Just Rainsticks
The cost for this Building is $52,000 -- which is a significant chunk of Money to be sure -- but the real cost, as suggested above, comes in real estate, because this is the largest building we have built for the Squiport Expansion so far!
Just Rainsticks will pretty much occupy ALL four of the extra sections we had to build for this -- and there is no way (NO way) you could have fit that in with the first two Buildings in just 12 sections. It was not going to happen.
Unfortunately we next need to build more negative (unusable) space in the form of the open walking area to front the boardwalk for Just Rainsticks, and then additional sections pushing out to the edge seaward as the real estate for the next placements. But we are getting ahead of ourselves here.
Building Just Rainsticks has a 24h timer attached, and once that runs out and you tap the building into place you will complete Part 9 of this segment in the series and you are rewarded with the traditional $100 and 10 XP!
You have just advanced the quest line, you have another Income-producing Building for your town, so hey, win-win!
You are now very close to the last quest for this Expansion Content in this section of the Guide -- but there are still a few gap quests that need to be completed before we reach that point!
The remaining gap-quests involve Lisa and the Sea Captain, so try not to commit them to lengthy tasks until you clear these away, right?
Note: When you get to this stage in your quests you are probably going to need to tread water again and build your warchest of funds back up -- considering that you will be plopping down a total of $52,000 for the Building plus we are now having to commit $7,500 and X time for EACH new Boardwalk Section(!) so it is fair to say that this part of expanding your available space is not coming cheap!
Complete the following gap-quests before returning here:
- The Old Man and the Sea Part 4 -- Make Sea Captain Practice Standup Routine (1h) $70 / 17 XP
- Just Rainsticks -- Make Lisa Browse for Rainsticks (4h) $175 / 45 XP.
Squidport Pt. 10 -- Have a Street Performer for your Squidport Boardwalk!
We have now reached the final quest segment for the Squidport Expansion for this part of the Guide, and in the process this quest was triggered by the need for our Squidport to return to its former days of glory as the entertainment spot for Springfield -- which we can accomplish via the Sea Captain, who can help us to obtain the services of a Street Performer to liven up the Boardwalk!
The most economical approach for completing this quest is to select the Human Statue from the in-game store menu -- the Human Statue only costs $10,000 (as opposed to spending Donuts, which the other Street Performers require us to pay in order to unlock and place them).
Buying the Human Statue and placing him on the Boardwalk immediately completes this quest and unlocks its reward -- $100 and 10 XP -- and in the process both serves as our Introduction to Street Performance art while at the same time adding the first member of the Boardwalk Performers Group (which is worth 25 XP to us).
Note: As odd as this may feel, because the Human Statue is in fact NOT a Statue but rather is a Human NPC, you cannot move it around like you do objects. That means you cannot enter the move menu to relocate him to a place you like better.
Wherever the game places him that is where he stays unless HE decides to move. Thought you should know about that in order to cut down on the frustration of not knowing if you see what we mean?
- = - = - = - = - * - = - = - = - = - = - @@ - = - = - = - = - = - * - = - = - = - = -
The Old Man and the Sea
Completing Part 4 of the Squidport Quests will unlock and prompt the first part of The Old Man and the Sea quest line, and the dialogue in which Homer spots the Captain's House Boat out at sea and thinks that he is hallucinating!
Bear in mind that you will want to get Homer's Quest Icon cleared as soon as you can so that he is available for other quests and prompting. Assuming you have built up the warchest, this should go very smoothly.
The Old Man and the Sea Pt. 1 -- Place Sea Captain's House Boat. The Houseboat costs $15,000 and includes the character of the Sea Captain.
The Old Man and the Sea Pt. 2 -- now that you have the Houseboat placed beside Squidport and the Sea Captain has been added to your game the rest of the quest line can commence. Starting with having the Sea Captain Tell a Tall Tale! This is a 4h task that pays $175 and 45 XP.
The Old Man and the Sea Pt. 3 -- For this gap quest you need to have the Sea Captain complete the Read Nautical Literature task, which takes 24h and rewards you with $275 and 55 XP.
Finishing this gap quest takes you back to the Squidport series for Part 9.
The Old Man and the Sea Pt. 4 -- For this gap quest you tap the quest icon on the Sea Captain and then have him Practice his Standup Routine -- which is a 1h task.
Your reward for this is $170 and 27 XP, and it moves the Squidport quest line to the final quest for this section, Part 10.
- = - = - = - = - * - = - = - = - = - = - @@ - = - = - = - = - = - * - = - = - = - = -
They Fight and Buy-It
This is a gap quest called “They Fight and Buy-It" which requires you to "Make Milhouse Browse the Itchy & Scratchy Store" and "Make Bart Browse the Itchy & Scratchy Store" -- both of which are 4-hour tasks and are required to trigger the next quest in the Squidport series.
Completing this quest rewards you with $450 and 100 XP.
- = - = - = - = - * - = - = - = - = - = - @@ - = - = - = - = - = - * - = - = - = - = -
Double Down on She's a Loser
Chances are you were not expecting yet another quest line with a large chunk of land requirement and a new Building. If so though you were not paying attention above...
At the risk of repeating the same information over and over, you have entered in to the stage of the game where you are going to need a LOT of open and available land and Money, and the best tactic -- the most effective tactic -- to deal with this is to cease working quests and spend a week or three accumulating money (and XP hey Bonus!).
By the way this is a critical and key quest as completing this opens up a bunch of other quests, some of which you may consider strategic. Well, that and it adds gambling to the game :)
Double Down on She's a Loser Pt. 1 -- To complete the first part in this quest line you will need to build the Springfield Downs, and that will require $34,500 in Cash and a fairly large piece of open land.
Building the Racetrack -- it is actually a Dog Track -- will take 24h and rewards you with a big chunk of XP (3,500 to be exact) so all in all, well worth it! Note that if you are in a hurry and you really cannot wait, you can rush the build by spending the usual 12 Donuts (but really if you can avoid that we say avoid that).
Double Down on She's a Loser Pt. 2 -- Double Down on She's a Loser at the Dog Track to get your first taste of Dog Racing and the new gambling opportunity in town! At the end of the race you receive your standard reward of $100 and 10 XP. Which is good because you lost this bet...
- = - = - = - = - * - = - = - = - = - = - @@ - = - = - = - = - = - * - = - = - = - = -
Once You've Gone Organic
A new quest that comes with the Marge character, once the quest icon appears over Marge's head and you tap it, you get a conversation of her speaking with Homer about how he has been feeding the children. She is not very happy with his answer, and tells him that she is going to the store.
This quest has you sending Marge to the Kwik-E-Mart to go shopping for food, which means the standard 1h Shop at Kwik-E-Mart task.
- = - = - = - = - * - = - = - = - = - = - @@ - = - = - = - = - = - * - = - = - = - = -
A Flair for Exploration
This set of gap quests has you playing with Bart again...
A Flair for Exploration Pt. 1 -- Have Bart buy some Flares -- a 4h task. Your reward is a nice $175 and 45 XP.
A Flair for Exploration Pt. 2 -- Next you have Bart set off the Flares in a Brown House, which takes 12h to complete and rewards you with $420 and 100 XP, which is not too shabby.
- = - = - = - = - * - = - = - = - = - = - @@ - = - = - = - = - = - * - = - = - = - = -
Just Rainsticks
This one is actually simple and relatively quick, as it just requires you to have Lisa “Browse for Rainsticks" at the newest shop you have added to your Boardwalk - Just Rainsticks.
The task takes 4 hours and rewards you with $275 and 55 XP, then triggers the gap quest for the Sea Captain in the Old Man and the Sea series.

- = - = - = - = - * - = - = - = - = - = - @@ - = - = - = - = - = - * - = - = - = - = -
Krustyland Expansion Content
Previously this part of this section of the Guide contained the first set of Krustyland Tasks, Missions, and Quests. With the advanced state of the Krustyland Expansion and its independent nature, the decision was made to extract all of the Krustyland Expansion Content and place it in its own Section of the Guide.
To access that information you now need to open the dedicated Krustyland page - look in the menu on the right-hand-side of the page and open the Section titled "The Krustyland Mission" to proceed.
- = - = - = - = - * - = - = - = - = - SPRINGFIELD - = - = - = - = - * - = - = - = - = -
Springfield Quests Phase II
At this point you have eased through the opening Missions and their Quests for Phase I of Springfield for Levels 15 thru 20, and it is time to cover the Phase II for Springfield 15 - 20.
The organizational process for the Missions gets a little confusing because you are not just doing the Squidport Expansion Missions and Quests (which are not really part of Springfield Phase I mind you but rather are part and parcel within the Expansion range for this new area called Squidport).
In addition to that there are also some Krustyland Missions and Quests you will have completed so that you come out of this on the other end, ready to resume the strategic Springfield Quests (Phase II) which will set your game up nicely for the next Buildings and the Missions that they enable.
We have already remarked earlier on the division of the Mission types -- Story Line Missions/Quests/Tasks -- Character Development Missions/Quests/Tasks -- and finally the Gap-Quests. You should be aware that there is a Fourth Class of Mission/Quest/Task sequences here, and that is the Recurring Undefined Quests -- which are basically gap-quests that the game can spring upon you at any time for any reason or just because it feels like it.
If a Mission or Quest pops up that you do not recognize and that is not listed in the TOC for your present Level Range (or the next Level Range as that can happen) consult the Recurring Undefined Section to see if it is there (it probably is)...
With all that in mind it is time to begin working your way through the next Phase of local Missions/Quests/Tasks!
- = - = - = - = - * - = - = - = - = - = - @@ - = - = - = - = - = - * - = - = - = - = -
I'm Stalking on Sunshine
The next quest has you doing creepy things as Moe, who, let's face it, is really a creepy creeping creeper creep! Yeah so this is a two-part gap-quest that requir es you to complete the following tasks:
- Have a Shrub - This requires a conveniently placed Shrub in which Moe can hide in order to perve from...
- Make Moe Spy on Midge - This is the actual perve action perpetrated by Moe, in the Shrub...
Not really sure how that works since we don't have Midge, but anyway once you trigger the second part of the quest Moe will go hide in the Shrub and "Spy on Midge" using a set of perv-binoculars. Then you just have to wait out the timer and voila! Mischief managed!
- = - = - = - = - * - = - = - = - = - = - @@ - = - = - = - = - = - * - = - = - = - = -
Free Band-Aids with Every Cut
This is the next active quest for Marge in Springfield - isn't it great that Marge is back in town? Yeah... And this also one of the "hub" actions since it placed a Building from which additional quest lines can interact.
Free Band-Aids with Every Cut Pt. 1 -- Build Jake's Unisex Hair Palace
As this technically only requires Level 15 to unlock -- assuming you have Marge and have progressed to the point you unlocked it -- so in theory you might have already completed this before but possibly not. Either way you should do it now if you have not already done so!
This Building costs you $29,000 and completing this part of the quest rewards you with $100 and 10 XP.
Free Band-Aids with Every Cut Pt. 2 -- Make Marge Visit Jake's Unisex Hair Palace.
Now that the Hair Salon has been built it is time to send Marge there to have her hair done. Have Marge complete the following task:
Visit Jake's Unisex Hair Palace (4h) $175 and 45 XP.
When you complete this quest you are rewarded with the traditional $100 and 10 XP.
- = - = - = - = - * - = - = - = - = - = - @@ - = - = - = - = - = - * - = - = - = - = -
Truffle Surprise
-- Help the Simpsons Celebrate their Anniversary
Truffle Surprise Pt. 1 -- Send Homer to Visit the Track -- to complete this part of the quest line you need to have Homer do the following Task:
Visit the Track (3h) $135 and 35 XP.
Completing this quest earns you $100 and 10 XP.
Truffle Surprise Pt. 2 -- Send Homer to Shop at the Kwik-E-Mart
It seems that Homer has not done very well at the track and is now going the convenience store flowers route... Sigh. To complete this part of the mission have Homer do the following task:
Shop at Kwik-E-Mart (1h) $70 and 17 XP.
Completing this quest earns you $100 and 10 XP.
Truffle Surprise Pt. 3 -- Build the Gilded Truffle
Marge has her heart set on having their Anniversary dinner at the Gilded Truffle - which Homer points out does not exist anymore... But hey, it is his wife after all, so extra effort is required. Plus that should get Homer some extra karma and kudos as well! So, to complete this part of the mission build the Gilded Truffle!
Completing this quest earns you $100 and 10 XP.
Truffle Surprise Pt. 4 -- Dine at the Truffle.
This basically completes the main goals of the quest, as now that you have completed re-Building the restaurant, you can have them eat at it. To do that, have Homer and Marge each complete the following Task:
Dine at the Truffle (2h) $110 and 27 XP (Each)
Completing this quest earns you $100 and 10 XP.
- = - = - = - = - * - = - = - = - = - = - @@ - = - = - = - = - = - * - = - = - = - = -
Miranda Rights
The arrival of this hub-quest marks the start of the political side of the game. They say once you place a Police Station you can never look back, they also say power corrupts, and absolute power corrupts absolutely... Still you have to do it so you may as well find it amusing.
Miranda Rights Pt. 1 -- Build the Springfield Police Station
The soonest that this quest can unlock is Level 17 but it generally ends up later in the game -- like now. The cost for the Police Station is $40,500 with a 24h build time, but the most interesting thing about this Building is the wide number of Characters whose tasks and jobs it unlocks!
In addition to unlocking jobs for the Police -- which in the case of Springfield means Chief Wiggum, and his boys, but will you also be surprised to learn that it unlocks tasks and jobs for Mayor Quimby, Snake, Smithers, Dr. Nick, Homer Simpson and Lenny? Well it does!
Completing this part of the quest rewards you with the traditional $100 and 10 XP and unlocks the next part of the quest.
Miranda Rights Pt. 2 -- Make Wiggum Patrol Springfield
He does not want to do it -- let's face it, the Chief of Police is not much of a cop -- but you have to make him do it because otherwise, well, otherwise who will fight crime? Have the Chief complete the following job:
Patrol Springfield (8h) $275 and 70 XP.
Completing this part of the quest line rewards you with $100 and 10 XP.
Miranda Rights Pt. 3 -- Make Wiggum Eat at Krusty Burger
Well, he does have to eat, right? Have Wiggum complete the following task:
Eat at Krusty Burger (30m) $40 and 10 XP.
Completing this part of the quest line rewards you with $100 and 10 XP.
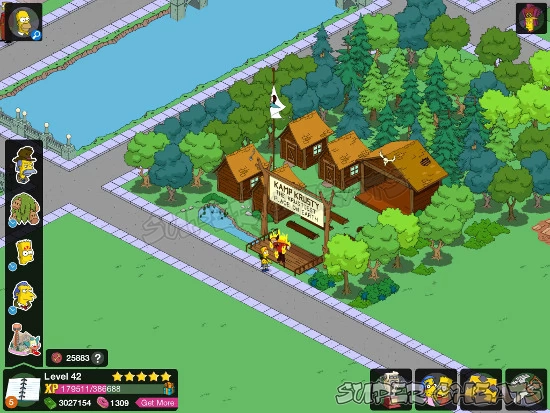
Miranda Rights Pt. 4 -- Make Wiggum Patrol Springfield
It is time to do the rounds again and he still does not want to do it -- but you are in charge and he has to do what you tell him to do, right? Have the Chief complete the following job:
Patrol Springfield (8h) $275 and 70 XP.
Completing this part of the quest line rewards you with $100 and 10 XP.
- = - = - = - = - * - = - = - = - = - = - @@ - = - = - = - = - = - * - = - = - = - = -
The Mysterious Brown House Continued
The Mysterious Brown House Pt. 4 -- Make Cletus Harvest Copper Wire from the Brown House.
To complete this part of the quest you just have to make Cletus complete the following Task:
Harvest Copper Wire in the Brown House (3h) $135 and 35 XP.
Completing this quest earns you $100 and 10 XP.
The Mysterious Brown House Pt. 5 -- Make Quimby 'Nap' in the Brown House.
The interesting thing about this quest is that even if you actually HAVE built the motel, the game will still proceed as if you have not... Making the Brown House the focus of course, which only makes sense. Say, isn't the Mayor married?
Nap in the Brown House (30m) $40 and 10 XP.
Completing this quest earns you $100 and 10 XP.
- = - = - = - = - * - = - = - = - = - = - @@ - = - = - = - = - = - * - = - = - = - = -
We Don't Sell myPods
This begins the Mission and Quests that will see another new Building added to your Springfield -- King Toot's -- which starts and pretty much ends with Lisa Simpson, our resident gifted child and musician!
We Don't Sell myPods Pt. 1
While this functions as something of a gap-quest that has Lisa playing the Sax to start, it is also the opening quest in this Mission to bring the Music Store called King Toot's to your Springfield. This Mission and its Quests are flagged by Lisa, and to complete Part 1 you need to have her do the following Task three times:
Play the Sax (4h) $175 and 45 XP.
Completing this quest earns you $100 and 10 XP.
We Don't Sell myPods Pt. 2
This stage of the Mission has us opening the Building Menu for the in-game store and selecting the icon for King Toot's -- Springfield's premiere music store where you can buy instruments AND Sheet Music, but NOT myPods (or myPads for that matter) -- which is too bad if you were not here for the Mapple Store event since that means ain't nobody getting a myThingy! At least not for now.
To complete this Mission you need to purchase King Toot's -- which will set you back $37,000 -- and then wait for 24-hours for it to build!
Completing this quest earns you $100 and 10 XP.
- = - = - = - = - * - = - = - = - = - = - @@ - = - = - = - = - = - * - = - = - = - = -
Next Stage
We have reached the point where we have completed all of the quests that are part of the Levels for 15 thru 20, and well done you! Now it is time to move to the next section of the Guide and continue the long quest lines that make up this part of the game.
Part 11: The Top Hump (Levels 21-25)Previous Page
Part 09: The Middle Stage (Level 14)
Anything missing from this guide?
ASK A QUESTION for The Simpsons: Tapped Out
Comments for Part 10: The Land Effort (Levels 15-20)
Add a comment
Please log in above or sign up for free to post comments- Introduction
- Important News - Please Read
- The Story -- An Overview
- Basic Game Play
- Player/Game Levels
- Cash and Donuts
- Community Friend Requests
- I Missed that Event / Item / Character....
- Character Finder Tool
- Neighbor Town Quick Nav Tool
- Improved Level Cap Income
- Who Is Sideshow Bob?
- Frink Points / Friendship Points System
- Contacting EA for HELP!
- Holidays & Special Events
- Walkthroughs
- Reference
- Trivia
- Addendum
 Join us on Discord

Unless there is some magical way where money in cash makes more money I think the idea that postponing your buildings to be faster in the end is just a case of somebody being bad at math.
And do we have any hard evidence on the '100K = better odds at mystery boxes' case?
midge is what moe calls marge in the show!
That was a bug - a random bug - that duplicated items in the game. I did not get two Squidport Entrances - I ended up with two Mayan Calendars. But that bug is OLD. I do not believe it happens now as they fixed it.
That is really odd - are there other quests that you have not completed that might be prereqs for that? That is worth looking into. Otherwise you should file a help ticket with EA...
I have never been offered the quest have homer shout at the sea quest so cant get squidport quests
I have max amt of friends and only one of them seems to have thi but they have 2 squid port entrances. Can anyone tell me how to squire this second entrance?or if not how could I contact this neighbor and find out from them how they got it? Anybody out there have any info on how to do this? Would greatly appreciate the help!!