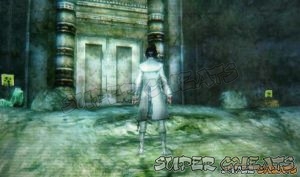
Capture the Black Samurai
Thank you for printing this page from www.SuperCheats.com.
Remember to come back to check for updates to this guide and much more content for Shin Megami Tensei IV
Follow this guide to hear about updates
Last Updated:
| Client | Reward | Task |
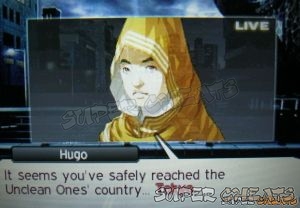
| Hugo | 4000 macca | Capture the Black Samurai |
As you’re ordered to return to the castle, you’ll have another dream. The next day, Hope will inform you to assemble in Aquila Plaza. Before going there, you may want to visit the Blacksmith and Apothecary to sell the relics and to resupply if needed. Once ready, head to the Emergency Meeting Ground to proceed with the story.

After the briefing with Hugo and Gabby, you’ll have to head to K’s tavern to start with the main Quest and pick up some Challenge Quests as well.

New Challenge Quests
Before proceeding with the long, main Quest, check your gauntlet to find two more Challenge quests (I want a Classy Down Quilt, Slaying the Dragon of the Lake, Dance of the Dead) Refer to the Challenge quest section of this guide for the individual walkthroughs of these side quests.
Tip: The Dance of the Dead Challenge Quest will be quite troublesome in your current level. You may want to try it after finishing the lengthy main quest.
Naraku – 4th Stratum
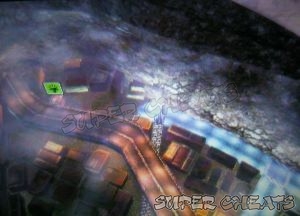
Head to Naraku and skip through the first and second levels. Upon reaching the third Stratum, you can take the alternate route to the east through a crawlspace to avoid going through the poisoned corridor. Make your way to the northwestern path of the 3rd level to meet up with the master samurais guarding the place. They’ll then allow you to go deeper in the labyrinth.
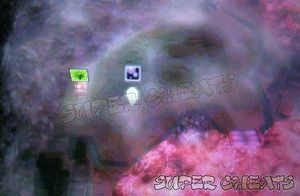
There are new Demons that you can scout and fuse here. The place also has different elevations which will require you to use the ladders. Refer to the map to find the relics in the area. Make your way to the northeast ledge to find a Red Earring. Continue down south through a narrow bridge. Be prepared though since three demons will ambush you in the front and back.
After crossing the first bridge, head to the southeast through a waterfall to find another chest ahead containing The Key to Naraku. Now backtrack a bit then jump to the west over the broken bridge. Head to the north first to find a ledge with a chest containing a Bufula Stone. From there, head south to reach the next level.
Naraku – 5th Stratum
Run through the straight path until you reach a door. Pick up the relic to the left and open the chest to the right to find a Revival Leaf. Now before opening the door, get your toughest Demons and carry at least one with Media and Bufu. To make the battle easier as well, it will help bringing in demons with buff Skills. There’s a boss fight in the door ahead and you’ll need as much help as you can get.
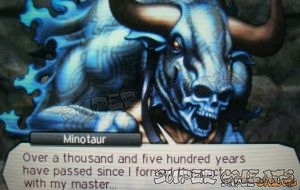
LV13 Minotaur
Weak: Ice
Null: Fire, Light, Dark, :pst
Resist: Poison, Panic, Sleep, Bind, Sick
This boss has over 2700 HP which will make this battle last a lot longer. Don’t let your guard down since it also has three press turn icons. Fortunately, it has a weakness: Ice. Use ice attacks and items to gain as many free turns as you can. This boss will use War Cry to lower your party’s attack and defense then follow up with a multi-hit, all-party attack called Labrys Strike.
During the battle, the Minotaur will ask you questions. Depending on your answers, you can gain an upper hand in the battle.

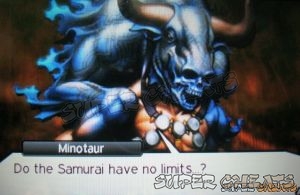
First question: “We are determined to win” (increases your attack)
Second question: “Indeed not” (lowers the enemy’s accuracy)
Near the end of the battle, the Minotaur will start using Oni-Kagura which can deals massive damage and can instantly take out low HP Demons you have. Continue with the assault and you should be able to outlast him in battle.
There will be two paths available. Take the western arc as it contains several relic spawn points. Continue to the middle north and take the ladder down to the next area.
Naraku – Excavation Worker Quarters
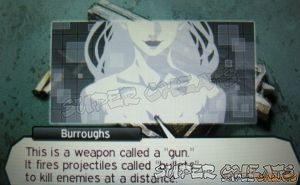
This area has several treasure chests. From the ladder, check the small room past the sign to find a red chest with Dx Incense. Continue forth and an event will take place. Here you’ll find a Bruce Gun which will be added to your combat menu. It will be loaded with FMJ rounds. There will be two chests in small alcoves nearby. Loot the chests nearby to get a Patra Stone and Light Grimoire.
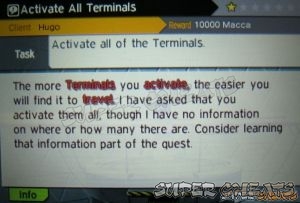
Continue to the next alcove to find an Ag Incense. Another event will take place as you walk further south and the group will find themselves in the Sky Terminal. This will allow you to travel instantly to Naraku and Aquila plaza. Very convenient! Name the terminal with whatever you want and the link will be completely established. You can now use it to return to the surface to rest and resupply. A new Quest will be added as well though this will a long, ongoing one as it requires you to find all terminals in Naraku.
It will be a good time to upgrade your equipment as well since the shops will have new inventory. There are two new Challenge quests (Missing Child Search, A Drunkard’s Best Friend) that you can register in your gauntlet by looking at the tavern blackboard. These two can be completed now if you want. Refer to this guide’s Challenge Quests section for more information.
When ready, grab the Lu Incense from the alcove in front of the terminal. Head further south and exit through the door to reach the next area.
Naraku – Temporary Scaffolding
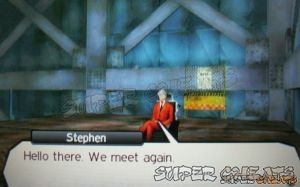
Proceed and Stephen will appear before you again. Here, the DDS or Digital Demon Service will be enabled. This will allow you to connect with other demon summoners via Streetpass. You can exchange Demons attached to cards and exchange it with other SMT players. Attached demons via DDS may gain levels or come back with items. If another user receives the card, the DDS Skill that corresponds the number of received cards can be used in battle. To activate this, open the menu and select Burroughs Streetpass.
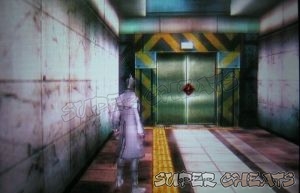
Continue down the ramp to get a Revival Bead from the chest. This is a straightforward path so just follow the ramps and pick up any relics along the way until you reach the elevator. Take the elevator for a scene.
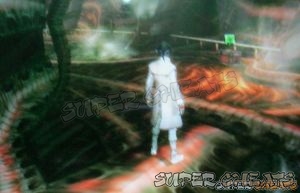
Naraku – 1st Observation Platform
Once you reach a new area, Burroughs will warn you about a strong demon nearby. That indicates a boss fight ahead. It will be a good idea to avoid unnecessary battles for now and just collect the chests along the way. There are only two chests here containing a Chakra Drop to the west and a Zanma Stone to the right. Before heading to the exit, you have to prepare for a boss fight.
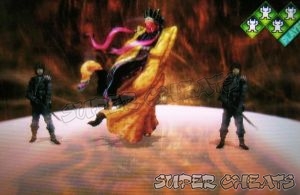
LV15 Medusa
Weak: Force
Resist: Gun, All status ailments
Drain: Elec
Null: Light, Dark, Lost

Best prepare Demons with resistance against Elec attacks and those who can use Force attacks. As usual, having demons with healing, buffs and debuffs is recommended to win this battle. This boss has three turns and will use Zionga, a more powerful form of Zio. She can also use Tathlum Shot which can cause over 100 damage. Her Rapid Needle and Snake’s Fangs doesn’t deal that much damage but can hit everybody in your party. Her life is around 2800 so this battle will be probably as tough as Minotaur.
Like Minotaur, there will be two instances that Medusa will chat with you in the middle of battle. Answer her correctly and the odds of the battle will tip to your favor. Don’t let up on your attacks and she’ll eventually fall.
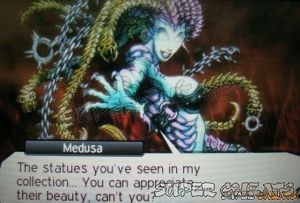
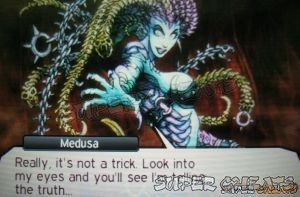
First question: “Indeed, they’re beautiful” (Decreased attack)
2nd: Give her a side glance. (Defense decreased)
After the battle, continue downstairs to the next elevator. After the scene and getting out of the building, a new mission will be available to you. At this point, you’ll have three active Main Quests that overlap each other and go hand-in-hand.
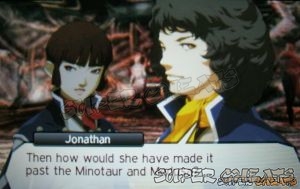
Please follow the walkthrough for "Find the Military Base" for the continuation of this main quest.
After reaching the Counter-Demon Base
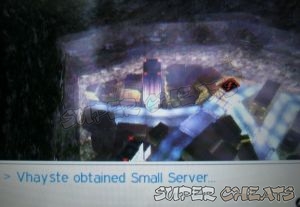
You’ll continue in this main Quest after completing “Find the Military Base” and activating the terminal in Kasumigaseki. For now, head back to Mikado and use the barracks to heal everybody. Next, head to K’s tavern to receive some new Challenge quests. (Relic Recovery: Small Fridge, PC, Power Cable and Wind Turbine)
You can also drop by the Hunter Association in Ueno and accept some new Challenge quests. These quests are probably too much for you at this point so they may have to wait until you’re at least LV30. (The Secret to Durable Clothing, Samurai and Hunters United and Hunter Tournament Prelims). Please consult the Challenge Quests section of this guide for the individual walkthroughs of these sidequests.
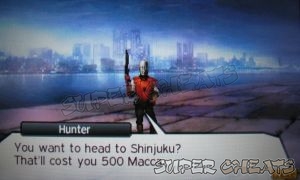
When you’re ready to proceed, head north of Sakura-dori/ Tokyo Station area past the guide NPC in the city map. Enter the marker there to find a hunter that will help you cross the river to the new area for 500 macca.
Shinjuku
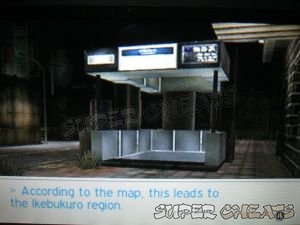
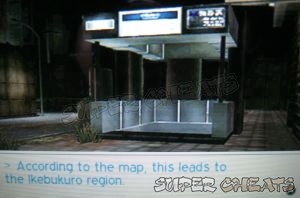
In the first intersection to the west, past the poisonous swap is a tunnel that leads to Ikebukuro region. There’s nothing much you can do there at the moment but there’s a chest to the northwest containing a Bead. The only accessible area is through a group of buildings to the southwest of the tunnel but you can’t proceed anywhere at this point of the game.

In Shinjuku, keep heading west past the tunnel across the poisonous swamp until you reach the other side of the city. There are demon domains here but don’t be fooled; the bosses of these domains are WAY too high for your current level. (Unless you’ve been grinding with DLC Challenge quests)
You can explore the vast Shinjuku area and grab some items and relics along the way.
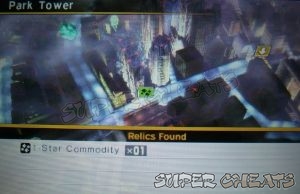
Relics spawn points: Park Tower, Yoyogi Stadium, Nakano Building
Items: Chakra Pot, chest in the southwest corner
Bead Chain, chest northwest, past the poisonous swamp
Demon Domains: Yoroi Shrine
Further south are more locations of interests. However, be warned that the Demons here can be too much to handle if your current level.
Relic points: 4 Towers
Domains: Cameron Building
Once ready, make your way to the south and turn east in the 4th intersection. You’ll get past the Park Tower relic point and you’ll find the Shinjuku South Entrance and the Shinjuku National Park. The latter is not your objective yet but you can get a couple of items there.

Shinjuku National Park – Pond Garden
This is not your objective yet but you can explore the area to find some items and relics.
Chest, southeast corner: Balm of Rising
Chest, west: Summon Stone

Shinjuku – South Entrance
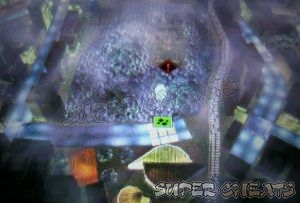
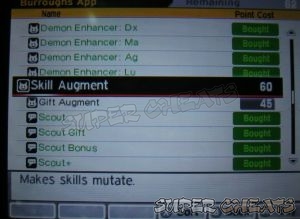
This is a large area with lots of relics and treasures to loot. On your way in, you’ll find a young girl named Hikaru. She’ll give you a tip to check out the Juraku Bookstore in Ikebukuro. This will also update the Quest and unlock two new apps: Skill Augment and Gift Augment.


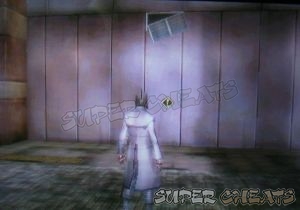
Examine the corpse to the northwest corner of the first area to find a Dis-Poison. Head to the east and check the wall to find a vent you can climb in. This will lead you to another room with a chest. Open it for a Chakra Pot.
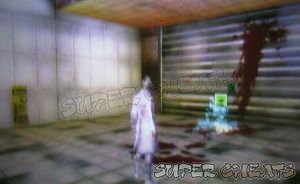
Now head to the middle and enter through the narrow passage. There’s another hunter corpse in the northeast corner of the inner area, beside a closed grate. Examine it to get a nerve gas. There’s also an elevator in the middle though your access is limited for now. Head to the other side of the station to find relic and a ladder that will allow you to climb up the roof of a small convenience store. Loot a Bead from there.

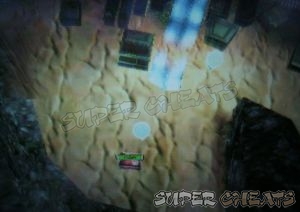
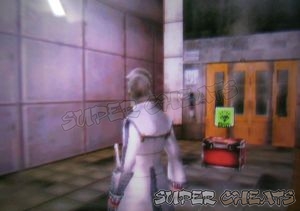
Now go back down and go to the southwest of the convenience store to find another ladder. Climb it to reach an enclosed area with two chests containing a 10-point card and Summon Stone.

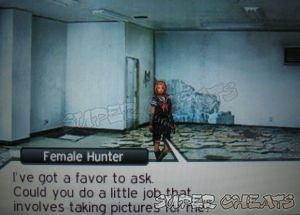
Due west of the convenience store is a room that you can enter. Here, you’ll find another female hunter which happens to be a friend of Nozomi. She’ll ask for your help in taking pics. This will be registered as a new Challenge Quest. (Shelter Inspection) After talking to her, exit this immediate area (don’t leave to the city map!) and find the stairs leading to Shinjuku’s Underground District.
Shinjuku Station - Underground
Before doing anything else, go straight up to find a red button. Push it to open the gates. To the west lies the elevator that will take you back to the surface and to the right is the terminal that’s currently occupied by a demon. There are also some new items in the stores here so you may want to upgrade your gear and prepare your party before attempting to clear it.
LV24: Ose
Resist: Dark

This demon has around 900 HP and has no weaknesses. Its main attack is Fatal Sword, which deals 150+ damage to a target. You need to bring out high-HP Demons as well as those that can increase your party’s defense and/or lower the enemy’s attacks. If you have a demon that can innately nullify/repel/ absorb physical attacks then by all means use it. Having a demon with a skill buff that can repel physical attacks will do as well.
Defeating this demon will unlock the Shinjuku Terminal and update the main Quest “Activate All Terminals”. You can now check the tavern in Mikado to receive a new Challenge quest (Creating Fireproof Clothing). Use this chance to conveniently use the barracks and rest up.
Talk to the man in a black suit to the west of the station to update your main Quest. Head to the east this time to find the shops and Shinjuku Hunter Association. Check the bulletin board to register new quests. (Corpse Disposal, Quality Food, Phantom of Madness, Training Battle 1, Training Battle 2). Refer to the Challenge quests section of this guide for more information.
Note: Of all the available Challenge Quests available, Corpse Disposal is lengthy since it is required for the main plot to continue.

After completing Corpse Disposal, the main quest will be updated. To proceed further to the story, return to the Shinjuku Underground District and talk to the Heavily Accented Man for him to open the shutter and give you access to the western side of the Shinjuku Underground District. A new main quest will become available as well. (The Seat of Government)

There are also a couple of new Challenge Quests that you need to trigger by talking to certain NPCs. (Her Memories, Ikebukuro Free District) Refer to the challenge quests section of this guide for more information.
After completing the main quest The Seat of Government
From the Government Office Plaza, return to the West Entrance Buildings and go through the manhole to the south. Follow the straightforward path until you reach the Shinjuku Underground District. You can accept a new Quest from the Hunter Association (Demon Guarding the Shrine) though it can wait since you need to face a LV45 demon for that specific Challenge quest.
Finish whatever extra business you may have then prepare to move out. From Shinjuku, head north to where the poisoned swamp is and enter the tunnel leading to Ikebukuro.

Sugamo
After exiting the tunnel, hug the rock wall to the north until you run across a hole that will allow you to explore the area further north. There is a relic spots there and a building that has a demon’s domain at the end of the road to the west. The master of this domain is a LV44 Grendel. Defeating it will render a SDF Equipment, which is a valuable relic. Facing this strong foe is entirely optional and you can just fight it later once your party’s level is near it.


If you still haven’t looted the chest to the northwest, follow the road to that direction from the other side of the rock wall. To proceed with the mission, head to the southwest and follow the ramp leading to an entry point.

Ikebukuro – Sunshine Front
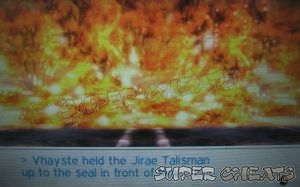
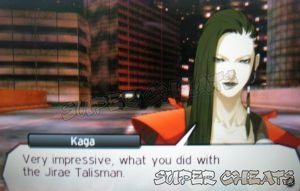
Approach the barrier and a woman named Kaga will approach your group. Since you have the Jirae Talisman from completing the last main quest, you should be able to use it on the barrier. After a brief conversation with her, a new main quest will be registered. (Hunting Xi Wangmu)
For the walkthrough of this Quest, please follow the link above.
After completing “Hunting Xi Wangmu”
Ikebukuro – East Entrance
After defeating Xi Wangmu in the main Quest “Hunting Xi Wangmu”, the path leading to this area from the Ikebukuro Underground District will become open. This is a fairly large area so you’ll have to rely on the map to know the locations of the relics and hunters’ corpses for loot. There is also a large portion of the area that’s poisoned so you have to have a demon that has Amrita or Me Patra to help you cope with it.

If you have accepted the challenge quest “Sunset for a Demonnapper”, search the room on the western side of the area, south of the stairs leading to the station.
If you have the challenge quest “Ikebukuro Free District”, the spot where you can take a photo of the Ikebukuro East Gate is located in the middle portion of the map, north of the taxis enclosed in a railing.

There's also a Demon's Domain in the northwest corner that has the Small Fridge, necessary for another challenge quest "Relic Recovery: Small Fridge"
After looting the area, make your way to the southeast where you’ll find the Juraku Bookstore. It currently has a small demon’s domain which you need to explore and clear.

Juraku Bookstore
As you run around the domain, you’ll encounter the same horde of Lilim Demons shortly. They were the same horde that you encountered in the Kiccigiorgi Forest mission.
LV30 Lilim Horde
Weak: Ice
Null: Elec, Light, Dark
Pummel these Demons with your party-based ice Skills like Mabufu/-la/-dyne and Ice Breath. You shouldn’t have problems defeating them since their HP is only around 1100.

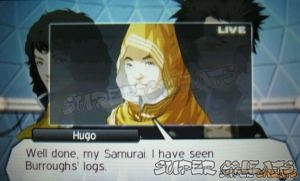
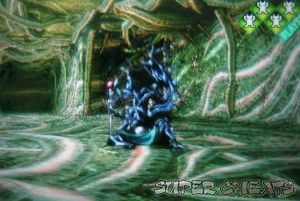
After defeating the horde, explore the domain further until you reach the door that leads to the Black Samurai. After a short dialogue, she’ll finally surrender and you’ll finally be able to complete this Quest.

You’ll be back to Mikado automatically as part of the story. Read through the next dialogues and part ways with your friends. Drop by K’s Tavern to register new Challenge quests. (I’m No Good at Demon Fusion, Training Battle 3, Training Battle 4)
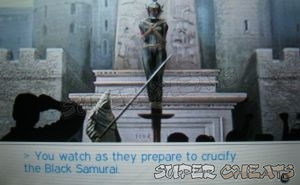
To proceed with the story, head to Mikado Castle and select Obelisk Plaza to attend the public execution. The next morning, head to the Monastery to receive a new main Quest.
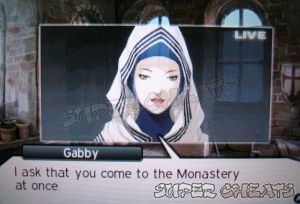

Please refer to Rescue the VIPs for more information.
Anything missing from this guide?
ASK A QUESTION for Shin Megami Tensei IV
Comments for Capture the Black Samurai
Add a comment
Please log in above or sign up for free to post commentsNo comments yet. Tell us what you think to be the first.
Table of ContentsClose
Guide Updates
Get notified of updates to this guide
Many of our guides get updated with additional information. To get an email when this guide is updated click below.
 Join us on Discord
Click to close