Episode 6: Cat and Mouse
Thank you for printing this page from www.SuperCheats.com.
Remember to come back to check for updates to this guide and much more content for Resident Evil: Revelations
Follow this guide to hear about updates
Added:
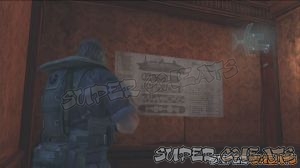
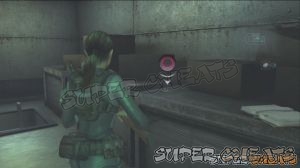
The control will now switch to Chris. Ignore the weapon box since Chris won't allow you to use it. Get inside and get the MG ammo in a vase in the northeast corner of the room (scan). Grab the handgun ammo nearby and scan the vase beside the map to get a hand grenade. Obtain the ship interior map on the wall as well. Next, take the elevator down and exit to the promenade. There's a lot of enemies here but don't worry, they're not infinite. You have to blitz through them and go upstairs so you can easily funnel them.

Scour the area for more items. I won't be specifying their individual locations. Once done, continue through the steel Lifebouy door in the lower floor and make your way to the exit. You won't be able to use the weapon box here so just go past it. Once you've reached the promenade area's entrance and before opening the Helm Door, go downstairs to find a Hand Grenade in the corner.
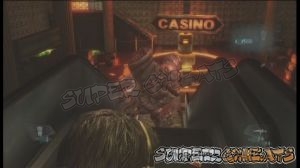
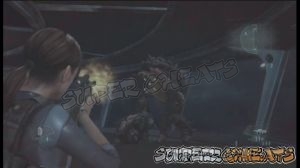
Once you've reached the main hall, scan the space below the large clock's pendulum to get some shotgun shells. Now go upstairs and get some handgun ammo on the table near the weapon box. Now go downstairs and enter the Casino. Grab the green herb on the chair near the door and it will break open, revealing two massive chainsaw monsters.

You have to use your grenades here to stop them on their tracks. Pulse grenades are powerful enough to stun them and allow you to land a melee attack. Keep distance and don't allow yourself to get caught in their chainsaw attacks since you can instantly die regardless of your health. Use the slot machines, fountain and escalators to run around and lead them to circles while you're attacking their heads. Take care not to get caught by their foot traps.

After taking them out, obtain the Trident Key from one of them then continue to the door where they came from. Grab the green herb and hand grenade then open the door. Jump through the opening and immediately kill the bloated monster before it explodes near you. Exit the door and immediately kill the bloated monsters. Scan the pile of gore in front of you to find a hand grenade. This room has a lot of monsters so take them out before continuing. Scan similar piles ahead to find a handgun ammo and another grenade. Take the ladder up.
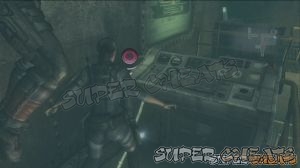
Kill the bloater immediately then jump down the next opening. You can't go anywhere else so ride the lift and go down. Go through the door to the northeast and jump down the ladder. Follow the corridor until you reach the control room. There are two exploding monsters and a clawed one outside. Before heading out, grab the two grenades on the console. Exit and throw a grenade in the middle. The double detonation should instantly kill the clawed monster as well.


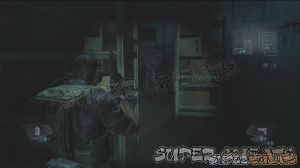
Go through the next door and follow the corridor. The first corner has a ranged monster, while the second corner has an exploder and two normal monsters. Kill them and proceed further. In the next room, there's an exploder inside the room with several ammo. There's also a normal monster ahead but be careful since two more will spawn behind you. Kill the exploder and grab the much needed ammo. There's also a green herb in the corner, beside the valve.

The next room has an exploder and two ranged monsters. Shoot the exploder first then deal with the ranged monsters. Exit the room and kill the monsters ahead. Enter the gate to the south and head to the next door to complete the section.
The control will now switch to Jill. You have to find the pipe in the console Parker was operating earlier, this is beside the map display on the wall. After grabbing the wall, swim to the grate in the middle and pry it open.

It will fail the first time so find another pipe in the bottom of the room, middle-right side. Remember to take a breather using the air pockets at the top of the room. Pry open the grate for the second time to escape.

After the scene, scan the floor near you to find a hand grenade. There's an ammo box ahead and a Shotgun Ammo Case. Now you have to make your way back to the control room. Be careful since more infected fishes will be waiting to ambush you. Before reaching the control room, there will be two supply crates in the corner near the door. Open them for some ammo. After the cutscene, use the weapon box to upgrade/ swap weapons. Exit the control room and head to the ladder. You'll be ambushed by two normal monsters. Kill them and go up the ladder. Return to the lift and pull the lever for a cutscene.

Your next destination is the main hall. Exit the lift enter the tunnel to the north. Be careful of the monster on the ceiling. Take the ladders up until you reach the casino VIP room. Make your way to the main hall next. Once in the main hall, before taking the elevator, head to the northwest to find a broken display case with a Custom Parts kit. Regroup with Parker and take the elevator. A large monster will jump on top of the elevator. You have to quickly shoot its dangling limb's soft spot before it smashes you in, dealing heavy damage. Keep doing this until it lets up.

Once you've reached the observation deck, grab the ammo and green herb nearby then use the weapon box if you want. There's a boss battle ahead so make sure you don't get caught off guard.
This boss only has two attacks and will have predictable movements due its size and overall build. First is the charge. Evading it will require proper timing but it will help waiting for it to get into charging position (wait for it to lay down its massive, carapaced limb in front it) then quickly run away. The two gas tanks will help halt its charge, rendering it motionless. Use this chance to pump bullets to its unarmored parts.

After charging, it will be vulnerable for 3-4 seconds, enough time to pump lead to its squishy parts before moving away. It's attacks are devastating and can even knock down your character so do your best avoiding it. Also, aside from the two gas tanks, you don't have any other means of stopping the creature. Keep repeating the pattern until you defeat it. You can scan the remains several times to get your analysis up.


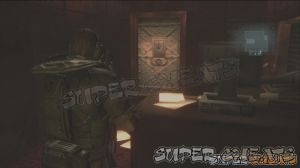
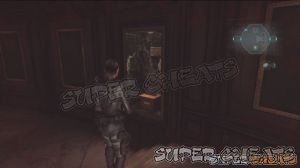
After defeating the boss, the remaining supplies in the room, including a Rifle Ammo box by the window. There are ammo under the seats so make sure to scan them as well. Once ready, go up the ladder. Scan the box to the left to find some handgun ammo then get the Veltro Key Card from the card nearby. There's also a Veltro Agent's Journal that you can read.

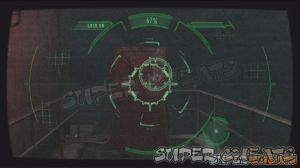
Open the door using the key card then collect the ammo from the ammo boxes right outside the door. Continue along the walkway and pick up the green herb before the stairs. Continue up and take the ladder to reach the antenna array. Scan the handprint on the electrical panel then operate it. Rewire the antenna .


Anything missing from this guide?
ASK A QUESTION for Resident Evil: Revelations
Comments for Episode 6: Cat and Mouse
Add a comment
Please log in above or sign up for free to post commentsTable of ContentsClose
Guide Updates
Get notified of updates to this guide
Many of our guides get updated with additional information. To get an email when this guide is updated click below.
 Join us on Discord
Click to close
HOW TO SPRINT IN CHAPTER 1 with mouse suppport
What is the pattern to rewire the antenna?