Episode 3: Ghosts of Veltro
Thank you for printing this page from www.SuperCheats.com.
Remember to come back to check for updates to this guide and much more content for Resident Evil: Revelations
Follow this guide to hear about updates
Added:
You'll be in a flashback sequence with Parker in your control. Collect the ammo, hand grenade and green herb in the room. Exit to the next hall and take the path to the left. This leads to a green herb. Pick it up and regroup with Jessica. You have to eliminate all monsters in the area until Jessica tells you to move out. There's also a lot of grenades, herbs and ammo around the area so make sure to pick them all out before moving out. Make your way to the elevator and kill the monster there. Disembark from the elevator and continue to the next room. A monster will break through the windows. Kill it and continue inside.
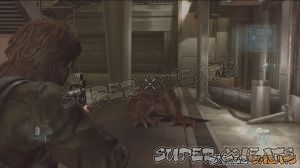

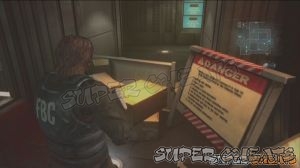
There are more enemies waiting inside. Before entering, vault over the yellow caution sign to find a green herb and some ammo in the corridor. Exit the conference room and turn to the right to find an M3 Shotgun beside the Danger Sign. Before going forth, turn around and enter the room at the end of the corridor to find shotgun shells, a green herb and a couple of hand grenades inside.

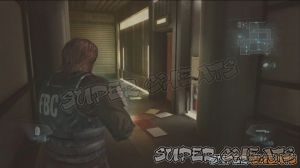
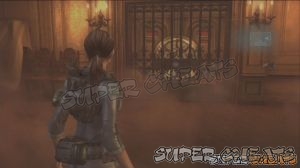
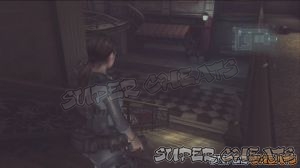
Continue to the next room to the west to find another green herb and some ammo in one of the lockers there. Exit that room and continue to the next hallway. Follow the straightforward path until you reach a staircase. Make your way to the 6th floor and you'll find a large double-door. Check the table to the right before opening it to find a grenade and ammo. Enter the office area and kill the three monsters patrolling the area. Loot the lockers for some ammo then exit the room.


Head to the south and open the gate. The monsters chasing Jessica will be kind enough to wait until you finish the sequence. Head to the next room and collect the ammo and herbs then call the elevator. You have to defend yourself from waves of monsters that will attack. After a while, the elevator will arrive. Head there and push the button to close the door.

Disembark from the elevator and make your way to the helipad. After the scene, the control switches back to Jill.
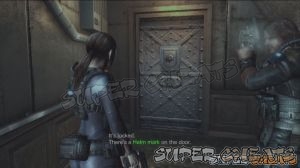
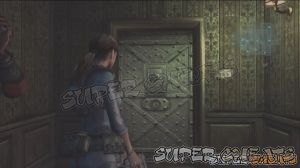
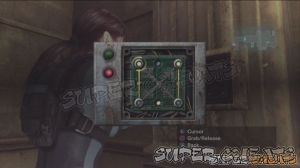
Go downstairs to reach the lower portion of the bridge. Collect the green herb and handgun ammo on the table ahead, near the elevator. Before taking the elevator, kill the BOW in the next hallway and enter the room to the northwest. Here you'll find a lot of goodies, including a Helm Key and Custom Parts. Collect the BOW Decoys and ammo. There's a card reader-protected safe in here as well. Take note of its location.


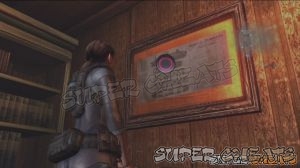
There's another helm door to the southwest. Open it using the key you found to find some valuable items inside. Start off by getting the ship's Upper Deck Map on the wall to the south. Pick up the Crest from the bookshelf then examine the captain's seat. Scan his open stomach to find shotguns shells. You can examine the nearby book as well to know the history of the ship.


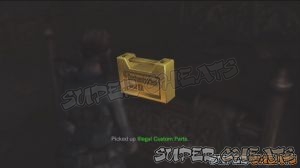
The elevator is not working so backtrack to the elevator you used to reach the bridge. Next, select the Upper Cabin to reach the second Helm Door you passed by earlier. Scan the bed to obtain “Illegal Custom Parts”
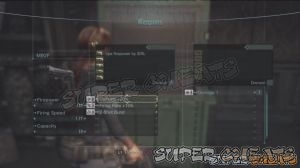
from underneath it. Return to the elevator and select the Lower Cabin and head to the weapon box room to upgrade your weapon using the custom parts you found earlier.
Make your way to the cafeteria where you'll find two new enemies. These fire projectiles so take them out from a distance. Before opening the helm door in the Cafeteria, go upstairs and make your way to the middle-northern room. There should be a shotgun displayed on the wall and an empty pedestal under it. Place the Crest you obtained earlier to get this shotgun, called Windham. A BOW will burst through the cabinet beside you so take it out and return to the cafeteria. When ready, open the helm door to proceed to the next area.

Once you've reached the large hall, go behind the large clock to the east to find a handprint behind it.
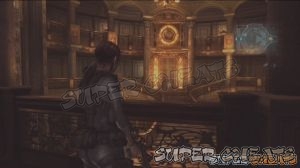
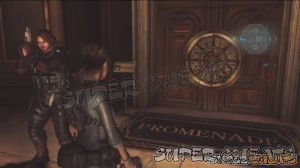
There's also a weapon box nearby. Upgrade your shotgun if you have the extra part(s). Examine the massive door behind the clock then examine the note posted beside it. You'll have to go to take the stairs and to the promenade deck.

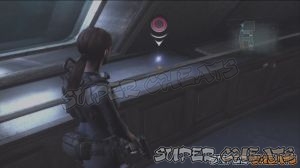
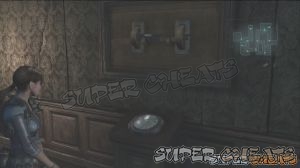
In the same area, go downstairs and scan the broken display case on the wall to the northeast. You'll find another handprint there.

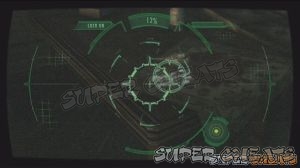
Next, take any of the stairs to the northwest/southwest to reach the third floor. Open the door to the southeast to reach the Solarium. There are free scanning targets here so just open your scanner and scan the chunk of flesh on the ceilings and on that massive lump. Hack the panel beside the green-lit door ahead to open it. Enter the room and scan the handprint on the electrical box.
There's also a M40A1 rifle, a custom part and a document on table to be added to your Key Items inventory. There's also a control to purify the pool. Activate it and leave the area since the filtration will take a while.

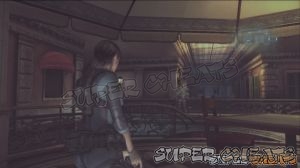
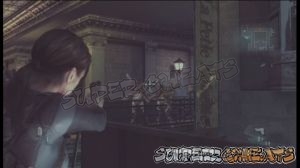
Back in the main hall, make your way to the bottom floor and enter the door leading to the promenade deck. Once there, destroy the crate at the bottom of the stairs to grab some handgun ammo. Go back upstairs and enter the door. Follow the corridor and grab the rifle and handgun ammo at the end. Enter the next door and take out the ranged enemies across.
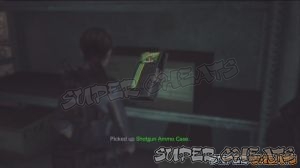
Follow the path to the left to find a green herb, then go around and take the stairs to the lower floor to find a custom parts kit on the table. Enter the small storage room southwest of the table to find a Shotgun Ammo Case. There's also a weapon box nearby so use it to upgrade your weapons.
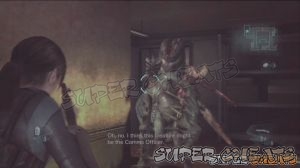
Go back upstairs and examine the white gate with red arrows to call your partner and lift it. The comms officer is located inside the room in the corner. Before opening it, grab the ammo and clear the area of enemies since you'll have to take it down.

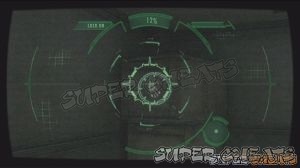
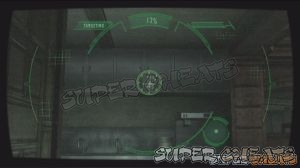
This fight will take a while and will surely test your survival skills. First off, take note of the gas canisters. You need to detonate these when the boss gets near. This should stun it, allowing you to go up close and deal massive melee damage. Next, the enemies here will be endless. You'll encounter the basic and upgraded forms melee-type mutants, and the ranged mutant. The ranged mutant can also lay down traps that will prevent you from moving so make sure to watch where you're going.
Next, the ledges and windows. This will allow you to vault over them, giving you a quick escape. Keep on the move and concentrate your fire on the boss only. It's okay to shoot the ordinary, pesky enemies as long as it will help keep you alive. Take note that the health and ammo in this area is very limited so you'll have to do with what you have. Your partner will be completely ignored by the enemies as well so don't count on him. As usual, this boss' weakness is in the head. Try your best dealing damage with it. Kill the remaining enemies and get the Lifebouy Key from its corpse.

After the battle, scan the crate inside the room where the mutated comms officer came out.
In the same area and before leaving, go to the lower floor and go to the open kitchen. There's another handprint on the hanging cabinet.

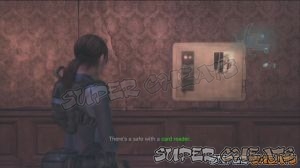
Now open the Lifebouy door to the west and examine the elevator. Next, open the control panel so you can rewire it. From here, you can go back to the bridge or deck. There's no point in going back to the bridge for now so select Deck. Grab all ammo, green herb and grenades. There's some ammo inside the trash bin that you can reveal by scanning and a safe that's locked by a card reader. Both doors leading outside are locked in the similar fashion as well so ignore them for the meantime.
Check the handprint on the table to the left. Return to the elevator then go to Promenade Deck.
Make your way back to the main hall and head to the second floor. Open the door to the Communications Room using the Lifebouy Key and the chapter will be complete.
Anything missing from this guide?
ASK A QUESTION for Resident Evil: Revelations
Comments for Episode 3: Ghosts of Veltro
Add a comment
Please log in above or sign up for free to post commentsTable of ContentsClose
Guide Updates
Get notified of updates to this guide
Many of our guides get updated with additional information. To get an email when this guide is updated click below.
 Join us on Discord
Click to close
It so very very difficult that monster is ugly but we win
i cannot kill the officer. omg it si difficult
The game is not really that bad. the thing I dislike about it it the weapons are not strong enough or stable to make head shots. If your gonna have to be able to respond at a moments notice, your gun should be more powerful that your mêlée and your ability to use your gun should have better stability for head shots , it in fact they cannot be upgraded to good potential use in the beginning. I scanned and item in scene 4 , in the kitchen leading up to the main battle. It told me something was found, but it could not be pit up, nor did it blink. However it did say item found. I would not own this chapter of
resident evil for those reasons. The others one like code veronica, were game oriented and the fire power matched the game as it grew to intensity. This one doe not do that as I thought it would
Good tip for killing boss: jump back and forth thru window of room where you shot lock off. He can't get you thru window but other enemies can so you'll have to watch out for 'em. Else, use the canisters to deal big damage then melee (max power) and retreat. Repeat! Good luck!
[color=red][color=red]Jill can Deal this MONSTER Easily as she can in RESIDENT EVIL 3 with much more Difficult Monster NEMESIS .....
u say main hall 2 floor use the key on the communication door I ran all over the 2 floor don't see no door to it
this game is much tough compared to the last part resident evil 6 had every thing in it a good strong hero like leon than jake and chris also added to the story this part has a new character but lets be honest jill is nt half as good as leon or jake for that matter moreover this game is way to confusing and rediously tough please make a better part of it and zombies did much better part of scaring its just this ghost r difficult to kill nt scary it sucks
Its too hard,I can't pass it.. :(