Utility Items
Thank you for printing this page from www.SuperCheats.com.
Remember to come back to check for updates to this guide and much more content for Minecraft
Follow this guide to hear about updates
Last Updated:
The items that fall under this category include tools that you will want to make as soon as you can, resources that you will want to have handy because they are very useful, and items that allow you to do specific things and actions. They are for the most part present in the later stage of your play, after you have obtained all of the basic needs for survival.
-- Arrows

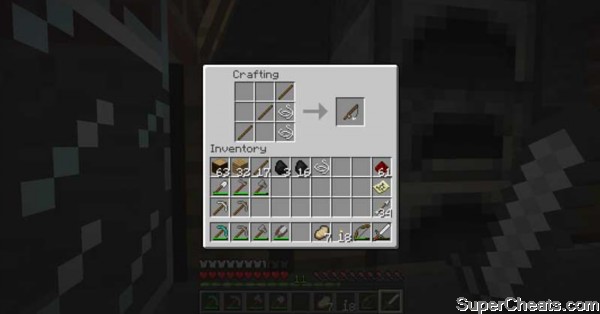
The Arrow Recipe
The ammunition for Bows is not only a crafted resource, as they are often found in the wild in the morning on the ground with the odd Bone or two, and when you find them in this fashion you now that a Skeleton was caught out by the sun as the morning arrived. In the image above it is clear that a pair of Skeleton found themselves caught in the sunlight, and died together!

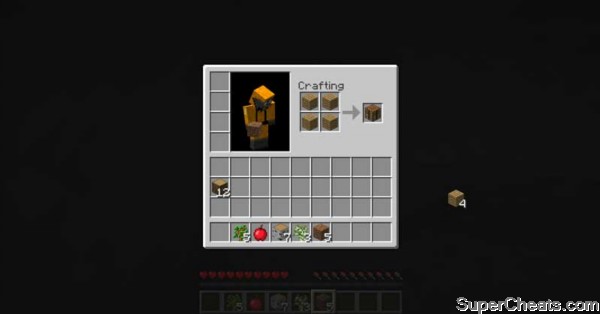
Arrows and Bones discovered in the Wild
Being useful items the player should never pass by Arrows (or Bones) like these without picking them up in passing. A crafted item acquired as loot represents effort that the player will not have to make themselves.

The Bed Recipe
-- Bed
Not only a useful tool to skip through the night by sleeping in it, once placed a Bed also has the effect of resetting your spawn-point after you have slept in it at least once as long as it has not been destroyed. Beds are crafted from Planks and Wool, and can only be used at night (if you try to use one in the daytime it will tell you that it can only be used at night).
An interesting side-effect for sleeping in Beds is that while the game will jump time forward to the next dawn, time is not actually passing, so for instance if you placed Iron Ore in the Furnace and then went to sleep, when you wake up the next dawn and check the Furnace you will see that while for you the night has passed, for the Furnace it has not.
It is generally considered to be wise when on extended exploration runs to bring a Bed with you so that you can install it in your base and sleep to set your spawn-point to your base to avoid having to make so long a trek back if you die. Bear in mind though that while this works fine in almost every area, the one place you do not want to place a Bed and try to sleep in it is in The Nether -- as it will explode when the player tries to sleep in it.
The Boat Recipe
-- Boat
One of the two vehicles in the game (for now), the Boat is used to travel faster on water, but bear in mind that it is only large enough to hold the player, and it is quite fragile, so care must be taken in its use. The good news is that Notch has declared that larger customizable boats are intended to be added as a future update, which should add to the Pirate Fun on the multi-player servers!
The fact that Boats can be pushed and will move by water currents means that to some extent they are a form of effortless transportation -- assuming that the current is headed in the direction you want to go in that is.
Once crafted, your boat can be placed anywhere in water, or on land for that matter, by right-clicking it from the Hot Bar, and is recovered by hitting it. Getting in is also accomplished by right-clicking the Boat. If you are contemplating a long sea voyage, it is an idea to bring several Boats with you so that when yours is wrecked you have another or three to use!
If you plan to build a dock at which to keep your Boats, Wool is generally considered to be the material of choice, since it is much less likely to destroy your Boat if you run into it while docking.
The Bone Meal Recipe
-- Bone Meal (as a Fertilizer)
In addition to its use as a Wool Dye, Bone Meal can also be used as a Fertilizer, allowing you to instantly grow a number of crops, including:
Grass: When applied to a Grass Block, one Bone Meal will spawn tall grass and a few flowers.
Melons: When applied to the planted vine, one Bone Meal is consumed and the vine grows instantly, ready to spawn Melons.
Mushrooms: When applied to a mushroom, one Bone Meal is used and the mushroom grows instantly into a Huge Mushroom, which can then be harvested with multiple results.
Pumpkins: When applied to the planted vine, one Bone Meal is consumed and the vine grows instantly, ready to spawn Pumpkins.
Saplings: When applied, one Bone Meal is consumed and the sapling grows instantly into a large tree, provided it has enough space.
Wheat: One Bone Meal is consumed to instantly grow one Wheat, which is then ready to be harvested. Note that this is not considered to be an efficient use of this resource.
-- Brewing Stand
The equivalent of the Crafting Table for Potions, and appears to function under the power of the Blaze Rod with which it is created, by its heating the metal rods sticking out to brew Potions. The Brewing Stand has 4 slots -- the bottom 3 are used for Glass Bottles, which are filled with either water or a potion; the upper slot is used to brew an ingredient into the potions below -- hence the reason Brewing is considered a craft in the game.
The items which can be used as ingredients on water bottles are: Blaze Powder, Fermented Spider Eyes, Ghast Tears, Glistering Melon, Glowstone Dust, Gunpowder, Magma Cream, Nether Wart, Redstone Dust, Sugar, and Spider Eyes.
When the player brews an ingredient, one ingredient will distill into all three slots, creating three identical Potions.

The Bucket Recipe
-- Bucket
Buckets are an item that is used for carrying Water, Milk, or Lava, and that versatility puts it squarely in the Utility Section. Bear in mind that Water and Lava buckets can only be obtained by using the bucket on a source block, while Milk buckets are collected by using the bucket on a cow.
Buckets can be crafted from Iron Ingots, or they can be found in dungeon chests -- there is an 80% chance of finding one bucket in a dungeon chest. Water buckets can be used to extinguish fires in an emergency, and to drain and fill lakes and ponds.
Water dumped from a bucket can be used to clear out small fields of Tall Grass, making it useful for collecting seeds and for clearing the area for building.
The Cauldron Recipe
-- Cauldron
While it was originally intended to be used in the Brewing process, that never happened; in its current implementation in the game a Cauldron will hold one bucket of Water (enough to fill three Glass Bottles) and is widely used either as a decoration for craft rooms or kitchens in player homes, or to fill Water Bottles in The Nether.

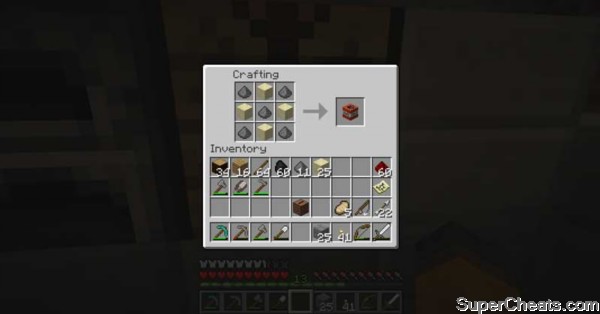
The Chest Recipe
-- Chest
In the world of Minecraft Chests are blocks that are used to store items and basically come in one size that, when placed side-by-side, becomes a larger size of Chest. The single Chest can store up to 27 stacks of Items, while a Large Chest can store 54 stacks of items. Chest are used by targeting them and right-clicking them to open them, which causes a window to open in the game with the contents shown, The contents of the Chest can be moved around, or removed, and when you want to move all of the items in a slot to your inventory you can do so by Shift-Clicking the stack.
The Clock Recipe
-- Clock
You may not think so at first, but having a Clock in your Hot Bar can be a very useful thing, especially when you spend a lot of time underground. Similar to the Compass (which now that I think on it is also a very useful tool) your Clock basically shows the position of the Sun and the Moon relative to the horizon -- when the Sun is directly overhead, it is Noon, when the Moon is directly overhead it is Midnight, you get the idea.
Clocks are crafted from four Gold Ingots and a Redstone Dust, and were added during the Halloween Update on October 31, 2010.

The Compass Recipe
-- Compass
Now I know you do not need to be told what a Compass is, or what it is for... And while they are very useful for telling you which direction you are headed in, in the world of Minecraft they serve more than that purpose, as they are also an ingredient in the crafting of Maps, which are a very crucial Utility Item in the game because without them, well, let me put it this way, it is very easy to get lost.
Added to the game during Secret Friday Update 9, on September 10th, 2010, you sort of have to wonder how players got by without them before that... This crafted item is created using four Iron Ingots and a Redstone Dust in a similar way that the Clock is crafted, on a Crafting Table, and as mentioned, it is an ingredient for making Maps as well, which means you will be making more than one.
The important thing to understand here is that the Compass needle points towards your spawn point, not North, and it functions no matter where it is located (except in The Nether and The End, where it does not function at all) -- so you can find your spawn point pretty much whenever you need to which is a very good thing... Note that if the Compass needle is pointing straight up, the spawn point is straight ahead, and using a Bed to sleep seems to re-orient the Compass on the new spawn point.
Actually that is something that we should discuss further -- when you craft a Bed and sleep in it, doing so resets your spawn point to the location where the Bed is -- as long as that Bed does not get destroyed that is. If the Bed gets destroyed then you no longer have it as a spawn point. But if you created the Bed in your Den or Player Stronghold that should not be a worry.
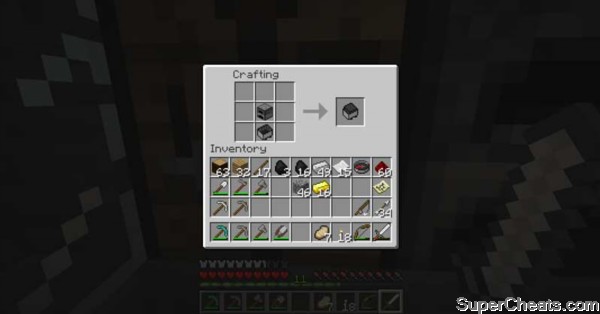
The Craft Table Recipe
-- Crafting Table
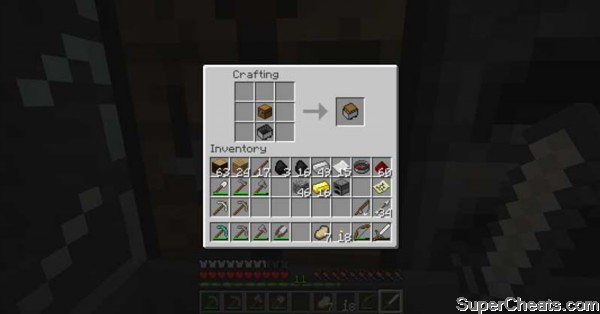
This would have to be the absolute most dead-on useful object you can craft in the game, in fact it is widely understood to be the gateway to crafting in the game since very few recipes can actually be created using the Personal Crafting Window and its 2x2 boxes, whereas all of the recipes that are created using the Crafting Window Interface can be made in the Crafting Table and its 3x3 boxes.
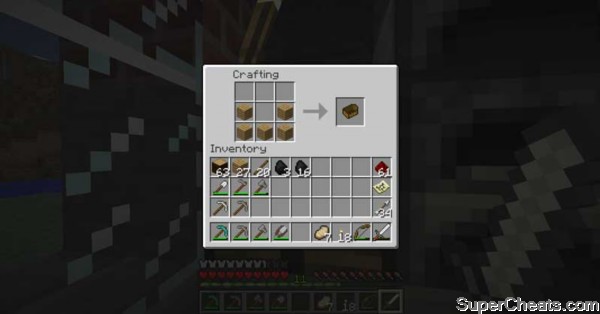
The window interface to the Crafting Table is a pop-up window that contains the Crafting boxes above, and your Inventory Boxes below, with a small box that will display the finished crafting item that not only shows you that you have placed the ingredients properly, and confirms the item you are crafting in case you made a mistake. The image below shows you the Crafting Table Interface:
The Crafting Table Interface
The objects called the "Crafting Table" must be placed in the world in order to use it, and it is made from resources that you can obtain with your bare hands and craft in our Personal Crafting Window -- specifically four Wooden Boards placed within the four boxes of your personal Crafting Window.
You need the Crafting Table to craft anything that requires more slots than your personal Crafting Window contains obviously, which is in fact most of the basic and all of the advanced crafted items in the game... But in addition to serving that function, it also nicely serves as an object that decorates your Crafting Area.
When you first start out and have constructed your initial safety den, placing the Crafting Table is mostly a matter of finding a convenient place to put it down and use it, but once you progress past the need for initial safety and begin the long and involved process of building and improving your Den, and eventually converting it into a Stronghold, you will want to create purpose-based rooms in your Stronghold such as the Crafting Room in which you will naturally place a Crafting Table as well as one or more Furnaces and a lot of storage in the form of Small and Large Storage Chests, blocks that represent combined resources (such as Gold Blocks which contain 9 Gold Ingots) both to decorate and for the convenience of storage.
Bear in mind though that having more than one crafting location is a smart approach, so you may want to have a Crafting Table or three spaced out in your Mine, in any manufacturing buildings you make, and other locations where it may be convenient.
The Enchantment Table Recipe
-- Enchantment Table
This is widely considered to be one of the advanced crafting recipes largely due to the requirement for a significant number of Obsidian Blocks in its recipe -- a material that is very rare in nature but that you can obtain a reliable source for though the construction of an Obsidian Plant (see the proper section of this guide for that information) that uses Alchemy to convert Redstone Dust to Obsidian Blocks.
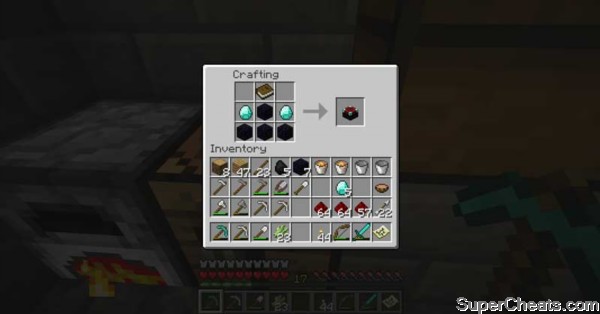
The recipe for an Enchantment Table requires four Obsidian Blocks, two Diamond Gems, and a Book. When it is crafted the Enchantment Table can be placed anywhere in your home/den by placing it in your Hot Bar and then targeting the location that you want to place it at and right-clicking.
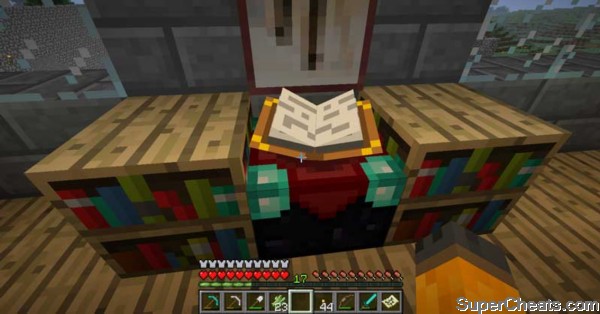
Constructing an Enchantment Circuit
In the image above you will notice that the Enchantment Table has been placed between a pair of Bookcases -- the reason for that is that the Enchantment Table and Bookcases are linked in this fashion, with the Bookcases making the Enchantment Table more powerful and, conversely, adding to the strength of any Enchantments that are made on it. You can visually verify the additional strengths being added to your Table by the flow of magical letters and symbols that will begin to emerge from the Bookcases and flow towards the Book on top of the Table.
The Bookcases must be physically linked to the Table to boost its power -- with the example above being a very basic strategy. The more Bookcases you have linked into the Enchantment Circuit, the more power is added to the process, and the better class of Enchantment you can obtain. Players who are serious about Enchanting rarely ever place an Enchantment Table on a bare floor, preferring instead to place a layer of Bookcases, and then place the Enchantment Table on top of the center Bookcase before continuing the layering process building a wall of Enchantment.
There is no clear evidence to suggest that there is any limit to the number of Bookcases that can be inserted into an Enchantment Circuit, and for most players the only limit to this is the space that they have available, which is probably why most serious Enchanters prefer to build their Enchantment Room underground in a carved out chamber, with a solid wall of Bookcases extending in ranks towards the rear of the Chamber. Having said that, you will find that you can still obtain good casual results by creating a small Enchantment Room with a dozen or two Bookcases -- we are just saying...

The Recipe for Crafting Fences uses Sticks
-- Fences
While they may not be at the top of your list for Utility Items the Fence in Minecraft is a basic security item for several reasons. They are useful to protect the player when creating objects such as Incinerators (Lava pits used to dispose of unwanted items), bridges, and other dangerous areas, they are used to provide a separation for farming areas to keep Mobs out in order to protect your crops, and to keep mobs IN when you are creating ranch facilities and animal pens, and of course they are useful in the creation of traps.
The recipe for Fences is a simple one, requiring only Sticks to make, which makes this perhaps one of the easiest player-crafted area control items in the game.
The Fishing Rod Recipe
-- Fishing Rod
Fishing Rods are used for obtaining Raw Fish, and are constructed by using Sticks and String on a Crafting Table. They can be employed in any body of water to catch Raw Fish, but bear in mind that fishing is an active action -- the player must pay attention to the process in order to reel in their Raw Fish when they get a bite.
To cast the line you use the right mouse button and aim it at the water you want to fish in; right-clicking again will reel the line in. The rod can be cast and reeled in a total of 65 times before it will break, that being its durability rating. Casting it in water and reeling it in without a catch does not reduce its durability. You can repair a fishing rod using another fishing rod above it in the crafting window.
Fishing in a body of water that has the chance of being struck by lightning results in easier catches than otherwise.
In addition to catching Raw Fish, the Fishing Rod can actually be used to snag Mobs and pull them close to the player -- a useful tactic when dealing with a flying mob. The Fishing Rod can also be used to grab onto Boats and Minecarts and pull them towards the player.
The Furnace Recipe
-- Furnace
Another dead-on useful tool in the game, especially as you need it in order to get the metal ingots you need to make the better tools, armor, and weapons in the game, the Furnace is created on the Crafting Table using Cobblestone.
Furnaces can accept a wide variety of fuel items including: Blaze Rods, Buckets of Lava, Charcoal, Coal, Fence pieces, Saplings (of all types), Sticks, Trapdoors, Wood Blocks (of all types), Wooden Planks, and Wooden Stairs. Despite the variety, Coal is generally considered to be the best and most efficient fuel.
The Recipe for Gates (Fence Gates)
-- Gates (Fence Gates)
Like Peas in the dish of Peas & Carrots, and Chocolate Gravy in the world of the Ice Cream Sundae, the Gate is a complimentary element in the use of Fences in the world of Minecraft -- especially when you take into consideration the fact that the player cannot jump over Fences unless they do it from a higher elevation than the level at which the Fence is placed!
The recipe for crafting of Gates is very similar to that of Fences save for the fact that the center components are Wooden Boards rather than Sticks -- which makes complete sense when you think about it, since the Sticks represents the posts and rails, and the Boards the actual Gate itself.
When placing Gates in a Fence line you may find that it is a lot more convenient if you place a lit Torch on either side of the Gate on its posts, since they can be difficult to spot in a long line of Fencing otherwise...
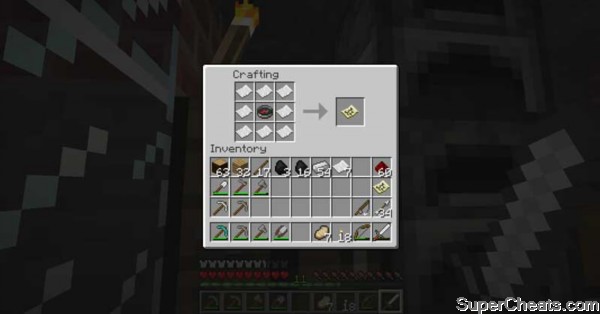
The Map Recipe
-- Maps
This player-crafted item is created by placing a Compass in the center of the Crafting Table and surrounding it with pieces of Paper. Once you have created the Map it is not "active" (that is to say, locked to a zone) until you actually place it in your hands by placing it in the Hot Bar and selecting it. That is an important distinction since (A) when you walk off the edge of your current Map you will want to then use a new Map to start mapping THAT zone, and (B) messing up and accessing the Map in a zone you already HAVE a Map for will just make it another Map for THAT zone -- so don't do that.
A lot of players think that Maps in the game are oriented towards the East, since the Sun appears to rise in the direction of the top of the Map -- but in fact the Sun actually rises in the North in the world of Minecraft.

The Minecart Recipe
-- Minecarts
A case can easily be made that the Creeper is the official mascot for Minecraft, but if you ask most players they Minecart is what sticks out in their minds as the emblem of the game, and not because you cannot play the game without one, but rather because when you begin to play building a proper mine, with tracks and carts, is usually at the very top of your list of things you want to accomplish. Later that grows to a Minecart Train with Storage Minecart and a Powered Minecart (a Minecart that is equipped with a Furnace) and beyond.
Constructed from Iron Ingots, the Minecart is a ride-able vehicle that will go where you lay the rails, and is able to carry the player as well as Mobs, and items of course. Although they can be useful in mining, they are far more useful as transportation, with players constructing powered tracks to move from one side of the map to another, and then of course there are the extensive and complex roller coaster layouts that have been created.
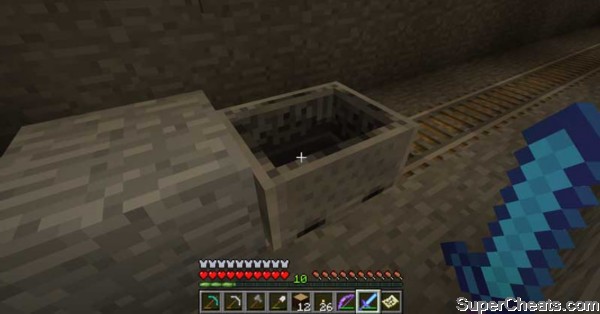
A basic Minecart on a Powered Track becomes very fast transportation for long-distances
To ride a Minecart you place it on tracks just as you would place any other block, and then right-click the Minecart to get in. To get out you right-click it again. Moving a Minecart on a regular track (as opposed to a powered one) is accomplished by either the player pushing it, having another player push you in it, or pushing it to get it going and then jumping into it.
You can use a Minecart for some unusual purposes, for example if either a passive or aggressive mob is hit by a regular cart (or pushed into it) the Minecart will stop and the mob will be put into it -- and will ride in it. After a certain amount of time they can get out on their own -- and if the player right-clicks the cart to get in it themselves that will cause the mob to be ejected. The cart being destroyed will also eject the mob.
There are several types of track that the player can make and place, including regular Tracks, Powered Tracks, and Detector Rails.
The Powered Minecart Recipe
-- Powered Minecart
The Powered Minecart (a Minecart with Furnace) accepts coal or charcoal as the fuel for powered movement and can be used to push other Minecarts, causing it to function as an engine -- though it should be noted that as Minecarts do not attach to each other, they can only be used to push and not pull other carts.

The Powered Rail Recipe
-- Powered Rail
Perhaps the most important addition to the game, the Powered Rail can be used as an alternative to the powered Mine Cart, removing the need to constantly re-load fuel in its bunker. Powered by Redstone Torches and Redstone Powder for the wiring (to connect the Redstone Torch to the Powered Rail segment), this is as close to perpetual motion as we are every likely to get...
The Powered Rail Recipe
Crafting a Powered Rail requires Gold Ingots -- six of them to be exact -- and that one ingredient is why you will not be building entire tracks of Powered Rail, believe it. In addition to the required six Gold Ingots, you will also need a single Stick, and a single Redstone Powder for each Powered Rail that you want to craft.
On the average rail run -- which presumes you are on a straight and level surface, you will need to place a Powered Rail every tenth rail segment -- though in theory you can get away with placing one Powered Rail every 12th rail segment and still have the run work, it is just that the cart will slow down perceptibly just before it arrives at the next power section.
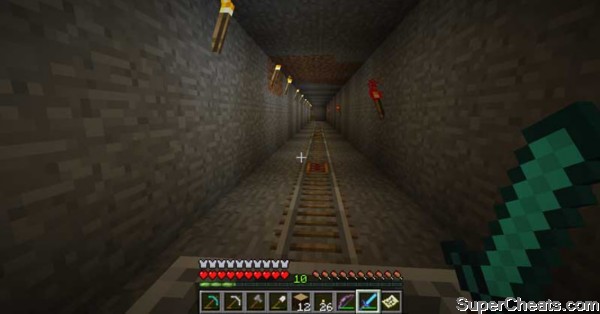
A typical Powered Rail Run
Since Mine Carts can only push -- and not pull -- it is generally considered to be more efficient to use one or two Powered Mine Carts when you are creating trains rather than trying to force the carts to function using Powered Rail on your track run, since the carts will not behave predictably or necessarily remain close together throughout the run.
-- Saddle
Used exclusively for riding Pigs, Saddles are obtained only from treasure chests in dungeons at the present time, though it is said that a crafting recipe will be added to the game eventually... Note that when a Saddle is placed upon a Pig and the rider mounts the Saddled Pig by right-clicking it that is the extent of their control over the situation. That is to say that a Pig, while it will allow the player to ride it, will NOT allow the player to control where it goes. You are, for all practical purposes, just along for the ride.

The Sign Recipe
-- Signs
Signs are Player-Crafted Items that have text on one side, and that are used to mark property, leave directions, post rules or other information, or to simply express yourself when the need strikes you...
For the most part they are used more often on multi-player servers, as part of puzzles or quests, and to inform new players of the rules for a given server. Once they are placed the player is presented with a window in which up to four lines containing fifteen characters each can be placed.
The Storage Minecart Recipe
-- Storage Minecart
Basically these are created by joining a Minecart with a Chest to create a Storage Minecart, whose purpose is to store and transport items and resources. They function the same as a normal Minecart, save for the fact that they cannot be ridden in.
To use a Storage Minecart, after it has been placed on tracks the player then uses the "Use" command (right-click) to access the storage.
The TNT Recipe
-- TNT
Crafted from Sand and the Gunpowder that is obtained as loot by killing Creepers, TNT is a general utility explosive that can be used by itself as a tool -- it is particularly useful in mining -- as a weapon, and as an element of a trap. The recipe for TNT requires five Gunpowder and four Sand.
Anything missing from this guide?
ASK A QUESTION for Minecraft
Comments for Utility Items
Add a comment
Please log in above or sign up for free to post commentsTable of ContentsClose
- Walkthrouhs
Guide Updates
Get notified of updates to this guide
Many of our guides get updated with additional information. To get an email when this guide is updated click below.
 Join us on Discord
Click to close
awesome