Day 2 in the World of Minecraft - Seeking Parity
Thank you for printing this page from www.SuperCheats.com.
Remember to come back to check for updates to this guide and much more content for Minecraft
Follow this guide to hear about updates
Last Updated:
The question of whether or not you have arrived at our virtual "Day 2" in your game progress is can be answered by ticking off all of the following items in the "Day 1 Ticklist" below. Note that when we use the term "Day 2" here we are not talking about the second in-game day, or even the second real-life day since you began playing your current and active map, but rather something more skin to a Spiritual second day -- a mark of progress that declares that you have managed to accomplish all of the items for the short-term concept of survival and you are now ready to move beyond those very basic actions into and beyond simple survival!
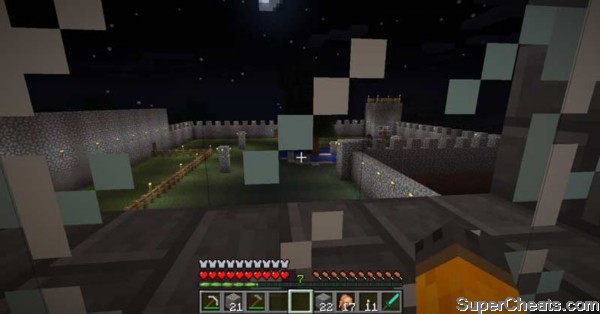
The view from the upper floor of our Stronghold
So before we get started here, let's review the ticklist to see that we have hit them all... Note that these are presented in the logical order that we more or less completed them, but save for specific items on the list like crafting of the Crafting Table and the Furnace (which are required for later items) these might be accomplished in any order.
--The Spiritual Day 1 Ticklist
--
01 -- Locate an area in which to build our Den -- this can be purely a temporary respite and place to wait out the first long night, or it might be the actual permanent location that our Den will occupy and later expand into our Personal Stronghold -- either way you have chosen the area in which to spend the first night!
02 -- Locate trees and pound upon them to obtain a minimum of 32 blocks of Wood (but preferably more) for our immediate crafting needs. In the process of harvesting Wood be sure to pick up any Saplings that fall from the Leaves/Branches we destroy to be used as fuel in the Furnace we will be crafting...
03 -- Locate and obtain a minimum of 8 Blocks of Sand (but preferably 16) as part of our initial resource needs for making Glass Cubes.
04 -- Using the Personal Crafting Window create a minimum of 12 units of Wooden Board (try to have at least 8 Wooden Blocks still in your inventory though) then place one in all four slots in order to craft a Crafting Table.
05 -- Place the Crafting Table immediately anywhere convenient to you for temporary use now.
06 -- Quickly use the Crafting Table to craft two Wooden Pickaxes using more Wooden Boards and Sticks that we created, and then use one of the Pickaxes to break the Crafting Table in order to return it to your inventory.
07 -- Using a Wooden Pickaxe, harvest a minimum of 8 Cobblestone Blocks by harvesting Stone Blocks, and if there is time try to get 8 or more additional Cobblestone to use for making Stone Tools.
08 -- Construct your temporary Den or begin construction of your actual Den; You can either mine a bunch of Dirt Blocks and build a small hut, or you can carve into the side of a mountain or hill an opening one-block-wide and at least 2-blocks-high which is the entrance to your Den -- then go through and expand this into a room that is at least 5-blocks-deep and perhaps 12-blocks-wide.
Using Dirt Blocks close-up the entrance to the Den leaving one block at head-height open so you can see the outside to tell when day has returned while at the same time ensuring that no Skeletons, Creepers, or Zombies can gain entrance to your Den for now. Note that you want to stay away from this opening as a Creeper standing directly outside if it has line-of-sight on you could in theory use its detonation which would really ruin your day!
09 -- Select the spot you want to place your Crafting Table at and place it.
10 -- Using the Crafting Table and 8 Blocks of Cobblestone, place them in the Crafting Table filling all but the center slot to craft a Furnace. Place the Furnace beside your Crafting Table (or wherever in your new Den you want to place it).
11 -- Place a Block of Wood into the top slot of the Furnace and some Saplings into the bottom slot (the top slot is where you place the item you want to fire, the bottom slot is where you place your fuel. This will create a single piece of Charcoal. Note that if you got lucky and found a Coal while excavating your new Den this step is not required.
12 -- Place 8 Blocks of Wood into the top slot of your Furnace and your 1 Block of Charcoal to make 8 more Charcoal.
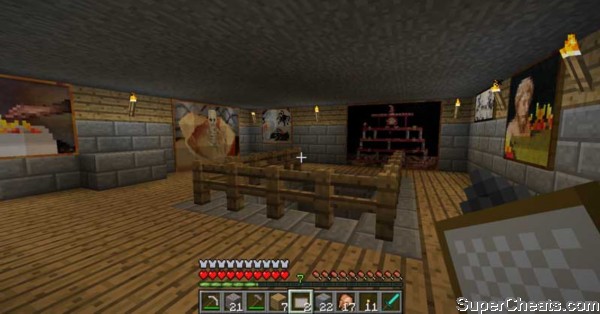
A view of the paintings available for decorating your den
13 -- Place 2 Charcoal pieces into your Personal Crafting Window with 2 Sticks below it and make 8 Torches. Place some of the Torches on the walls inside your Den to provide light! You have made light! Wilson would be proud of you!
** If you have the resources to continue do so, otherwise you will likely be waiting until dawn and then spending pretty much all of the next day harvesting Blocks of Wood, Saplings, and with any luck some Apples and then return to your Den for the next night period **
14 -- In the Crafting Table make a stack of Wooden Boards.
15 -- Fill all of the slots of the Crafting Table EXCEPT the middle slot with 2-Wooden Boards in each outside slot, and craft two Storage Chests.
16 -- Place the two Storage Chests in your Hot Bar, then locate the spot near your Crafting setup where you wish to place your Main Crafts-related Storage Chest, and place these two side-by-side to create one large Storage Chest rather than two small ones.
To place the chests in a wall, you need to make sure that the spots directly above the Chests are also free and open. The most popular way to place a chest is to mine the blocks at chest and head height, leaving a shelf-like indentation in the wall on which to place the Chests. Alternatively you can mine two blocks of the floor side-by-side and place the Chests in those, so that they become both the Floor AND your Storage -- you may want to do this if space is tight.
This is the storage you will use for crafting resources (at least for now).
17 -- Place 8 Blocks of Sand into the Furnace and use 1-piece of Charcoal to fire them into 8 Glass Blocks -- use these for the windows for your Den. Ideally you will want to place one or more to the left and right of the door of your Den so you can see outside to be sure that you are not walking into an ambush when you exit in the morning.
18 -- Place 8 Blocks of Cobblestone (or more as needed) into your Furnace and 1 piece of Charcoal to fire the Cobblestone into Stone Blocks. Stone Blocks are more resistant to the explosions of Creepers, so you will want to replace any of the Dirt Blocks that make up the outside wall of your Den with Stone. If some of the Blocks are Cobblestone (placed by you as part of the initial construction process you will also want to replace those with Stone Blocks.
19 -- Be sure to place a number of Torches on the outside of your Den both to provide light so you can see out of your Windows at night, and also to make it easier to spot your Den from a distance when you are away from it and needing to locate it to return to it as night approaches.
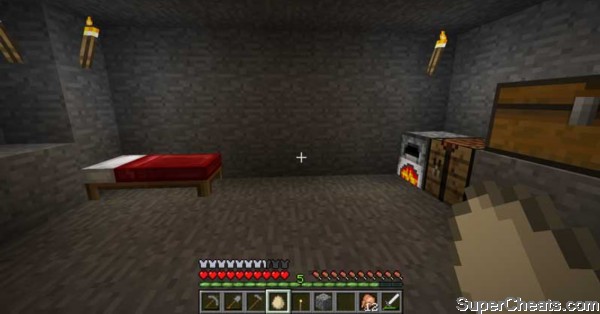
The basics of a well-developed den includes crafting and your Bed
20 -- When morning arrives and you can safely leave your Den, climb up above it (if it is built into the side of a hill or mountain) and construct a 1-block wide 4-block (or more) tall pillar and place a torch at the top on each side as the marker beacon to make locating your Den from a distance easier for you so you can quickly orient upon it and return to it as night falls!
21 -- If you have not already done so, using the Crafting Table, Sticks, and Cobblestones, make one or two Stone Axes (see the recipe if you need it). Use the Stone Axes for harvesting Wood Blocks but remember that you should harvest the Leaves/Branches by hand so as not to use up durability of your Axe, which loses double-durability on leaves as an improper use.
22 -- Supply Collecting: Survival Foods
Before we delve into assembling our Resources Stockpile it is time to think about food and putting away a supply of it in your stockpiled resources both for the future and because you should actually be in need of food at this point anyway -- check your Food Bar.
Ideally you are looking for Cows, Mooshrooms, Chickens or Pigs -- in a crunch you can also Fish but Fish are not the most efficiently used food item... Once you have a decent stack of your preferred meat (or whatever is available) collected during an entire day of foraging for food (gather seeds and Mushrooms as well if/when you encounter them) head back home for the night and cook up all of the raw meat you have acquired, retaining a partial stack in your inventory for eating as needed, and storing the rest in your Stockpile Storage Chest.
23 -- Resource Collecting: Wood Blocks
Now that you have basic storage it is time to begin the process of collecting resources for your Resource Stockpile, and Wood Blocks are an excellent starting resource, especially if you have not located a supply of Coal for obvious reasons (to begin mining you will need a ready supply of Pickaxes and Torches, both of which require Wood Blocks). Your target should be a minimum of two full stacks of Wooden Blocks, with two full stacks of Wooden Boards and two full stacks of Sticks in total.
24 -- Resource Collecting: Stone Blocks
Another obvious choice, Stone Blocks are acquired by first mining Cobblestone from actual Stone Blocks and then firing them in the Furnace to convert them to Stone Block form. You should obtain plenty of Cobblestone Blocks as you begin excavating your first Mine, so combine this collection activity with the construction of your first Mine which should be (ideally) nearby your Den but not part of it.
You should make an effort not to mine below your Den in case there is unstable types of Blocks there as it would suck to initiate a collapse of your floor above, right? While you are excavating your Mine be on the lookout for Iron Ore as well as other Ores (as those are next on the list). When you have a stack or two of Cobblestone head back home for the night and fire them in the Furnace to add these to your stockpiled resources.
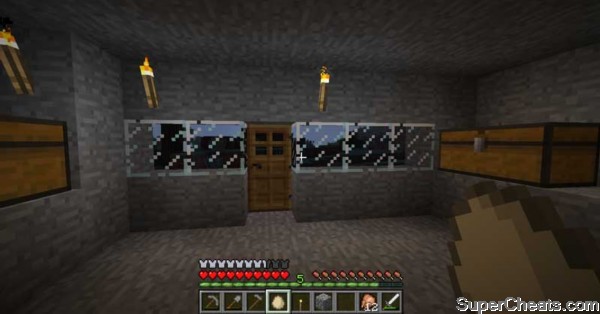
Windows to see out are a basic security measure for Creeper protection
25 -- Resource Collecting: Iron Ore
Collected as available, this is a resource that you will find in the process of excavating your first Mine. Whenever you find Iron Ore you should always retain it. Make it your routine when returning to your Den each night to smelt whatever Ore you have acquired in the day's Mining and adding the resulting Ingots to your Stockpiled resources. Your target is a minimum of one (or more) full stacks of Iron Ingots.
26 -- Resource Collecting: Gold Ore
Collected as available, this is a rare resource that you will find in the process of excavating your first Mine. Whenever you find Gold Ore you should always retain it. Make it your routine when returning to your Den each night to smelt whatever Ore you have acquired in the day's Mining and adding the resulting Ingots to your Stockpiled resources. Your target is a minimum of one (or more) full stacks of Gold Ingots.
27 -- Resource Collecting: Diamond Gems
Collected as available, this is a resource that you will find in the process of excavating your first Mine, and must be mined using an Iron Pickaxe or better... Whenever you find Diamond deposits you should always mine them, retaining the gems. Your target is a minimum of one (or more) full stacks of Diamond Gems -- though the likelihood of you finding a full stack right away is slim.
As soon as you are able to you will want to craft, at a minimum, a Diamond Pickaxe (which you need to harvest Redstone and Obsidian when you encounter it), a Diamond Sword, and a complete set of Diamond Armor (those being the best you can obtain and certainly items that you will eventually wish to Enchant.
28 -- Resource Collecting: Redstone Dust
Collected as available, this is a semi-rare resource that you will find in the process of excavating your first Mine. Whenever you find Redstone deposits you should always mine them -- mining Redstone requires you to use the Diamond Pickaxe, as otherwise you will destroy the deposit...
Your target is a minimum of one (or more) full stacks of Redstone Dust, a target you should easily be able to manage since each deposit will drop between 3 and 6 individual units. Note that Redstone Dust is also a core ingredient for obtaining Obsidian using an Obsidian Generator.
29 -- Resource Collecting: Obsidian Blocks
Collected as available, this is an ultra-rare resource that you will hardly ever find in the process of excavating your first Mine. Whenever you find Obsidian deposits you should always mine them -- mining Obsidian requires you to use the Diamond Pickaxe, as otherwise you will destroy the deposit...
Your target is as much as you can find or, conversely, a total of two stacks if you are manufacturing it, as that should be sufficient for all of your needs in playing the game, period. Note that Redstone Dust is also a core ingredient for obtaining Obsidian using an Obsidian Generator.
30 -- Resource Collecting: Wool Blocks
This crafting resource is collected either by killing Sheep (they may drop a single block when killed) or preferably by using the Shears Tool on Sheep, which allows you to obtain up to three Wool Blocks from each Sheep without killing it, which means you will be able to do so again after it eats Tall Grass and re-spawns its Wool Coat.
In addition to obtaining Wool Blocks through Shearing Sheep, you can also use Wool Dyes that you have crafted directly on the Sheep to change its default Wool Color to whatever your Dye Color is that you use on them. After shearing the Sheep their sheared coat will appear to be remnants of White or Grey Wool, but when the Wool re-spawns it will be whatever color you Dyed the Sheep as, which makes it a renewable supply for that color.
Placing Beacons to mark your Den location and help you find it when you get lost
31 -- Crafting a Bed: After you have obtained an initial supply of Wool Blocks, you will want to craft a Bed on the Crafting Table using three Wool Blocks and three Wooden Boards. Place the Bed in your Den and, when night falls, sleep in it to reset your spawn point to the location of the Bed.
After you sleep in the Bed, as long as it remains where you slept in it, and the Bed is not destroyed, your new spawn point will be the Bed's location. This setting can be used to your advantage by carrying a Bed with you when you are exploring so that you can set your spawn point to your temporary Den in case you are killed, which saves you from having to run however far you were from your home Den in order to recover your items.
32 -- Resource Collecting: Wheat Seeds
Obtained by harvesting Tall Grass by hand or with any tool OTHER than the Shears, the Seeds you obtain in this fashion are Wheat Seeds. A reasonable target amount is one stack, as harvesting Wheat that you grow from the seeds will result in obtaining additional seeds.
33 -- Resource Collecting: Pumpkins and Pumpkin Seeds
Obtained by harvesting Wild Pumpkins by hand or with any tool, Pumpkin Seeds can be obtained by harvesting the Pumpkini Vine or by placing a Pumpkin in a crafting window and crafting it. Once properly planted a single Vine will produce multiple Pumpkins and each Pumpkin serves as a source for additional seeds as needed.
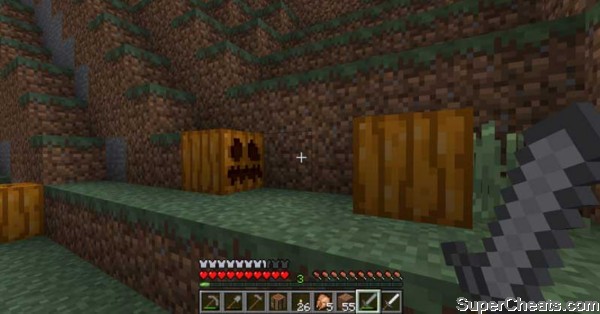
Your first Pumpkin will be encountered in the wild, like those above
34 -- Resource Collecting: Sugar Cane
Obtained by harvesting Wild Sugar Cane by hand or with any tool; Sugar Cane grows naturally adjacent to Water Blocks (and will ONLY grow near adjacent to Water Blocks) and can easily be obtained.
The raw resource that is used for crafting both Sugar and Paper, a good target is a full-stack of Sugar Cane plants, which can then be used to farm a renewable supply of the plant. You will need to do so as you will eventually require a lot of paper...
35 -- Create a Map: To make your life a lot easier you will want to create at least one Map now before you begin to explore your initial (home) zone, both so that you know where you are, where you are going, and where you have been, and so that you can find the areas of interest to you where you noted that specific items can be found, as well as easily being able to find your way home.
Maps are crafted using 8 Sheets of Paper and a Compass (the Compass is crafted with four Iron Ingots at the cardinal points in the Crafting Table with a Redstone Dust in the center. When you are creating your Map, make a second Compass for you to use as a tool (as a Compass in other words) to carry with you in your Inventory.
Note that the Map will ONLY record the details of your travels when opened by placing it in your Hot Bar and selecting it, so you will want to open it very so many steps so that it updates the area that you have just passed through on the Map.
36 -- Create a Clock: To make your life a lot easier and make it simple to check the time of day to determine when night is close, you will want to create at a Clock to carry with you in your Inventory. Clocks are crafted by placing four Gold Ingots in the cardinal points on the Crafting Table with a Redstone Dust in the center.
--
As you review the ticklist above bear in mind that most of the items on it are sensible and necessary to your continued progress in the game. Towards the end we address the issue of your resource stockpile, which is itself a critical element in your continued success in the game not only because it provides you with ready access to the materials that you will require for crafting, but also because it reinforces the notion that what you have, you earned.
Before we progress to the second half of the expansion of your life, we should step back and review the matter of your first mine, and what it was meant to accomplish. As you review the listings for the items in other sections of the guide you will notice that many of them -- and especially the resources that you obtain as a byproduct of mining -- appear only at specific levels of the world. That is no accident, and it should serve as motivation for you to dig deeper, explore further, and learn to extend your capabilities to create outstations of convenience.
At the bottom of your mineshaft you should have created a small base in which you have crafting capabilities, and stored resources, so that you can resupply the tools you need as you mine. There are a number of items that are not so obvious -- but that you should be on the lookout for -- and should you encounter an Abandoned Mine or a Dungeon in the depths, at this stage you are advised to block it back off but remember its location for later, when you have the proper tools to explore and clear it, which at a minimum would include Diamond Armor and Weapons.
Before you move on to the next section it would be an idea for you to make the effort to obtain the raw materials (Diamond Gems) that are required in order to outfit yourself with a good set of armor and decent weapons. Having done that, your next goal in the process of mining your way through the underworld is to locate and capture Lava source blocks (blocks of Lava that are not moving) which you will store in Metal Buckets back at your Den, as you will need these for the next section which covers the construction of an Obsidian Generator. Note that you will also require a supply of Redstone Dust, and a few Buckets of Water...
Next Page
Constructing an Obsidian Generator and Some Obsidian BlocksPrevious Page
Music Discs
Constructing an Obsidian Generator and Some Obsidian BlocksPrevious Page
Music Discs
Guide Menu
Anything missing from this guide?
ASK A QUESTION for Minecraft
Comments for Day 2 in the World of Minecraft - Seeking Parity
Add a comment
Please log in above or sign up for free to post commentsTable of ContentsClose
- Walkthrouhs
Guide Updates
Get notified of updates to this guide
Many of our guides get updated with additional information. To get an email when this guide is updated click below.
 Join us on Discord
Click to close
This cite is great
I hope it continues helping me.