Main Quest - The Dead Dunes
Thank you for printing this page from www.SuperCheats.com.
Remember to come back to check for updates to this guide and much more content for Lightning Returns: Final Fantasy XIII
Follow this guide to hear about updates
By mogg1342
Last Updated:
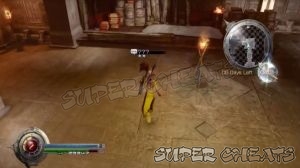
When you arrive here, visit Chocolina and take all the available quests from her message board then activate the red cactuar, There are quite a few of these found throughout the desert and function as warp points for quick travel between sections. Purchase all the new garbs from the Outfitters too. Also, you will sometimes see lizards wandering in the sands as you explore. Exterminate 30 of these harmless creatures with R1 or RB to unlock the Lizard Lariat trophy.
Head straight north up the narrow path (on the map) and you'll come to some steps where you can grab the Pilgrim's Crux. Your next destination is the bandits settlement, but sadly the shortcut is currently blocked off by a sandstorm so you'll have to take the long way around. Be sure to activate the warp point when you get there. You will meet Mal, another one of Baird's colleagues at the settlement's cafe so sell him Soul Seeds. Find Adonis (the red clad man with white hair), talk to him and accept his challenge. Use the warp point outside and teleport to the area called "Near God's Wrath" (if you activated the red cactuar in that area), save and approach the blue marker to fight.
| Side Quest - Adonis's Audition |
| The Gurangatch is resistant to just about everything (except Wind which deals normal damage) up until its shell comes off. Meaning, you'll have to stagger it before you can inflict any significant damage. Equip a garb that grants some magic boost along with access to stronger wind spells. Create a Saboteur schema focusing on debuffing abilities as well. In battle, stick as many debuffs on Gurangatch as you can to speed up the stagger gauge and spam magic until it staggers. Attack or cast wind spells while Deprotect and Deshell are active.Leave enough ATB to defend like always, |
| Rewards - 1500 Gil, Monoculus Mask, HP+100, STR+4, MAG+8 |
The sandstorm should be gone now so use the new shortcut to return to the settlement. Find Adonis to complete his mandatory quest and trigger the event that ends with Fang joining the party.
| Side Quest - Tool of the Trade |
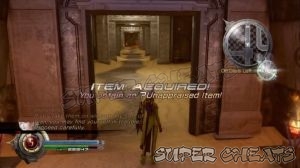
| The client Elmer is waiting on the second level of the Ruffian settlement. He wants Lightning to look for anything that's left of the equipment that he tossed in the desert. Head over to Atomos Sands and climb to onto the observation tower to survey the area. Notice that there is a shiny red object on the sands below. Go pick up that Loupe and take it back to Elmer. After this quest completes, you can bring him those Unappraised Items you found in the desert and he'll trade them for useful stuff. |
| Rewards - 400 Gil, Retro Scopes, Max HP+50, STR+2, MAG+4. |
Talk to Tobais, the general store owner and also pick up some of Bhakti's Oil from the ground.
| Side Quest - Old Rivals |
| Tobais will give you this sub-quest when you talk to him at the General Store of the Ruffian settlement. Come back and talk to this man again after you've completed Ramon's His Wife's Dream. |
| Rewards - 500 Gil, Snakeskin Hat, Max HP+50, STR+4, MAG+2. |
The correct entrance into the ruins is to the east of the Temple North Gate. You can teleport over to that location and just go the rest of the way on foot. But be sure to speak to Ramon before moving on. Also from Day 7 onward, the Aeronite, a special monster will start appearing at random on the Giant's Sandbox. He is the black distortion-like thing floating around on the field, and it will probably be best to avoid him for now. Defeating this creature will unlock the Desert Dragonslayer trophy.
| Side Quest - His Wife's Dream |
| You'll find Ramon moping at Temple Ruins North Gate entrance in the Giant's Sandbox. He will right next to the warp device which should be easy to spot. This quest opens up only after you've spoken to his rival Tobais at the settlement. Anyway, you'll find Monica's Arithmometer in the Grave of the Colossi. Use a Pilgrim's Crux to remove the sandstorm blocking access to one of the clearings there, and defeat the Trio of Goblets. Take the item back to Ramon for your reward. |
| Rewards - 1300 Gil, Gold Padlock, Max HP+100, STR+6, MAG+2 |
Also try to slay all the Cactuars that you find while trekking through the desert, as they drop the Cactuar Doll (an item for a Canvas of Prayers quest) plus a hefty sum of gil at 7500. There is another Pilgrim's Crux a good distance south from the Temple Ruins East Gate. Should you choose to explore this gigantic location (and you definitely should), make sure Chronostasis is running at all times and fight large enemies (like the Gurangatch) to quickly refill your EP gauge.

Activate all the warp points you see and pick up every treasure including a Spiritual Veil, Loupe and Rainbow Gem in the Atomos Sands; Key to the Sand Gate, Angel's Headband and Bhakti's Oil in the Oasis Lighthouse. Note that the path to this area is blocked by a sandstorm so use a crux on the stone to remove it then kill the Cactair for the Proof of Kindness item. You'll also find a man named Zanford at the Lighthouse and his presence comes with a big job for Lightning.
| Side Quest - Last One Standing |
| Zanford is waiting at the Oasis Lighthouse and requires you defeat all Omega class enemies in the game (31 in all). The Ereshkigal and Afro Cactuar must also be defeated in the special dungeon. It is therefore unlikely (if not impossible) to complete this quest on your first playthrough, |
| Rewards - 12000 Gil, Bladed Lance, Hermit's Cap, Max HP+160, STR+18, MAG+16 |
The narrow path in the Dry Floodlands that leads west to a dead end has another Pilgrim's Crux at the edge while the fourth Pilgrim's Crux is on the pathway connecting the Atomos Sands and the Grave of the Colossi. Don't forget the Star Bracelet in the Dry Floodlands and the Cosair Scarf near the Ruffian settlement and the Serenity Sachet in the graveyard. Onward into the ruins now.
Follow the path down the east entrance into the ruins proper. This dungeon is full of timed doors colored blue (open) and red (locked). The clocks above the doors indicates the time when the door opens or closes. Nevertheless, Chronostasis is your friend here so take time to fight and keep your EP charged. The freebies include a Nacre Cameo, Slow Lv.2, Deprotect Lv.2 and White Strap.
| Side Quest - The Life of a Machine |
| Bhakti is at the Sacred Grove inside the Temple and you must bring him at least 3 units of oil. Bhakti's Oil is found in the Ruffian General Store, the Oasis Lighthouse, next to the Adamatoise skeleton in the Graveyard of the Colossi and in the Atomos Sands Shrine. Give him the items and follow him into a room where Lightning discovers the remains of Bhakti's friends. Check the bones for some freebies then talk to Bhakti again to complete this mission. |
| Rewards - Cyber Scanners, Max HP+80, STR+4, MAG+4. |
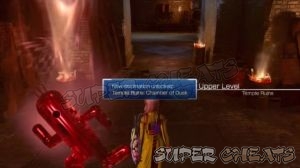
Activate all the warp devices and destroy statues at the Sentry Row for Yellowed Skulls, a Canvas of Prayers item. You'll soon come to a roadblock which requires you to visit the three shrines in the desert to collect the three Tablets (one from each shrine). Once you have all three, return to the ruins and continue through the Sacred Grove. Grab both Pilgrim's Crux and also speak to Bhakti.
Proceed further down the hallway to check the large red cube which will unlock the nearby door. Your next goal basically is to take those three tablets to the three galleries in the ruins to view the murals. This means you'll need to explore further and check the rest of the dungeon. Naturally, there will be more freebies mostly located in the Lower and Upper Levels of the Golden Chamber. The treasures are: Collectors Catalog, Cursed Band, Demon Claw, Thorn of Speed, Poison Lv.2.
| Side Quest - What Rough Beast Slouches |
| The client Nolan appears in the upper level of the Scorched Earth area in the Temple Ruins. This quest requires you to defeat the Aeronite, a beast that randomly appears in the form of a black distortion at the Giant's Sandbox from Day 7 onward. Note that this super beast will get bored and fly off after some time, if you fail to stagger it with enough frequency to keep it interested in fighting you. |
| Rewards - 8200 Gil, Pro's Beret, Max HP+160, STR+12, MAG+16. |
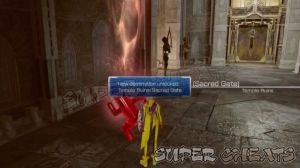
Also at Scorched Earth Upper Level is a Golden Scarab treasure (Canvas of Prayers quest item) and a man named Nolan who gives Lightning a job. To reach this section of the ruins you must kill the Earth Eater blocking one of the doorways near the warp point at the Golden Chamber. As for the galleries, one is found west of the Sacred Grove, another is near Scorched Earth and the third is just past a door in the Sacred Gate, which opens after you've seen two of the three murals. And with that take the newly completed Saint's Crux to the remaining door at the Sacred Gate to unlock it.
| Side Quest - Skeletons in the Closet |
| The client Jamus is in the Tavern of the Ruffian settlement. His task involves the decimation of the Skeleton population by defeating the Omega Skeleton. You will have to kill about 60 Skeletons for the Omega version to show itself. Or you can do yourself and just face it in the Ultimate Lair. |
| Rewards - 4500 Gil, Pioneer's Eyepatch, Max HP+140, STR+14, MAG+12 |
If you return to the Ruffian settlement after obtaining the first piece of the Saint's Crux, you'll find that the place has turned a whole lot livelier. Several shops had popped up so buy the new garbs from the Outfitters. Check for anything you might like then go speak to Jamus at the tavern for a quest. Anyway, what you fight behind in the Clavis Chamber depends will depend on what day it is. If it's Day 7 onward, you'll face the Parandus if it's Day 6 or lower then you'll be battling with the Grendel.
The Parandus has 480000 HP which isn't all that high but the real killer here will be the creature's debuffing capabilities. The best you can do is to try and defend against the worst of them which would be Poison, Fog and Pain. Equip accessories that give 100% resistance to those. Garbs that boost overall debuff resistance is a plus. Also make sure every schemata you use has Evade ability equipped, and that all three have access to wind-type attacks or spells. For the battle, you will usually find yourself having to stagger this boss twice, as the first disengages the barrier and the second is the actual knockdown. Spam wind magic until the barrier disengages, throw a Slow spell and work on inflicting stagger a second time. Unleash your best attacks as soon as he falls over.

His Disaster attack will cause a myriad of ailments which you can either guard or evade. Heal with Esunada if anything particularly bad sticks. But of all his attacks, Gloria Mundi and Hellkat are the deadliest even when blocked so your best option would be evade. For the former, do a sidestep instead of a backstep since the attack goes in a straight line. For the latter, start mashing the Evade combo as soon as the attack starts pulling you in since the strongest bit comes last, giving you some leeway to avoid it. Use EP for Overclock if you want but it's probably best saved for healing.

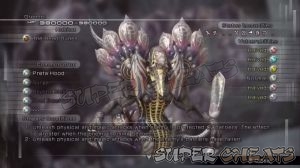
Once all the cutscenes are over and done with, snag the Preta Hood from the floor before you do anything else. The Mystery of the Holy Clavis trophy unlocked. That will be all for this location.
Anything missing from this guide?
ASK A QUESTION for Lightning Returns: Final Fantasy XIII
Comments for Main Quest - The Dead Dunes
Add a comment
Please log in above or sign up for free to post commentsNo comments yet. Tell us what you think to be the first.
Table of ContentsClose
Guide Updates
Get notified of updates to this guide
Many of our guides get updated with additional information. To get an email when this guide is updated click below.
 Join us on Discord
Click to close