Hospital
Wolfenstein Walkthrough and Guide
Wolfenstein Guide - Walkthrough
Hospital
Return to the Golden Dawn Safe House and speak to Leonid Alexandrov there. Then, follow the marker on your compass to the mission start point in Midtown East.
Objective: Investigate the Hospital.
After the cutscene, look for GOLD (1/23) by the chair in the southwest corner of the waiting room. Step into the hallway and enter the operating room on the other side; INTEL (1/6) is sitting on the patient. Step back into the hall and go through the next door along the east wall. GOLD (2/23) is on the floor below the window in the northeast corner. With that, leave the room and look for GOLD (3/23) behind the chair at the north end of the hall.
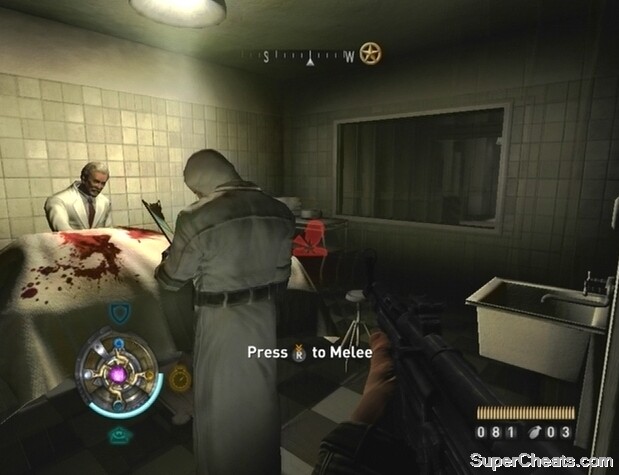 The Veil Assassin is somewhere in the hospital. |
Continue to the door at the west end of the hall. INTEL (2/6) is on the desk next to the door along the south wall of this room. Head through the door next to the desk and exit the bloodied booth through the door at the other end. Through the double-door across the hall, open the first locker in the northern operating room to find GOLD (4/23). Before leaving, look for GOLD (5/23) in the southern operating room. Step back into the hall and open the second locker along the east wall at the south end to find GOLD (6/23). Toggle Veil Sight and look next to the same locker to discover a red panel. Blast the panel to find TOME (1/2).
When you have the Tome and Gold, walk north down the hall to reach the stairs to the second floor. Open the second locker at the bottom of the stairs to find GOLD (7/23). With that, head up the stairs and open the first locker that you come to along the north wall of the second story hallway to find GOLD (8/23). Continue down the hall, turn the corner, and open the second locker you come to along the west wall to find GOLD (9/23).
Some wreckage around the corner blocks the stairs to the next floor. Stand before the shielded doorway into the stock room and activate Mire when it flickers off. Quickly move through the doorway to make it past the shield. Look for GOLD (10/23) among the junk in the northeast corner of this room. Proceed through the doorway, out the opening in the wall, and up the steps to the third floor. Along the wall straight ahead, open the second locker from the left to find GOLD (11/23).
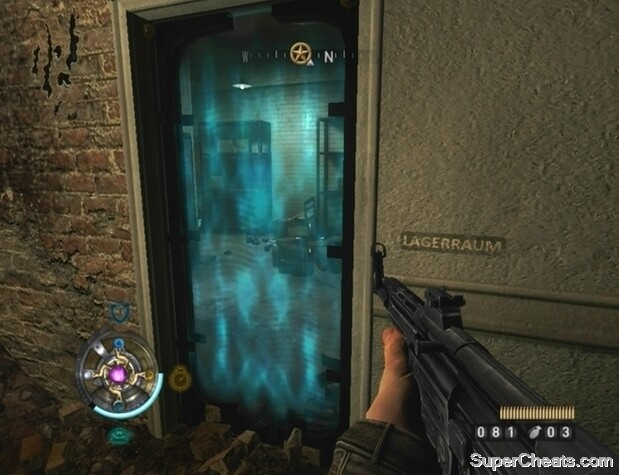 Use Mire to slip through the shield door when it flickers off. |
A grisly scene and some resistance await you in the patient ward at the end of the hall. Fight your way to the other end of the room and step into the hallway there. Enter the file room to find more carnage. GOLD (12/23) is on the cupboards at the southwest end of the room.
Objective: Defeat the Assassin.
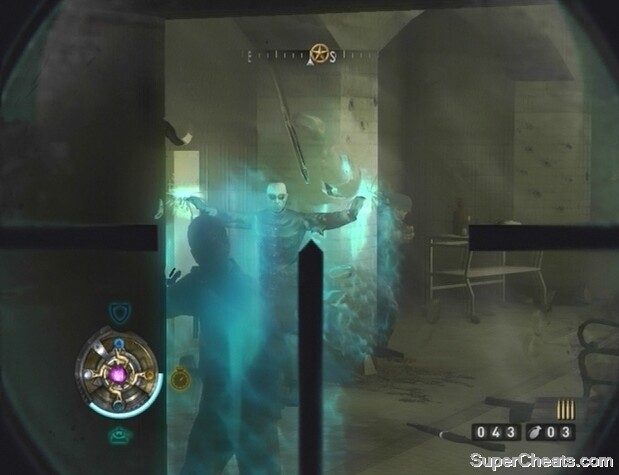
Continue up the steps at the west end of the file room. The Veil Assassin is cloaked but can be seen with Veil Sight. At the top of the steps, move to the end of the hallway and turn the corner; you should be able to see the Assassin at the other end of this stretch of hallway. If you have Veil Energy, you can use Mire to slow him down. Then, get behind him after his initial attack and continuously hit him with gunfire until he falls. If you’ve purchased the Shearing Crystal upgrade, you can severely damage the Assassin if you activate Mire while he is close. If you don’t have enough Veil Energy to make this tactic worthwhile, killing him just comes down to reaction time. It doesn’t take much to kill an Assassin, but they’re deadly at close-range.
It’s a bit tough to face an Assassin in this narrow hallway. Just don’t back yourself into a corner if you see him running at you; try dodging his swipe, as he is slow to recover after an attack. The Particle Cannon will make short work of him, but if you don’t have any ammo for that weapon, and upgraded MP40 or MP43 should work just as well.
Defeating the Veil Assassin in the hospital.
Objective: Access the Laboratory Wing.
When the Veil Assassin has been defeated, head back down the steps and return to the file room. Go through the open door at the southwest end of the room and activate Veil Sight to reveal a Veil Door. Before moving through, open the first locker along the east wall to find GOLD (13/23). After collecting the Gold, proceed through the Veil Door to complete the objective.
Objective: Storm the Secret Labs.
After turning the first corner, look for INTEL (3/6) next to the door along the north wall. Continue down the steps and blast the enemy in the cage. Use the switch in the cage to open the door across from it. The blast door will only remain open for a short while, so activate Mire right after using the switch and duck through before it closes. If you don’t have enough Veil Energy, there are several Veil containers in the corridor that you can absorb to recharge.
Enter the room at the west end of the first stretch of hallway. Look for GOLD (14/23) behind the bucket that the tortured man is sitting on. Exit the room and look for GOLD (15/23) in the second locker along the west wall. Continue down the steps at the end of the hall and open the double-door there.
 Keep the MG42 at the far end of the room clear. |
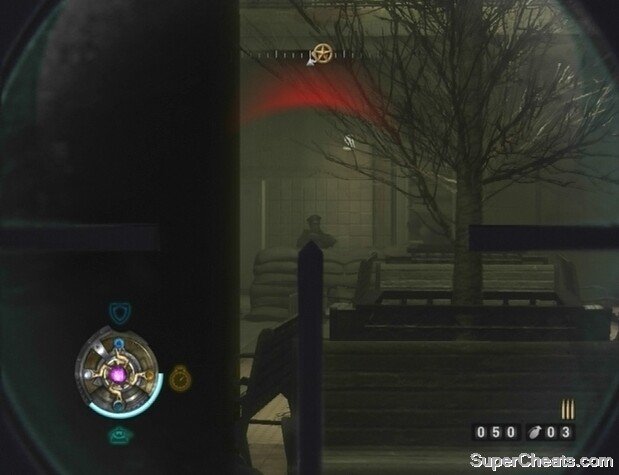
There’s a ton of enemies in this area, so don’t stand in the doorway for too long. There’s a mounted MG42 at the far end of the area, so switch to your Kar 98 and try to shoot the gunner. Shut the door if you’re taking a lot of damage, or duck back up the steps to heal. Another soldier is likely to take control of the MG42 soon after the first gunner falls, so keep it clear. The biggest nuisance in this area is the Scribe; try to headshot him while he’s busy shielding his allies.
When the area is clear, head through the doorway in the northwest corner. Look for GOLD (16/23) under the bed in the northwest corner of this room; you may have to nudge the bed with gunfire to reach it. There are more enemies around the corner, so be careful. After collecting the Gold, make your way to the other end of the room and look for GOLD (17/23) in the third locker behind the mounted MG42.
Continue up the steps at the southwest end of the room. The upper level is similarly occupied by enemies. There’s an MG42 mounted on a desk around the corner; the gunner should be surrounded by several allies, so try tossing a grenade or two to hopefully clear them out. Kill the soldiers on the walkway across from you and then look for INTEL (4/6) next to the filing cabinet along the west wall.
 Headshot the Scribe while he’s busy shielding his allies. |
When you have the Intel, continue through the doorway in the northeast corner of the room and start down the walkway. You’ll soon encounter some Sniffers and a Scribe. Back away from the Sniffers as they scamper toward you and fire at them. If the Scribe follows you too, return to the previous room and battle him there. There’s also another Veil Assassin about, so toggle Veil Sight and take this one out the same way you did the other. After dealing with those enemies, continue through the double-door at the southwest end of the walkway. Fight your way down the corridor and open the first locker at the east end to find GOLD (18/23).
There’s yet another mounted MG42 in the area at the bottom of the stairs. If you lack Veil Energy, head back up the steps and use the Veil container at the start of the corridor to recharge. Use Shield or Mire to kill the gunner, and then look for INTEL (5/6) on the desk that the MG42 is mounted on. When you have the Intel, proceed through the double-door next to the MG42. You are unable to use Veil Powers in this are until the Veil Inhibitor is destroyed. Head through the doorway next to the gate and destroy the Veil Inhibitor in the other room. Look for INTEL (6/6) next to the first doorway.
Once the Veil Inhibitor has been destroyed, activate Veil Sight to reveal a Veil Door. Move through the Veil Door to reach the next area.
Objective: Destroy the Machine.
Climb down the ladder, walk to the other end of the catwalk, and pick up the Tesla Gun powering the machine. Use the Tesla Gun to fry the Veil Assassin that runs at you. As you can see, the Tesla Gun should be your weapon of choice when facing an Assassin.
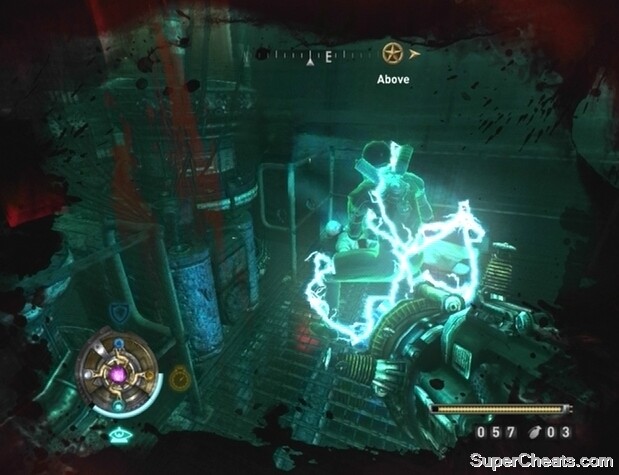 The Tesla Gun is effective against most enemies—including Veil Assassins. |
Objective: Destroy the Veil Inhibitor.
Climb back up the ladder and move to the other end of the upper catwalk. Open the door at the other end and shoot the Veil Inhibitor to destroy it. There’s another Veil Assassin nearby, so immediately switch on Veil Sight after destroying the inhibitor and use the Tesla Gun to kill him.
Objective: Continue through the Labs.
Activate Veil Sight and move through the Veil Door. Use the Tesla Gun to zap the group of soldiers around the corner and continue down the steps.
Objective: Investigate the Morgue.
Use the Tesla Gun to clear away the soldiers at the bottom of the stairs and then head into the next room. Continue down the hall until you reach an open double-door. Once through the open double-door, walk to the double-door at the other end of this section and turn into the room to your right. GOLD (19/23) and GOLD (20/23) are between the two desks in this room. When you have the Gold, continue down the steps and into the next area.
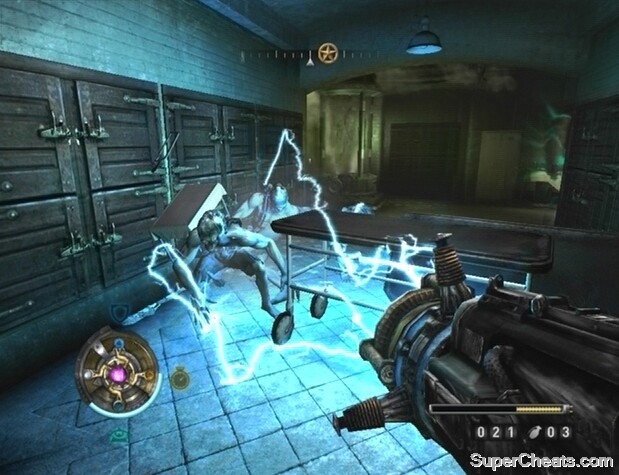 The Tesla Gun can stun several enemies at once. |
The Tesla Gun also works well against Sniffers, which you are sure to encounter once down the stairs. Fry them as they scamper towards you, unless a Scribe is shielding them. Kill the Sniffers and the Scribe, and then look for GOLD (21/23) in the locker at the end of this stretch. Kill the soldiers in the hallway before doing anything else. GOLD (22/23) is between the two shelves in the first alcove along the west wall.
Once you’ve collected the Gold, open the door at the south end of the hall. Toss a grenade at the soldiers covering below the window and clear out the others. GOLD (23/23) is on the ground between the file cabinet and the door. With that, follow the marker on your compass to a double-door and head through.
Objective: Destroy the Veil Portal.
After the cutscene, sprint down to the area below. You need to goad the Altered into destroying the three remaining pillars powering the Veil Portal. Stand behind one of the pillars and fire at the Altered to get his attention. He must hit the pillar twice to destroy it. The Altered is fast, so activate Veil Sight if you have the Veil Energy to spare. Just keep a pillar between you and the beast at all times and be ready to sidestep if he throws a boulder your way. When all three of the remaining pillars have been destroyed, you’ll be sucked into the portal along with the Altered.
Killing the Altered and destroying the Veil Portal.
Objective: Recover the Crystal.
After the cutscene, activate the machine on the east side of the ruined portal to bring up the crystal. Pick the crystal up to gain the Empower Veil Power. With Empower active, your damage output is upped and you can shoot through Veil Shields. Your accuracy also greatly improves. A highly useful power indeed.
Objective: Escape to Midtown.
You have unlimited Veil Energy for the time being, so toggle Shield as well and take out the soldiers at the other end of the room. When the room is clear, proceed through the double-door in the southwest corner. Move to the end of this room and look for a glowing red panel. Shoot the panel to reveal TOME (2/2).
When you have the Tome, return to the previous room and approach the shielded doorway at the east end. Shoot at the stack of explosive barrels through the shield to set them off, destroying the switch that controls the shield. Proceed up the steps beyond the doorway to reach a door back to Midtown East.
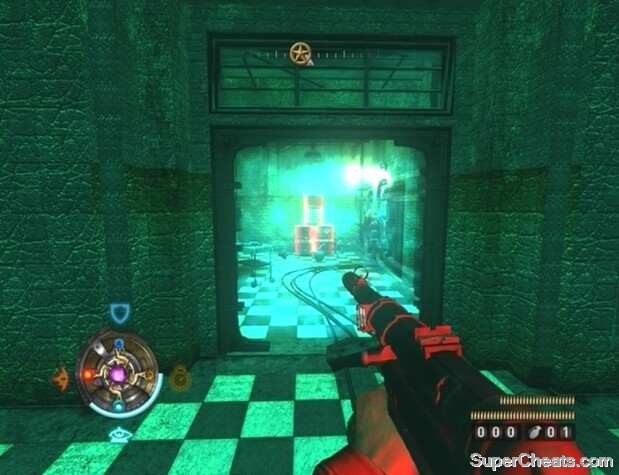 Empower improves weapon strength and accuracy, as well as allow you to shoot through shields. |
Back in Midtown, set “Return to the Safe House” as your active mission and follow the marker on your compass to the Golden Dawn Safe House. Speak to Sergei Kovlov to complete the mission.
In the hospital trying to storm the labs it say pull the switch then use mere to slow the door down but it still shuts long before i can get to it help please
Activate Mire just BEFORE you pull the switch. This gives you enough time to get through, especially if you RUN. (Sprint)
After picking up Intel 4/6, equip the Panzerschreck. Head North, slowly.once through the door, hold the LT button to bring the sights up, and aim them at the doorway in front of you. Proceed slowly toward the door, and when you get to the overturned desk,hug the left wall, aim at the open doorway stop and wait for the Sniffer to appear. The moment it does, blast it! This almost always destroys the Scribe on the other side of the door as well. Then all you have to worry about is the assassin.
equip your rifle before you pick up the crystal. when empower is activated turn on mire and its fairly easy to pick off the guys carrying the shield generators before they set them up. then you should be able to get rid of the others quickly. don't turn on the shield. bullets bouncing off it destroy nearby geists and the others will all blame you for it.