5-2: Experimental Facility
Resident Evil 5 Walkthrough and Guide
Resident Evil 5 Guide - Walkthrough
Chapter 5-2: Experimental Facility
 ______________________________________________________________________________
| ______|¯¯¯¯¯¯¯¯¯¯¯¯¯¯¯¯¯¯¯¯¯¯¯¯¯¯¯¯¯¯¯¯¯¯¯¯¯¯¯¯¯¯¯¯¯¯¯¯¯¯¯¯¯¯¯¯¯¯¯¯¯¯¯¯¯¯¯¯¯¯|
|| ____/|          [C5-2] Chapter 5-2: Experimental Facility                   |
|| |__  |______________________________________________________________________|
||___ \ |¯¯¯¯¯¯¯¯¯¯¯¯¯¯¯¯¯¯¯¯¯¯¯¯¯¯¯¯¯¯¯¯¯¯¯¯¯¯¯¯¯¯¯¯¯¯¯¯¯¯¯¯¯¯¯¯¯¯¯¯¯¯¯¯¯¯¯¯¯¯|
| ___) ||Experimental creatures are roaming the facility, and trespassers are  |
||____/ |wholeheartedly welcomed by an enormous B.O.W named Ultimate 8.        |
|-------|----------------------------------------------------------------------|
|ITEMS  |[] Box x4, [] Box, [] Machine Gun Ammo, [] Red Herb, [] Box, [] Box x2|
|       |[] Box, [] Box, [] Green Herb, [] Box, [] Box x2, [] Red Herb, [] Box,|
|       |[] Box x3, [] Box, [] Green Herb, [] Handgun Ammo, [] Box, [] Box x2, |
|       |[] Incendiary Grenade, [] SIG 556, [] Red Herb, [] Crate x2, [] Dead  |
|       |   Bride's Necklace x2?, [] Box x4, [] Handgun Bullets, [] Box x2,    |
|       |[] Green Herb, [] First Aid Spray, [] Machine Gun Ammo, [] Machine Gun|
|       |   Ammo, [] First Aid Spray, [] Incendiary Grenade x2, [] Handgun Ammo|
|       |[] Machine Gun Ammo, [] Rifle Ammo.                                   |
|-------|----------------------------------------------------------------------|
|EMBLEMS|1x.                                                                   |
|-------|----------------------------------------------------------------------|
|ENEMIES|1. Majini (Base).                                                     |
|       |2. Licker Beta.                                                       |
|       |3. Reaper.                                                            |
|       |4. Uroboros Mkono [BOSS].                                             |
|       |                                                                      |
 ¯¯¯¯¯¯¯¯¯¯¯¯¯¯¯¯¯¯¯¯¯¯¯¯¯¯¯¯¯¯¯¯¯¯¯¯¯¯¯¯¯¯¯¯¯¯¯¯¯¯¯¯¯¯¯¯¯¯¯¯¯¯¯¯¯¯¯¯¯¯¯¯¯¯¯¯¯¯
You'll want to have a handgun or machine gun in your inventory during this stage. Just the heavy weapons (shotgun/grenade launcher/magnum) won't do you much good during many parts of this stage.
Exit the area by going north and break the four [BOXES] in the room up ahead. The next few halls and corridors feature Majini's with weapons. They either have Stun Rods (who have to get close to you), machine guns (who will aim at you with a green laser pinpointer) and rocket launchers, dynamite or bows. You can take (and should take!) cover behind crates and walls to prevent getting hit.
Proceed through the two rooms and clean them from the Majini's. The second room houses a [BOX]. The next area can be tough on harder difficulties. Take cover by the wall and kill the first Majini. Move over to the crates and hide once more. Take out the rest of the Majini's one by one, and be sure to keep the ones with stun rods at a distance at all costs. When the area is cleared, check out the southwestern area and one last Majini will appear above the destroyed stairwell. You can find [MACHINE GUN AMMO] and a [RED HERB] here.
Go through the door and break another [BOX] before moving to the next area. There will be numerous Majini here, including one with a stun rod that turns into a Cephalo. Lure it to the small corridor and kill it here, you'll be a sitting duck otherwise.
With the first wave of Majini's killed, check the lower area for two [BOXES] on each side before going upstairs. When you do go upstairs, do so very slowly. Another fairly large group of Majini's are waiting for you. Try to lure as many back downstairs by firing a few times - then take out the remaining ones by aiming for the gas cylinders in the background. There's a set of gas cylinders at the far end of the area, but there are also two cylinders - one on each side that are hidden slightly out of view when you enter.
Just because Licker Beta’s are such lovely creatures, this video will show you how to deal with them in narrow corridors.
With the Majini's dead, loot a [BOX] on the left and ride the elevator at the end of the stage. You'll now be in a long corridor. Grab the contents of the nearby [BOX] and the [GREEN HERB] next to it, and find another [BOX] right around the corner. The other corner doesn't reveal treasure, but it does reveal a pathway with several lickers.. You can place proximity bombs, use grenades, equip the grenade launcher, but try to keep them at a distance. Alternatively you can use a rifle, handgun or machine gun and take them from a distance. If all fails - or if they get too close for comfort - resort to the shotgun and combat them from up close.
The next corridor spawns a few more of these lovely creatures. Proceed through it and head towards the door to enter a new area. This looks like a missile fabrication hall with several conveyor belts and tons of gas cylinders. Head right and loot the two [BOXES]. Jump down and grab a [RED HERB] and the item from the [BOX] to your right.
You'll spot two Majini's with stun rods to your left. Kill them ASAP and a whole lot more Majini's will enter the area. They have machine guns but they'll also use flash grenades to blind you. Immediately take cover and do NOT proceed at this moment. One of the grenade-throwing Majini's is located on the upper platform right above the conveyor belt. There's a pack of gas cylinders right next to him, so kill him with the explosion. Another Majini is located on a platform in the background. The others are all on the other side of the hall. Take cover behind the conveyor belt and kill them one by one. When you've downed them all, proceed east.
Climb the ladder and hop down to kill another Majini. Head left (east), break the three [BOXES] and kill the Majini on the upper level to the north. Head west, break another [BOX] and move on the conveyor belt when the containers have just passed. Walk in between the conveyor belts to speed things up and get off the right side at the eastern end. Go upstairs and kick in the door with the help of your partner.
Grab the [GREEN HERB], [HANDGUN AMMO] and the contents of the [BOX] on this platform, then slightly move towards the coveyor belt - act like you're going to get on it, but don't do this yet - and kill the Majini that spawns on the catwalk above the conveyor belt. He can be quite a pest, throwing grenades at you while on the belt, causing the gas canisters to blow up as well.
Before you actually move on the conveyor belt, shoot a few gas canisters in the distance to clear the way a little and make a run for it. The best way to get through this part is to keep the conveyor belts fairly clean of gas cylinders, killing the endlessly spawning Majini's in the distance, and making a run for the end as fast as possible. When you get off, quickly flip the lever to stop the production process and shoot the two grenade throwing suckers on the higher catwalk. When you kill them you'll be safe again .. for now.
Head downstairs and spot two [BOXES] to your left. Check the open dumpster to find a [BSAA EMBLEM]. There's an [INCENDIARY GRENADE] on a table that also holds a file on creatures called Reapers, and the suitcase contains a [SIG 556] machine gun. The lever for the conveyor belt is not yet powered, and we need to get it running due to our characters absolutely uncapable of, well, climbing a small little crate that's standing in the way.
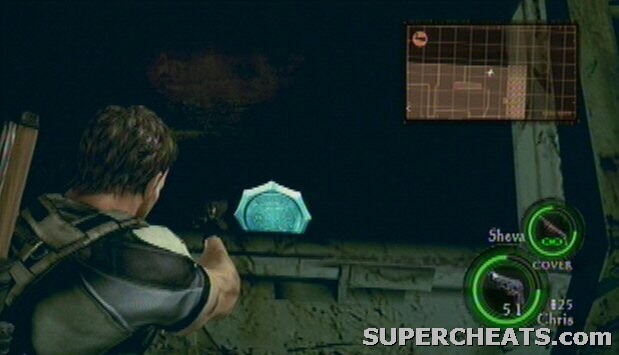 BSAA Emblem |
Either way, head north and make your way to the power box, ignoring the cocoons hanging from the ceiling. The power box is marked by your destination marker. After flipping both levers, search the area for a [RED HERB] and two [WOODEN CRATES]. Return to the conveyor belt and you'll encounter the first Reaper.
These beasts are dangerously ferocious and you should never get too close to them as they have an instant death attack. The only spots that matter are the beige/whitish bulbs that are exposed after shooting it several times. Be sure to target these areas and you'll find they go down much faster than if you're randomly shooting around. On Veteran and Professional these beasts are tough and can drain a lot of your ammo supply. Fortunately, there are only a few of them in the entire game.
With the conveyor belt turned on, make your way over to the other side. You'll first have to backtrack so you can get to the other side of the conveyor belt. Those dead bridge corpses may be dead, but they can still grab you. If you're interested you can look around for two [DEAD BRIDE'S NECKLACE'S] (or are there more, do you know?). Exit the area to the west. In the next room, loot the four [BOXES] and grab [HANDGUN BULLETS] from the corner.
BOSS FIGHT 7: UROBOROS MKONO
The toughest Uroboros creature you’ve faced thus far has one major weakness for fire. This video gratefully abuses this weakness.
This guy can be one tough enemy to down. His only weakness is fire, so you'll be using your grenade launcher's Flame Rounds, any Incendiary Grenades, Gas Cylinders and the Flamethrower in this area. Whenever Mkono is weakened by fire, a couple of appendixes with orange bulbs will reveal themselves - these are his weak spots, and you can only effectively hit them at this time.
Grenade Launcher's Flame Rounds:
You've probably found a couple of flame rounds just before you entered the boss area. Load them up your Grenade Launcher and fire them - one at a time - at the Mkono. This will temporarily reveal his weak spots, allowing you to switch to a different gun, preferably a machine gun and target them, as should your partner.
Gas Cylinders:
The area also contains three Gas Containers that you can use in a similar manner like you did with the first Uroboros boss. They have the same effect as a Flame Round from your Grenade Launcher.
Incendiary Grenades:
If you have any of these, throw them at the boss to get a similar effect as described in the previous two cases, except the incendiary grenades appear to be somewhat weaker, and thus their effect (or to initiate effect) seems shorter. Should you not have any Incendiary Grenades at all, pick them up from around the area (see ‘Collecting Items').
Flamethrower Usage:
When you run out of options, resort to using the flamethrower. The red lights indicate how full the tank of the flamethrower is when it is recharging. Green lights indicate that it is ready for usage. The downside of the flamethrower is that it requires one of you to get up quite close to the boss - which is very dangerous at all times. The boss' arm is the main problem here, and as long as that remains it is going to be difficult not getting hit when near the boss. Regardless, the brighter side is that you can always refill the flamethrower, and when the boss is on fire the other can target the weak spots of the boss with the most powerful weapons - including the arm of the boss.
Collecting Items:
With your back against the flamethrower, there are two [BOXES] on the right. To the left is a [GREEN HERB] and a [FIRST AID SPRAY] in the cabinet (slash the glass to grab it). The cabinet up ahead from this point contains [MACHINE GUN AMMO] and a [FIRST AID SPRAY], and the other corner houses another cabinet with [INCENDIARY GRENADE x2], [HANDGUN AMMO], [MACHINE GUN AMMO] and [RIFLE AMMO].
Boss Attacks:
The boss moves around fairly quickly, and it can disappear and reappear through-out the area. It's arm swing attack can cause a lot of damage (especially on the higher difficulties), and his swallow/grab attack is just as dangerous. His arm attack can be dodged; try to do this as effectively as possible.
Killing the Boss:
Using the above methods to weaken the boss, preferably use long range weapons such as the machine gun to target any orange bulbs. Make haste with destroying the arm, as it'll make things a whole lot easier when you have to resort to using the flamethrower.
unless you have a rocket launcher
To get the BSAA emblem, you have to be playing as Chris, because Sheva is too short to shoot inside the dumpster.
or you can 1 shot it with a rocket lancher when the spots come out
cool
niceeee