- The Bunker
Little Big Planet Walkthrough and Guide
Little Big Planet Guide - Walkthrough
The Bunker
.-------------------------.----------------------------------------------------.
|# Prize Bubbles In Level:| 47                                                 |
|Complete Level Once:     | Costume: Neon Wireframe   Box Robot Body           |
|100% Completion Prize:   | Stickers: Bad Witch Concept                        |
|                         |           Bad Witch Concept with Frame             |
|Ace Level Prize:         | Costume: Neon Helmet                               |
|==============================================================================|
|PRIZE BUBBLE PICKUPS IN LEVEL:                                                |
|------------------------------------------------------------------------------|
|STICKERS:                |OBJECTS:               |DECORATIONS:                |
|-------------------------|-----------------------|----------------------------|
|[] 427 Motif (6)         |[] Black Boot (19)     |[] 1008 Bottle Top (17)     |
|[] Faces in Circles (35) |[] Egg Carton Back(37) |[] 5 Coin (44)              |
|[] Mellow Sun* (10)      |[] Egg Carton Front (4)|[] Decayed Metal Plate* (47)|
|[] Red Clown Nose (28)   |[] Egg Carton Side*(11)|[] Dog Tag* (25)            |
|[] Russian Banner (38)   |[] Flip-Top Enemy (13) |[] Green Tartan Patch (34)  |
|[] Russian Border (45)   |[] Free Range Egg (16) |[] Old Bottle Top (7)       |
|[] Scary Head (24)       |[] Iron Scaffold (3)   |[] Pink Pin (30)            |
|[] Spiral Doodle (15)    |[] Iron Scaffold       |[] Red Bottle Top (32)      |
|                         |   Base (42)           |[] Sackboy Coin (9)         |
|-------------------------|[] Metal Spear (33)    |[] Star Bottle Top (39)     |
|COSTUMES:                |[] Multi-Spear         |[] Rubber Tongue (29)       |
|-------------------------|   Machine (27)        |----------------------------|
|[] Cardboard Hat* (22)   |[] Rotating            |MATERIALS:                  |
|[] Collar and Tie*(31)   |   Hemisphere (21)     |----------------------------|
|[] Soldier's Helmet*(5)  |[] Rotating Iron       |[] Barbed Wire (1)          |
|[] Blue Shellsuit (18)   |   Bridge (14)         |[] Blue Concrete (43)       |
|[] Grey Camo* (46)       |[] Spinning Electric   |[] Camouflage (40)          |
|[] Yellow Damask (2)     |   Platform (20)       |[] Grey Rusty Metal (26)    |
|                         |[] The Scientist (12)  |[] White Speckle Concrete(8)|
|                         |[] Tin Can (23)        |----------------------------'
|                         |[] Twisty Platform (41)|
|                         |[] Rotating Barbed     |
|                         |   Wire Cage (36)      |
'-------------------------'-----------------------'
Drag the general to the platform in order to grab the [RUBBER TONGUE] and the [PINK PIN]. Continue to the right and hop onto the platform to launch yourself in the air. Grab the [MULTI-SPEAR] and the [BLACK BOOT], but make sure you don't get your sackself electrocuted. Continue your way and evade the electrocutors on your way to the next checkpoint.
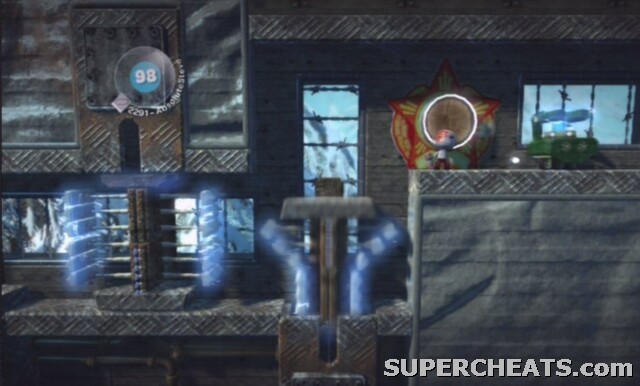 You'll come to hate the sad sound when you get electrocuted. |
Next, pop the creature and make your way through the rotating wheel. Getting in is easy, getting out requires a little precise timing. You should first acquire the two prize bubbles on top of the wheel, but that may be a bit tricky. While in the wheel (or still on the left platform) hop onto the edge of the opening. Let the wheel take you as high as possible before you fall off, then jump out to snag those two bubbles holding the [BARBED WIRE] and [ROTATING IRON BRIDGE].
Continue and move over the flipflopping platforms. Keep up, don't jump, don't fall - just keep up and grab the [TWISTY PLATFORM] at the end. Next up is another nasty electrocritter which switches between electricity and brains. Pop it to grab the [FLIP-TOP ENEMY]. Next up are half wheels that slam into each other. Use the fabric ball in the middle to get across.
At the checkpoint's platform, move to the very right and hop into the background. Go left, drag the block a little to the right behind the gong and hop to the background once more. Now you can grab the two elusive prize bubbles on the left: [ROTATING HEMISPHERE] and [CAMOUFLAGE].
| Aha! So that's how you get those Prize Bubbles! |
Continue through the two tunnels inside wheels - grab the Challenge Key in between - and make sure you start to dash through when they're lining up.
You can move to the background and hop onto the snow. Head left to find a sticker puzzle that you can't solve yet - you need the Power Fist Sticker - and even more to the left is a 2/3 Player area.
2x/3x Players:
You can grab some of the bubbles here with only two players, but the final few bubbles require a third player. Have one player hop into a wheel on the lower platform and pull the lever.
This allows you to go inside the second wheel and flip the lever here. Now it's time for the other player(s) to hop into the wheel on top. Have the player below flip the switch again. Now have one upper player move into the upper left wheel, and grab the [EGG CARTON SIDE]. Also step on the button to allow the first player to grab the [COLLAR AND TIE], [SOLDIER'S HELMET] and [DECAYED METAL PLATE] on the left. Are you flipping yet?
Now you really need the third player, which should still be located in the top right wheel. Flip the lever to allow the second player to grab the [DOG TAG], [CARDBOARD HAT], [GREY CAMO] and [MELLOW SUN].
Next is an electric spike obstacle course. You can grab the [EGG CARTON FRONT] during your manoeuvring. After this, pop the creatures that cross your path, but be SURE to pop them at the right time to grab all prize bubbles. The first bubble holds [IRON SCAFFOLDING BASE], the second [IRON SCAFFOLD], and from here you can walk to the right in the background to find the [GREEN TARTAN PATCH] and the [427 MOTIF]. Ride the green cart down, grab the [TIN CAN], then hop over the gaps with some electrified crazyness rotating around them. MADNESS.. I mean, CRAZYNESS!1!! Eh, actually, it's not all that bad, so just jump over them.
Another rotating wheel is up next, this time with only one opening, and electric bolts inside. Hop onto the ledge of the opening and jump to the background first for some prize bubble collecting. Here you can find the [SPINNING ELECTRIC PLATFORM] and the [1008 BOTTLE TOP]. Hop on top of the spinning wheel and jump to the background right of you. Four prize bubbles are waiting to be added to your collection: [RED BOTTLE TOP], [OLD BOTTLE TOP], [RED CLOWN NOSE], and the [STAR BOTTLE TOP]. Drop down to the right and find the [ROTATING BARBED WIRE CAGE] object. My.. You're quite the collector yourself, aren't you?
| You'll find many Prize Bubbles by using the wheel to your advantage. |
Jump in the wheel and immediately drop down. Grab the [EGG CARTON BACK] to the left of the conveyor belt, then proceed to the right. This is a tricky part:
Dodge the electric spikes and other obstacles while on the moving belt. To make things worse, there's also a bunch of prize bubbles placed along the way. I suggest you try to Ace the level some other time, because it's too difficult to do in one try. The bubbles here contain: [FREE RANGE EGG], [5 COIN] and the [SACKBOY COIN]. Next, pop the creature and free the scientist to get the [THE SCIENTIST] object.
Next is the hardest part of the game, a giant wheel with tons of gaps and electricity all around. It consists out of two parts: The first part is a series of green platforms on which you can stand, but which become increasingly smaller when you progress. Fortunately there is a gap after the smallest in which you can safely jump. Here you'll quickly have to grab the fabric ball and swing across the electrified floor. You'll now be near the next part, and you'll come across another checkpoint. Thank god.
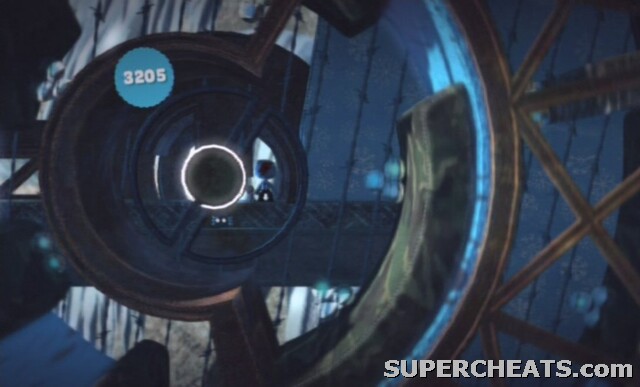 Meet *the* wheel. You'll hate it. |
The outer ring may be even more difficult. Hop over the electrified obstacles, after which you'll have to jump platform to platform in order to make the next. There are two series of platforms, and on the very last you can find the [WHITE SPECKLE CONCRETE] material. The hole you see is where you'll want to drop down. Many gamers die in the wheel of death - and have to start the level all over again - so don't consider it a shame if you have to restart. Only consider it a shame if you have to restart 5 times - no, that's a joke. Kind of. ;)
Now for the last part of the level. You're on another conveyor belt, except this one is going against the direction you're headed. You can grab the [GREY RUSTY METAL] from the left, and as you progress you'll also find the [BLUE CONCRETE]. Make your way to the end of the level, and don't sweat those hands if you're trying to ace the level. I know you can do it!
Replay:
When you get the Power Fist Sticker from the next level, return and place it on the cardboard during the place where you can hop in the background on some snow. Also check the walkthrough above for this information. When you've done so, you will be rewarded with the [SPIRAL DOODLE], [FACES IN CIRCLES] and the [RUSSIAN BORDER]. Also jump on the red button nearby a couple of times: This will cause the prize bubbles to fall down: [BLUE SHELLSHUIT], [YELLOW DAMASK], [RUSSIAN BANNER], [SCARY HEAD], and [METAL SPEAR].
LBP PS3 stuff
LOL.You guys make it look easy....
Where are all the keys
WHY GOD WHY oh tacos :3
Lbp2 is much easier the one.. I can't seem to beat the wheel at all ugh...
I could not beat the Wheel of Death to save my life (literally in the case of my poor sackperson!), but after reading the walkthrough, and more importantly the comments above I managed to beat it on the second try! Thank you to all the awesome folks who added such helpful hints!
Finally made it through it was easy when I finally figured it out :D hold the green platforms dropping to each platform when you get onto the second chamber slide on through now the last part is super tricky but don't go onto the second part yet hold onto that last green platform before the second save point till it's half turned angle yourself and let go you will fall straight to the end and fall out of the wheel :D hope that helps
On the "wheel of death" you can hold onto the green platforms to help yourself out. I noticed no one said anything about that. I'm still stuck but ionly die when I get to the outer level of it now.
Aced it, me and my 2 friends got all prize bubbles and did the whole level without dying
So hard! I got the Neon Wirefare but my friend wanted it & he asked me if it was on this level. Thanks for the info! -Map100
Aced all levels up to the end of Metropolis, dreading this level D;
One hint: if you can get on the side walls of the second checkpoint (Really hard and requires prescise timing) you can skip a high percentage of the obstacles if you jump onto the walls. Just be carful when you fall i got electrocuted the first time i tried it but it is possible (got me the ace i really needed) :P hope this helps.
what about the times 2 there bes a sticker duhhhh
Annoying as hell!! Played well beyond 100 times and can't get through the platforms in the outer wheel. You may say I suck but this level's design too.
Btw super nice tutorial +1
we should have a double life checkpoint or infinite to preserve the lives of wat may be deceased in the da death wheel..
annoying